
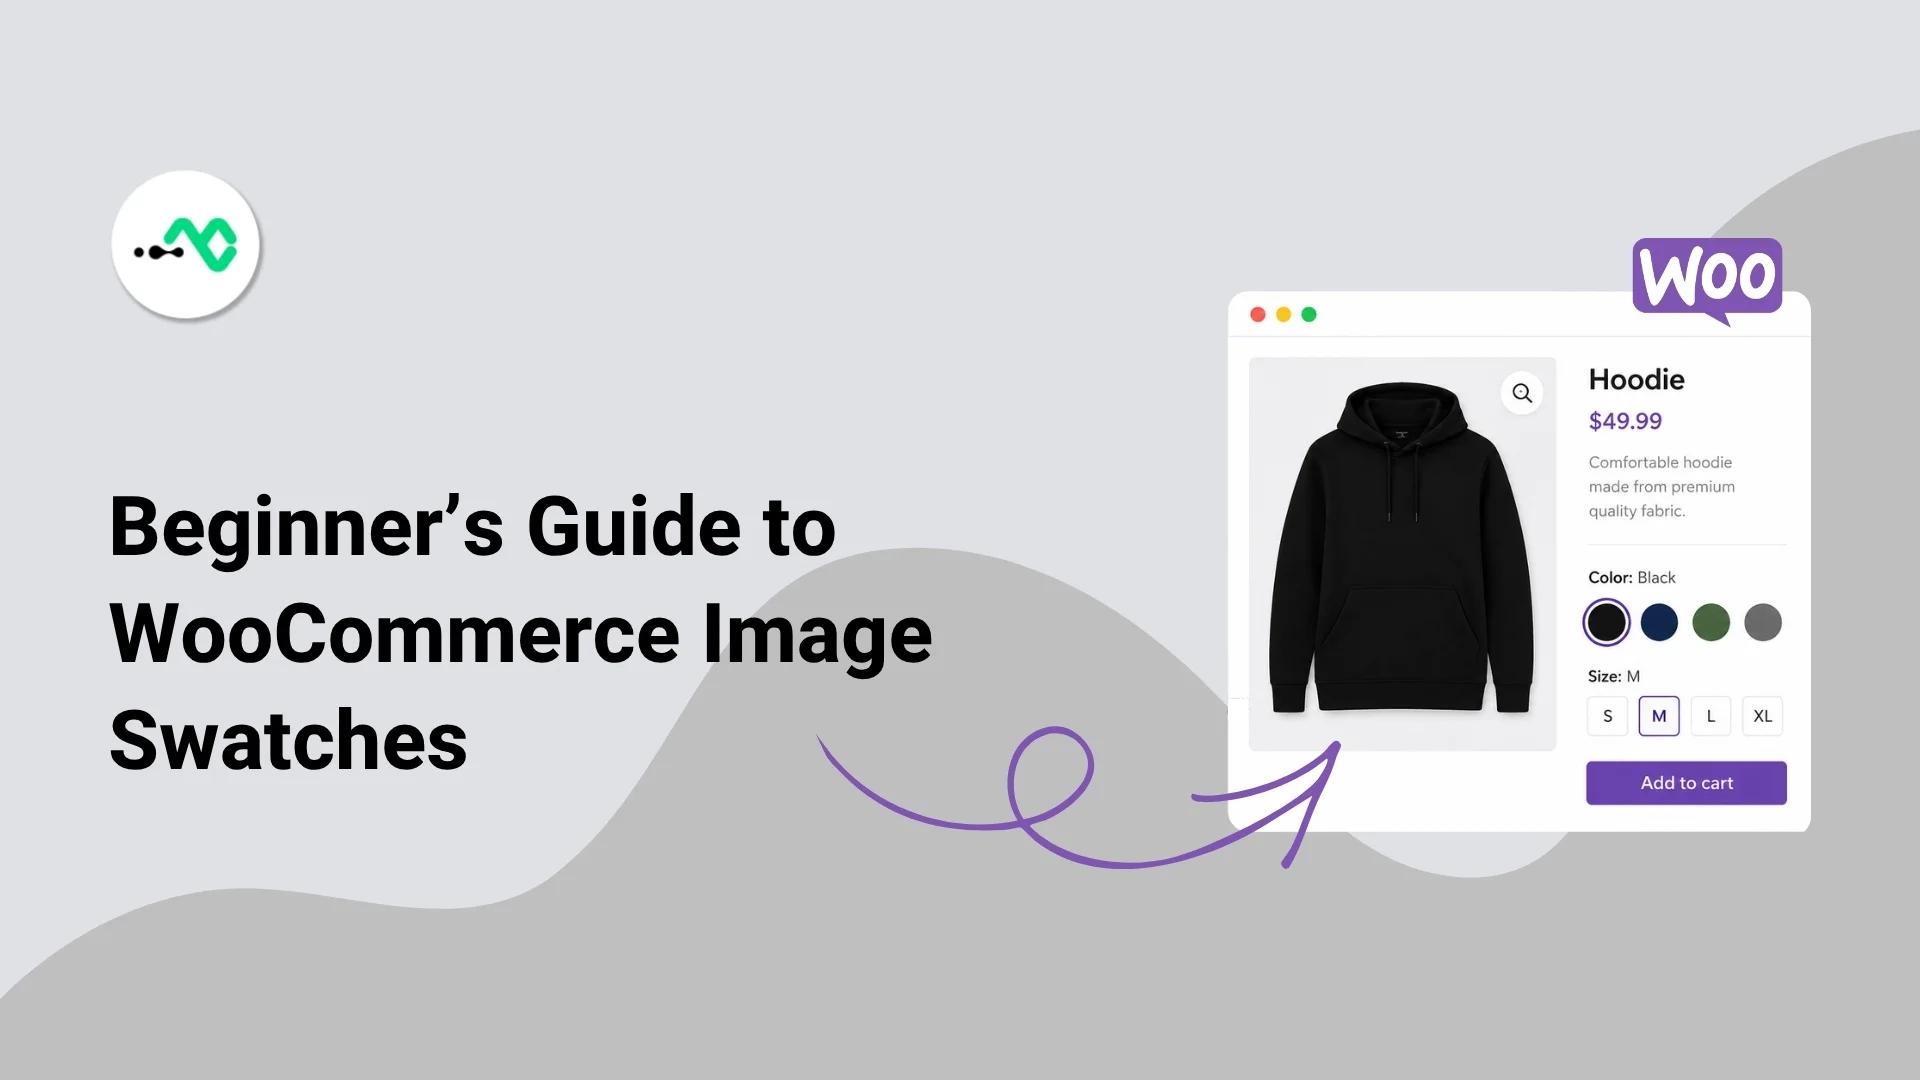
If you have variations for your products, don’t rely on the default WooCommerce dropdowns, because you might want to create a user-friendly environment for your customers, and built-in options cannot achieve that. By switching to swatches, or specifically image swatches, you can better showcase product variations.
- Customers can select a variation in one click.
- Provide a better idea of what product variation customers are switching to.
- Give your store a cleaner, more visual product selector.
These are missing with the default dropdown options. And for an eCommerce store to succeed, it needs the elements that can improve user interaction as well as present the platform in a way that drives product exploration. If you’re looking to add WooCommerce Image Swatches to your website, then in this guide, you’ll learn how to do that using the WPMozo Variation Swatches plugin in a few simple steps.
If you’re ready, let’s get started.
Why Use Image Swatches Instead of Dropdowns?
According to a study by the Baymard Institute, buttons and swatches outperform dropdowns for product variants. The research found that when customers are presented with both dropdowns and swatches, they often overlook size selectors in dropdown menus. In contrast, buttons and swatches make it easier to compare options and explore product variants.
Another study from the same institute suggests that swatches also improve product exploration on mobile devices.
Simply put, if you want to give customers a better way to browse products and select variants, implementing swatches, whether color, image, or text-based, is a smarter choice.
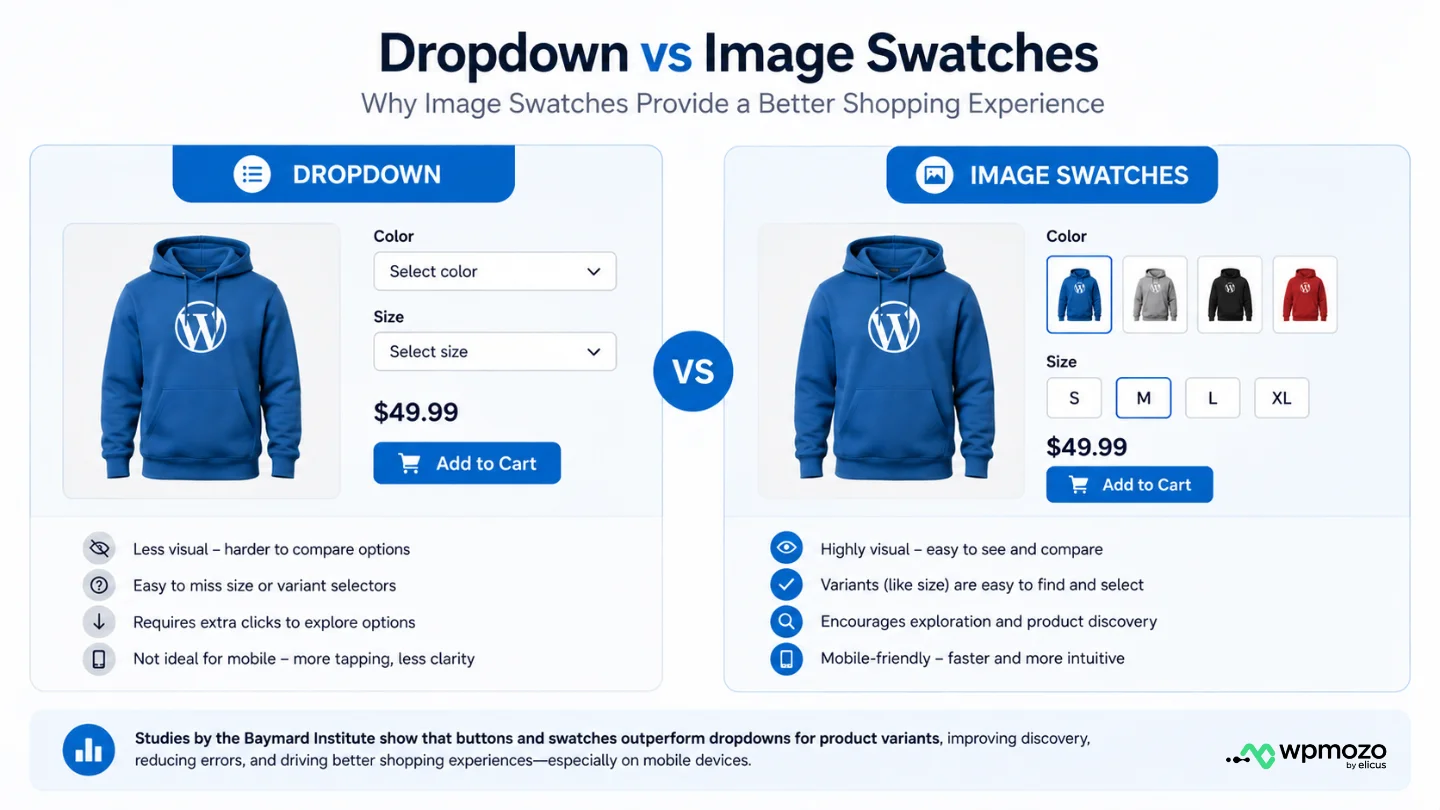
As you can see, swatches make it efficient to explore the variants with improved clarity and visibility. Now, follow the sections below to add WooCommerce color and image swatches to your website.
What You Need Before You Start
In order to implement the image swatches capability on your WooCommerce store, you do not have to do much. Just keep the following in check:
- WooCommerce is installed and activated.
- Products with variants.
- Product attributes created.
- WooCommerce variation swatches plugin from WPMozo.
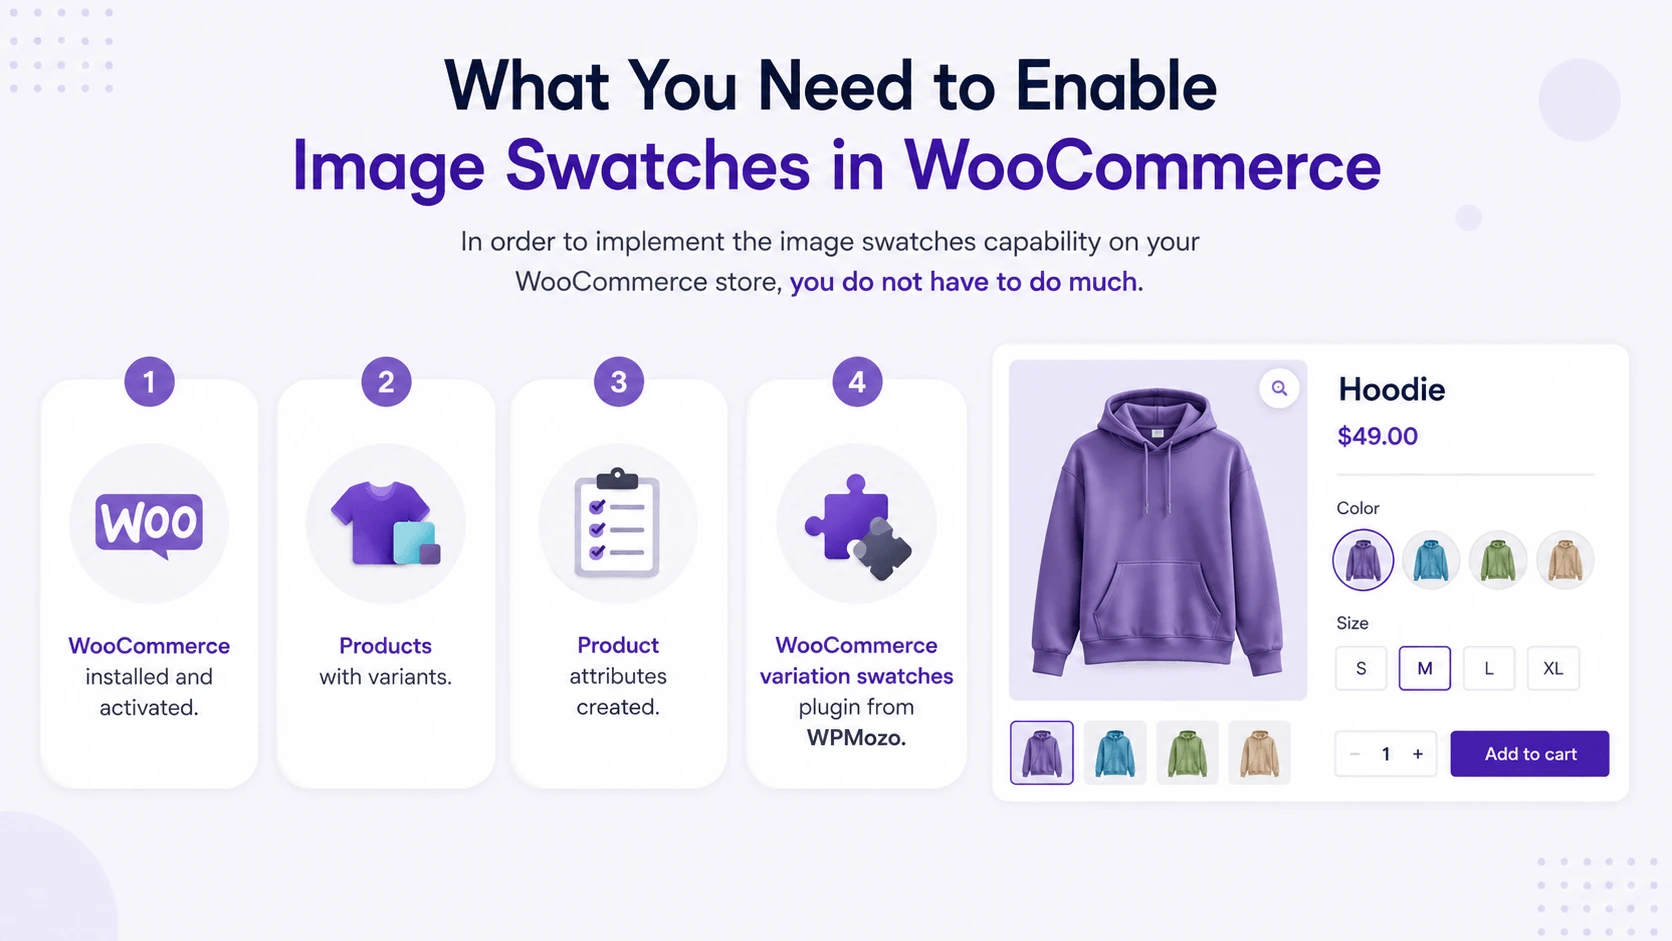
Because you’re already on this article, I assume you have already completed the WooCommerce part. The following sections will help you with the rest of the items in the above checklist. Let’s first start with the WPMozo WooCommerce Swatches plugin.
Step 1: Install and Activate WPMozo Variation Swatches
The image swatches plugin from WPMozo is a premium plugin; therefore, you need to purchase it from the official website. For that, go to WPMozo.com → WooCommerce → click on the Variation Swatches for WooCommerce.
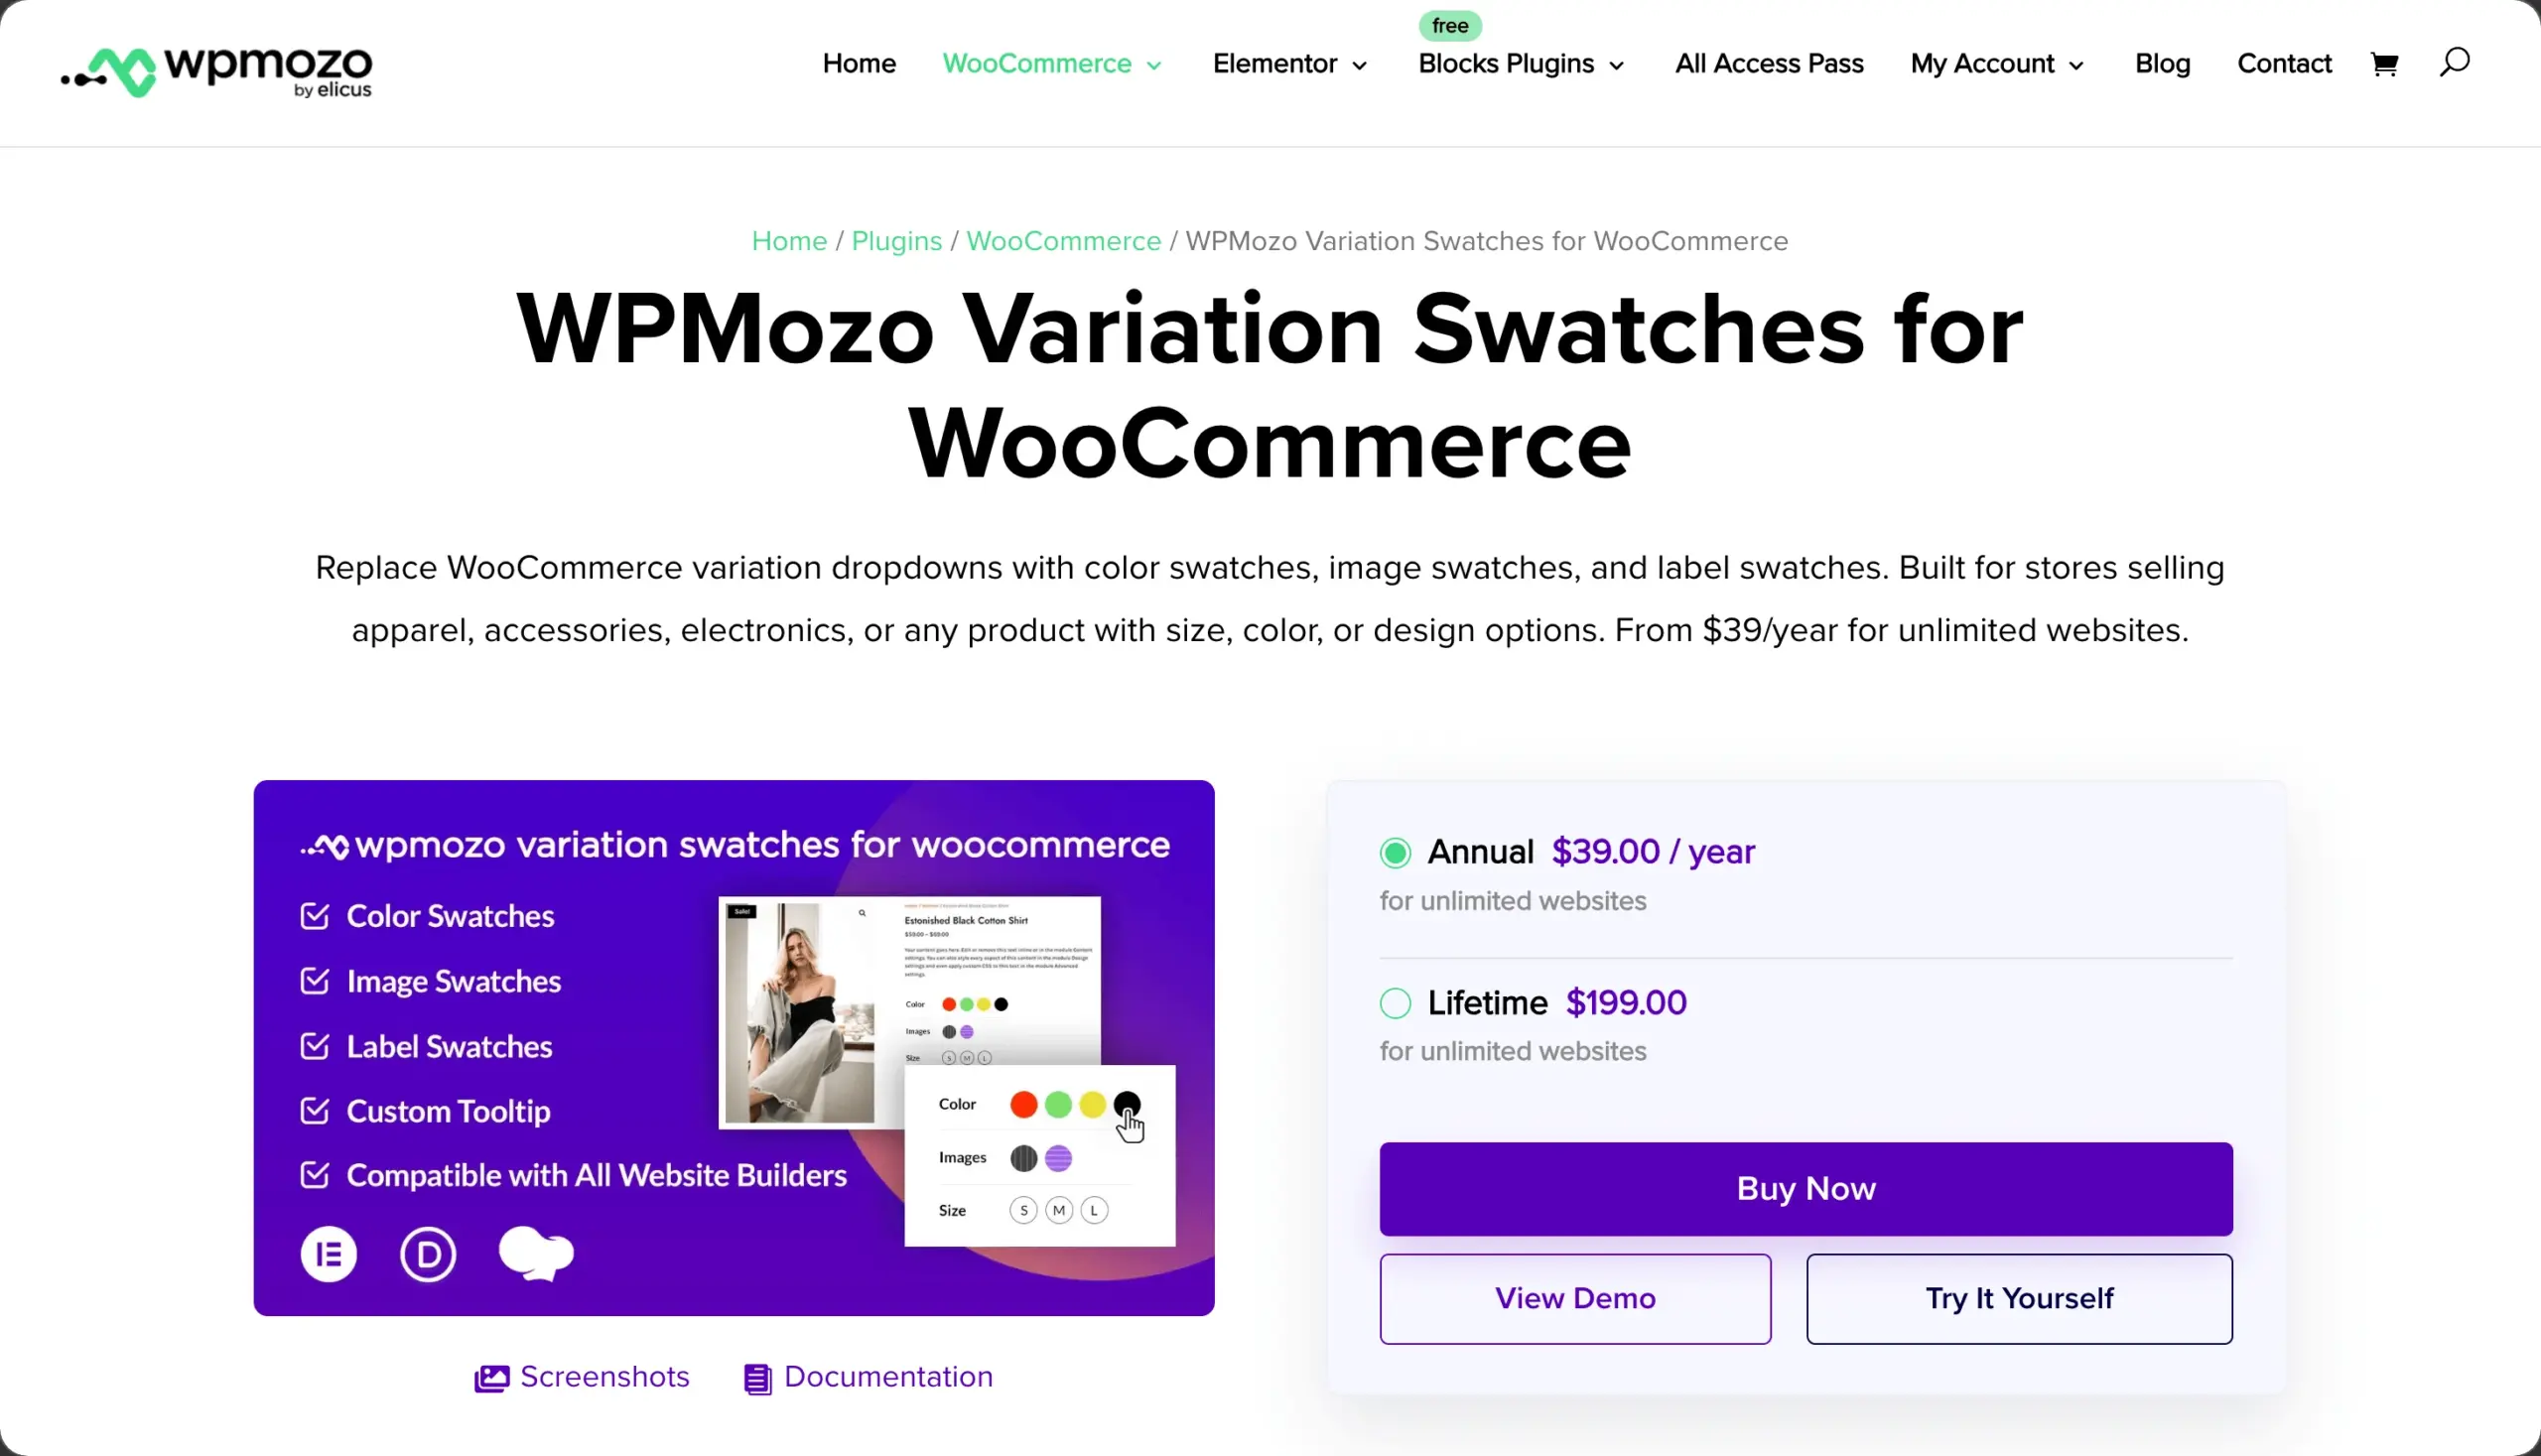
This will open the official page of the plugin.
There, select the desired license type and get it for your WooCommerce store. Once you have downloaded the plugin, follow the instructions on this page to install it.
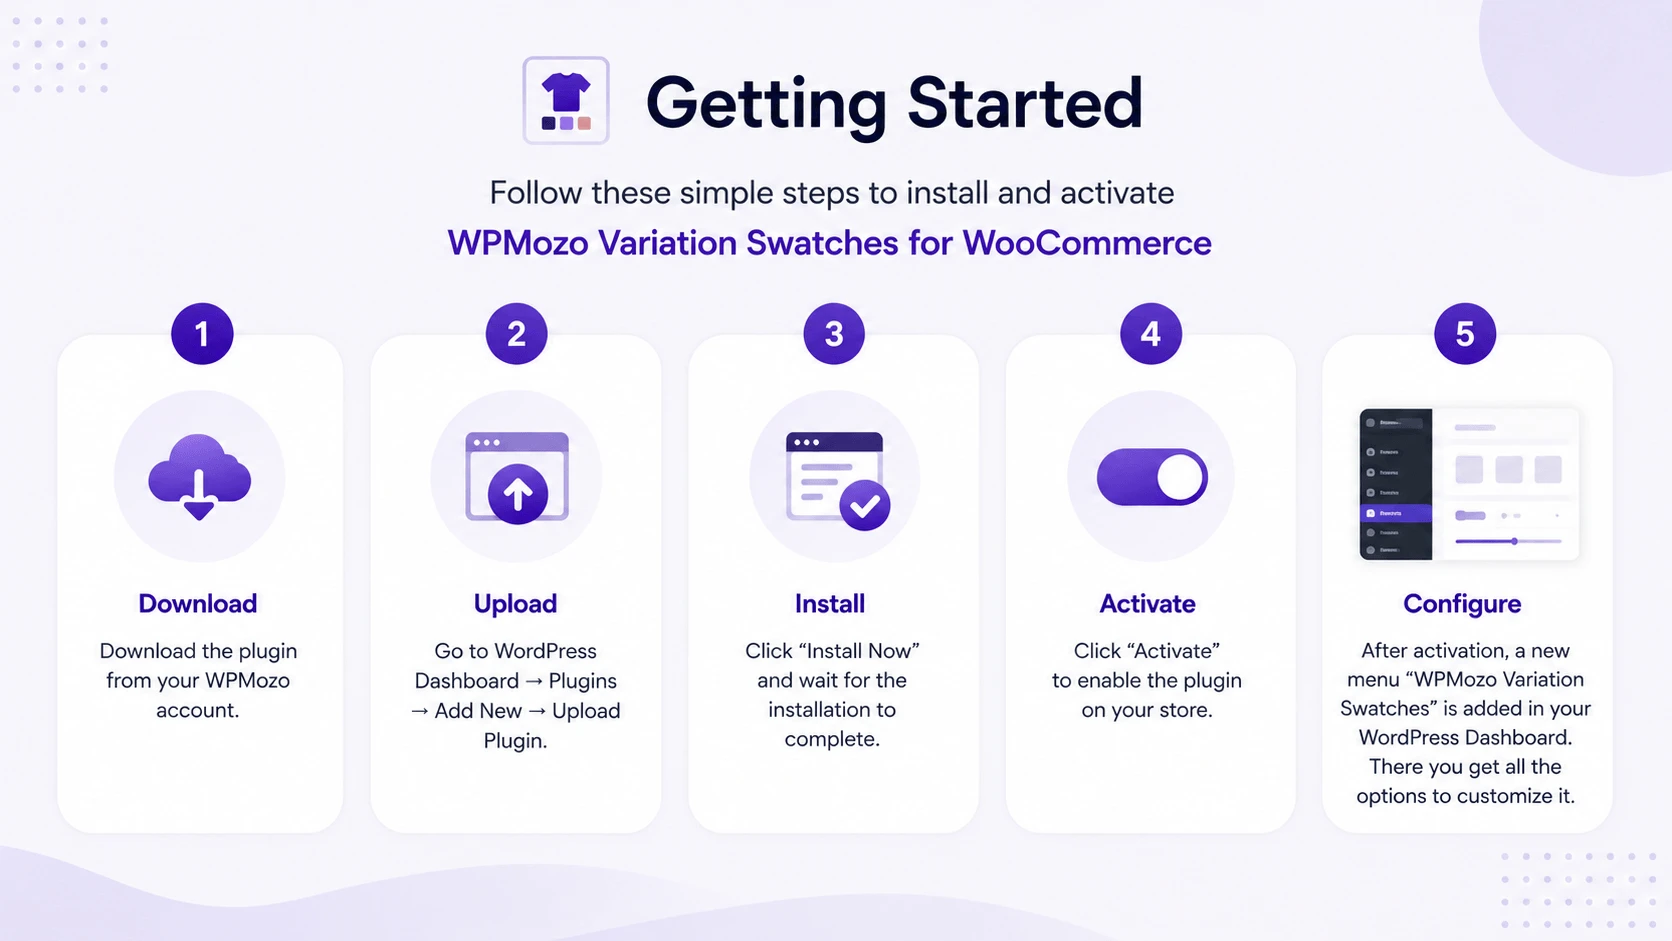
On successful installation and activation, you can find the plugin’s menu in the left sidebar of the WordPress Dashboard.
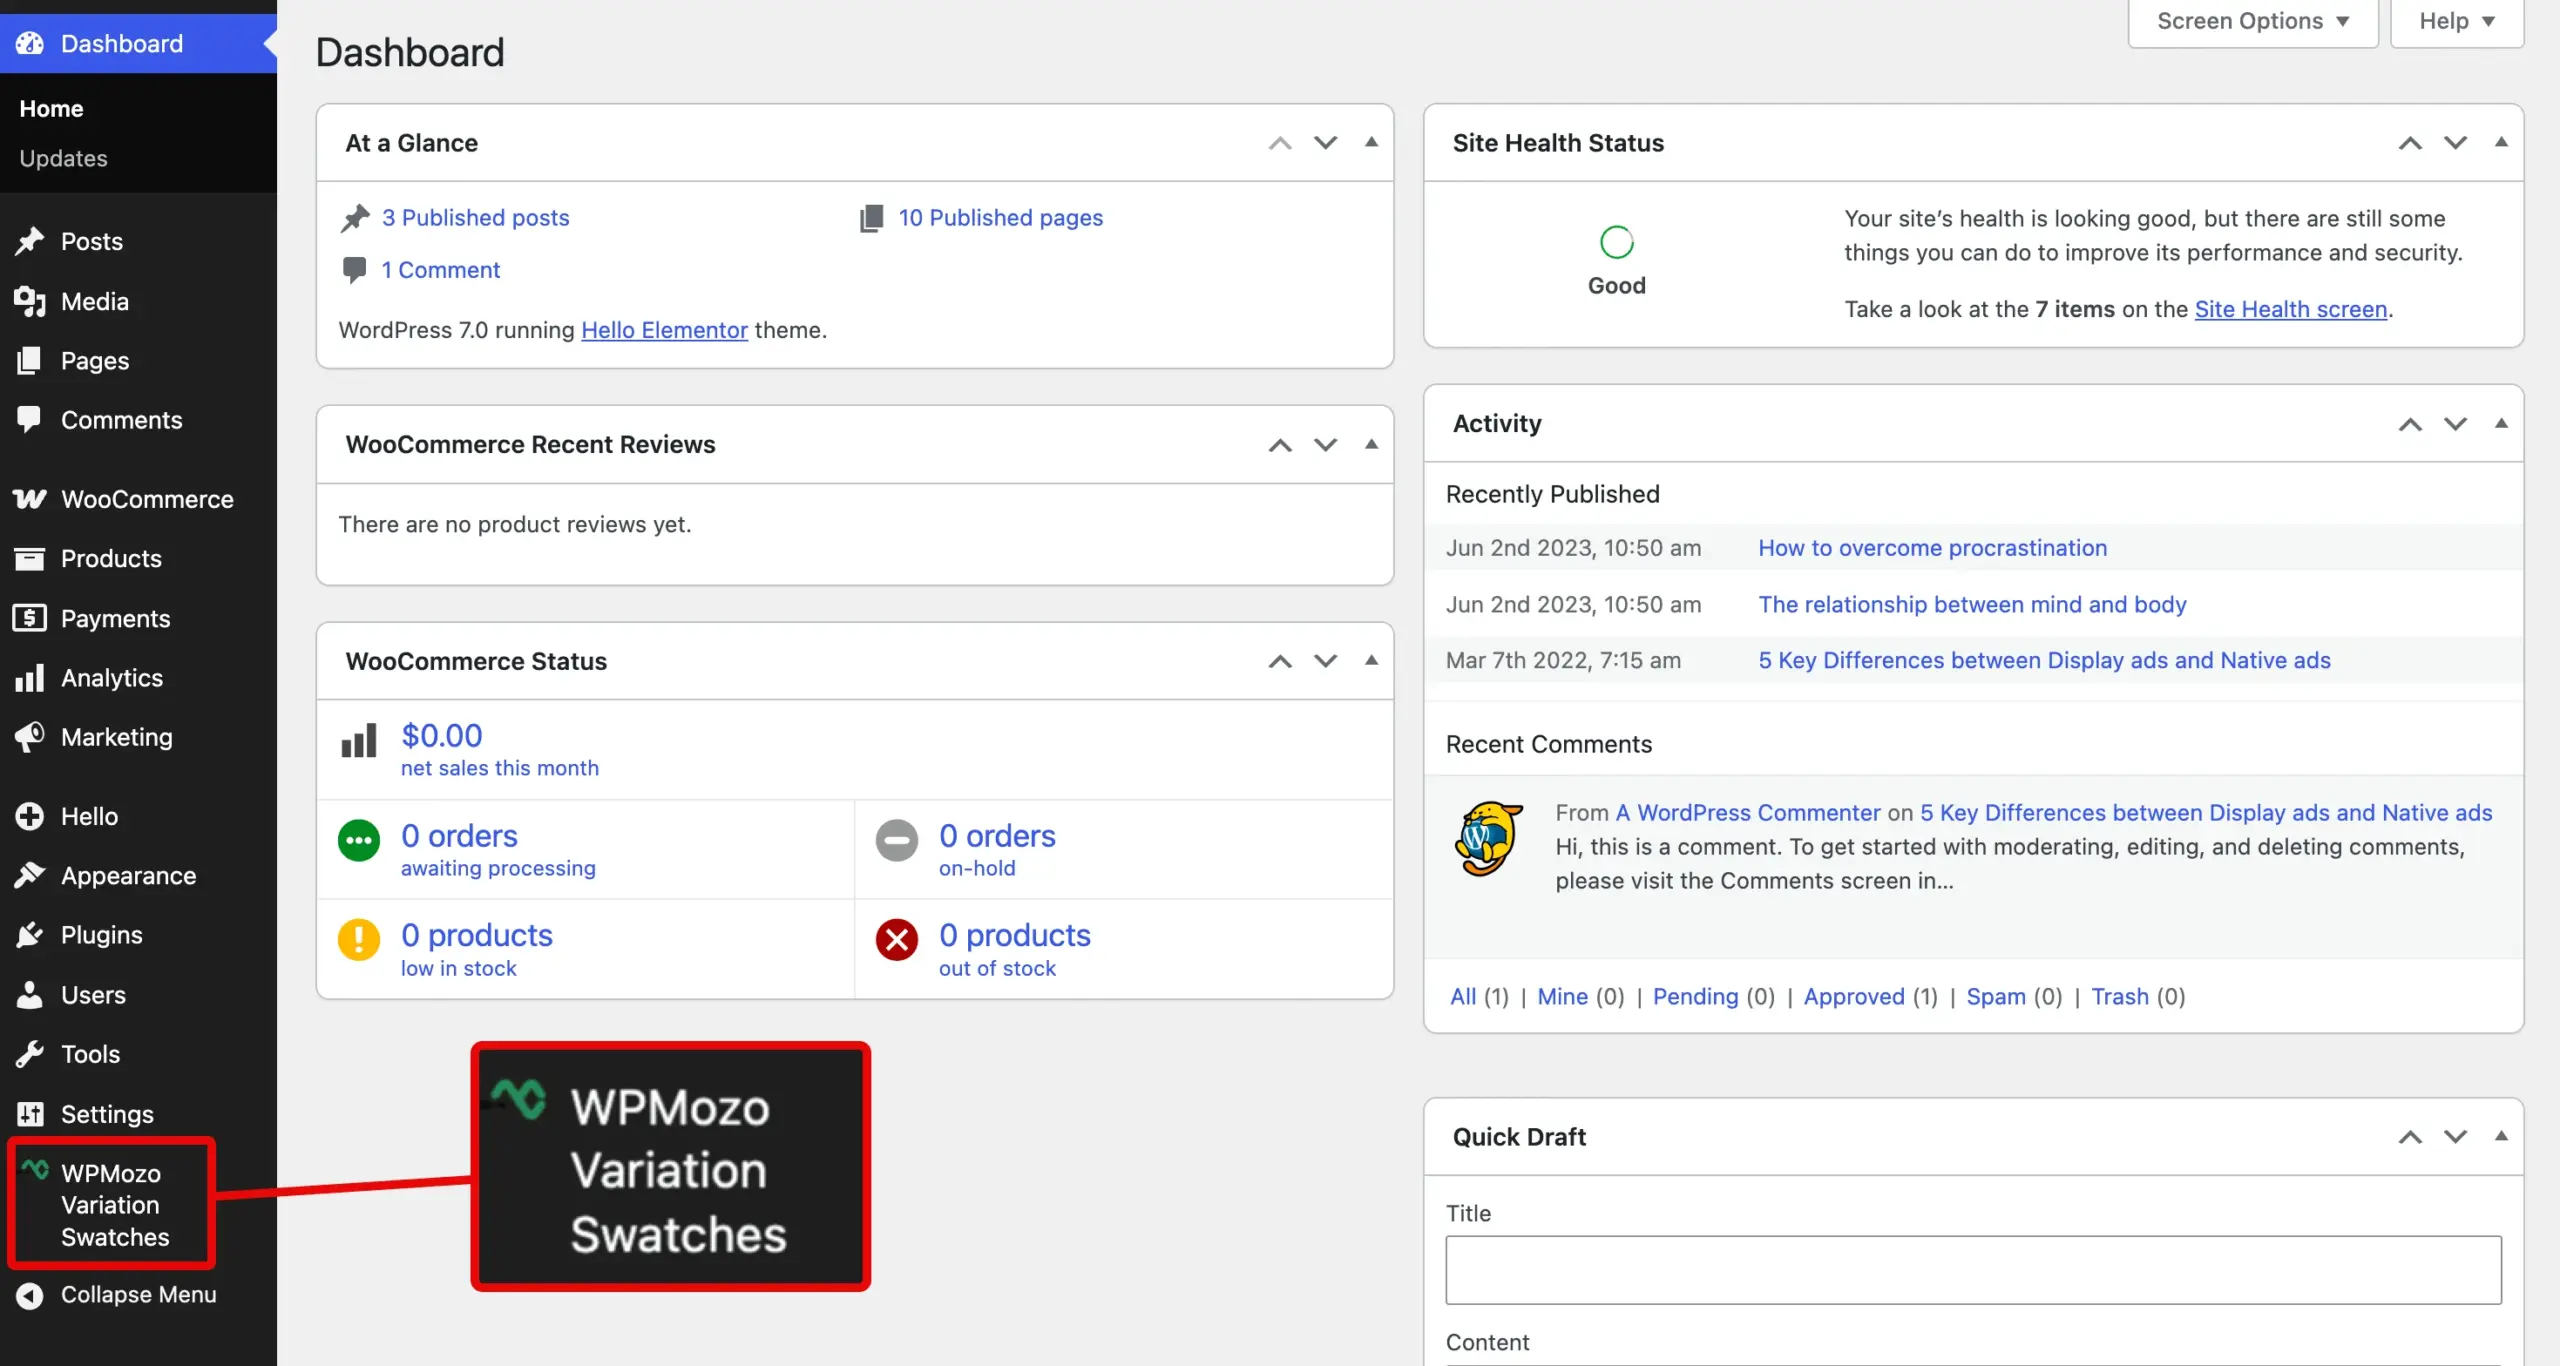
Open it to configure your variation swatches.
Step 1.1: Configuring Variation Swatches Plugin
The settings of the WPMozo Variation Swatches plugin provide you with multiple options to utilize it effectively. For instance, the General Options include:
- Controls to Blur or Cross the swatches for disabled attributes.
- You can change the swatch’s shape to Round or Square.
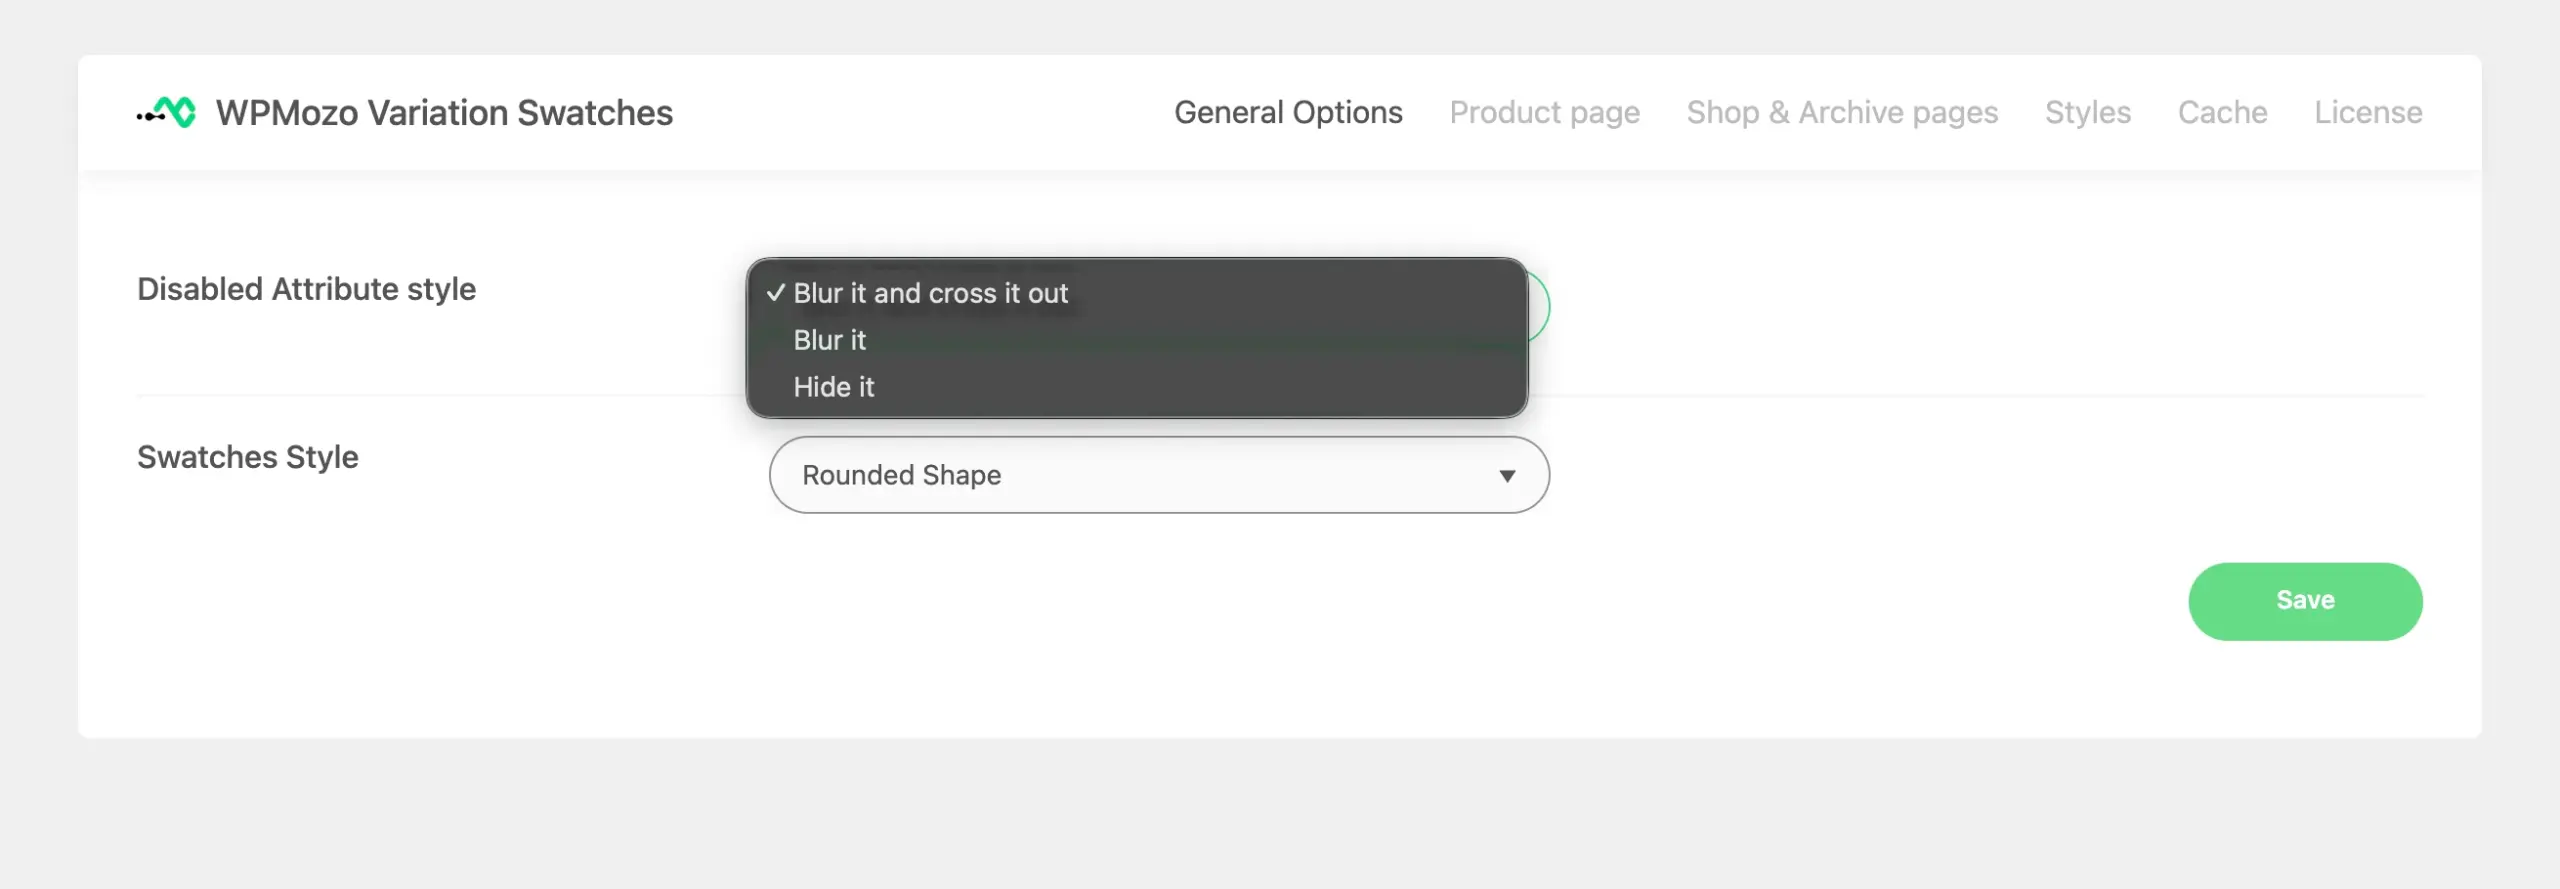
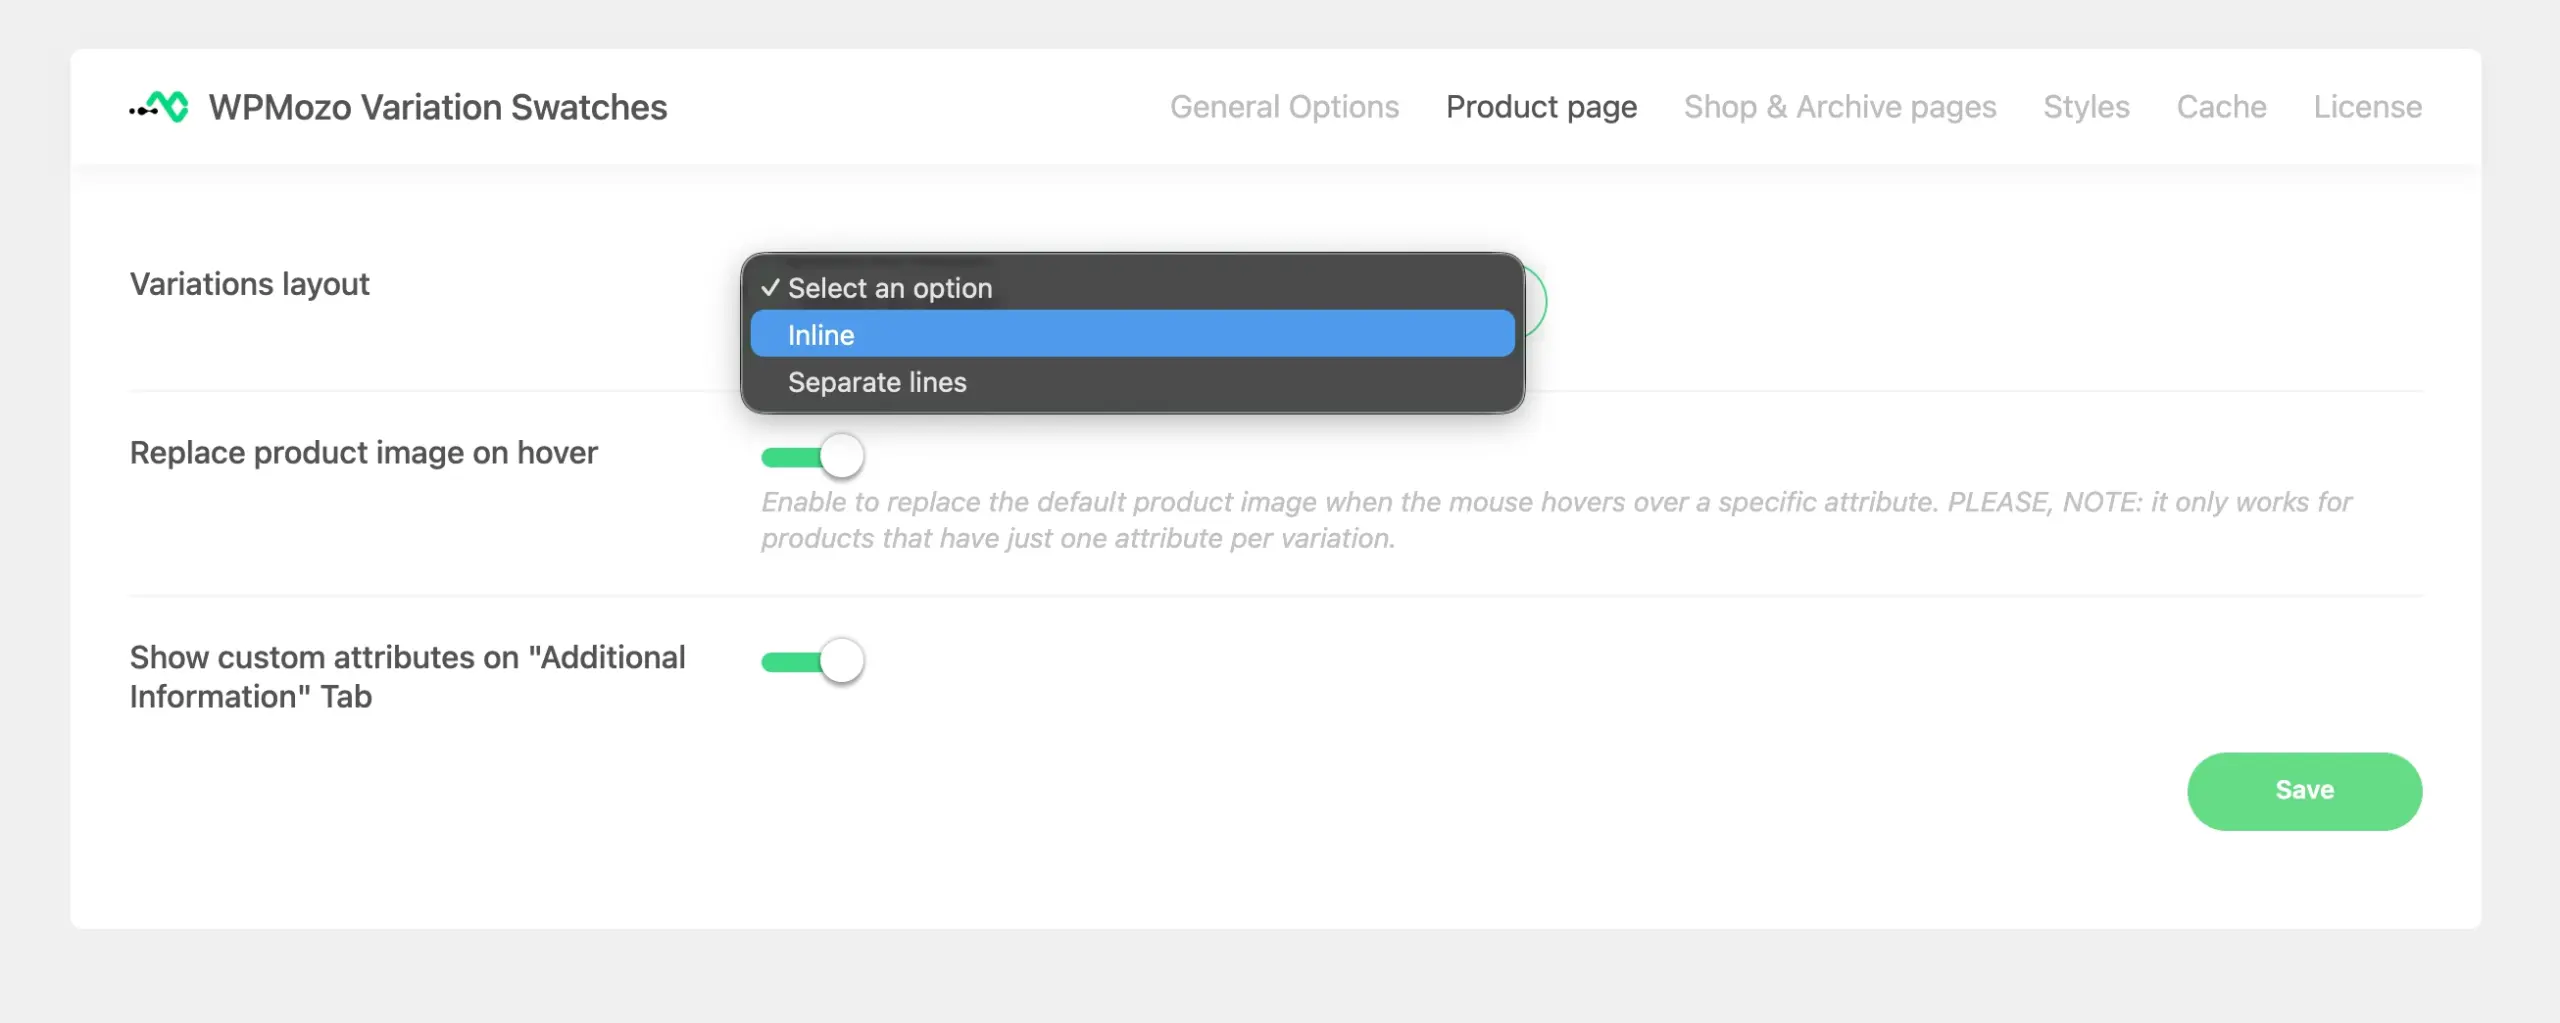
Then, moving forward to the Product Page settings, you get the options to:
- Change the variations layout to Inline or Separate Lines.
- You can also enable the Replace product image on hover and Show custom attributes on “Additional Information Tab”.
Likewise, there are other options such as showing the variations on the product archive pages, applying custom styling, and enabling the cache for smooth functioning. You can utilize all the options according to your requirements, and once you are done with that, you can move on to the next step to create/review your product attributes.
Step 2: Create WooCommerce Product Attributes
Product Attributes in WooCommerce help you distinguish one variation type from another. For example, you can create product variations such as Size, Color, or Style.
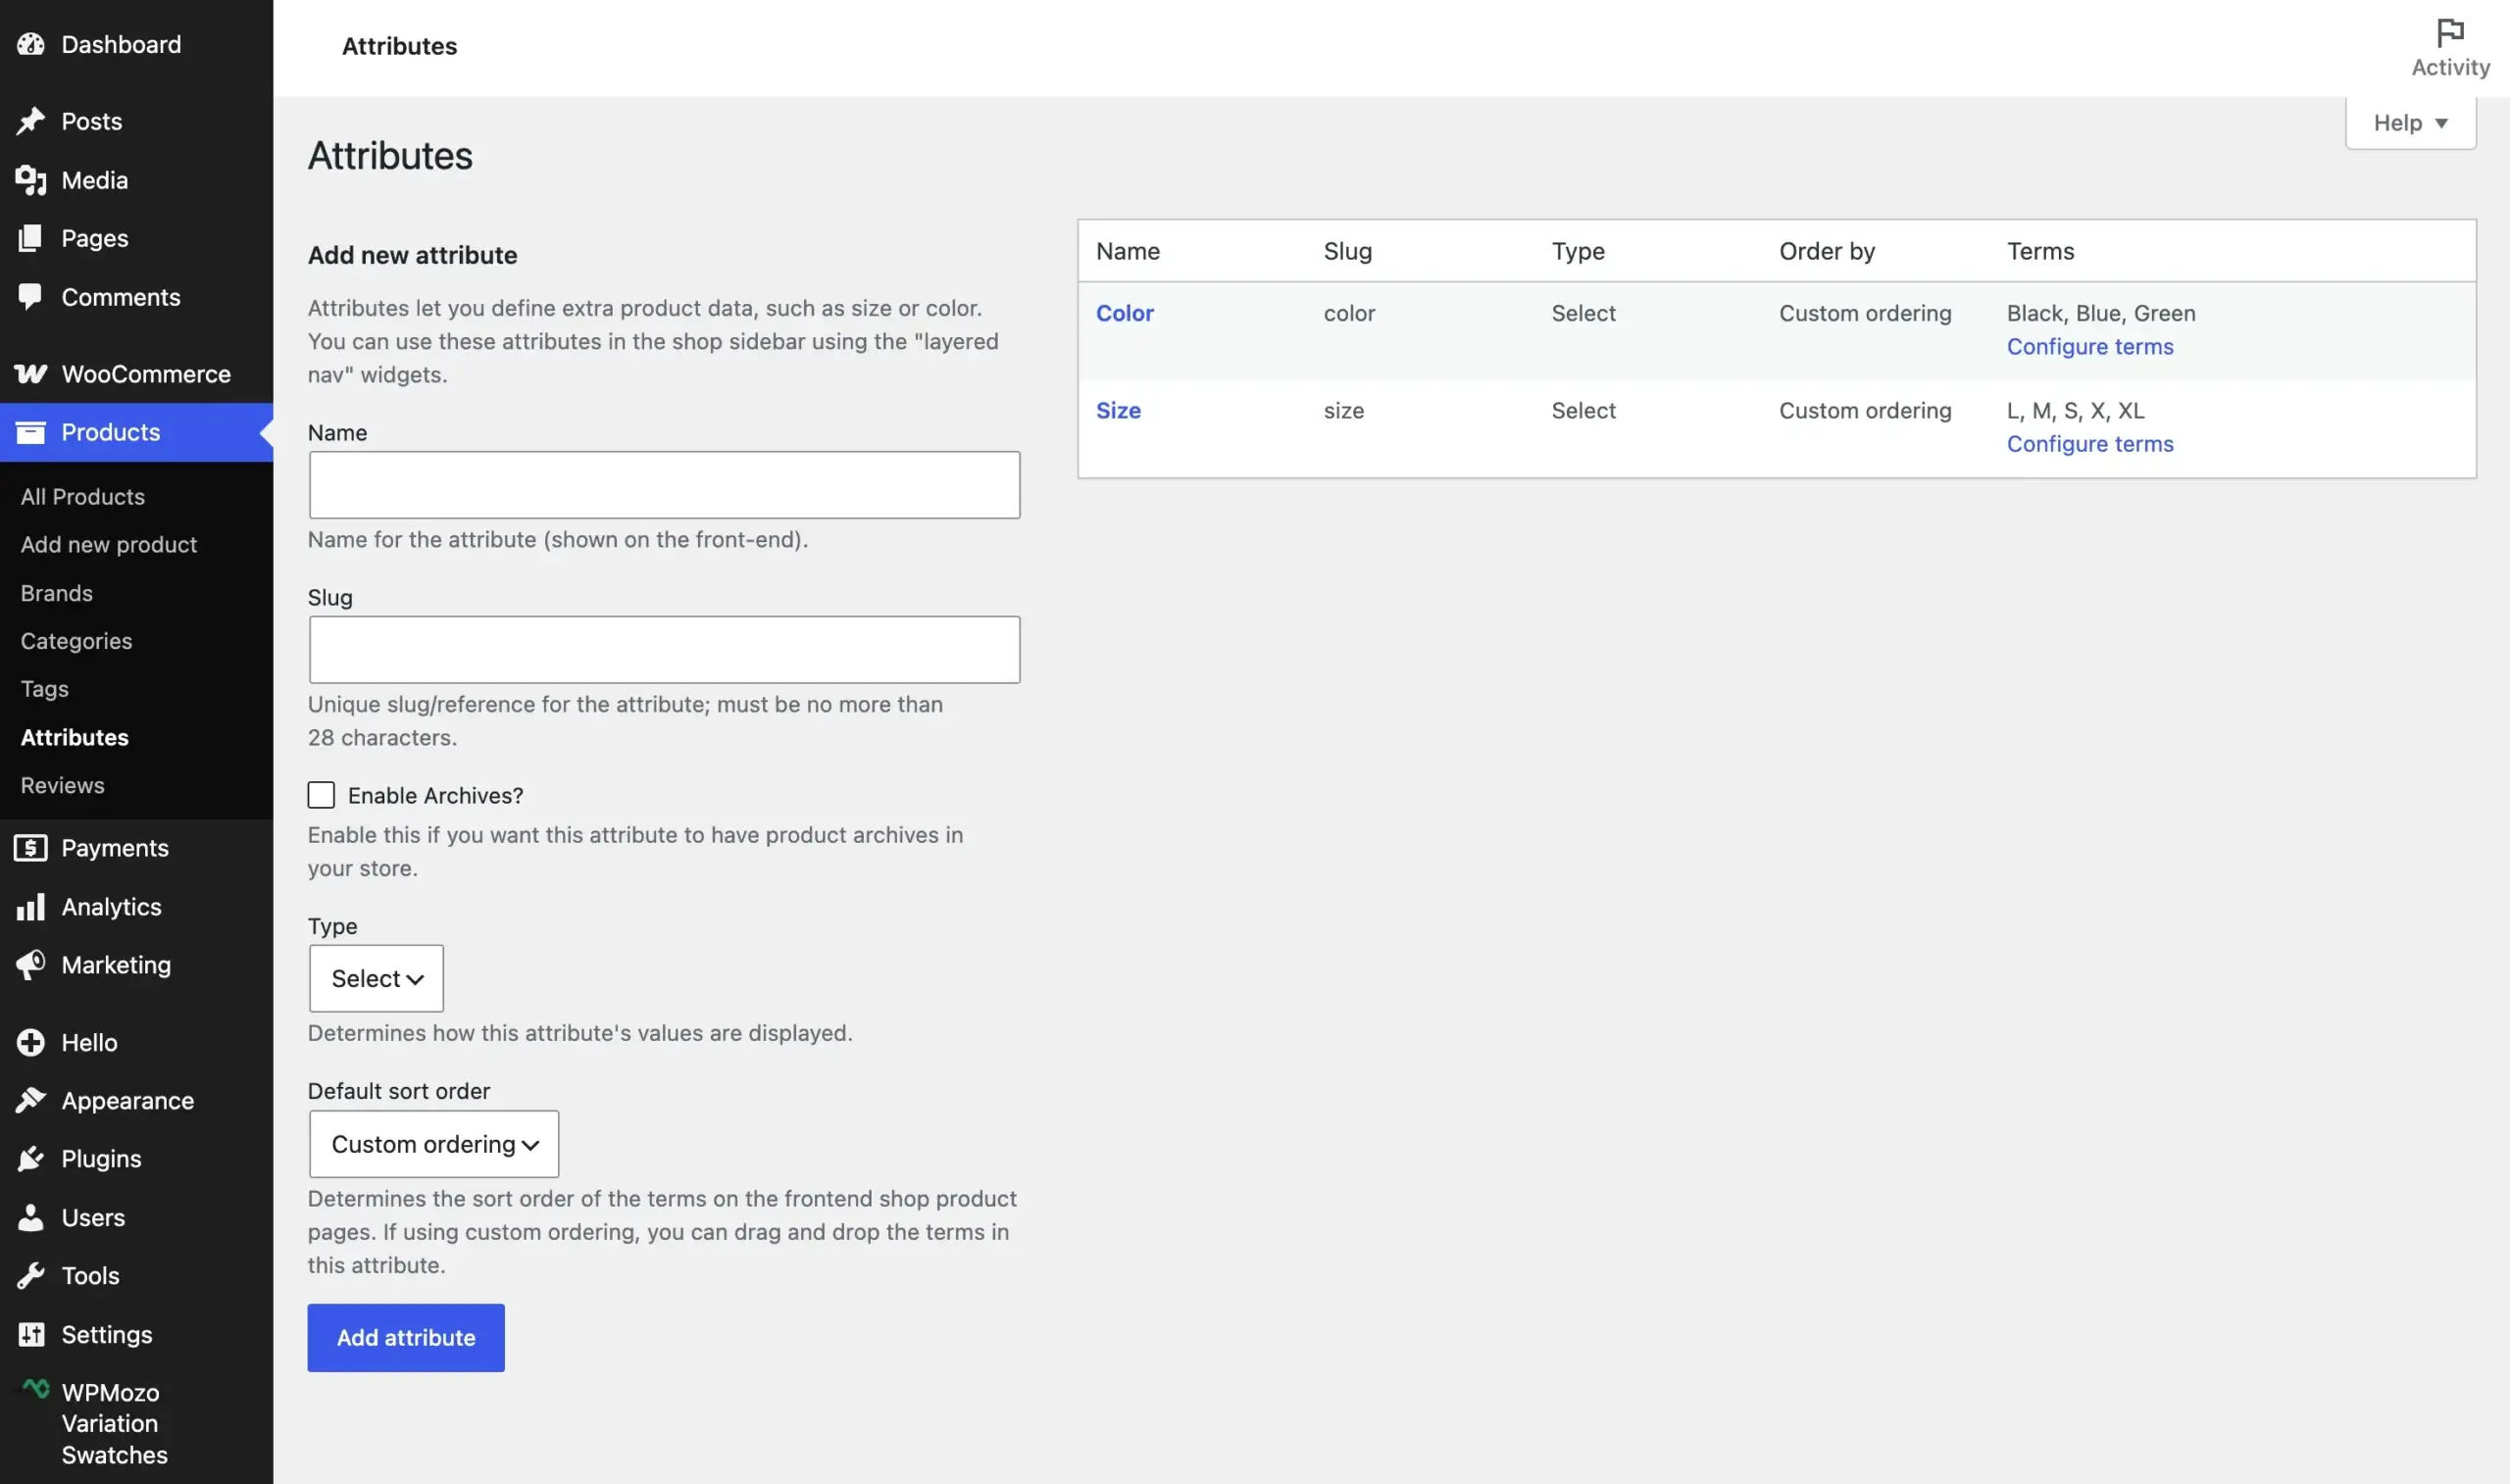
By default, WooCommerce creates the Color and Size product attributes. However, they are not configured for image swatches. By following the steps below, we’ll configure the default attributes as image swatches and also create a new attribute, Style.
To create a new product attribute, go to Products → Attributes.
Then, in the fields available, enter the name as Style. If you need to create an archive for this, you can check the Enable Archives, then in the Type → select Image.
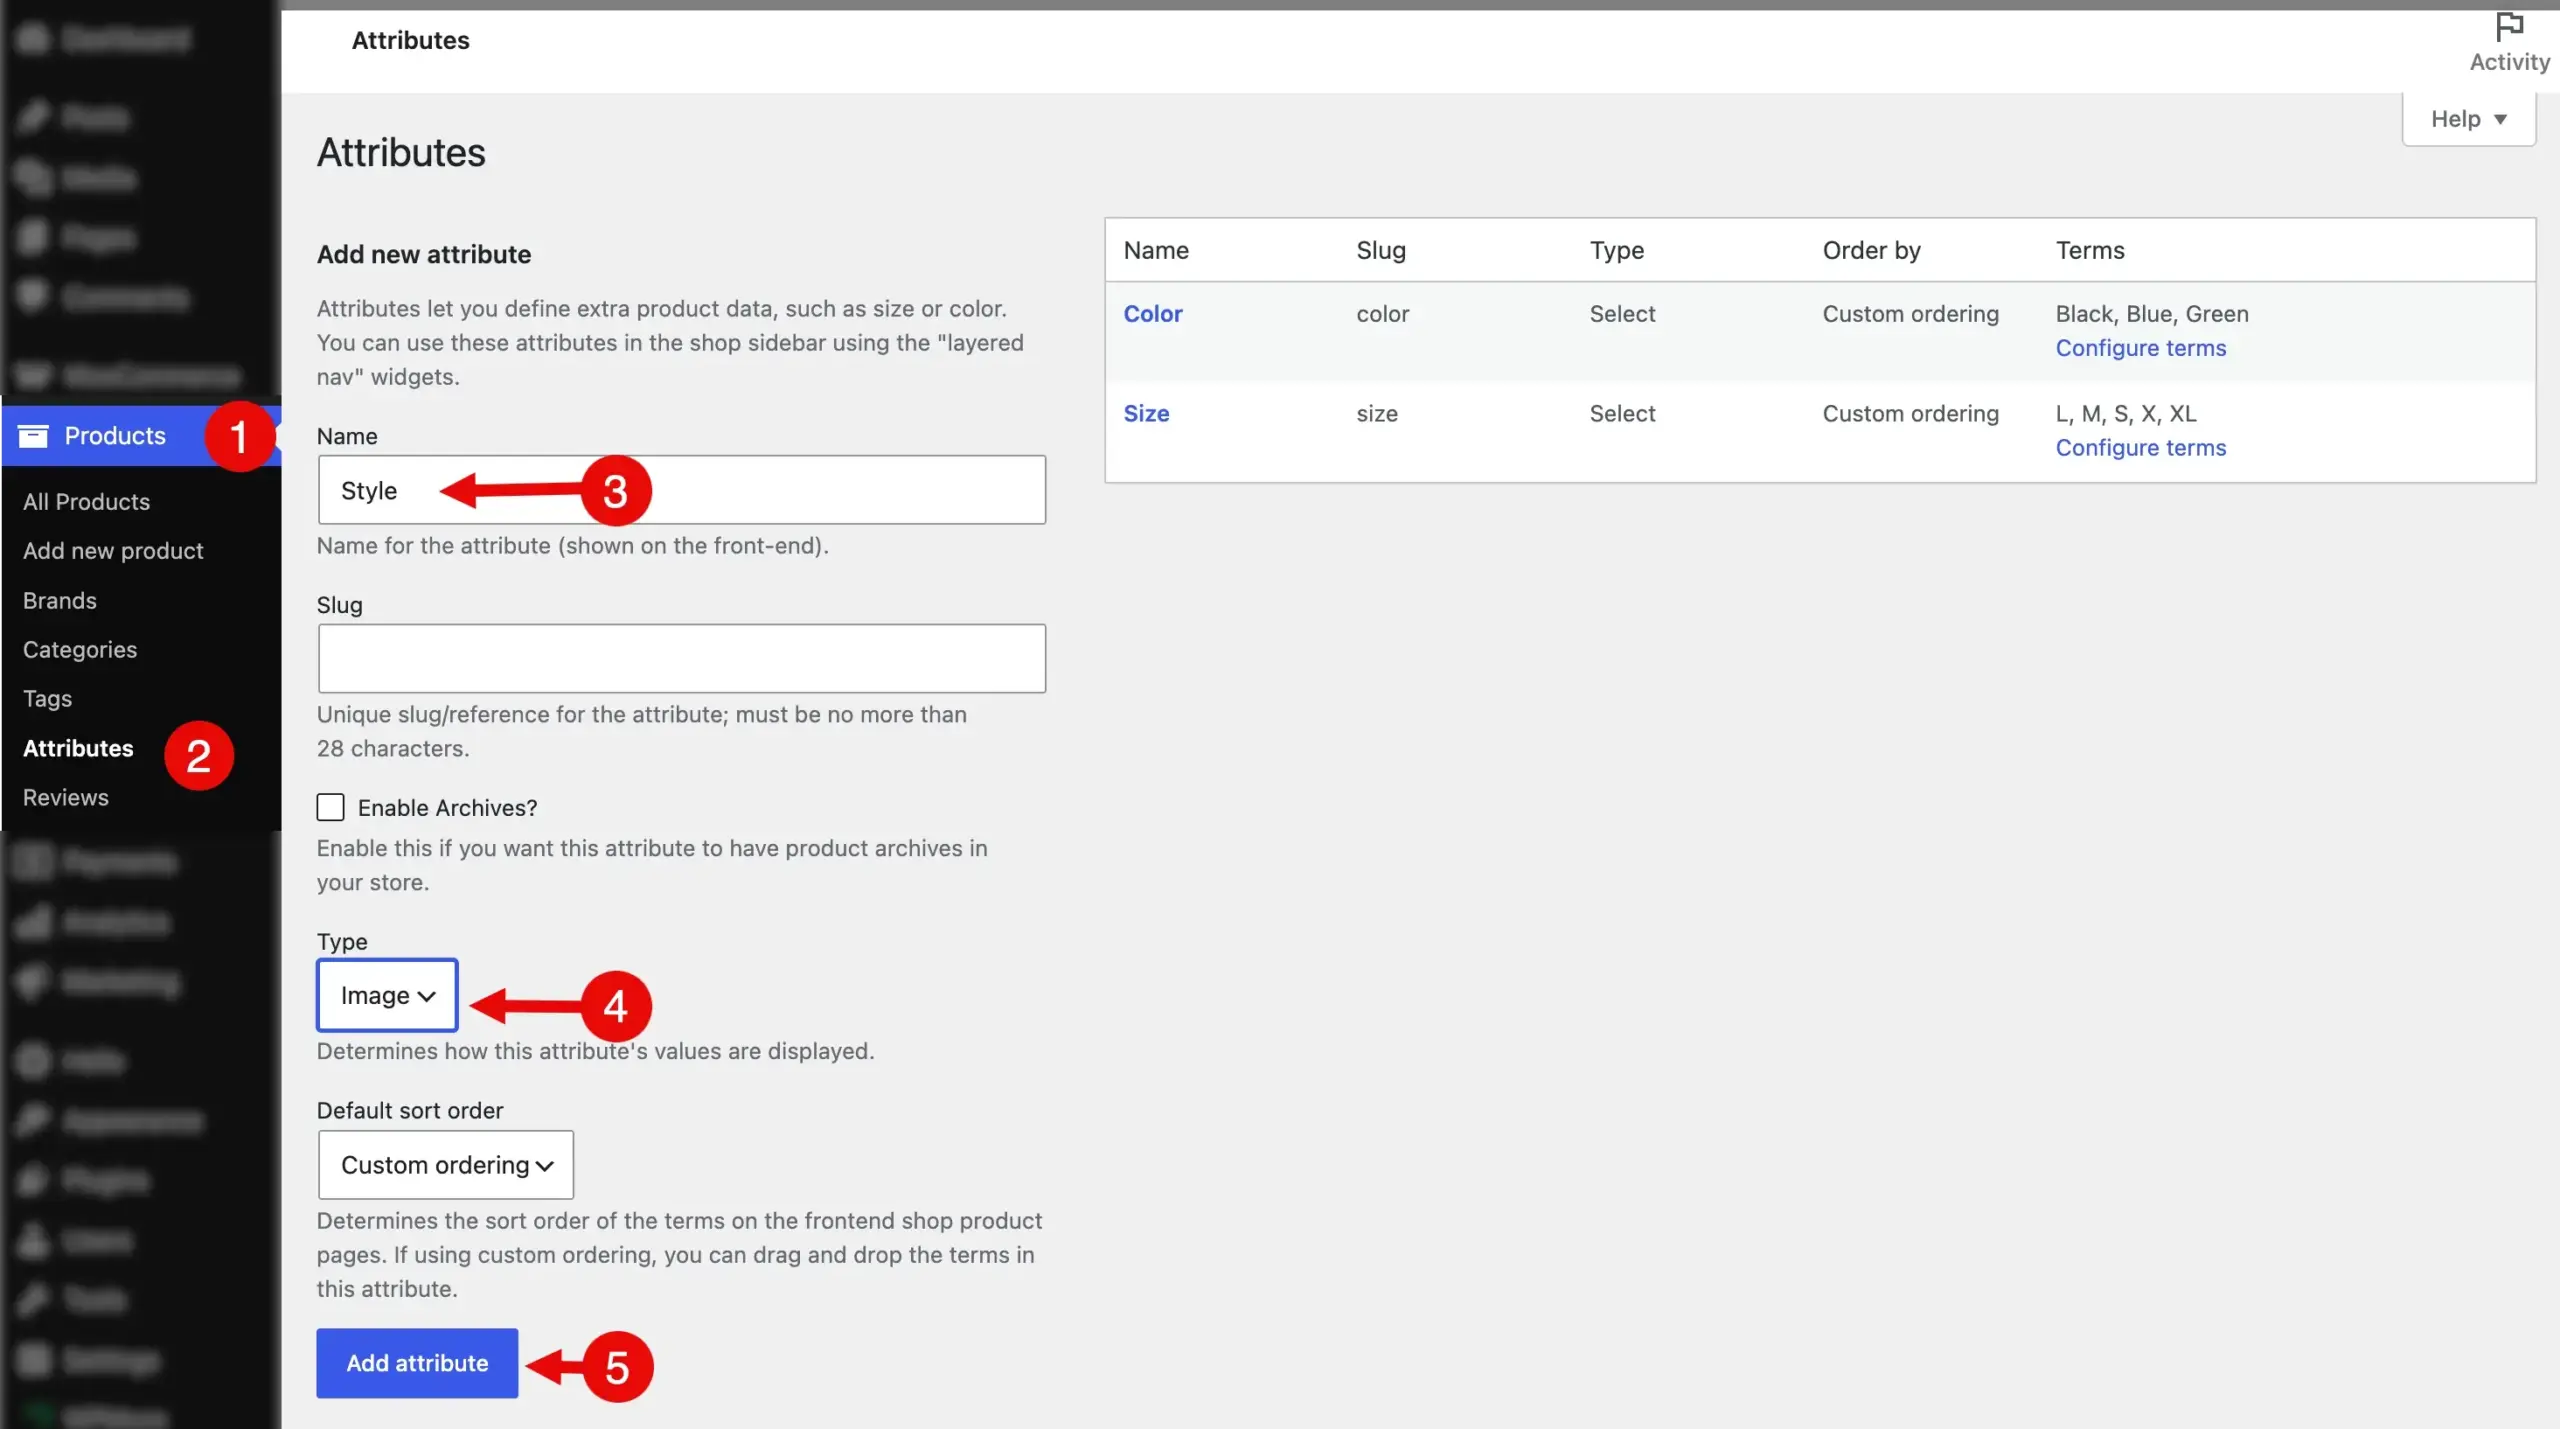
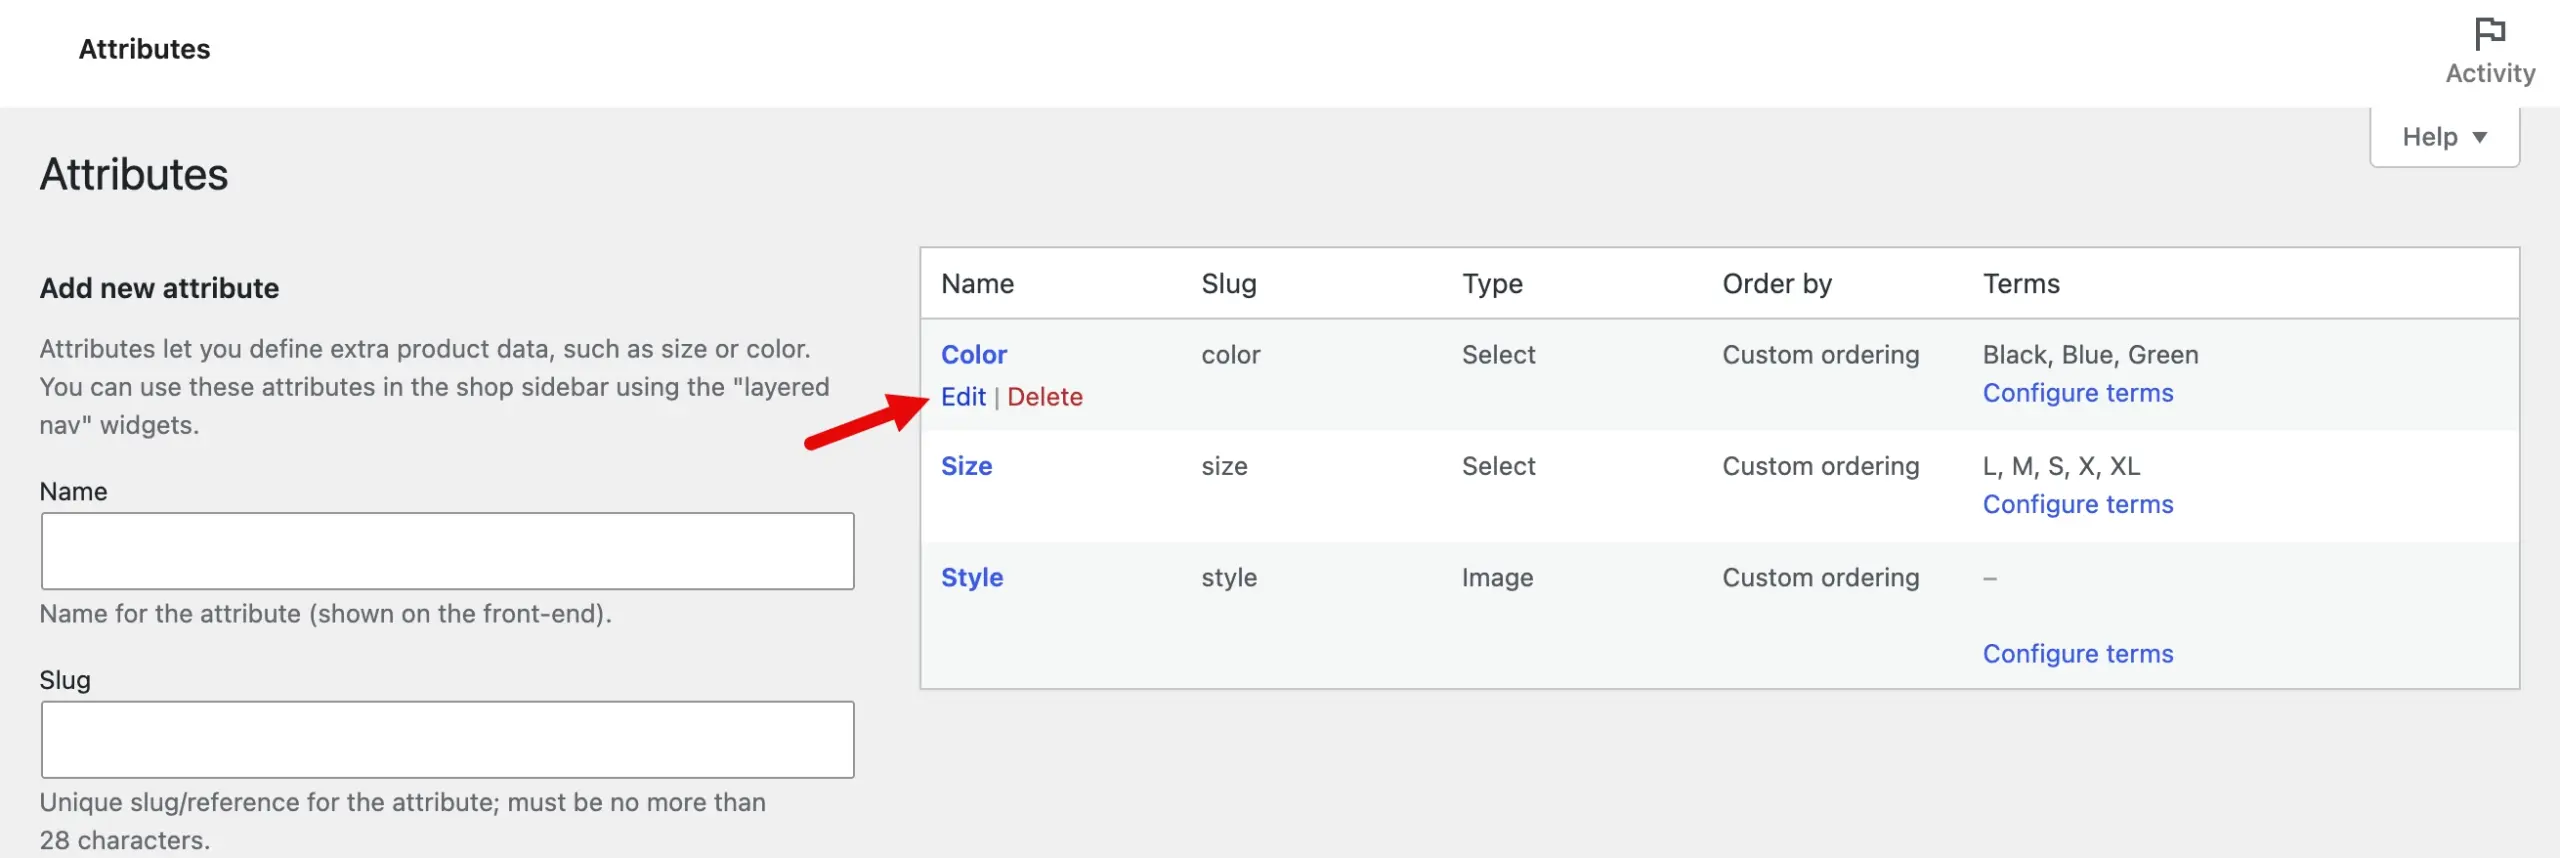
Lastly, click Add attribute. And the product attribute has been created. Now, customize the default one as well into image variation swatches. So, for that, go to the attribute and click Edit.
In the window that opens, go to Type and select Image from the dropdown.
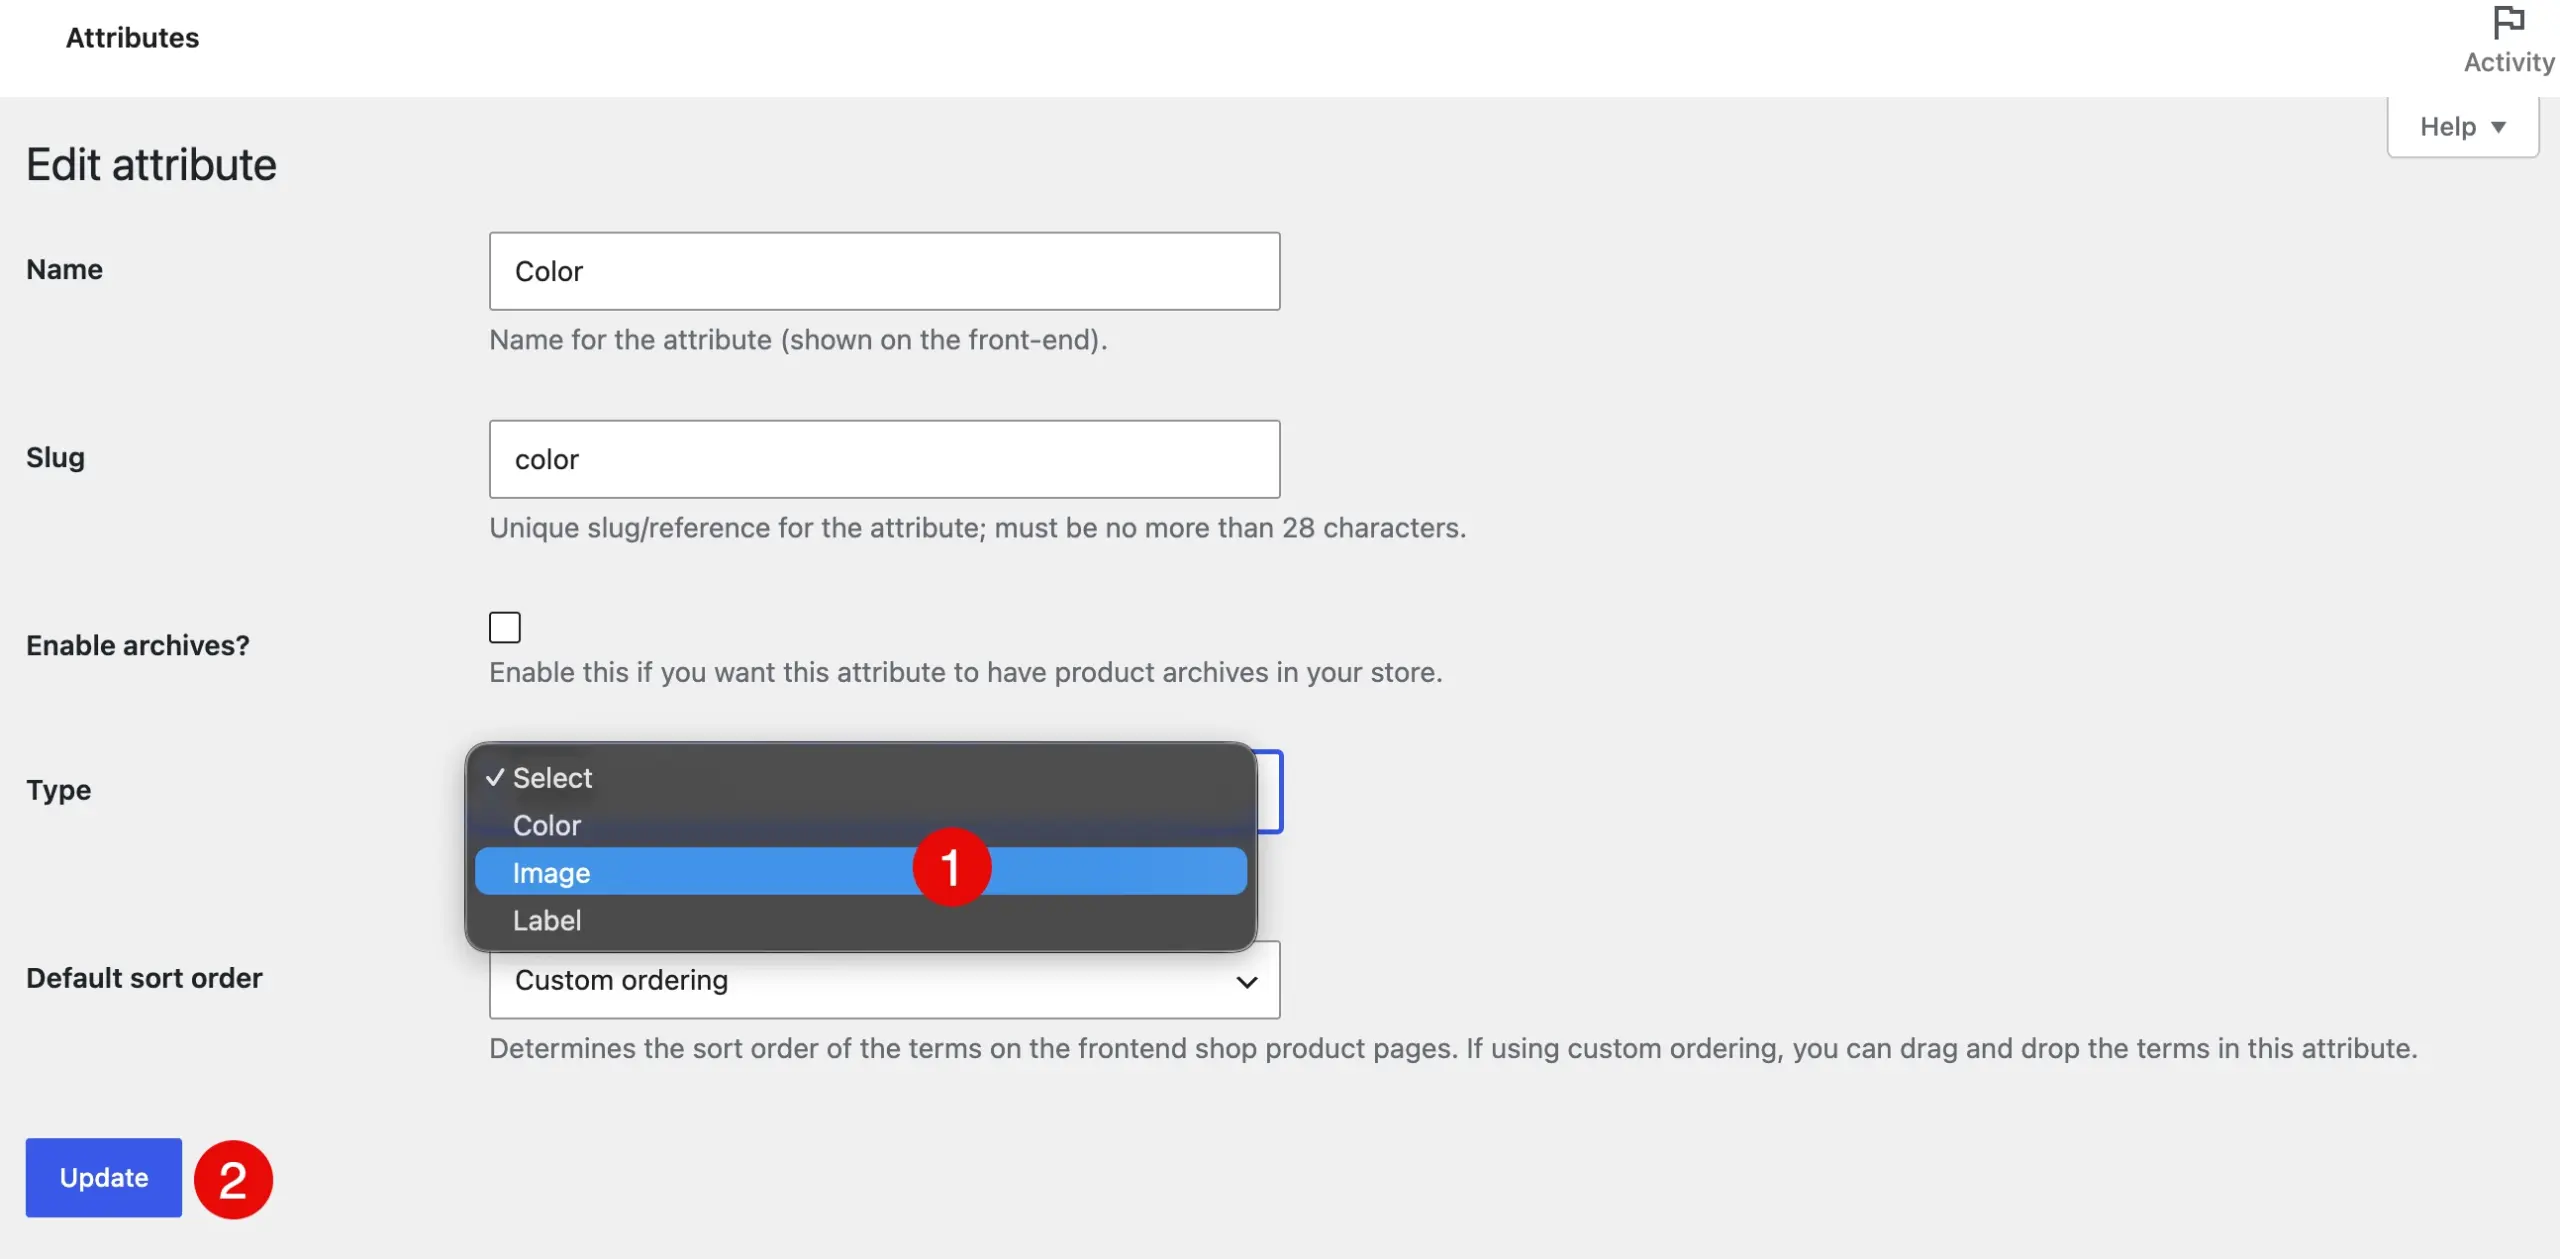
After this, click Update. Likewise, update the product attribute type for other attributes available.
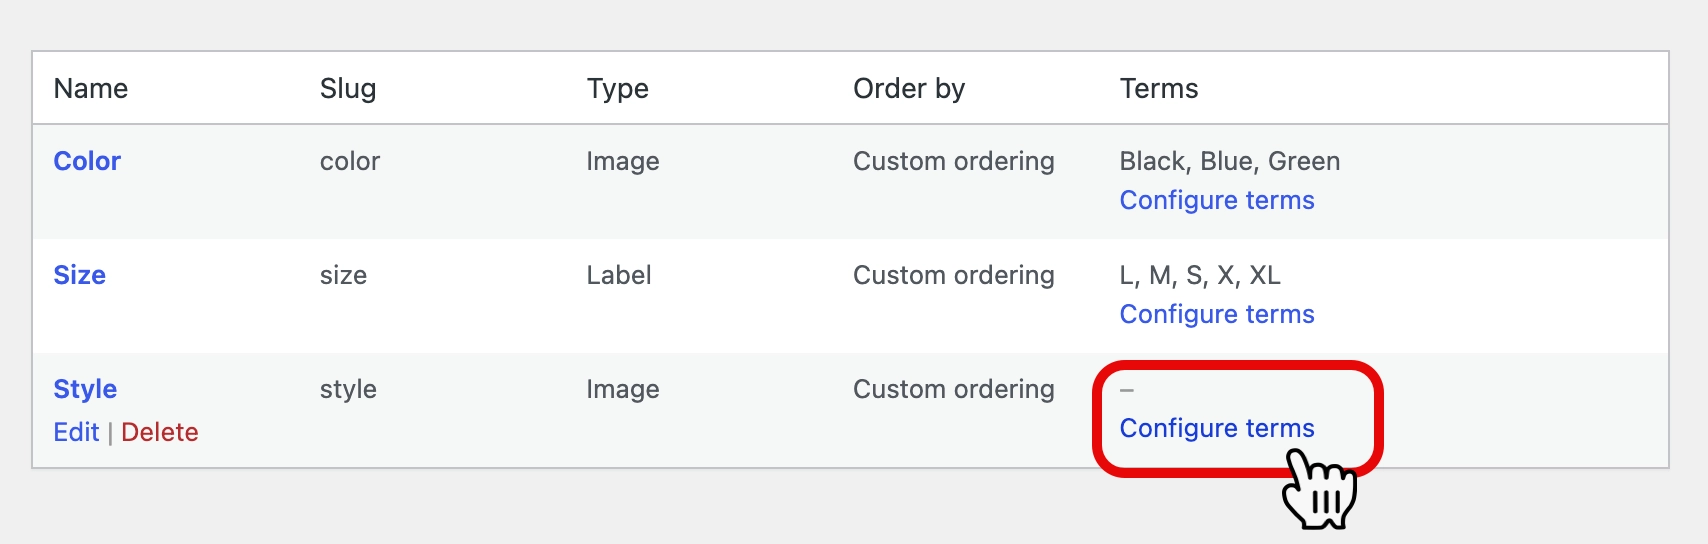
Step 2.1: Configure Product Attribute’s Terms
A product attribute term helps define the variations of your product. For instance, if you have a Nike t-shirt, it may be available in different styles such as V-neck, Half Sleeves, Full Sleeves, or With Hoodie. These are your attribute terms. To add your attribute terms, click on the Configure terms under the Terms column of your required attribute.
The Product Style window will open. Note: It’s an essential step, so follow attentively.
Enter the name of your style, then add other basic details, and once done, click Upload Image. This will be shown in the style for the product variation swatches.
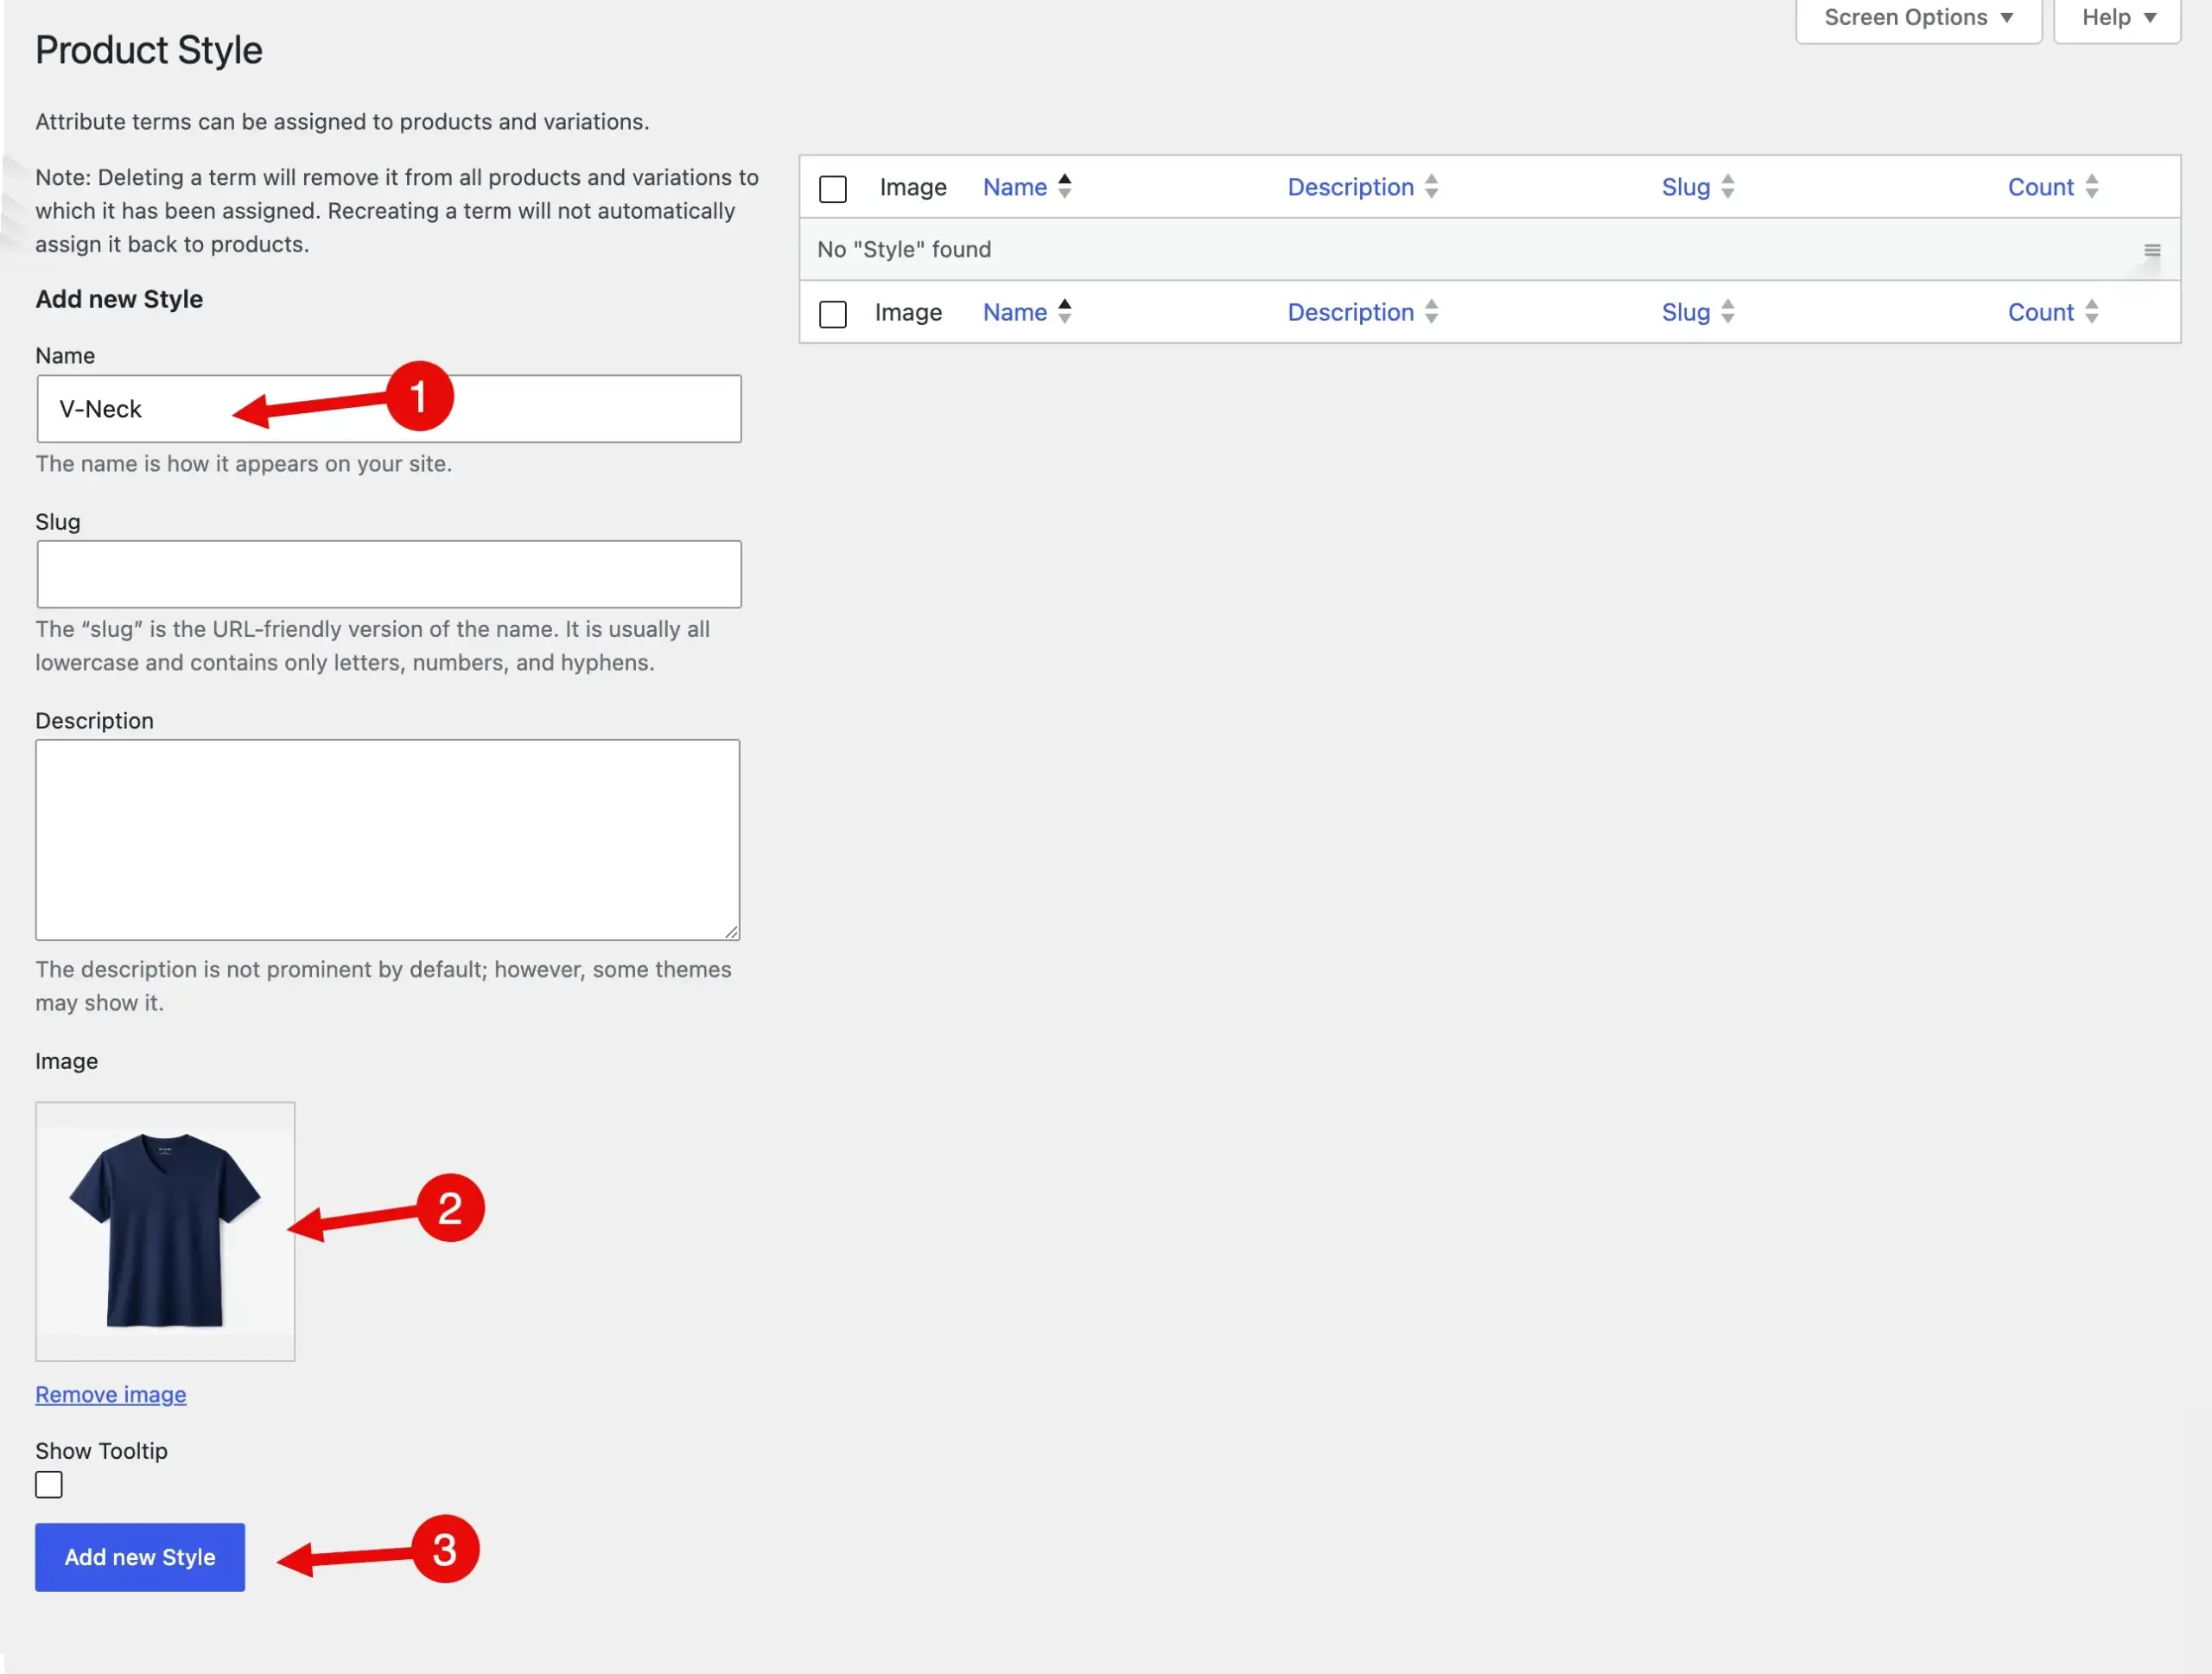
After adding the image, click Add new style.
That’s it, we have created our product attribute terms. Likewise, you can do the same for other terms and attributes as well.
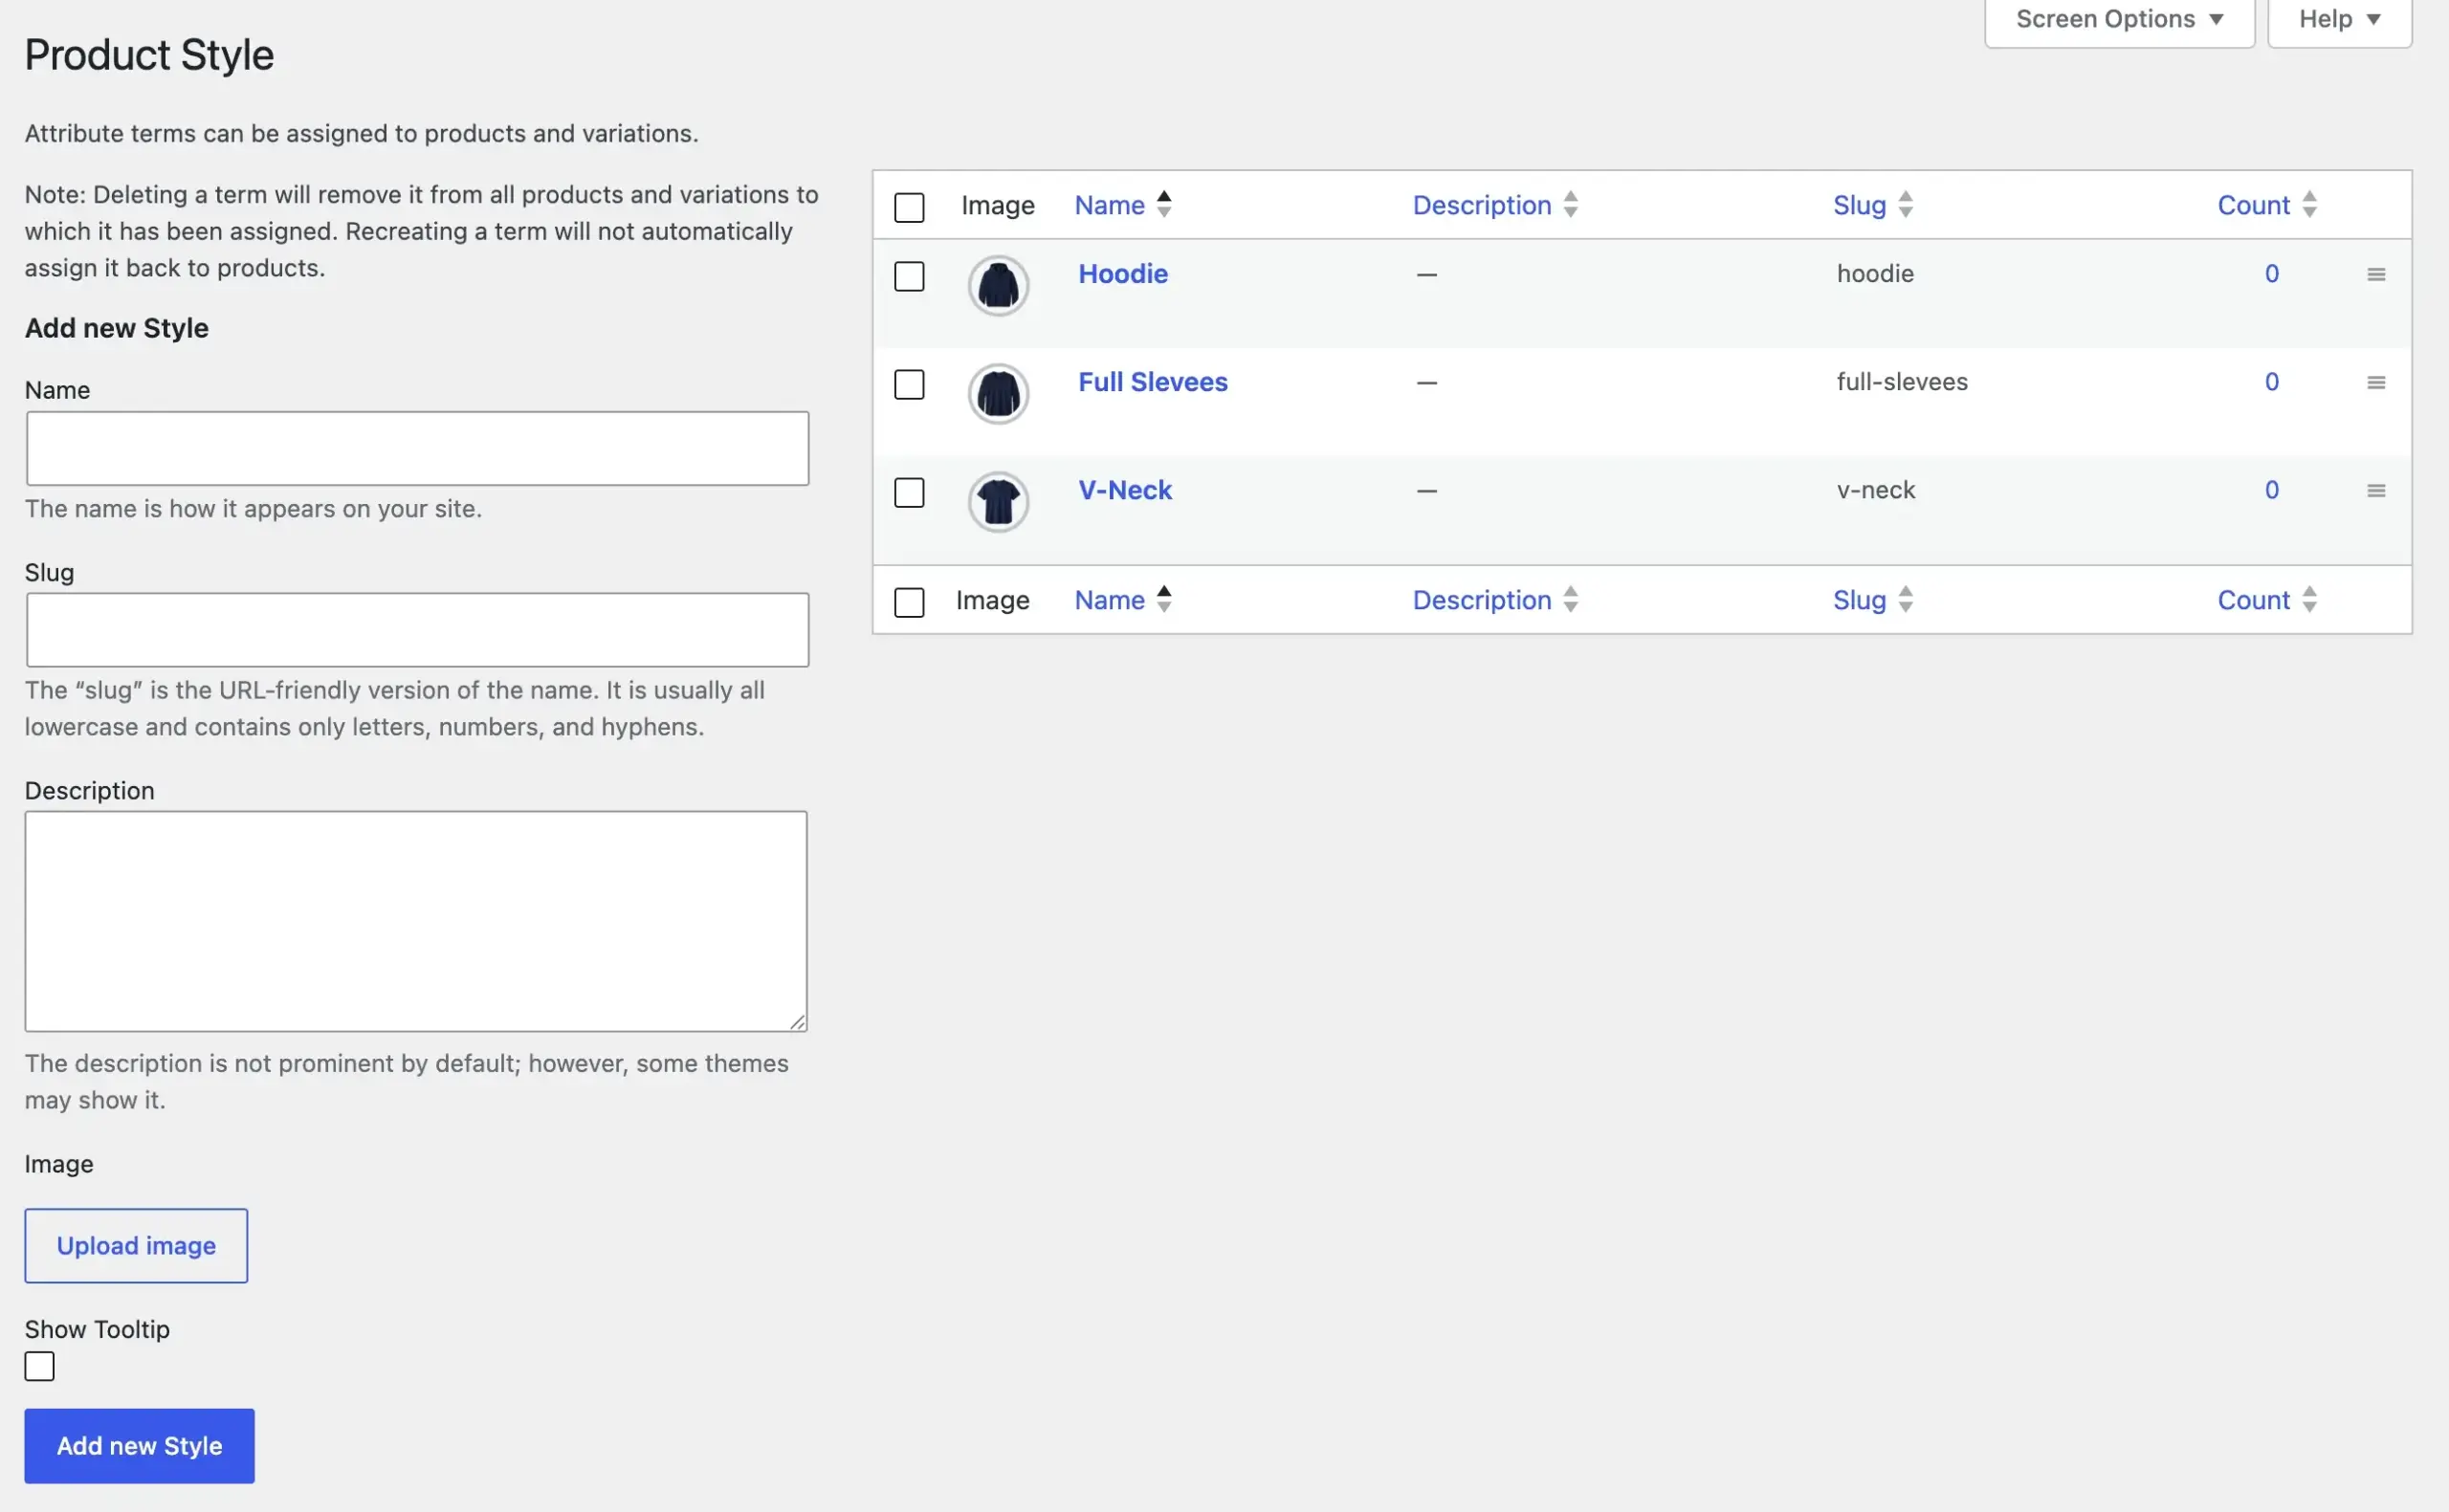
Now, move on to the next step to create variation for the product.
Step 3: Create Product Variations
To display image swatches, the product must have variations added to its details. To do that, we have to edit the product and make changes to its information. But, to make this tutorial follow, let’s start with creating the product first.
Go to Products → Add new product. In the window that opens, enter the name and description of your product.
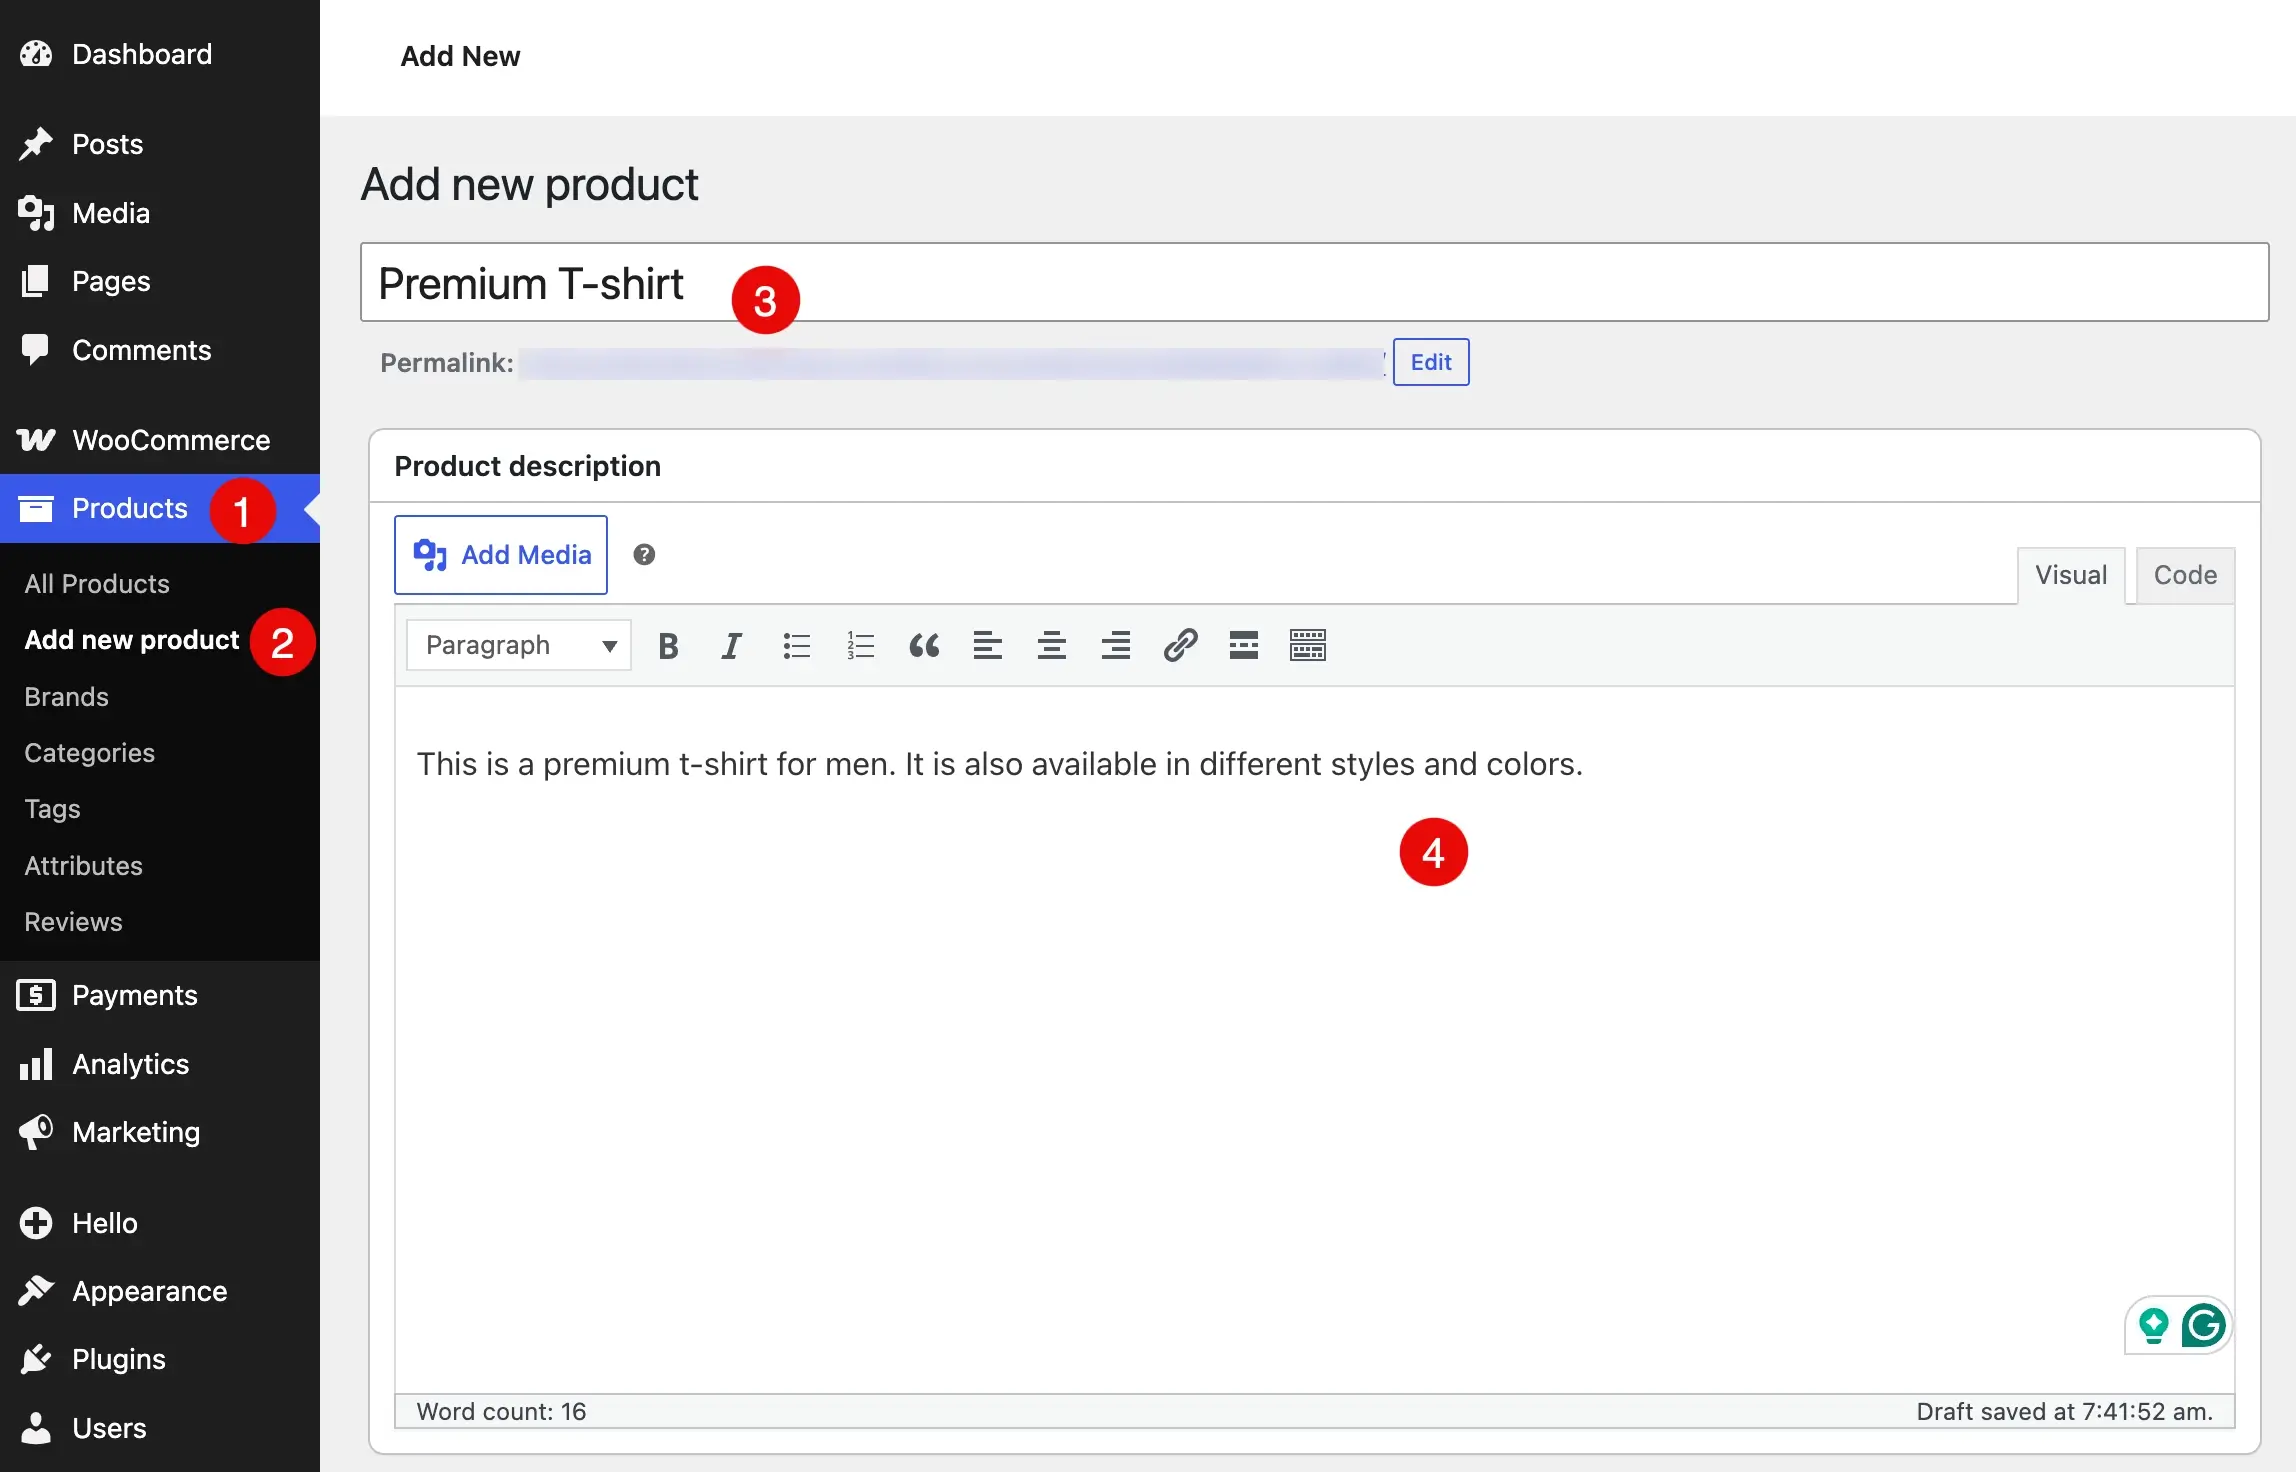
After this, scroll down to Product data, and select Variable Product from the drop-down list.
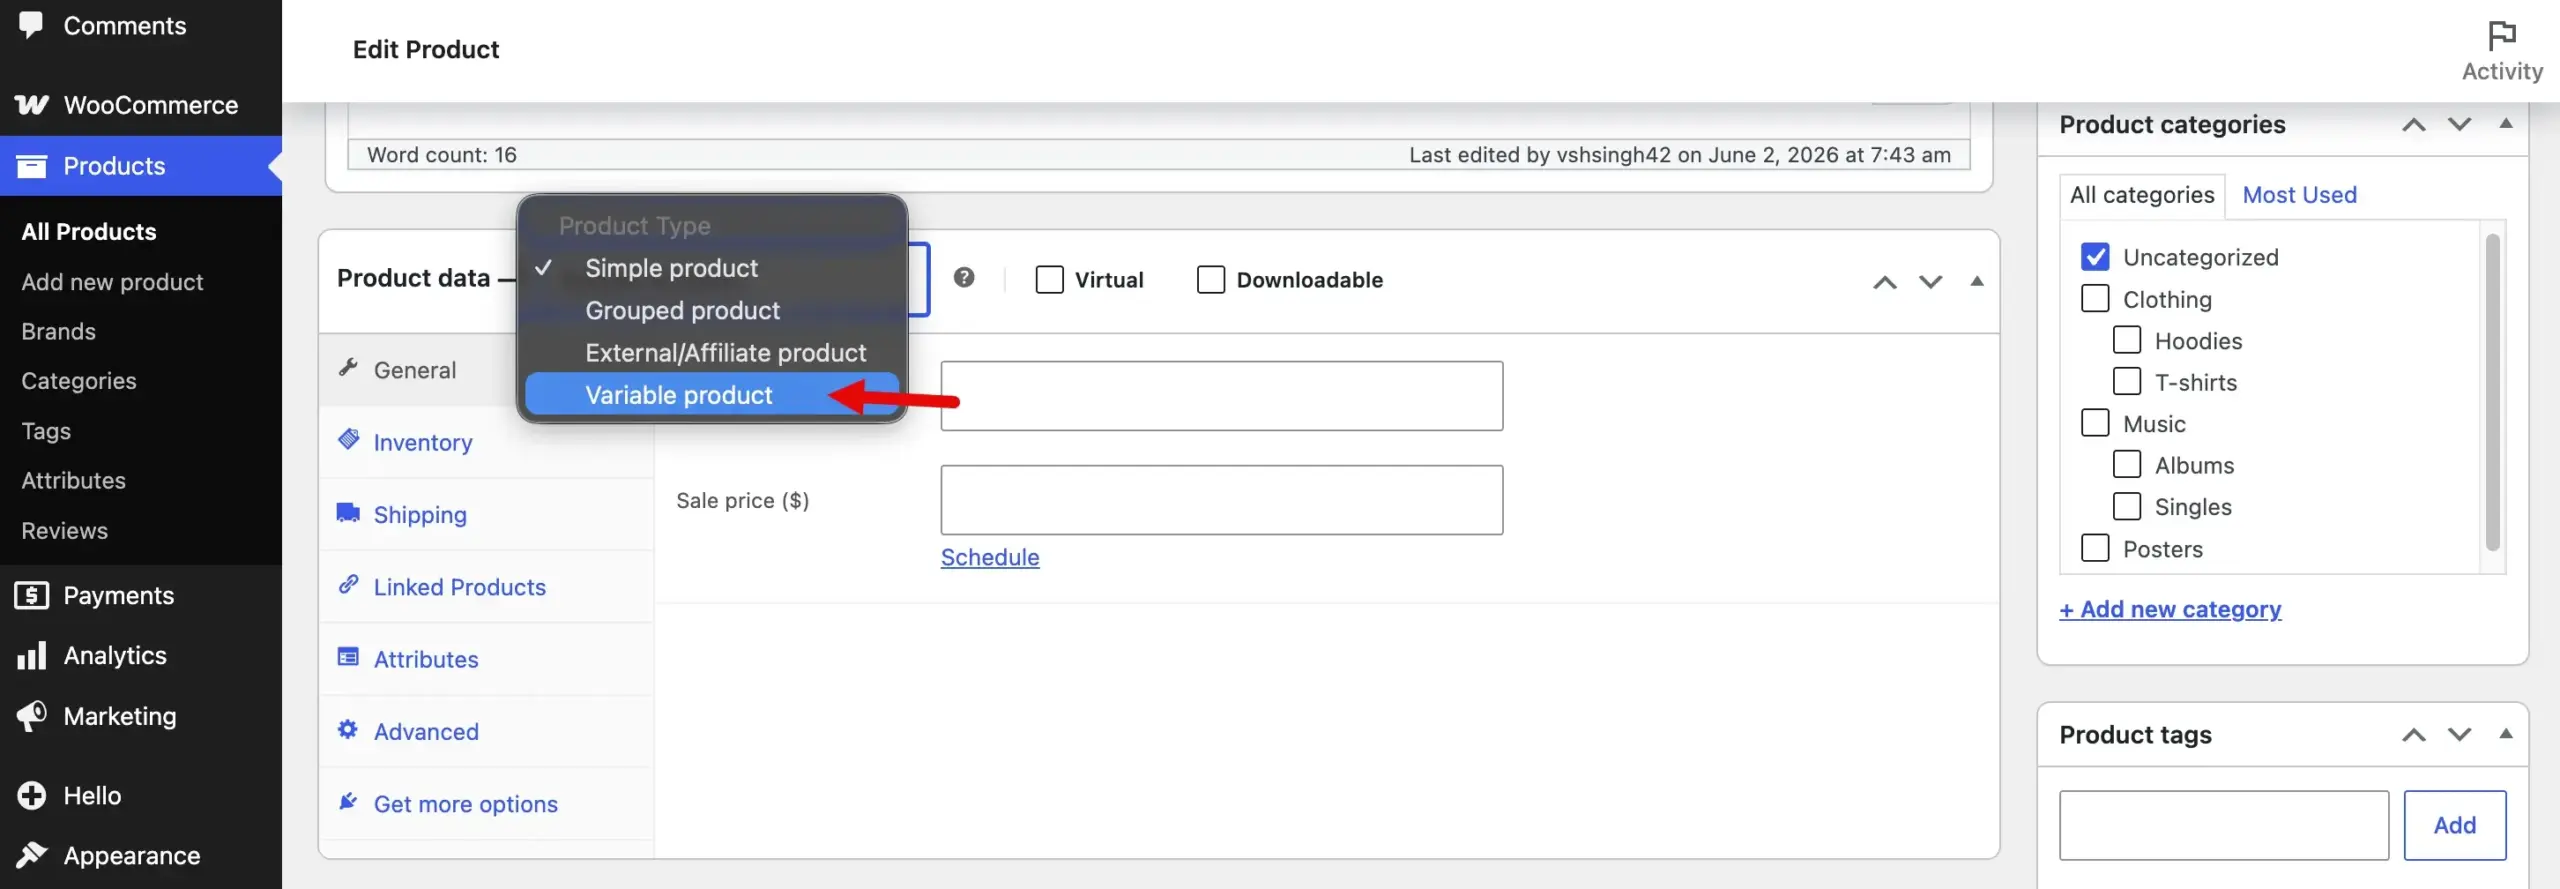
Then fill in the details in each tab from Inventory to Linked Products. Then in the Attributes, select the ones that apply to your product. For this tutorial, I’ll add all of the three attributes and their values. Click on the Add existing, then go to values, and select the available options.
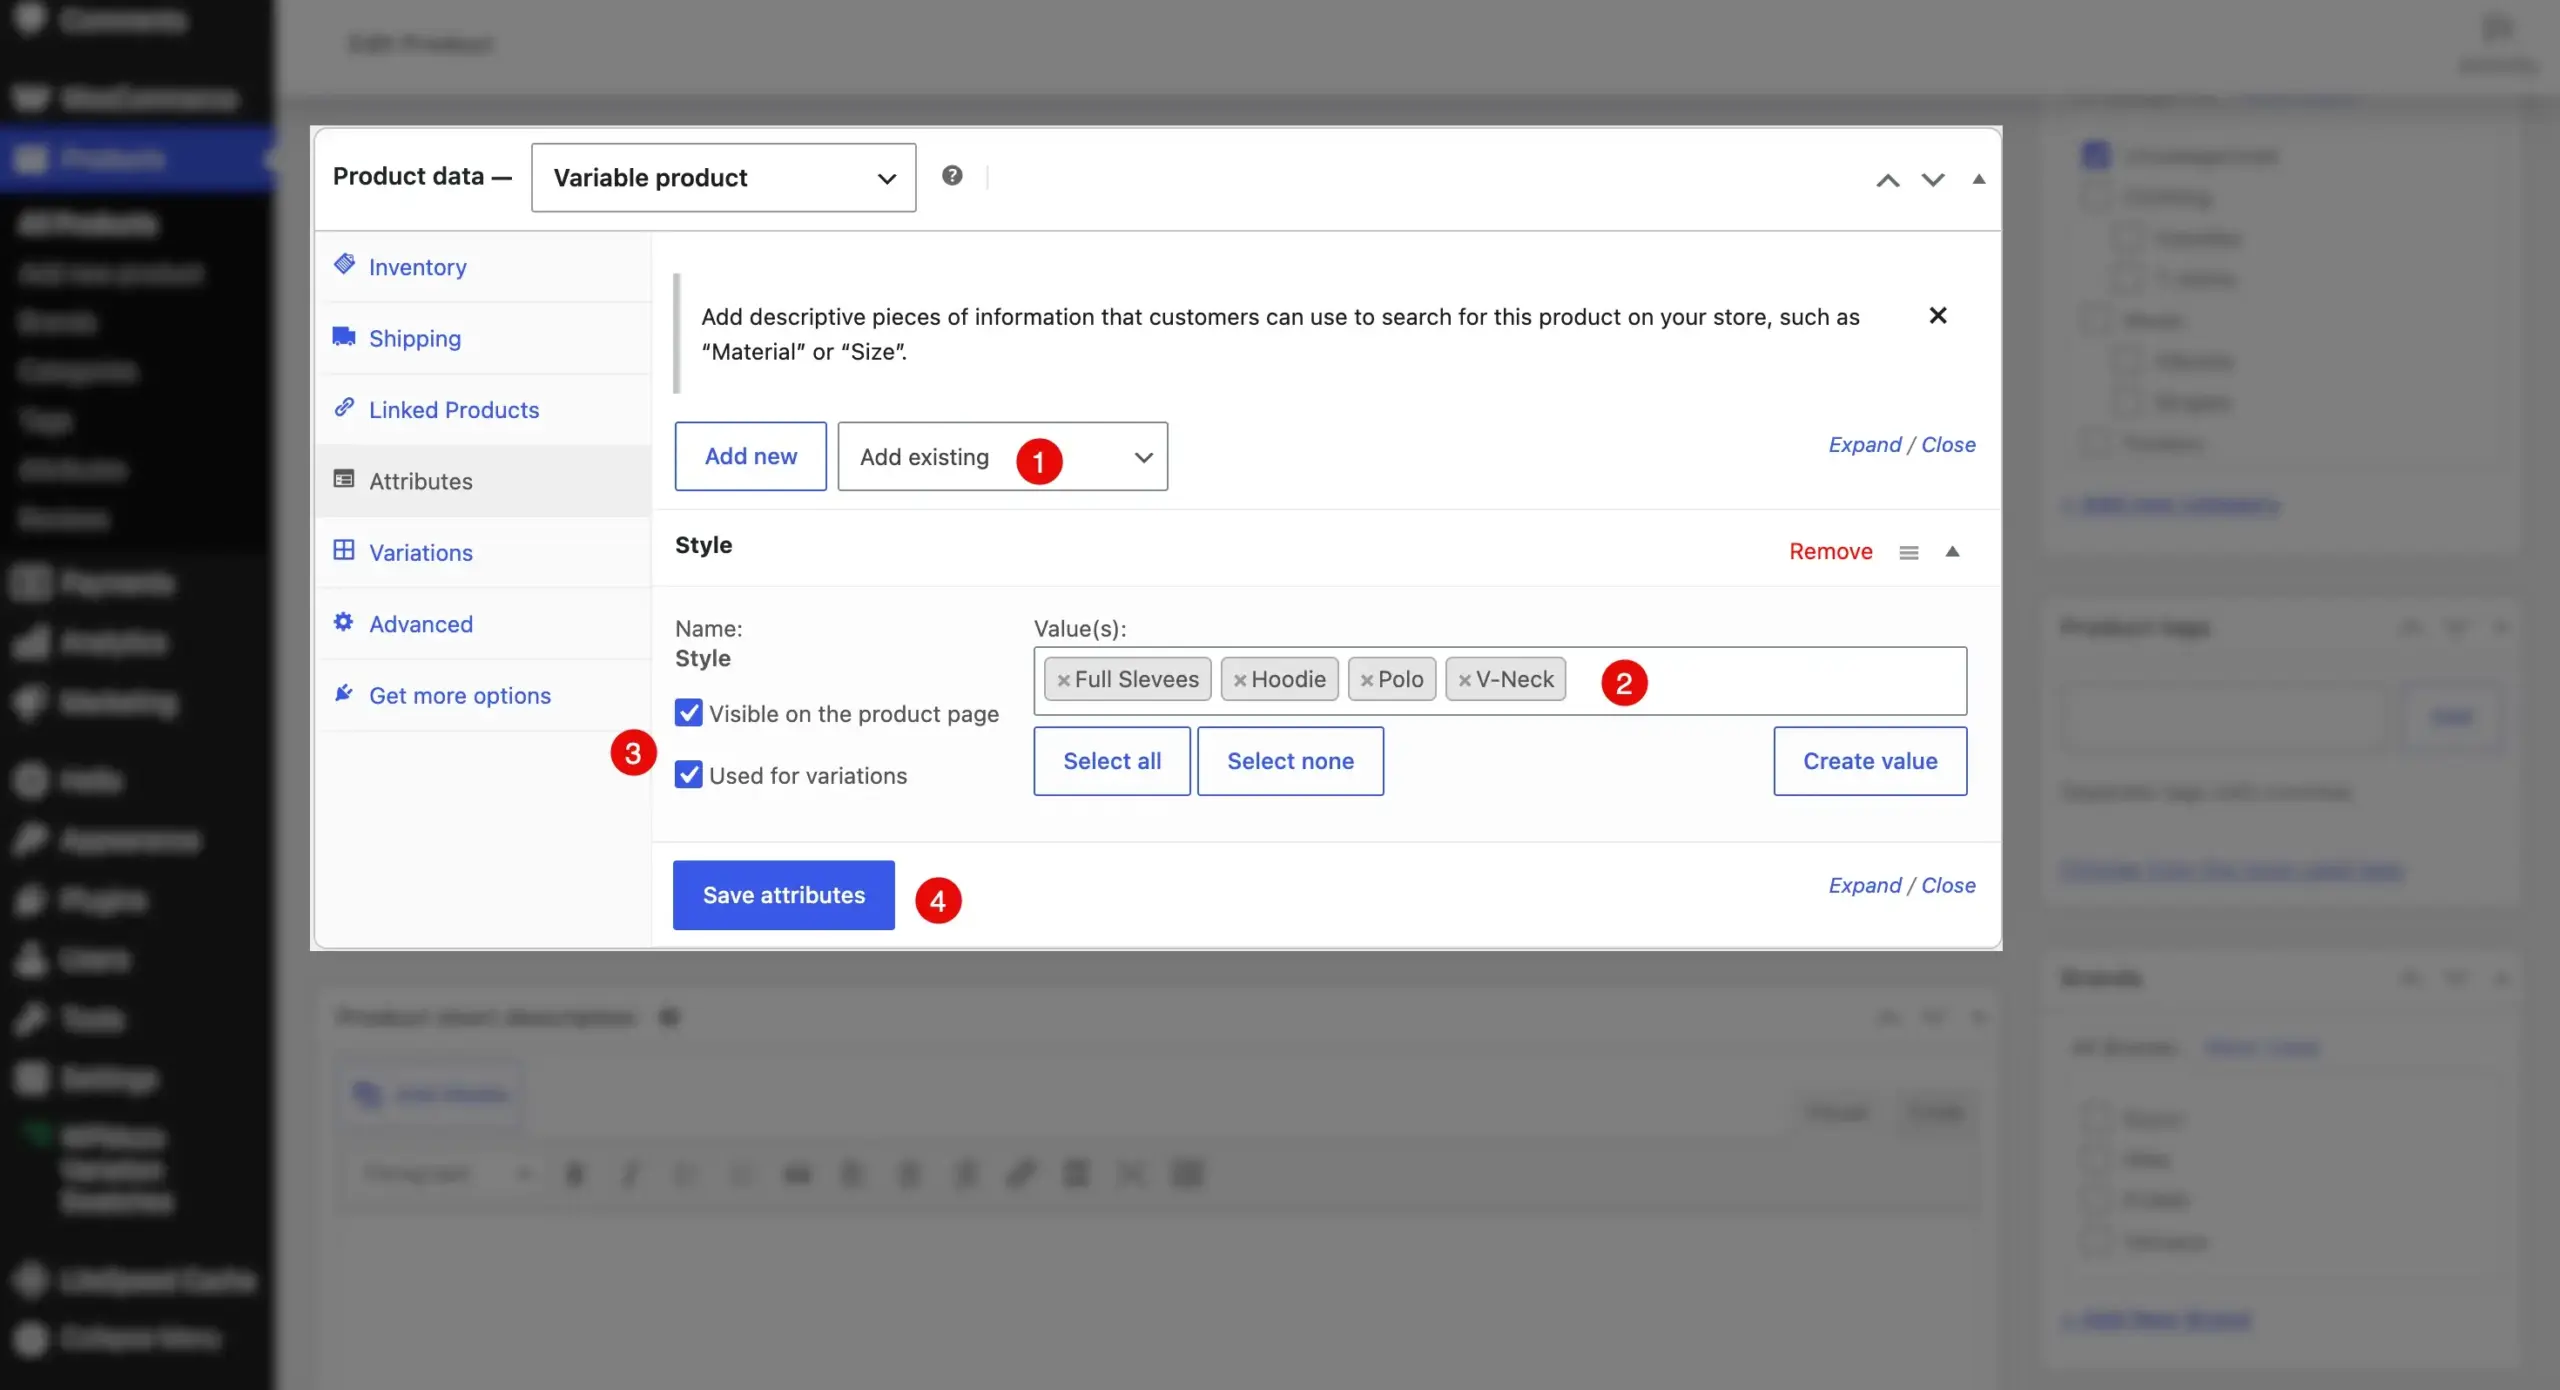
Select the checkboxes:
- Visible on the product page
- Used for variations
This selection will help in creating the variation automatically and add more details on the product page. Once done, click Save attributes. Now, the main part: adding variation to the product.
Step 3.1: Adding Images to Variations for Image Swatches
To create WooCommerce image swatches, this is the crucial step. Here, we’ll configure the values for our variation products and their images, too. Let’s see how to do that. From the Attributes tab, go to the Variations.
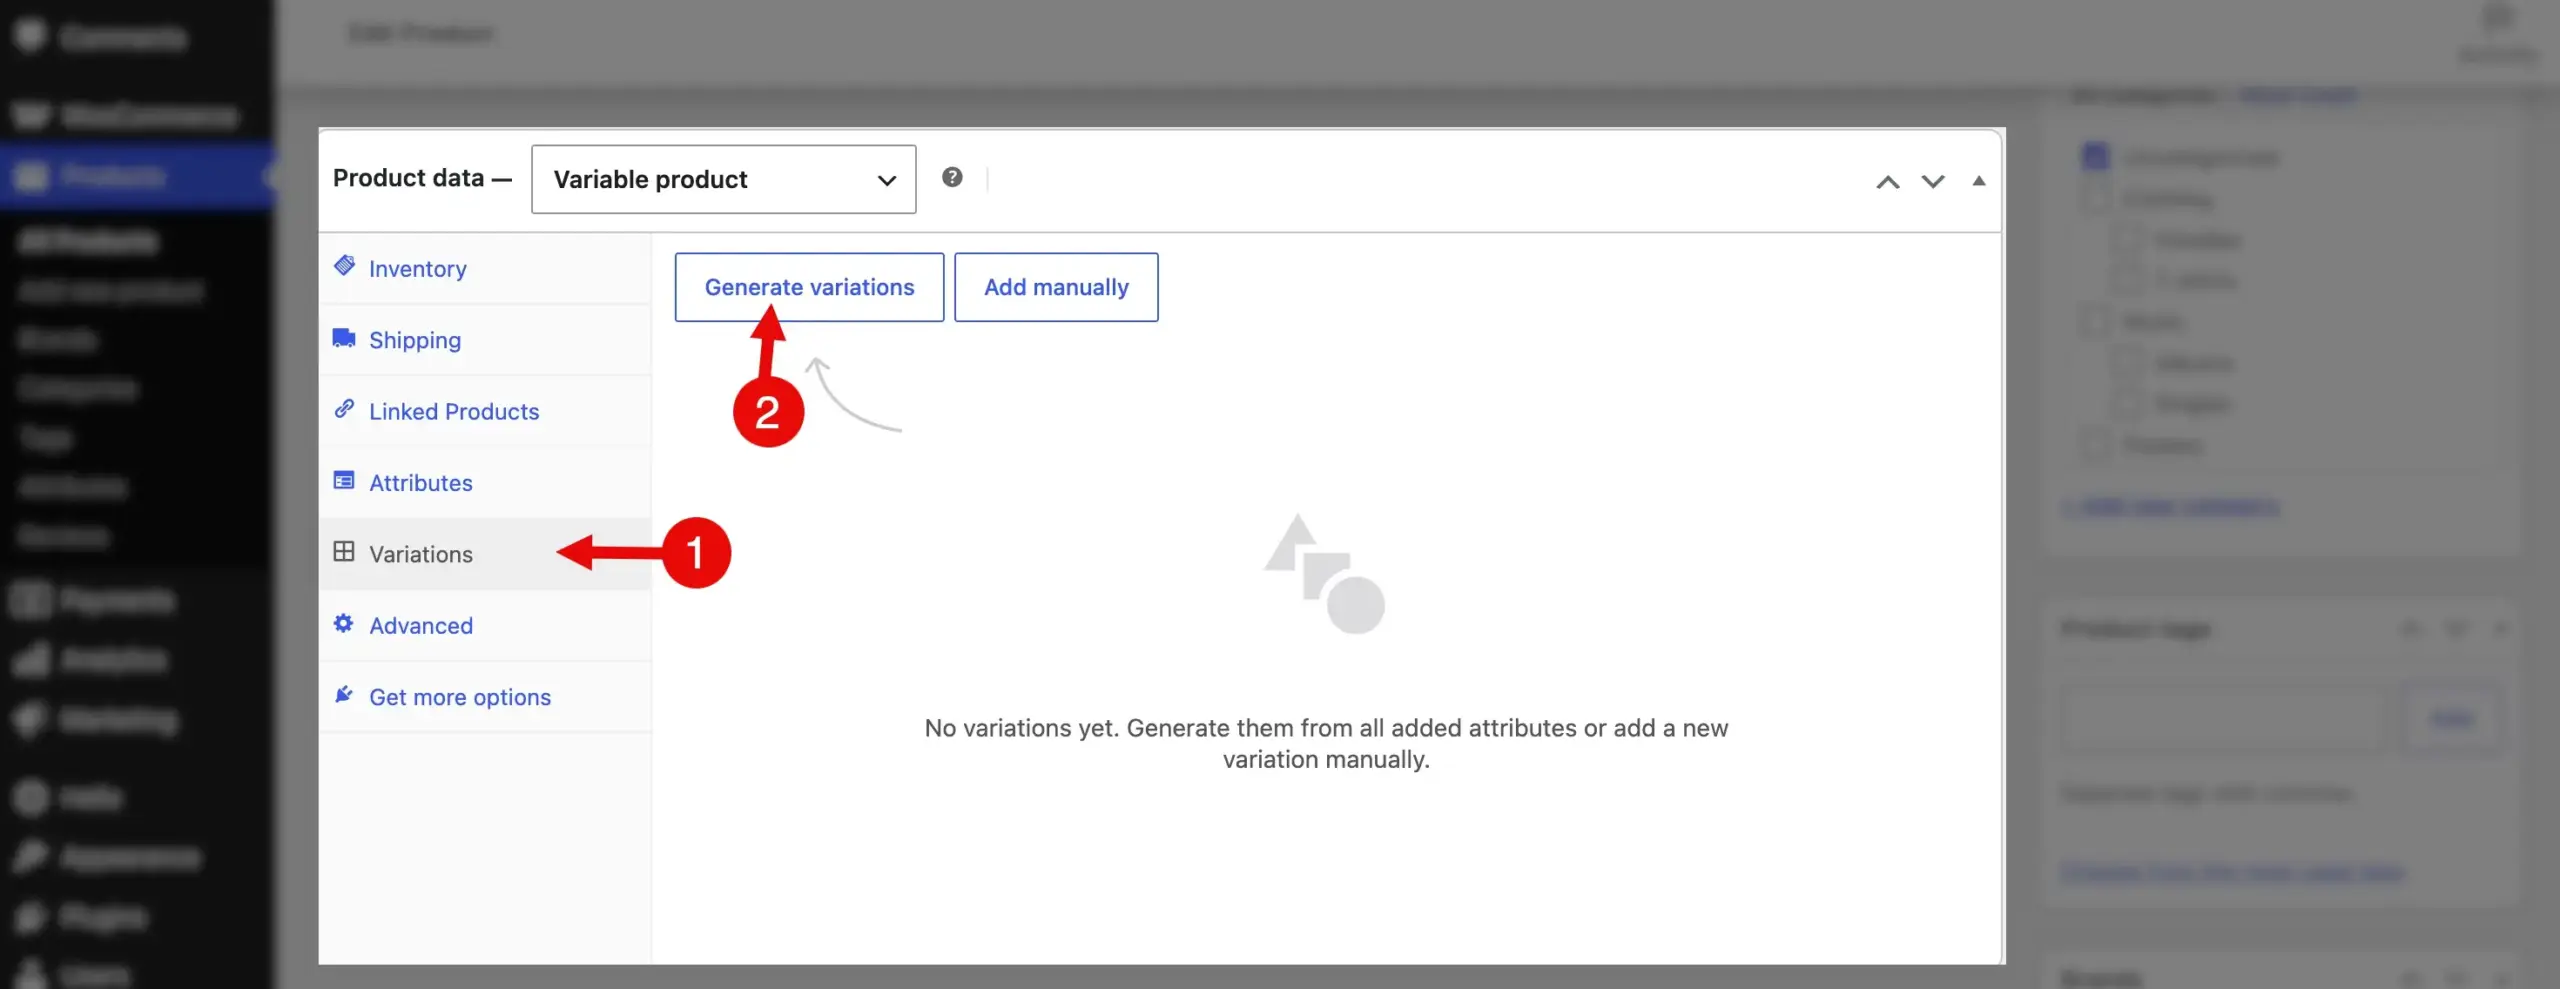
Then click on Generate variations, and this option will create a list of variations that the product could have, as you can see in the following screenshot.
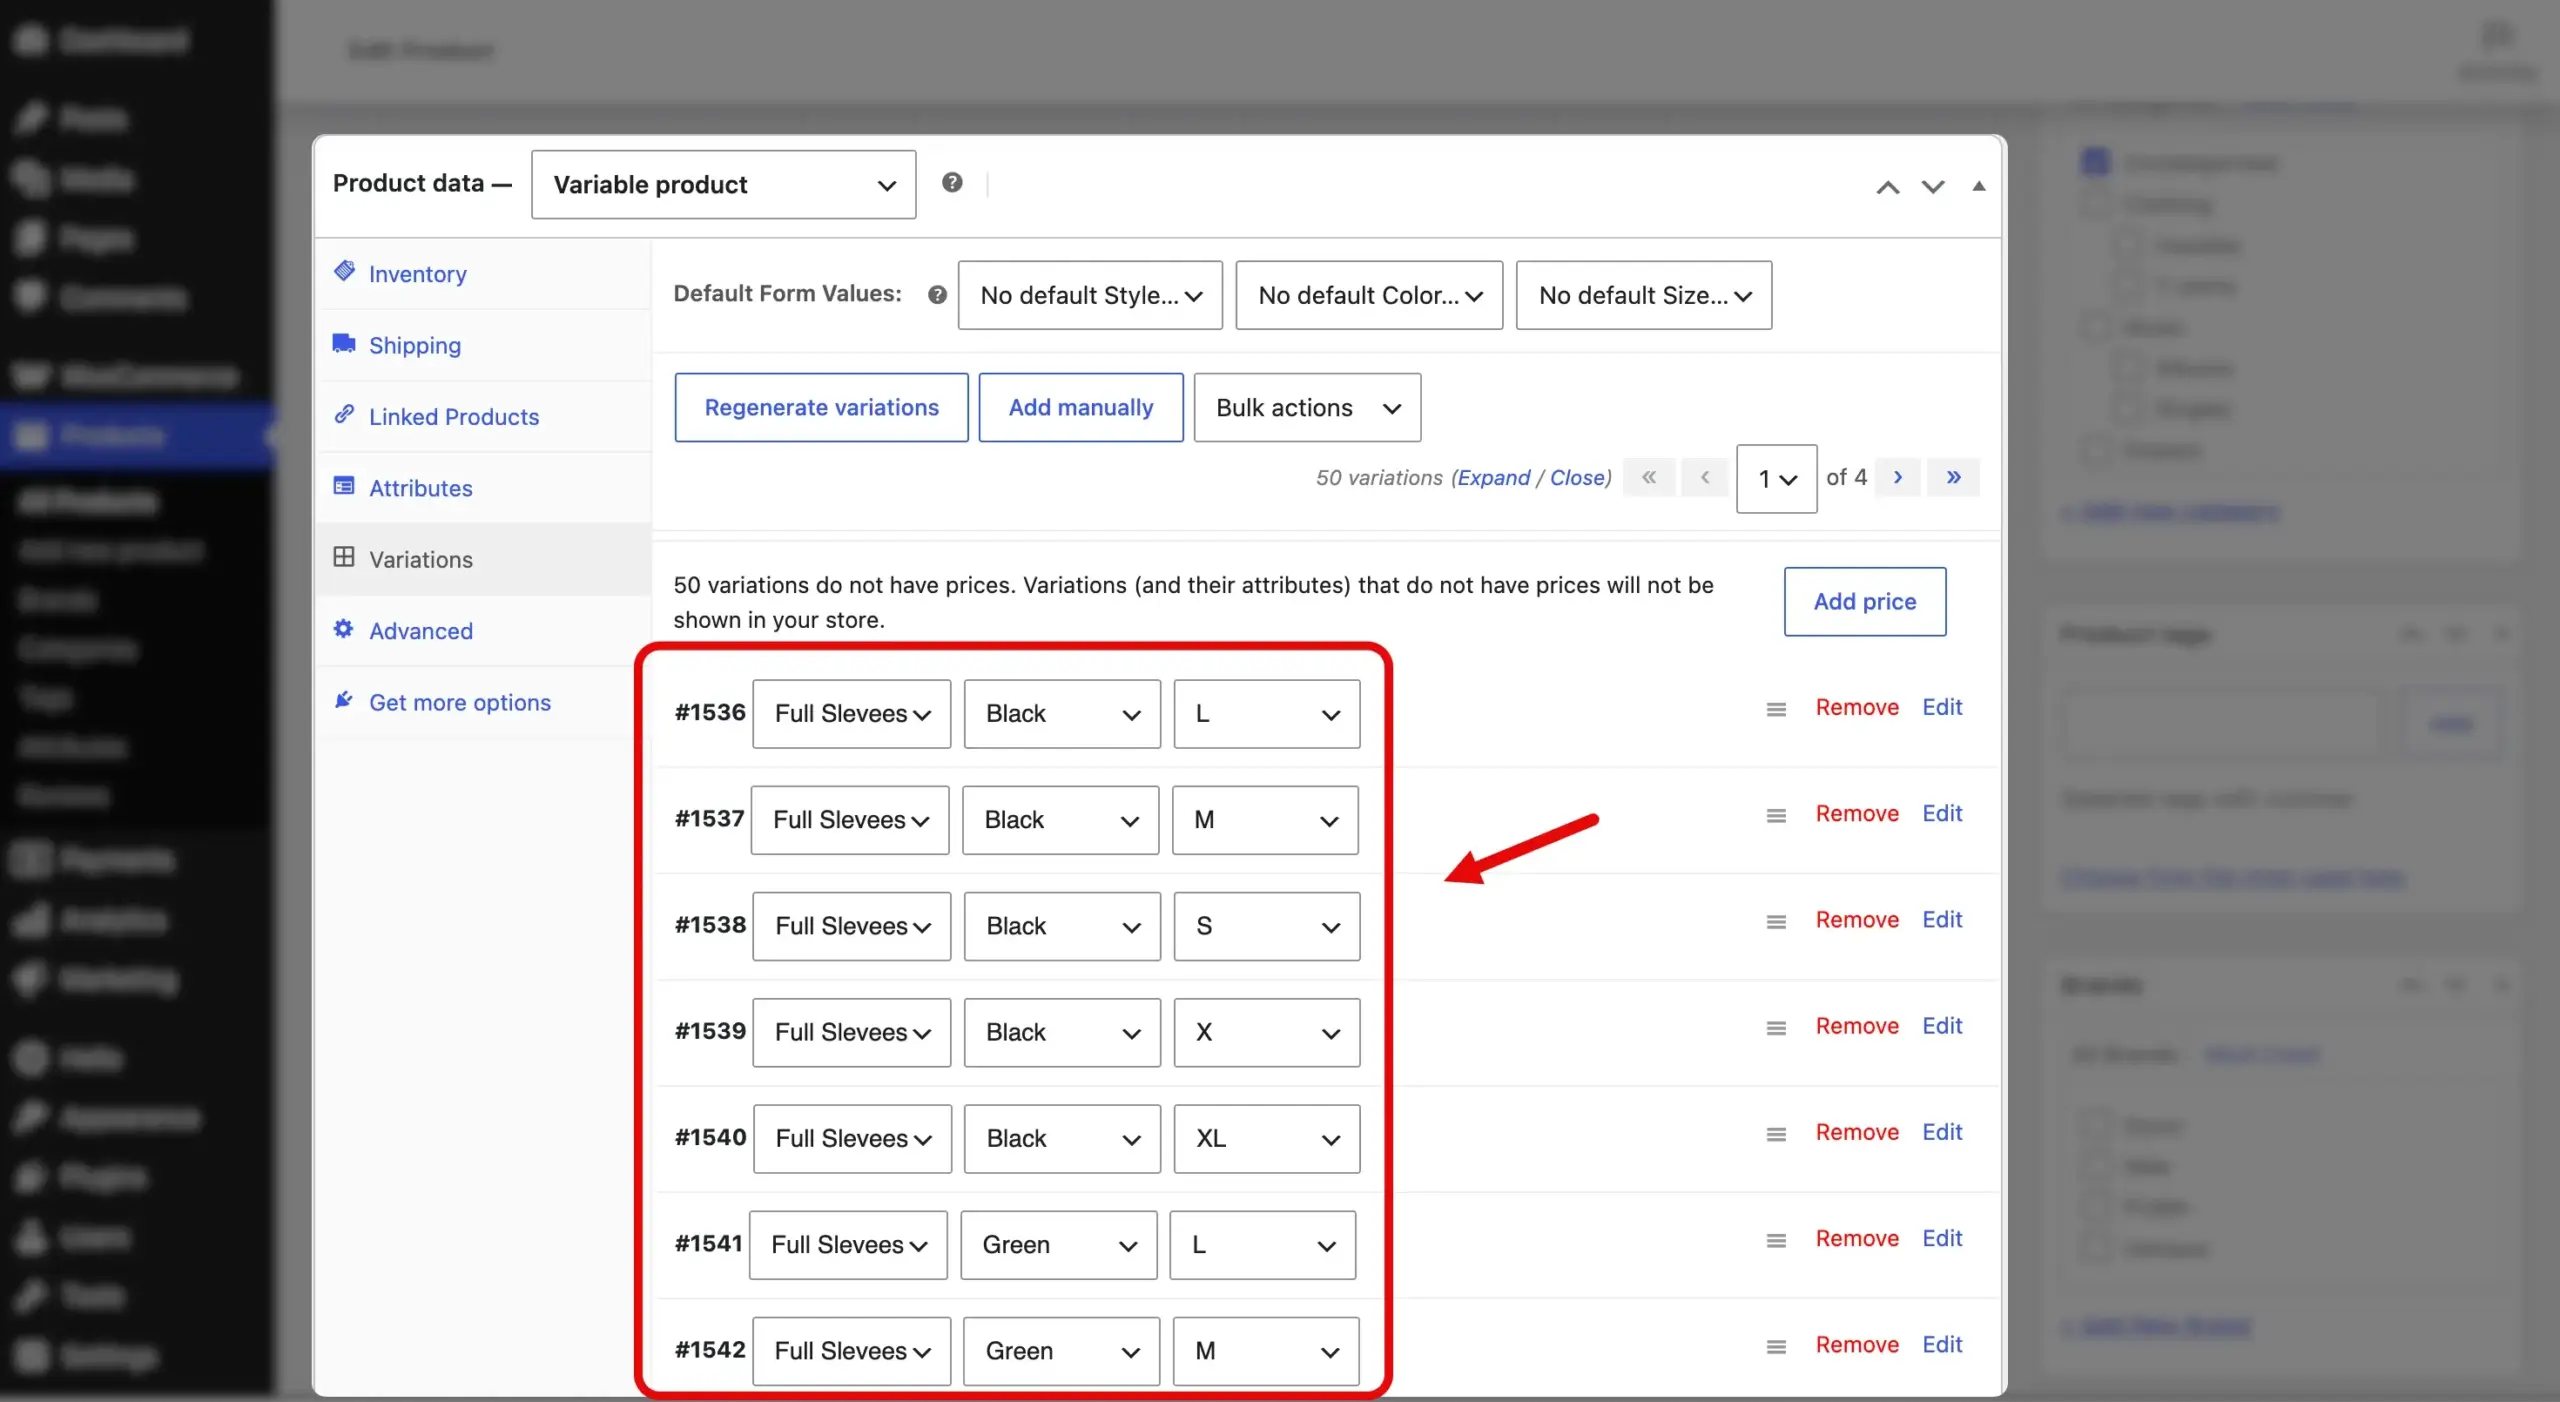
After this, click the Edit, then click on the upload image icon.
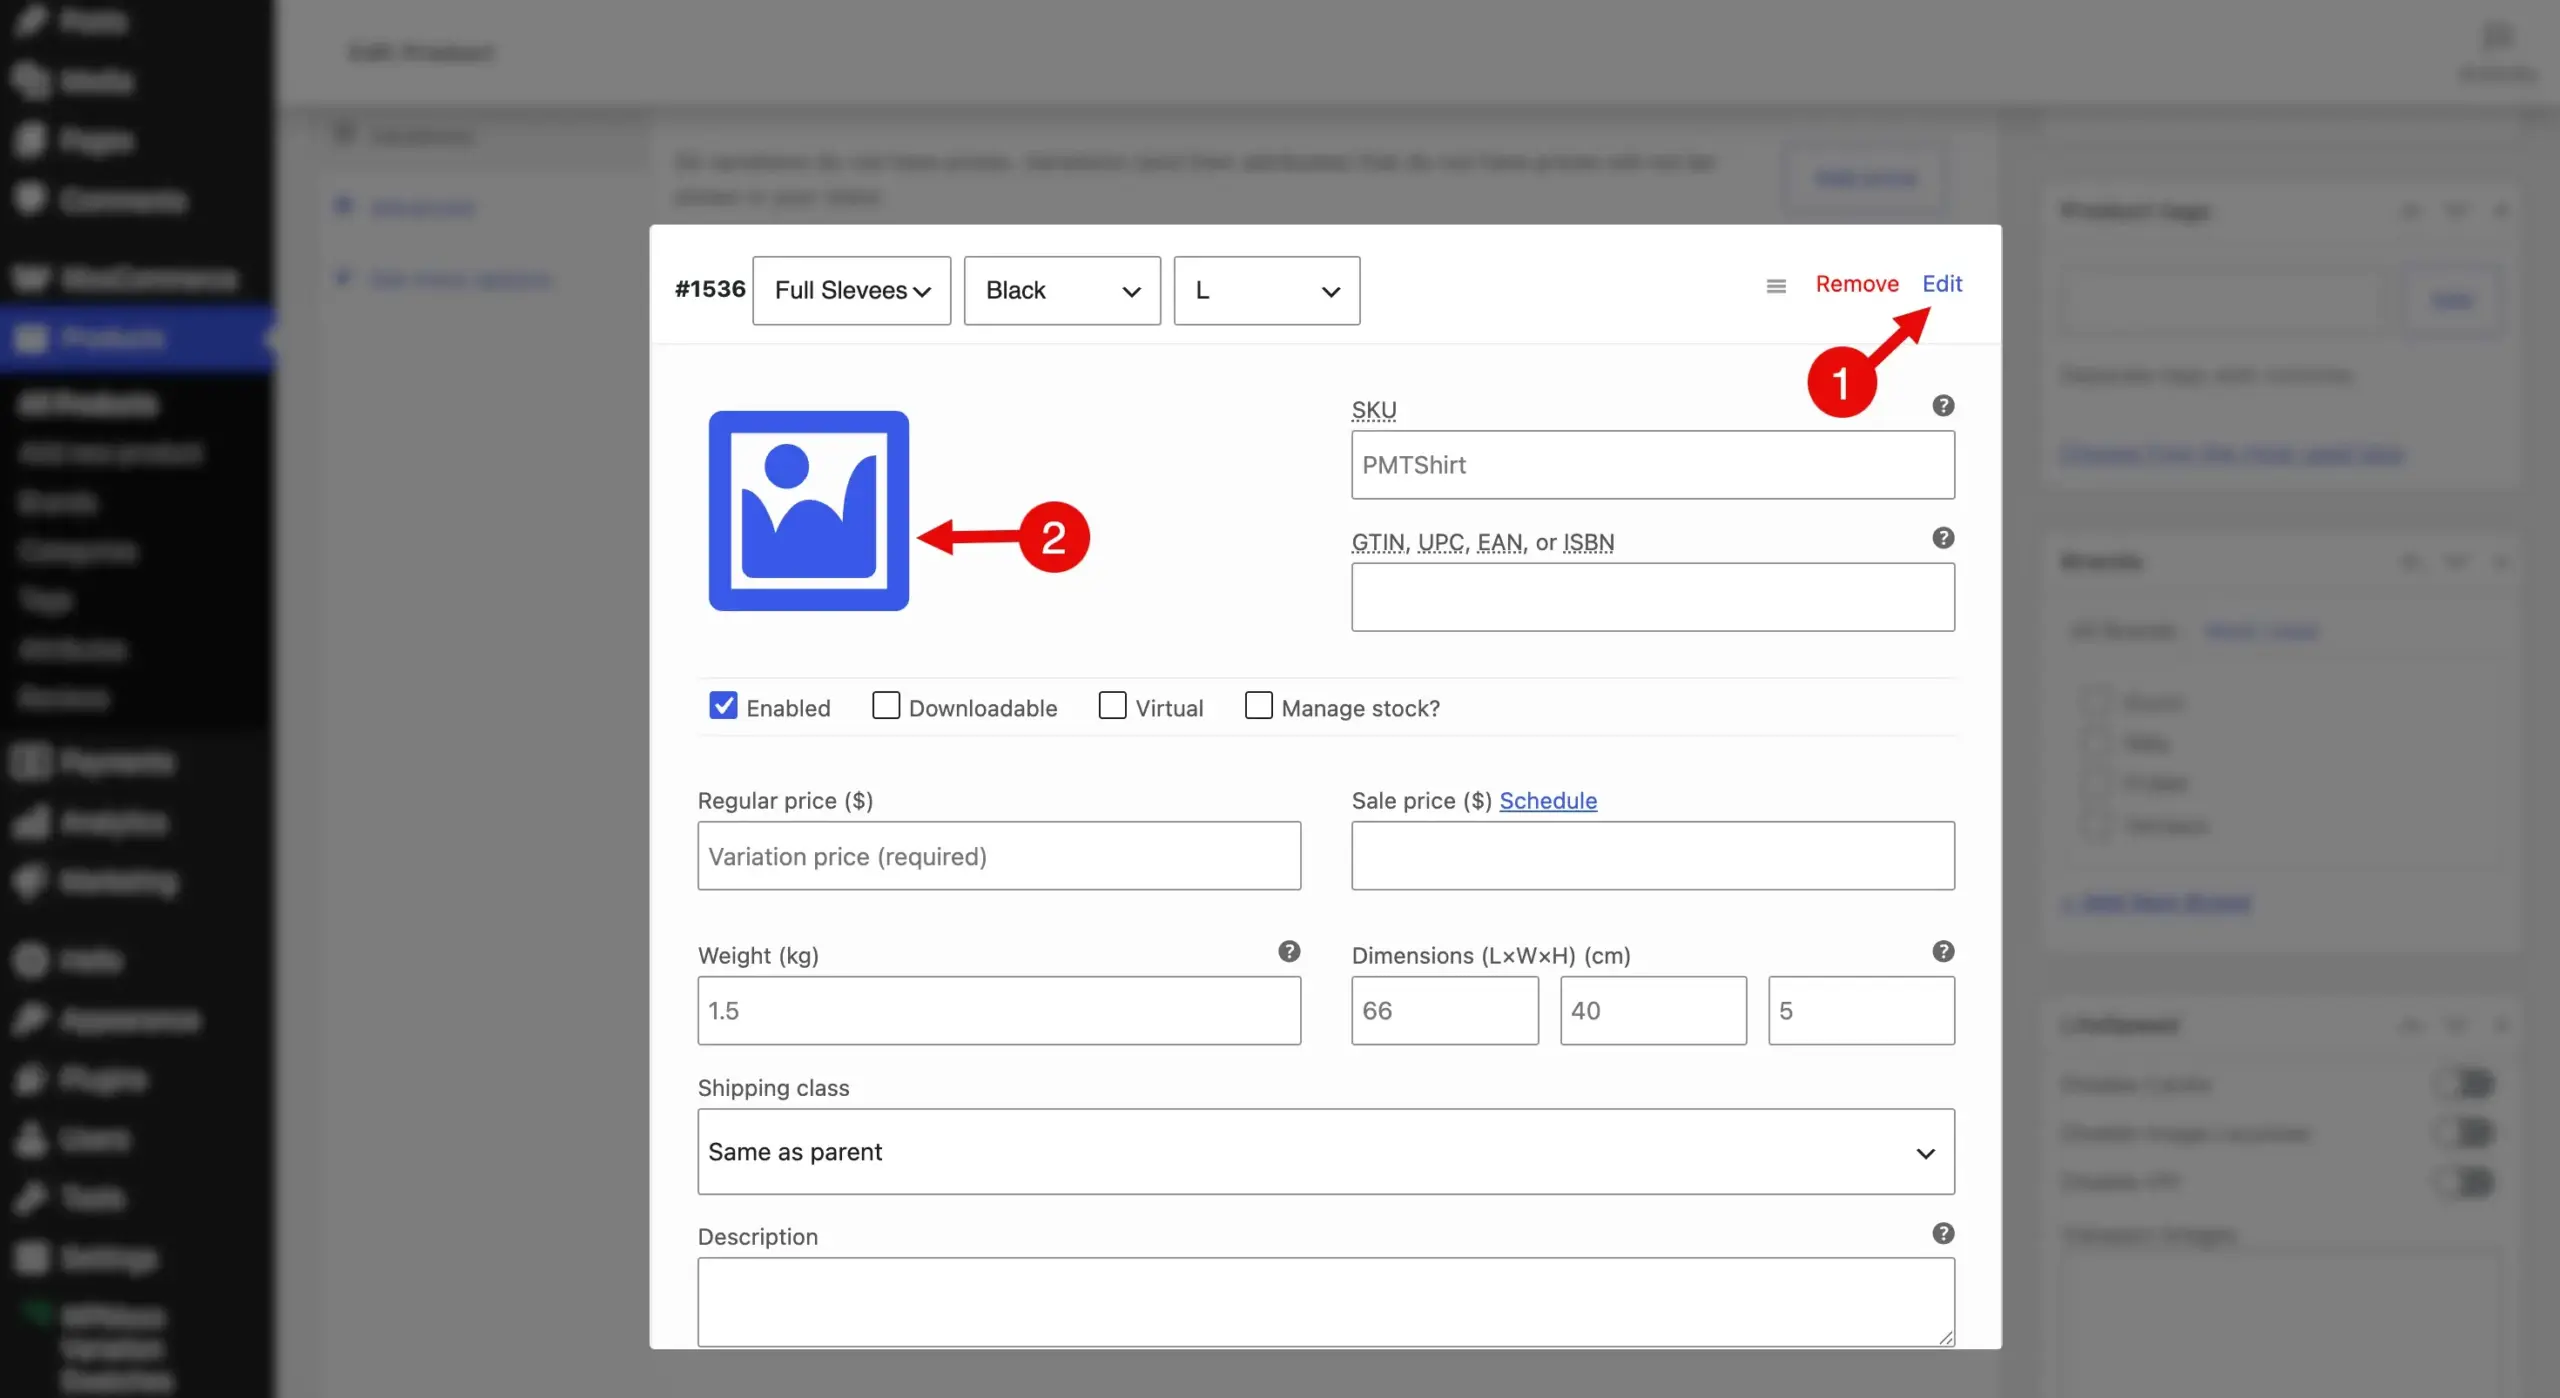
Upload your product image according to its variation values, and repeat the steps for each of the variable products. Once done, click Save changes.
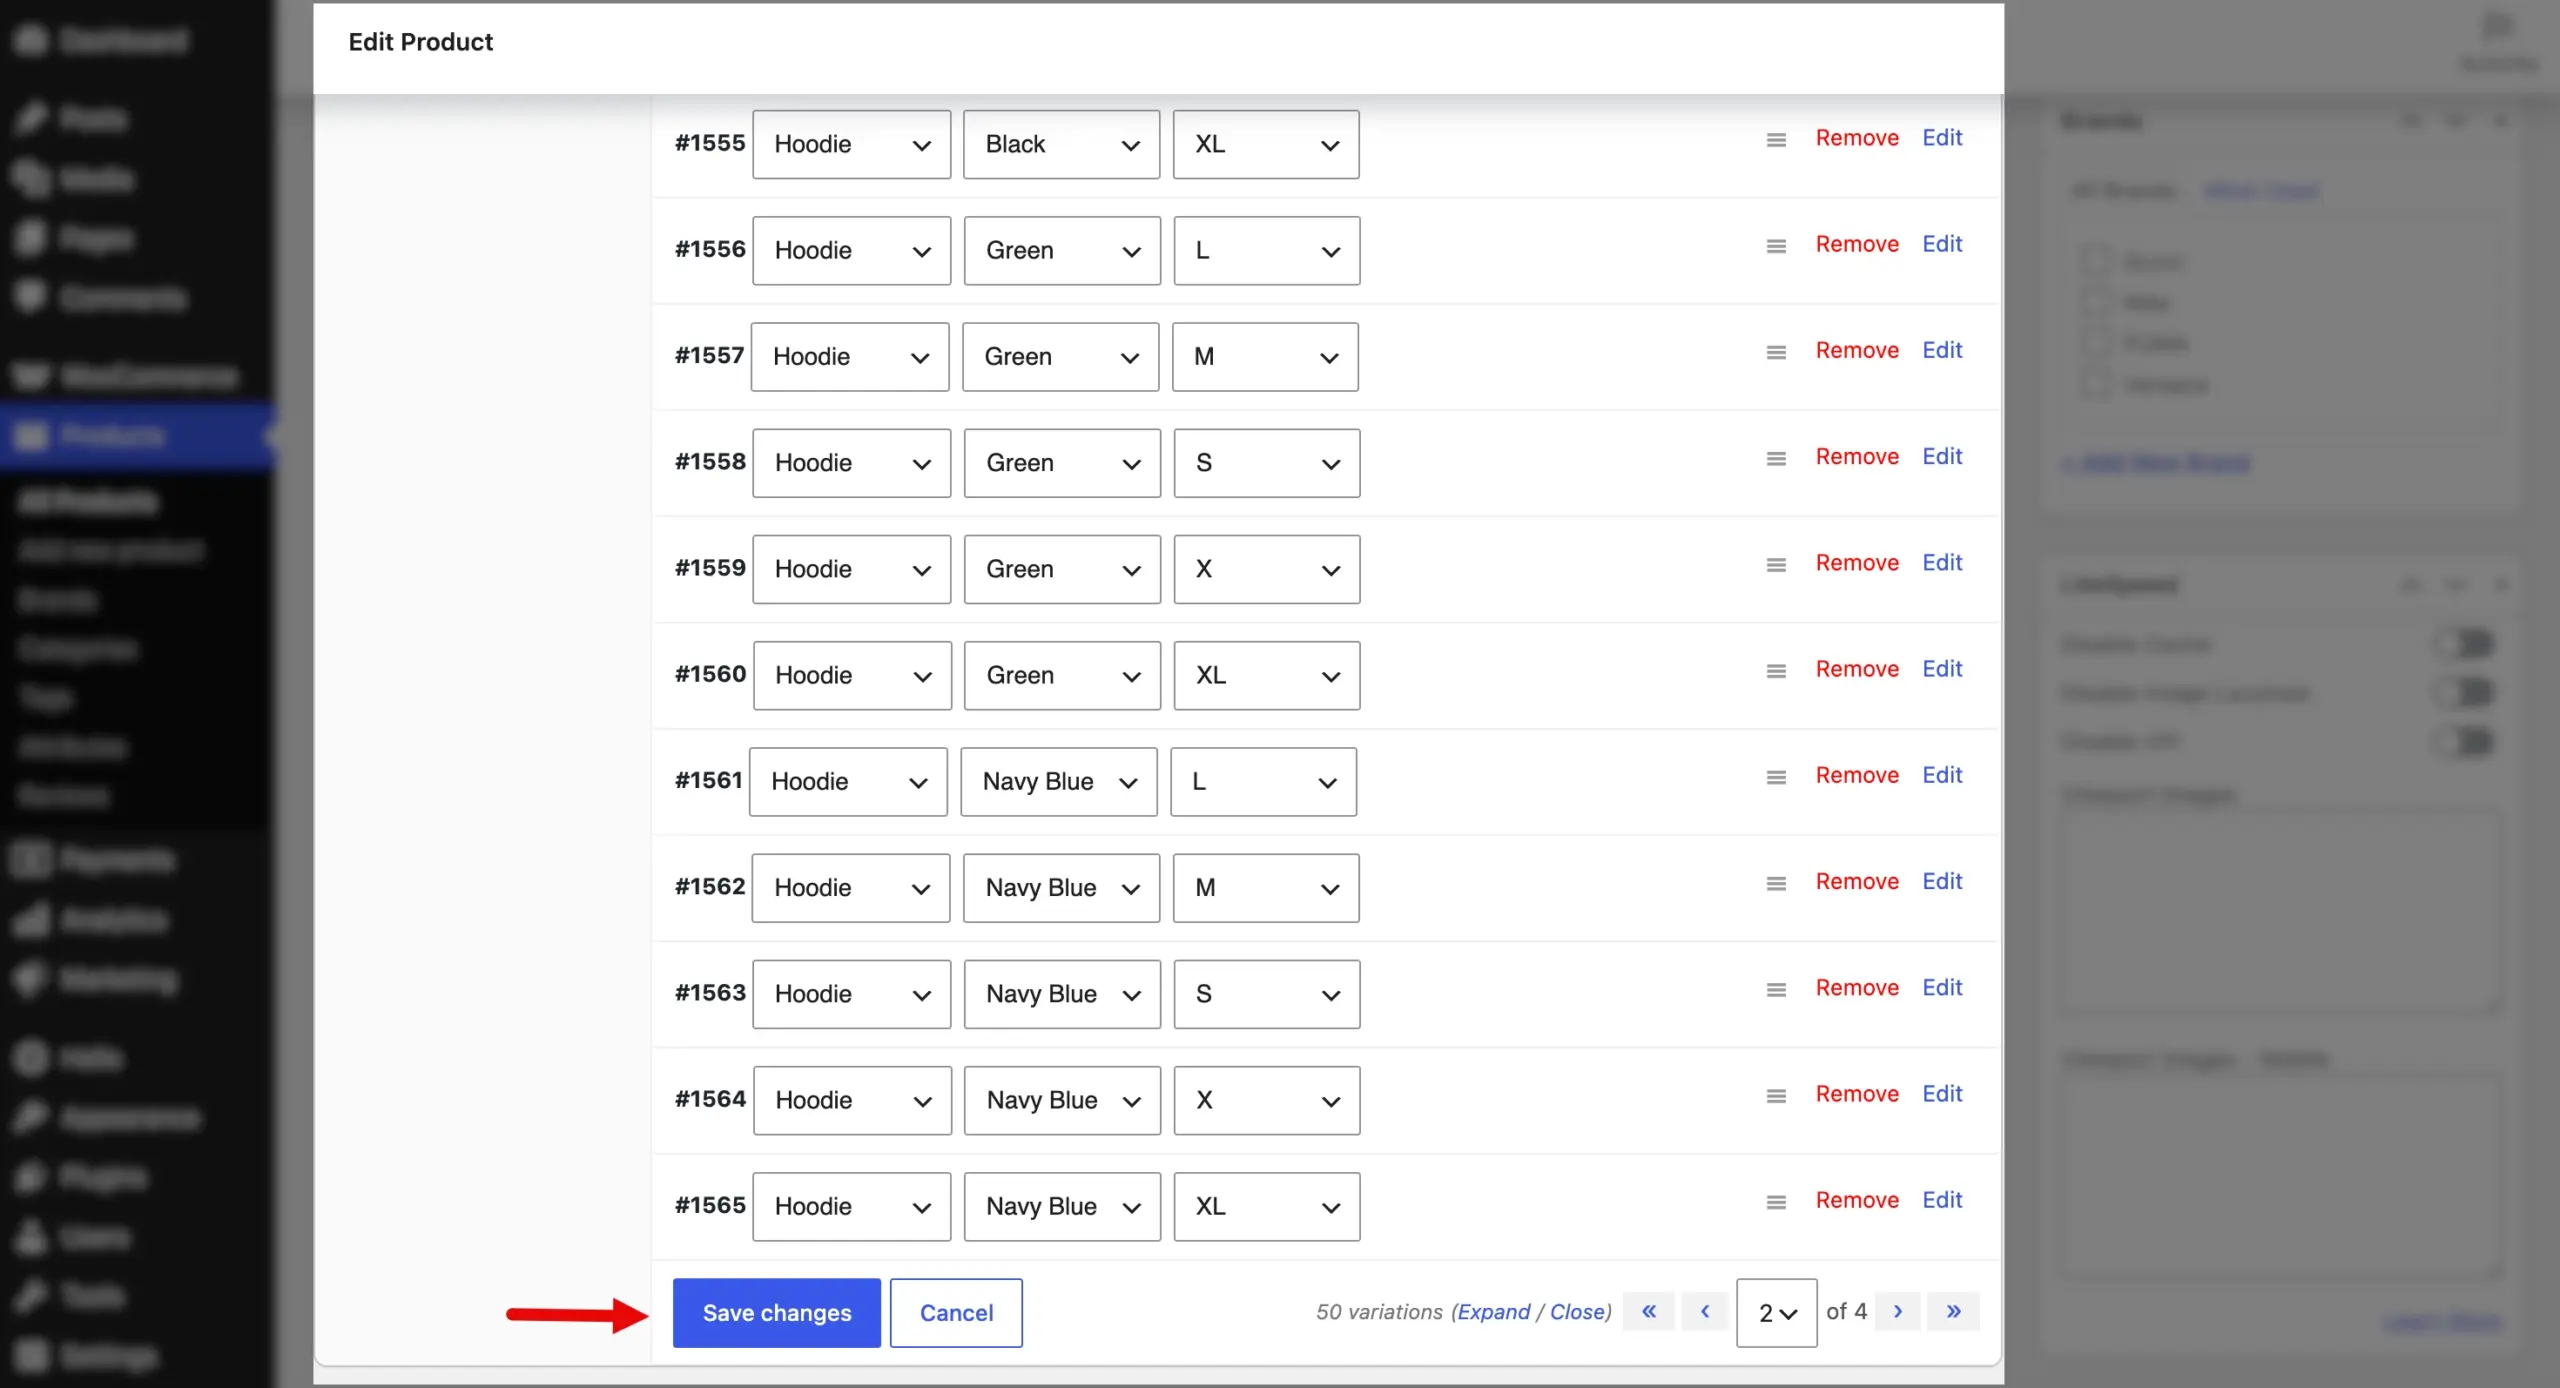
With this, our job is half done. Now, scroll up and click on the Publish button.
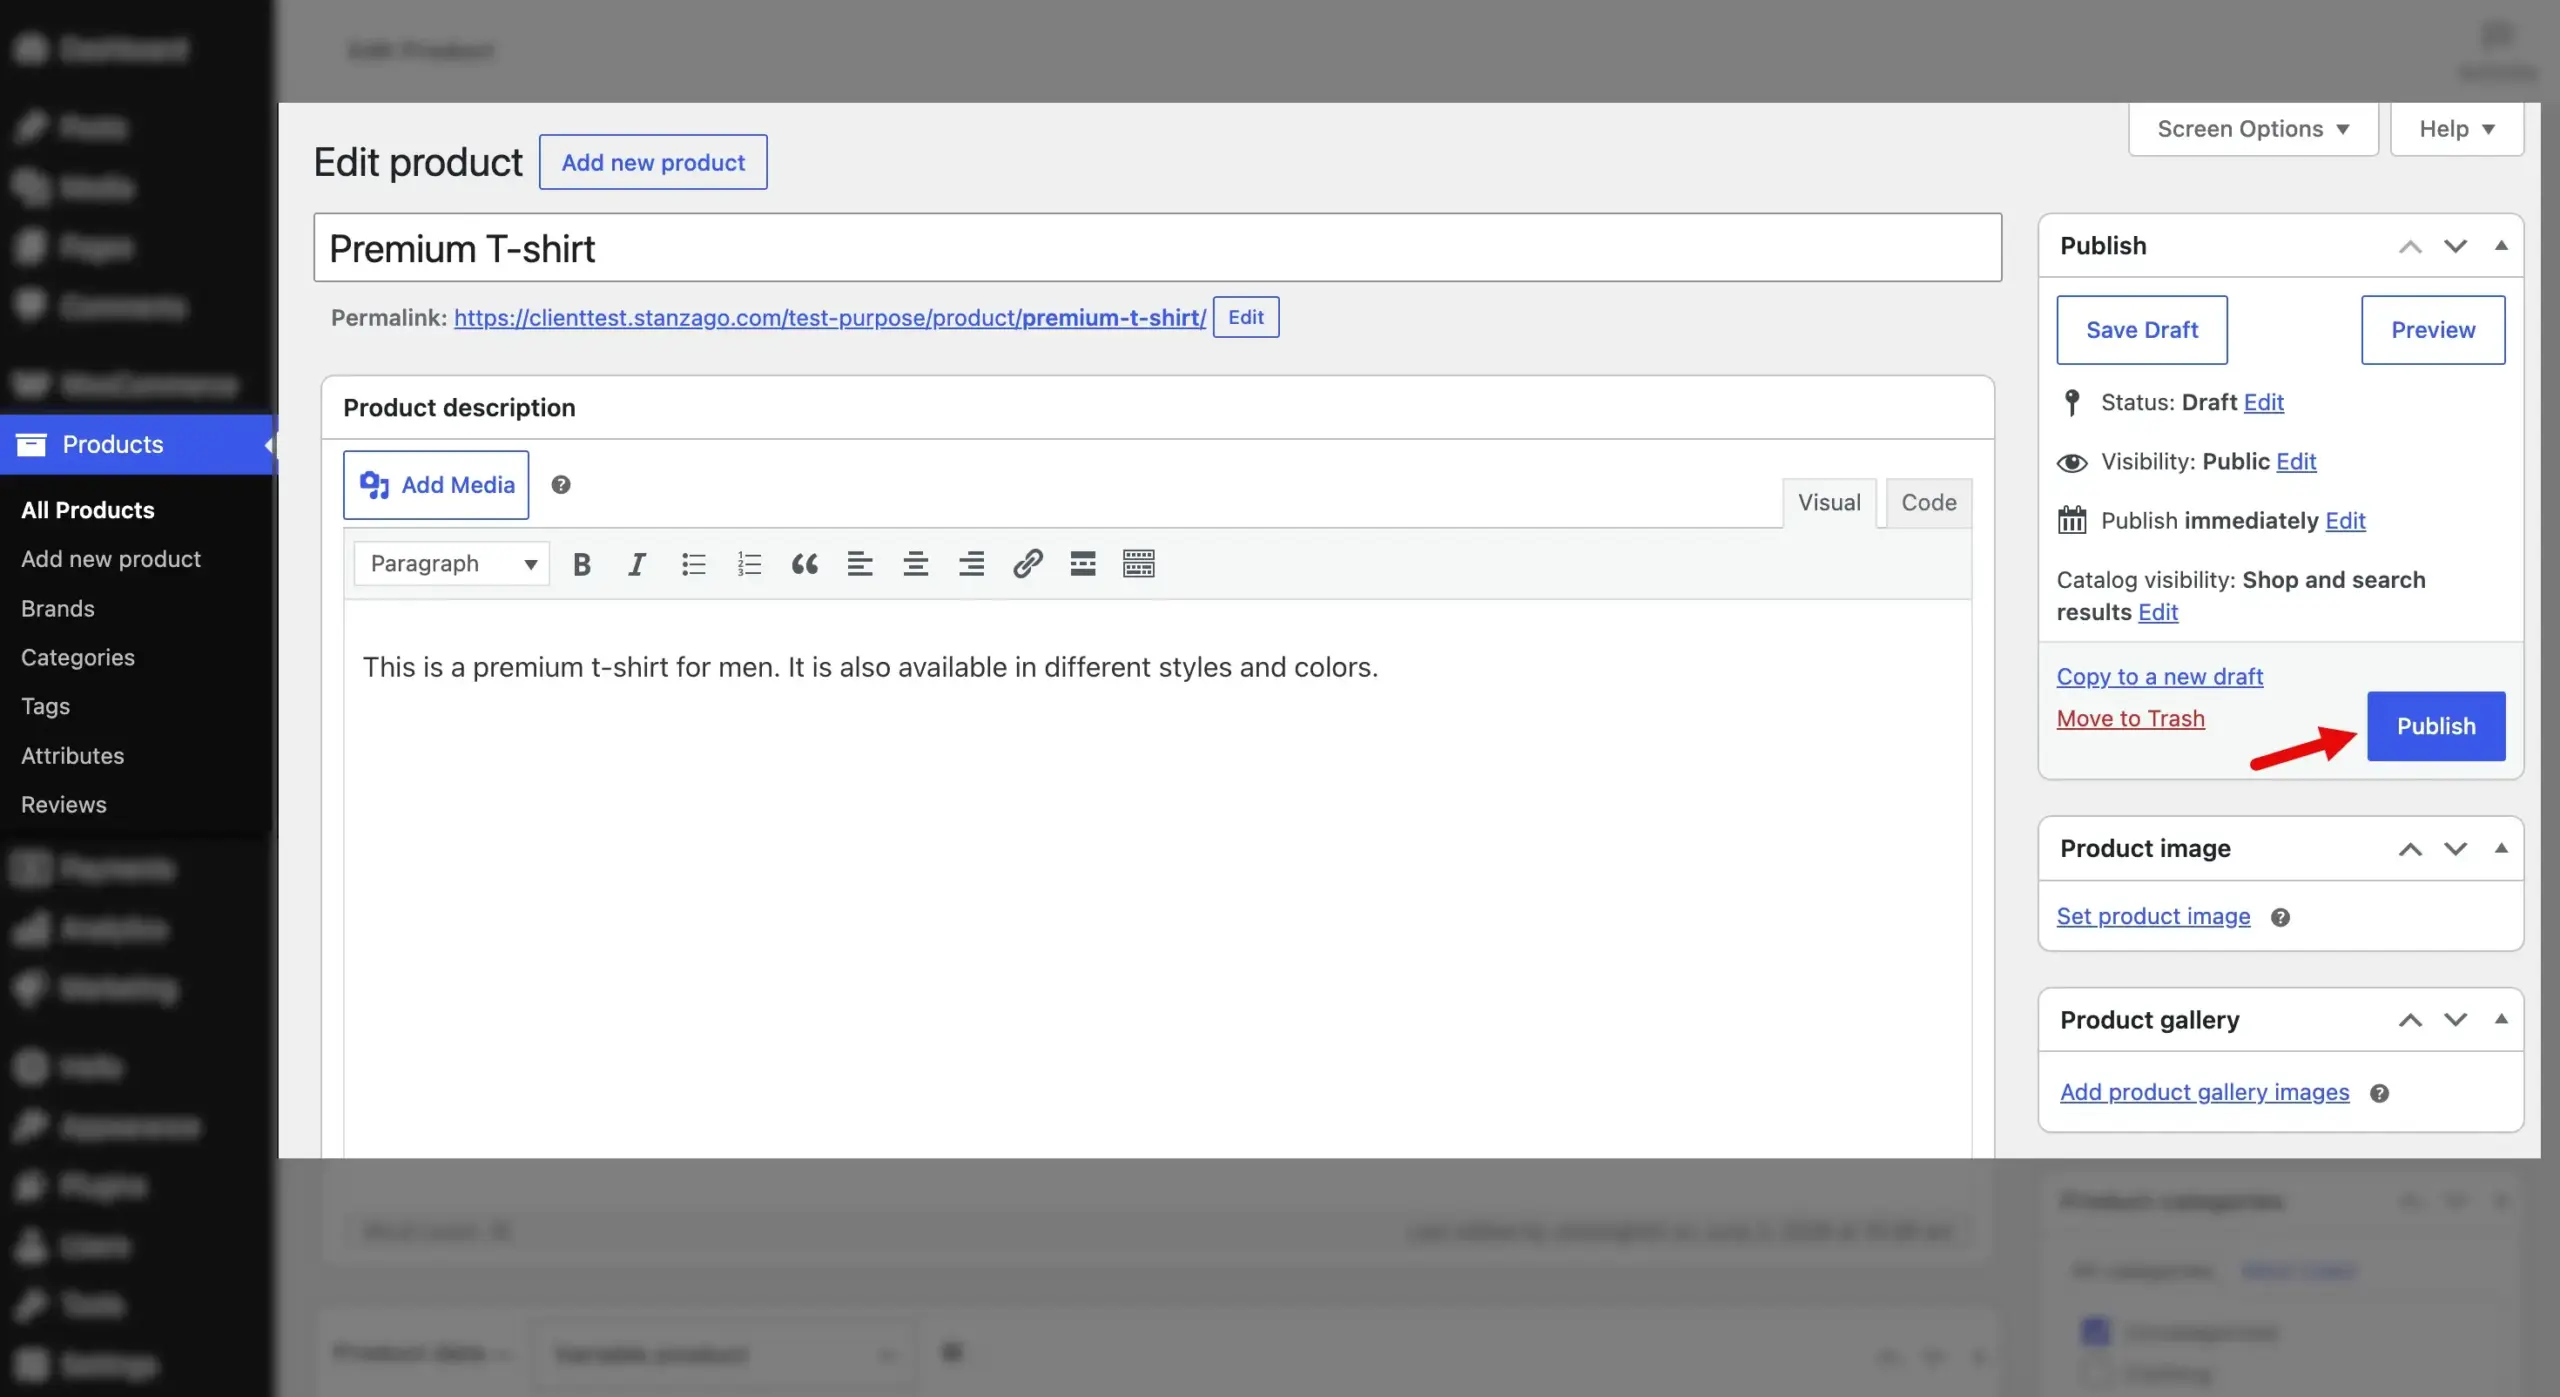
This will make the product live on your WooCommerce store, and you can view the image WooCommerce swatches on the product page, just like the following.
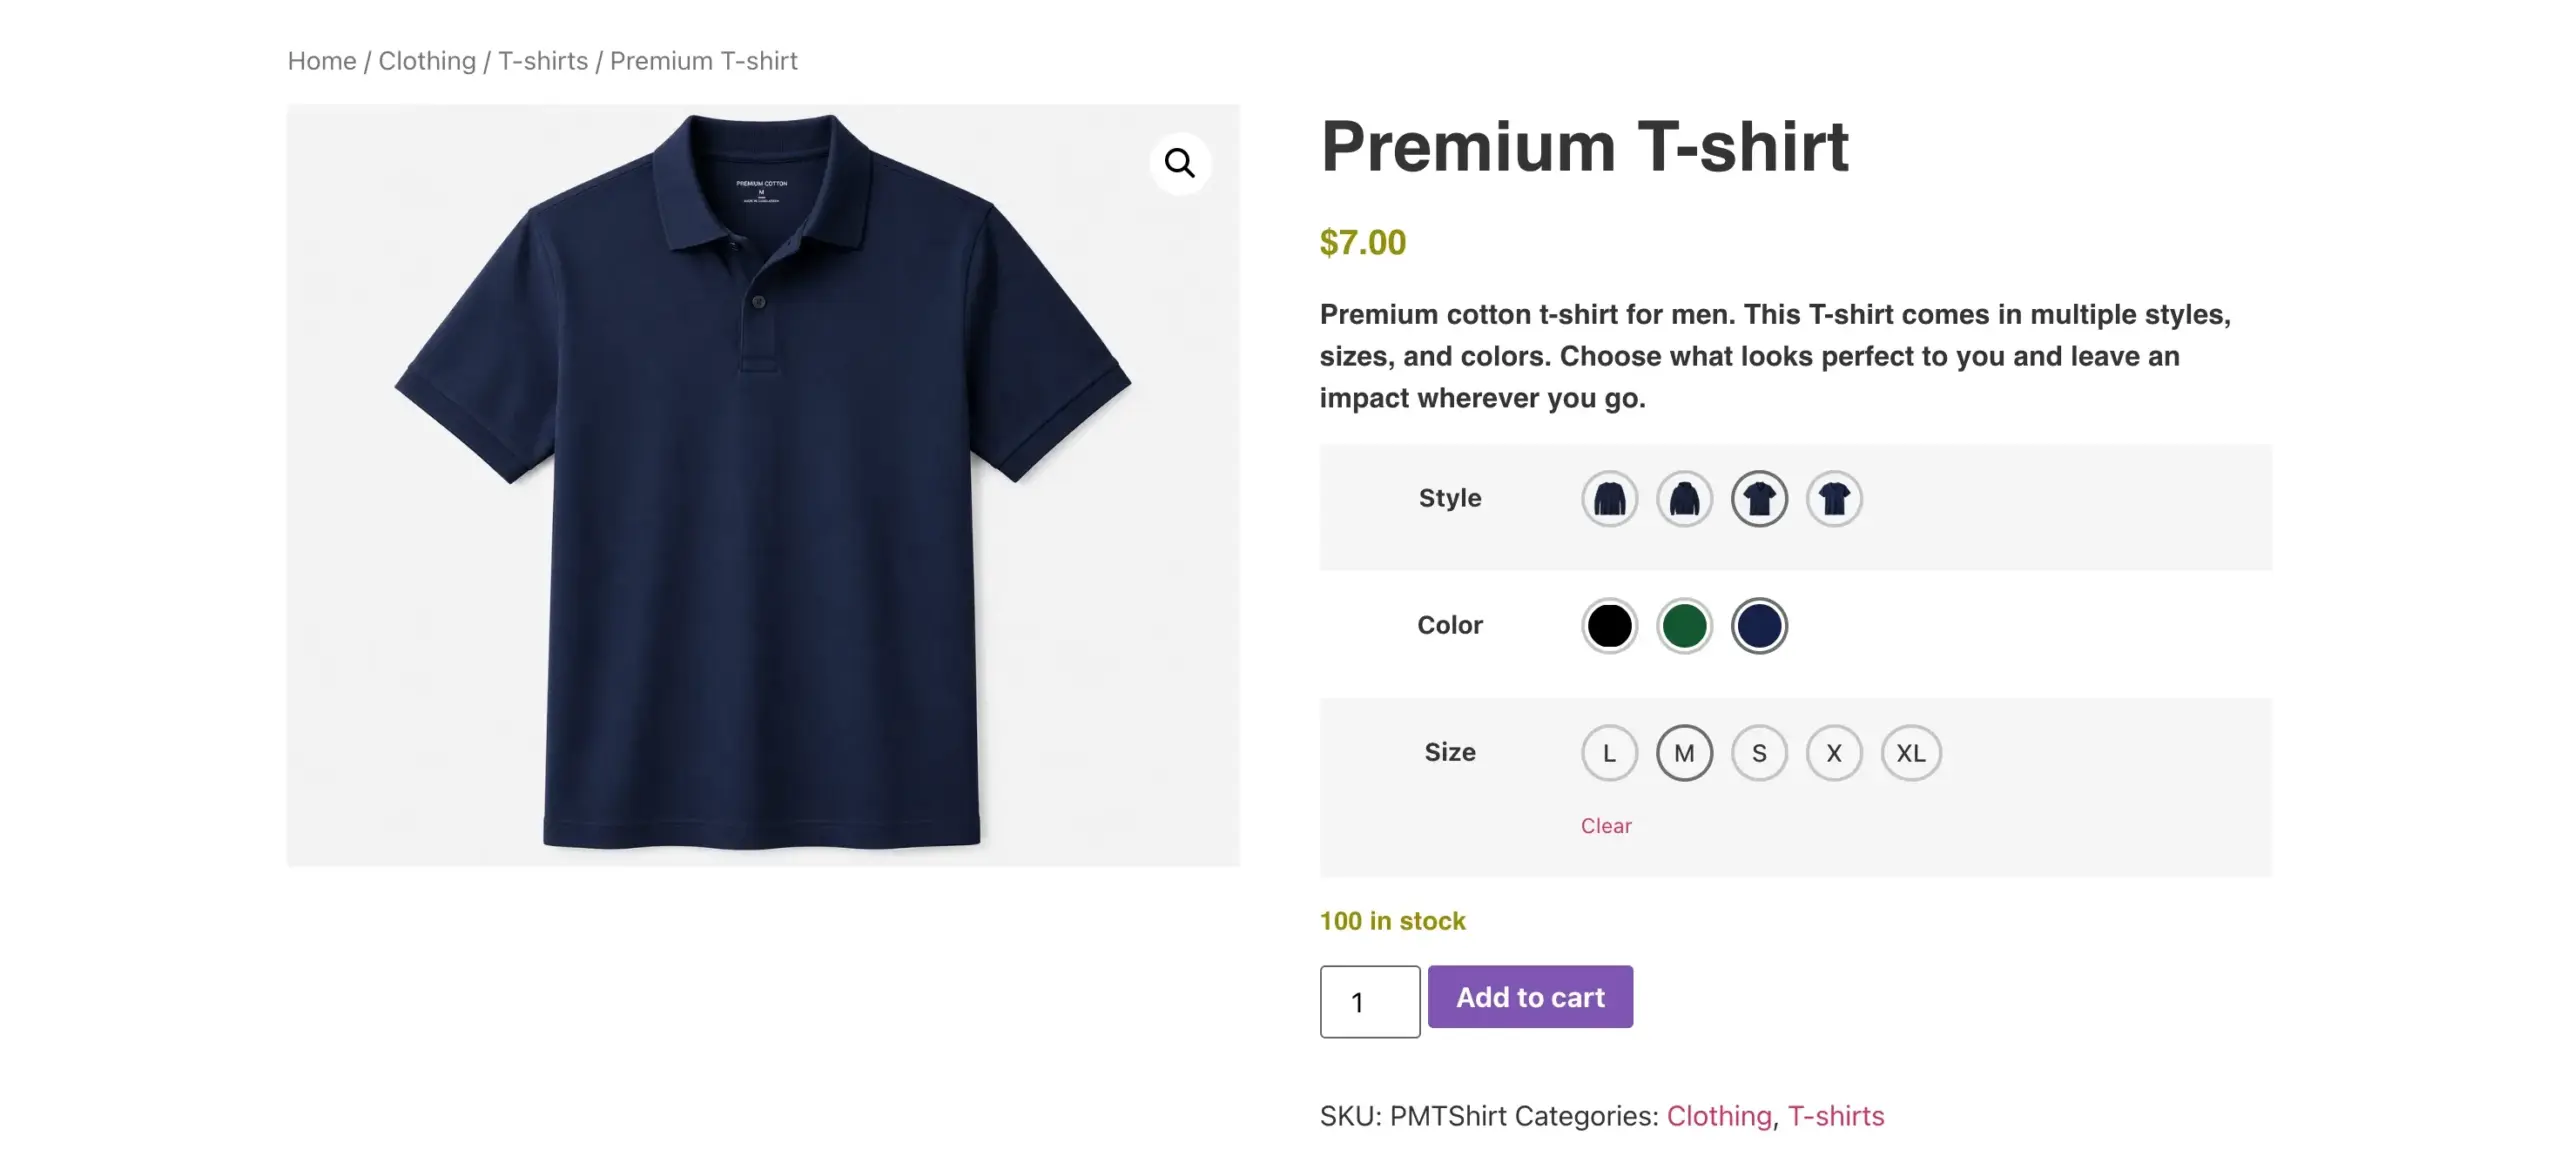
That’s it, we have successfully created image swatches for our product variations.
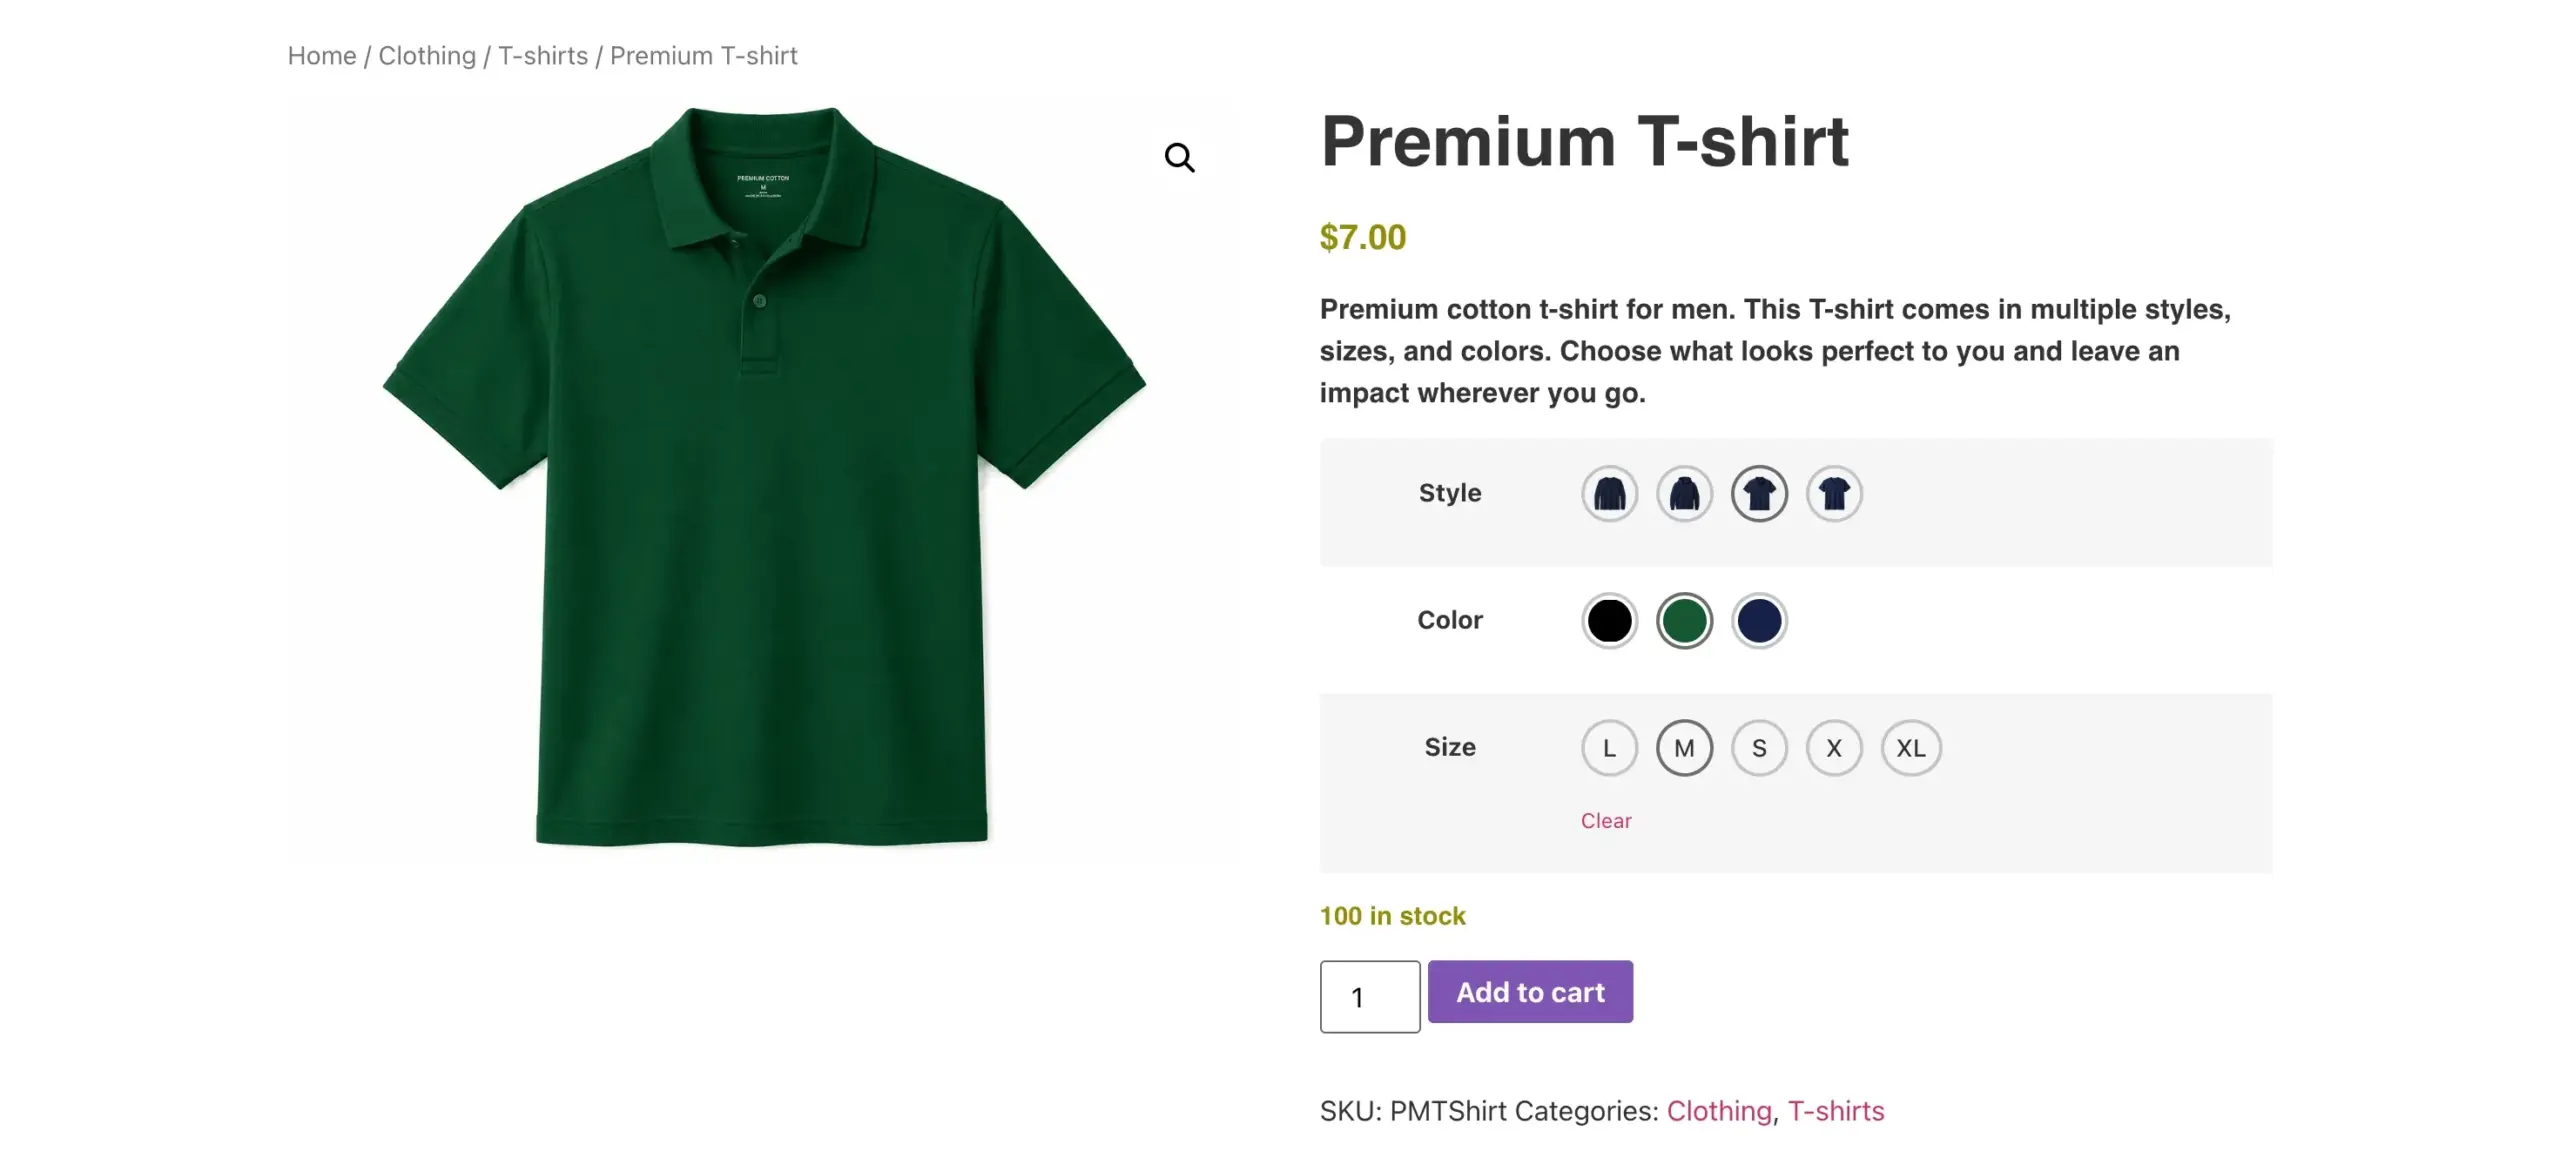
When you click on the swatches, the product showcase will change accordingly, just the above screenshot.
The WPMozo WooCommerce Variation Swatches plugin also comes with the option to change the look when you hover over the swatches. However, this only happens when you have just one attribute per variation. This is what image swatches on hover look like:
With this, we are done with our WooCommerce image swatches. The plugin offers other options to utilize it effectively. So, explore them, and make the most of them based on your requirements.
Common Issues and Fixes
While following the above steps, you may encounter some issues. For instance, the swatches might appear but not change. To avoid this, keep an eye on the following when adding product variations.
- Configure the default variation for the product in the Variations tab.
- Define prices for all product variations.
- Use labels for attributes that do not have image swatches.
- Ensure every variation has at least one additional option available. (By default you may only be able to add around 50 at a time, this comes from a server setting (PHP max_input_vars) rather than a true product limit, hence, make sure you perform appropriate actions, regarding this.)
By keeping the above in your checklist, you’ll be able to add variations that appear properly on the live product page. If issues persist, ensure WooCommerce and the image swatches plugin are set up correctly.
FAQs
To add image swatches in WooCommerce, install the Variation Swatches plugin by WPMozo, set your product attribute type to Image under Products → Attributes, then assign an image to each attribute term. When you generate product variations and publish the product, the image swatches appear on the product page.
Yes. WooCommerce uses dropdowns for product variations by default, but the WPMozo Variation Swatches plugin converts them to image, color, or text swatches.
Yes, the WooCommerce swatches plugin by WPMozo allows you to create image swatches that work across both desktop and mobile devices.
Yes, you can do that using the WPMozo plugin for variation swatches. Navigate to the Archive Page tab and enable the option to display swatches on shop and category pages. This lets customers filter and preview product variants directly from the product grid, without opening each product page.
The WPMozo Variation Swatches plugin is one of the best solutions for adding image swatches. It supports image, color, and text swatches, lets you display variations on both product and archive pages, includes hover-preview for single-attribute products, and gives you controls for swatch shape, layout, and disabled-attribute behavior.
Final Thoughts
Image swatches make it easier for customers to explore products in different types, sizes, colors, and styles.
By providing a visual representation of product variations, customers can identify a product variation at a glance. In this guide, we explored what image swatches are, why they matter, and how they can improve product selection and reduce friction in the buying process. We also walked through the steps and plugin required to add image swatches to a WooCommerce store.
By following these steps, you can quickly implement image swatches in your WooCommerce store and create a more visual, conversion-friendly product experience.
In this tutorial, the primary focus was on adding image swatches for product styles. However, you can also configure swatches for other product attributes, such as colors. Similarly, you can customize your product variations and attributes to display images instead of relying solely on labels or text, making product selection faster and more visual.
I hope this tutorial was helpful and that you can now create your own image swatches by following the steps above. Give these steps a try and let us know about your experience in the comments section!


0 Comments