Are you starting a WooCommerce store? Then you’ve made an excellent choice. Why? Because it’s a fantastic platform that can fulfill your requirement of creating an online store without writing code.
It’s a WordPress plugin that can be easily installed and configured per your business requirements. Over 5.1 million live websites are using it, and it’s been downloaded over 170 million times since its release in 2011.
Hence, you’ve made the right decision to create your eCommerce store using WooCommerce,
To help you further complete this decision of yours, this tutorial will share the steps that would effectively set up WooCommerce and allow you sale amazing stuff – regardless of its type.
Can’t wait to set up WooCommerce? Then, let’s get into the process right away.
Things Required Prior to WooCommerce Set-Up
Before we look at the steps, let’s check out what essential things you’d need to use WooCommerce for your online shop.
Domain
If you haven’t registered your store’s domain name, you should get it right away, as it would be required to utilize WooCommerce.

You can visit any of the domain name registrars like GoDaddy, Namecheap, or Google Domains to register your domain.
Hosting
To run your WooCommerce shop, you’d need a place where you can store its data. And for that, hosting is essential. Once you get your domain name, sign up for a hosting server that’s highly secure, fast, flexible, and easy to configure.
You can even get a domain name and hosting from a single platform like Bluehost or Hostinger. They provide free domains when you select their hosting plans. So, if you’re looking to save amount, you can choose their hosting services.
WordPress
Well, without it, you won’t have your WooCommerce. Thus, when you’re done with domain and hosting, simply install WordPress on your server.
Installing WordPress isn’t complex, and you’d be done with it without any external support. However, if you’re finding it hard to install WordPress, you could simply reach out to your hosting provider or follow this tutorial.
Once you’ve installed WordPress, follow the next steps to start your new WooCommerce store in no time.
Step 1 – Install the WooCommerce Plugin
To install WooCommerce on your WordPress site, go to Plugins → Add New → search WooCommerce, and click Install Now for the following,
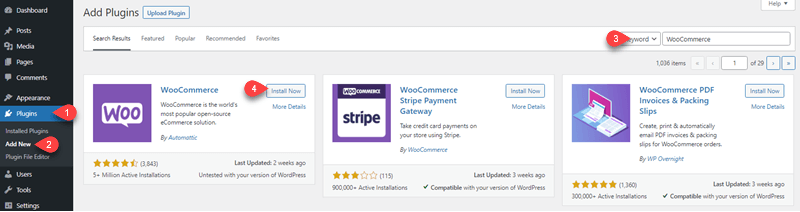
After installing it, click Activate to further initiate its setup process.
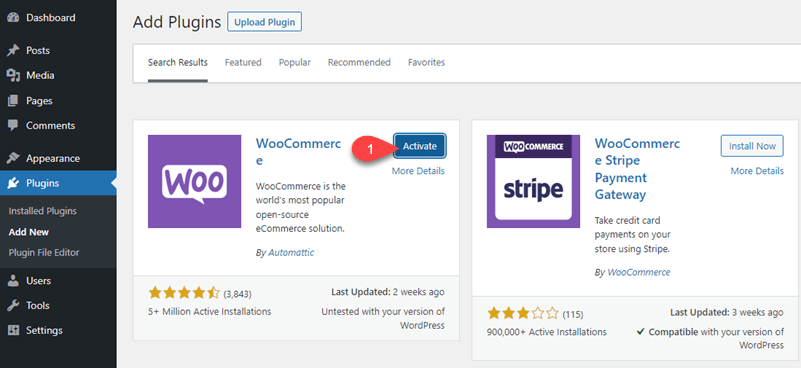
As soon as you activate the plugin, WooCommerce’s setup wizard will open. To complete that, follow the next steps.
Step 2 – Set Store Details
For starting WooCommerce, the first step you get in the setup wizard is to set your store’s details.

Set store details that apply to your online shop. You could also skip this step if you want to add details later. However, doing it on the setup wizard is a time-saving way.
Once you’re done with the details, click Continue. A popup will appear as you click on the button asking for consent to send non-sensitive data.
It’s up to whether you want to share or not.
Step 3 – Set Store Industry
After store details, the setup wizard asks you about your store’s industry. Like, what you’re planning to sell online. It includes numerous options such as Fashion, Health, Electronics, and more.
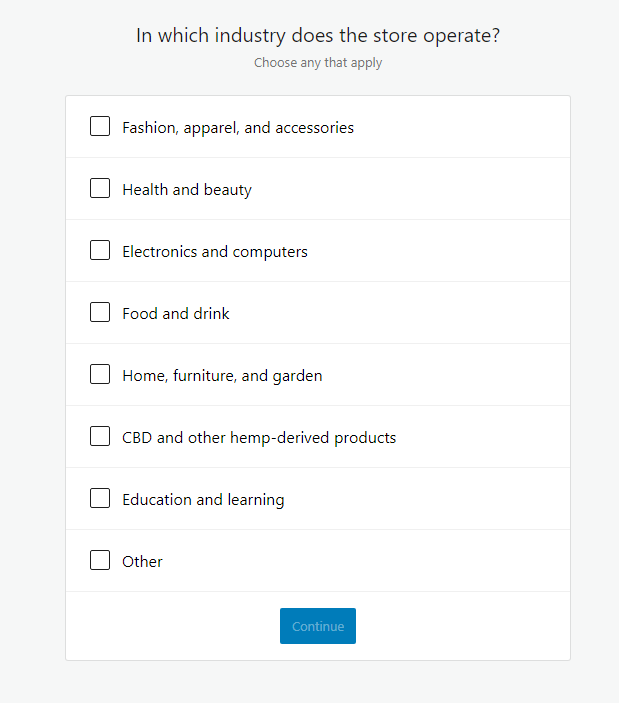
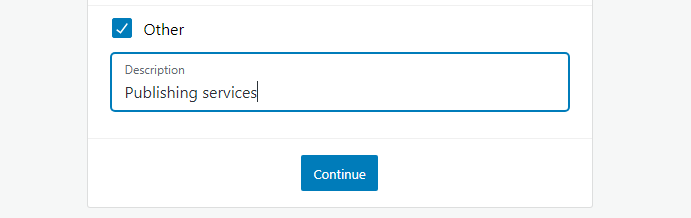
However, if your store doesn’t belong to any of the default industries, you could simply check Other and enter its description.
After defining your store’s industry, click Continue.
Step 4 – Configure WooCommerce Shop Products
Well, in this step, WooCommerce asks you the product types you’re planning to sell per your industry type.
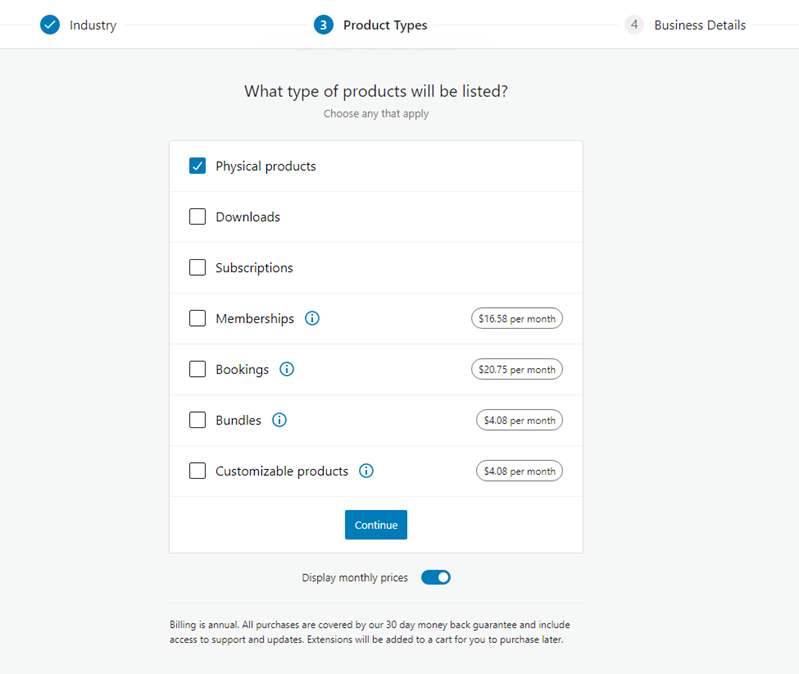
It includes Physical Products, Downloads, and Subscriptions for free. However, if you want to sell other than that, like Memberships, Bookings, or Customizable products, WooCommerce has premium plans for that starting from $4.08 to $20.75.
But, you can avail of these services from other WooCommerce plugin extensions available for free.
So, if you’re not interested in WooCommerce’s premium offers, simply select the ones that are free and click Continue for the next step.
Step 5 – Set Business Details
In this step, WooCommerce asks you to estimate how many products you’re planning to sell.
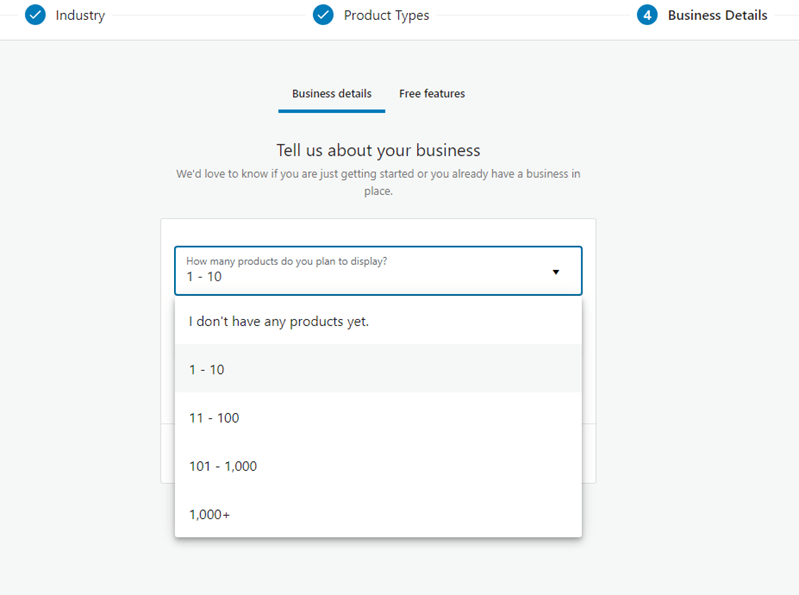
It includes options from 0 to 1000+. Based on your requirement, select the option you find most suitable. Then, it asks whether you’re already selling products somewhere — either online or offline.

Based on your selection, it displays more options to accurately set the business details.
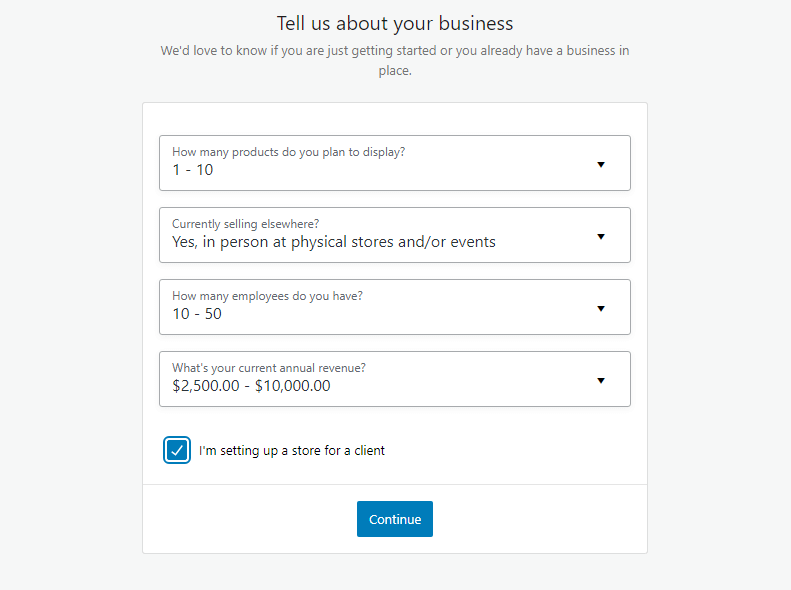
Besides, if you’re starting the WooCommerce store for a client, you can choose the I’m setting up a store for a client. Selecting these options won’t take much time. Once you’re done with them, likewise previous steps click Continue.
Now here, upon continuing, the WooCommerce setup wizard will show some free recommended options—for example, WooCommerce Payments, Jetpack, MailPoet, and more.
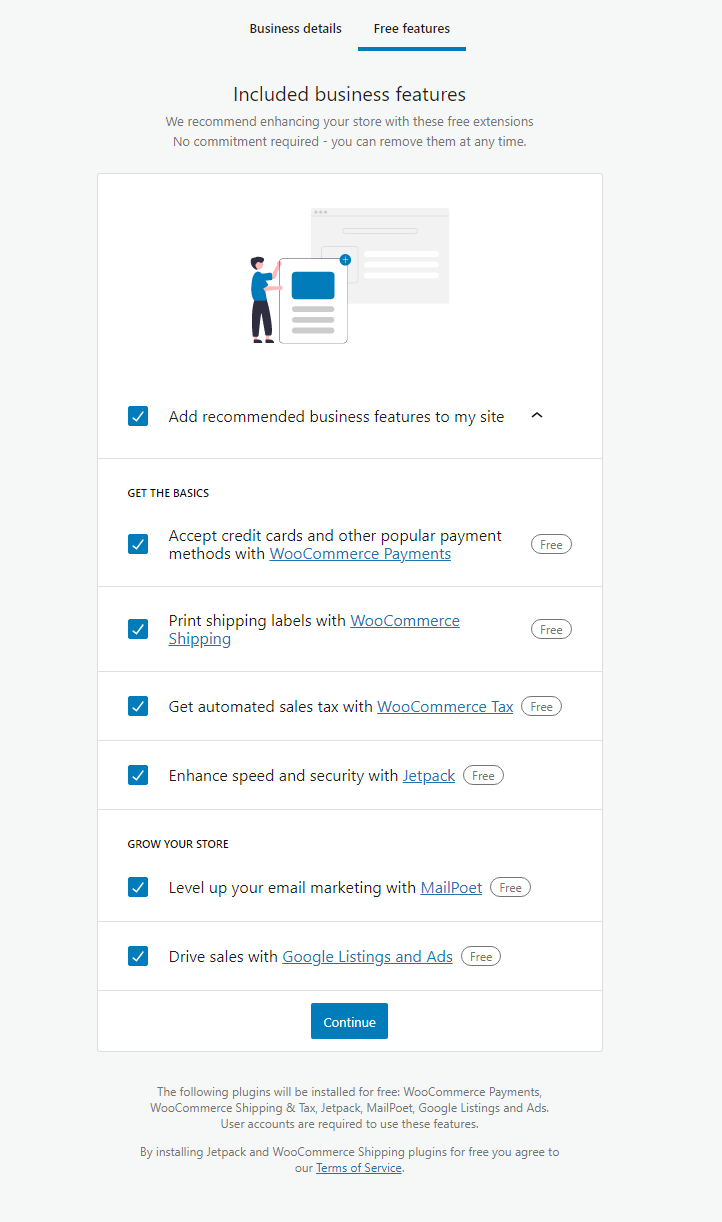
These are separate WooCommerce plugins that, if you allow, will get installed on your store. Therefore, it’s up to you whether you want them or not.
Our recommendation – Ignore installing these suggested features except Jetpack, which adds an extra security layer.
Once decided, you can click Continue for the last WooCommerce Setup Wizard step.
Step 6 – Choose Starting WooCommerce Theme
You probably got a theme when you installed WordPress. But, to give the store a store-like look, WooCommerce suggests some store-oriented themes to make your online shop look stunning.
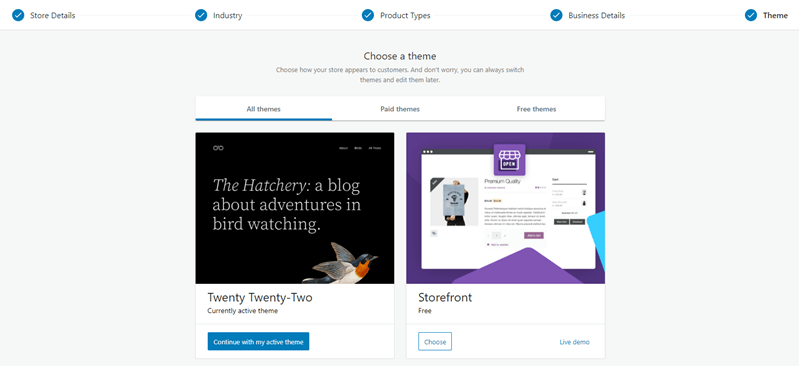
There are tons of themes available that you can apply to your store either free or by purchasing them. Select the one you think would represent your store and its industry best.
If you like to continue with the default WordPress theme, you could do that as well.
However, if you need more customized solutions or specific functionalities, you might want to hire a WooCommerce developer. Toptal is renowned for connecting businesses with top-tier, freelance WooCommerce experts who can tailor your store to meet your unique business needs.
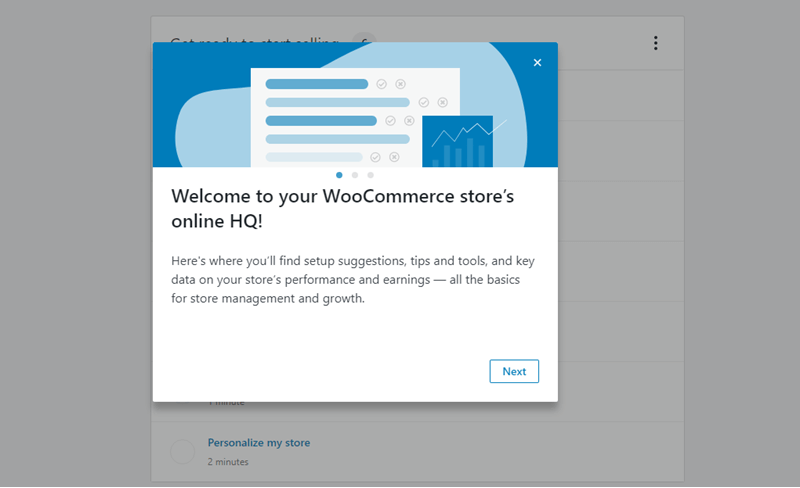
Upon completing the setup, you’d get the above page as your welcome to the WooCommerce.
To say, we’ve completed the setup. But we’re not done yet because we haven’t added payment methods, ship rates, and other options. Thus, for starting the WooCommerce store, we need to cover a couple of additional steps.
Step 7 – Configure Shipping Options of Your Store
By now, your WordPress Dashboard got the WooCommerce menu. And to configure shipping options, you need to access that. So, go to WooCommerce → Settings → Shipping.
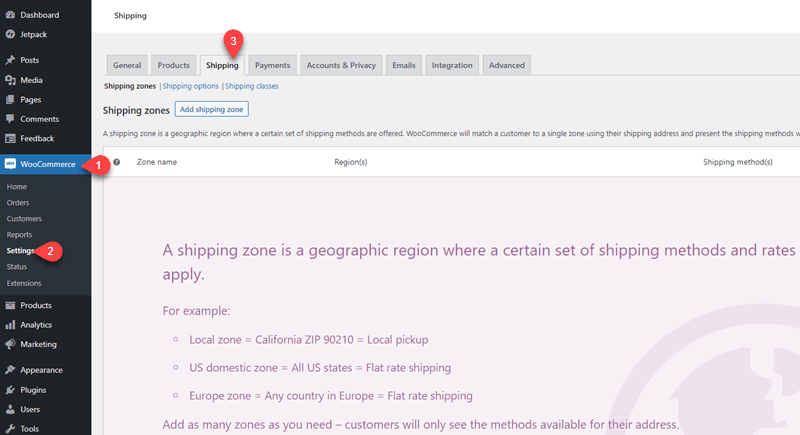
Here, you’ll get three options,
- Shipping zones
- Shipping options
- And Shipping classes.
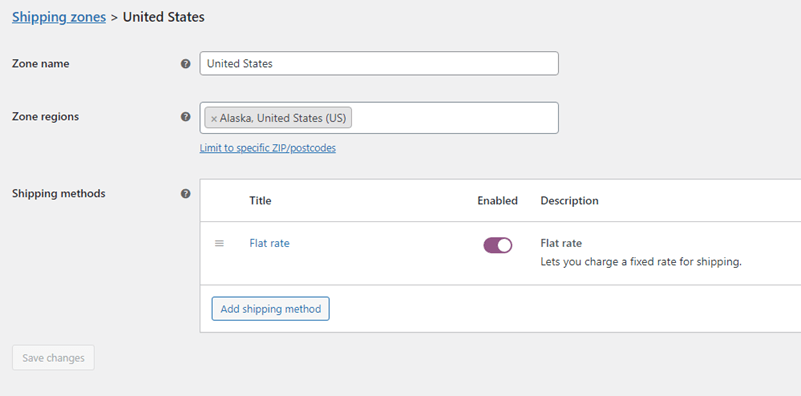
Access each one of them one by one, and apply configuration as applied. For instance, the Shipping zones setting allows you to set shipping rates for different regions.
Step 8 – Set Payment Gateways
The WooCommerce store is all about selling products and generating income or revenue. And for the revenue, the customers have to pay for the products. But if they won’t have any medium to initiate their payment, how would your store ever generate income?
Never. And that’s why you need to set up payment gateway(s). To do that, go to WooCommerce → Settings → Payments.
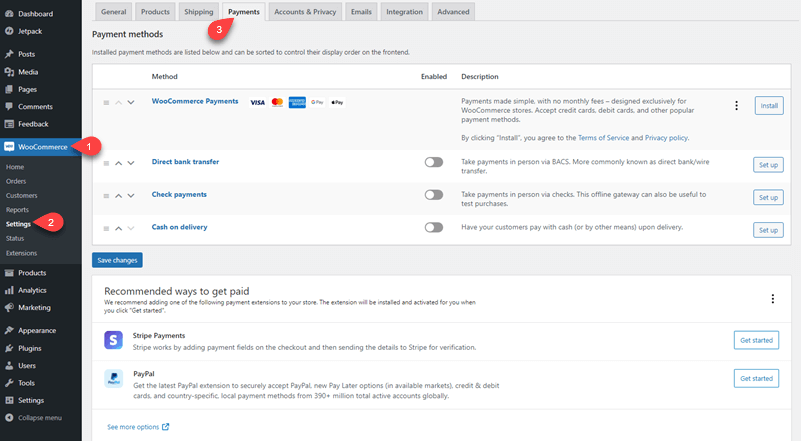
Here, you’ll find multiple options to enable as a payment method on your WooCommerce shop. For example, the default ones are WooCommerce Payments, Direct Bank Transfer, Cash on delivery, and more.
But skip on these and click Get started for either Stripe Payments or PayPal. Upon your selection, WordPress will open a new page asking for the details to set up the added payment gateway. For example, you choose Stripe; then you’ll see the following window.

Here, it requires Stripe account keys which you can get by following this tutorial on Stripe WooCommerce Integration to complete your payment gateway set up.
Step 9 – Add Products for Your WooCommerce Website
We’ve almost completed setting up the WooCommerce store so far; however, now all we need is products on it. Because without them, there’s no point in starting a WooCommerce-powered shop.
So, to do that, go to Products → Add New and input the details of the product.
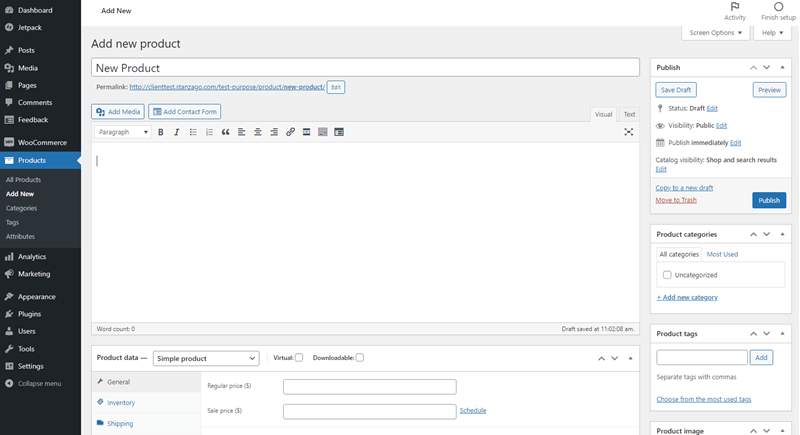
Once completed adding the details of your product, simply click Publish. And that’s it; we’ve completed all the essential steps to make our WooCommerce shop run.
Wrapping Up
So, those are our crucial steps for getting started with WooCommerce. By following the above steps, we’ve certainly completed what it takes to make the store available for the customers.
However, there are still some essential aspects remaining, such as making the store available for search engines. Therefore, to ultimately make the WooCommerce store ready, you should do the following,
- Add a SEO plugin to improve website ranking.
- Connect store to the Google Search Console or other Search Engine Webmasters and upload your store’s sitemap.
Once you complete the above, you’re good to bring more products and sales to your store.


0 Comments