An online store selling physical products would essentially require shipping options functioning on the site. Because, unlike an offline store, when a customer will checkout, you won’t be there to make the billing.
Thus, it has to be automated, based on different products and regions your customers are from.
If you’re using WooCommerce as your eCommerce platform, then it’s easy and quick to set up shipping methods. And in this blog post, we’re going to look at that.
So, that being said, let’s get to our point without spending more time.
WooCommerce Shipping at a Glance
WooCommerce is one of the world’s most used eCommerce platforms that provides you with many inbuilt solutions to run your digital retail business swiftly. And shipping options are one of those in-built solutions it provides.
Using this feature, you can define different shipping rules, methods, and rates that would help both you and your customers to simplify and understand the process of a product’s delivery. Because of this option, customers will know beforehand how much they need to pay for the delivery and when they’ll get it.
WooCommerce Shipping Options include different segments that allow you to set up shipping methods in the correct manner on your digital store. Allowing you to leverage this particular function to boost revenue.
How?
Well, for example, your competitor is charging its customers a shipping fee for a particular location. However, you, on the other hand, by using WooCommerce Shipping Methods, offering them discounts on shipping and orders, then who will the prospects prefer?
It’s probably you if you’re providing products as good as your competitors.
So, shipping options in WooCommerce can help you. And the following segment will show you how to do that.
Essential Aspects of the WooCommerce Shipping Options
As a whole there are multiple aspects WooCommerce Shipping Options have, however, the ones that you’d need to interact the most are the following,
- Shipping Zones.
- Shipping Methods.
- And Shipping Rates.
To set up your shipping methods in WooCommerce, you need to first create Shipping Zones, then Methods and lastly, define Rates for the shipping methods and zones you’ve created.
WooCommerce Shipping Zones
In WooCommerce, a Shipping Zone is a particular geographical area where you ship or deliver the items. For example, your entire city or a specific region in the town. Using WooCommerce’s Shipping options, you can create shipping zones as narrow as you want to or as simple as you can define them, like only using zip codes.

Look at the above image to have a clear idea of how the Shipping Zone can be defined.
WooCommerce Shipping Methods
As the name suggests, shipping methods are the different types of shipping you provide in a particular zone.
For example, Local Pickup, Free Delivery, Store Pickup and more. Using WooCommerce, it’s easy to add a shipping method; however you like and whenever you want it.
WooCommerce Shipping Rates
Shipping rates allow you to differentiate your shipping methods easily. It helps users to select a particular shipping method based on their convenience. For example, you charge $40 for Local Pickup and $30 for Store Pickup.
If users find store pickup convenient and reasonable they’ll go with it considering the fact that they have to pay less. However, if Local Pickup arrives early and that is what customers want, they’ll go for that.
Hence, making your Shipping options more efficient and per users requirement.
Now that we’ve covered all the essential aspects of WooCommerce Shipping Options, let’s see how we can set them up.
Steps to Set Up WooCommerce Shipping Options
By following the below steps, you’d be able to set up shipping zones and then, further adding methods and rates to them easily.
#Step 1: Configure WooCommerce Shipping Locations for Countries
To set up shipping options on your WooCommerce store, first, you need to configure where you want to provide your customers with shipping methods. For example, the country you’re doing the business.
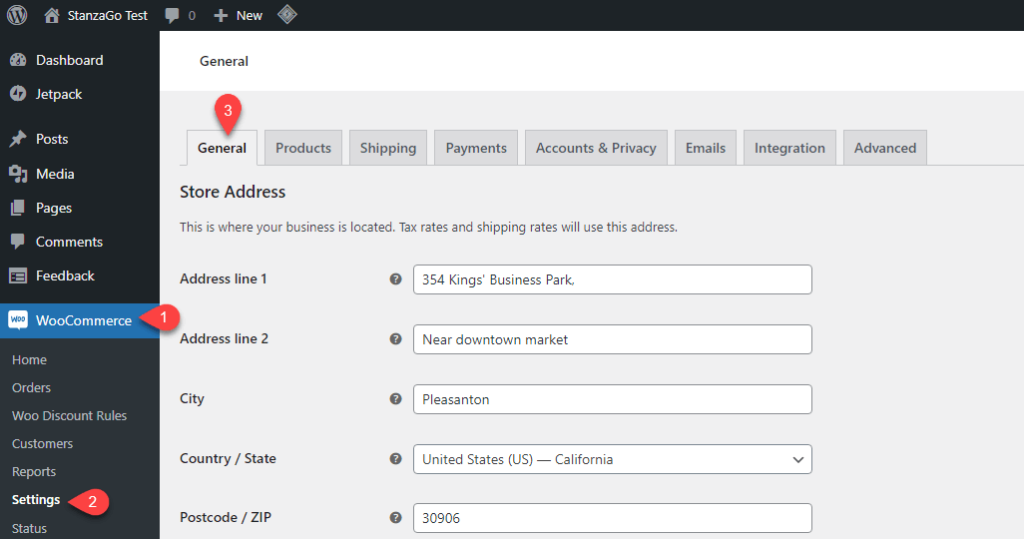
So, for that, go to WooCommerce → Settings → General.
Here, scroll down to General options, and then configure Selling & Shipping locations per your scope. For example, the Shipping locations option, provides you with 4 choices,
- Ship to all countries you sell to
- Ship to all countries
- Disable shipping & shipping collections
- and Ship to specific countries only
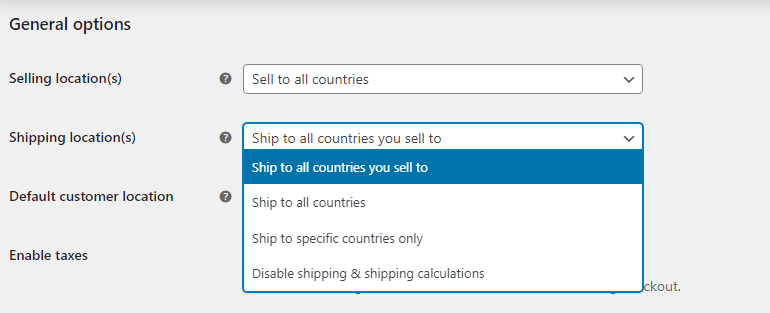
Select the one that fulfills your business requirements and then, scroll down to Save Changes.
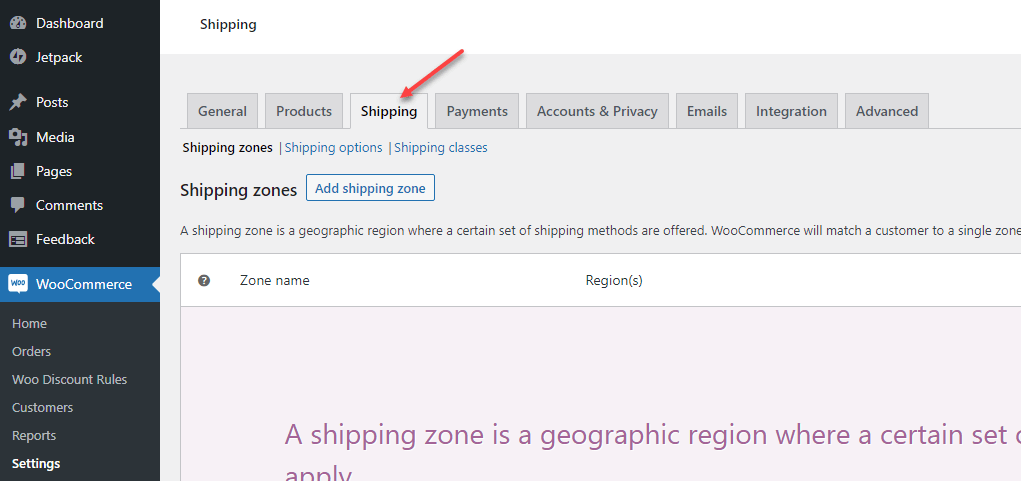
#Step 2: Set Up Shipping Zone
We’ve configured the Shipping location, now, we can set up our shipping zone. Click Shipping in the WooCommerce settings to access shipping controls.
Then, click Add shipping zone and a new window will appear like the following asking details of your shipping zone.
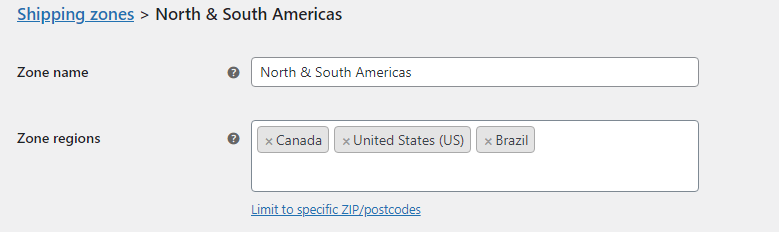
- Zone name: Define the name of your shipping zone.
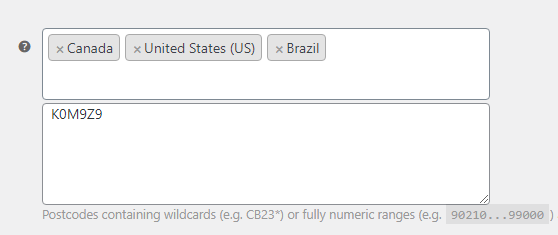
- Zone regions: To what region you want to enable this shipping zone. If you want to keep the zone specific to some regions, click Limit to specific ZIP/postcodes. It will open a text area where you can list the zip/postcodes.
Once added details, move to the next step.
#Step 3: Choose Shipping Method
In the Shipping settings after defining Zone name and regions, click Add shipping method.
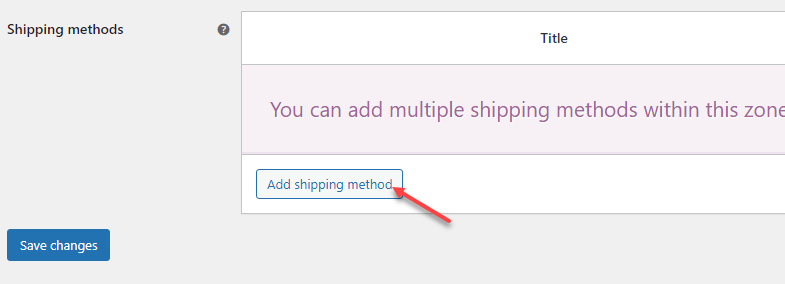
This will bring a popup on the screen providing you with different shipping methods,
- Flat rate
- Free shipping
- and Local Pickup

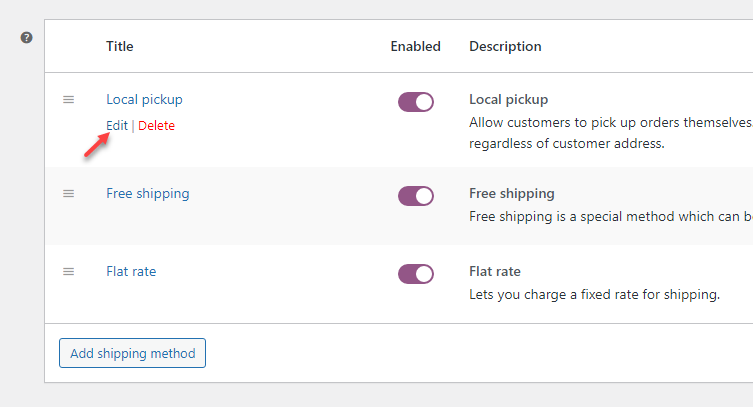
Select the one that’s required and then click Add shipping method. Once the method has been added, it will appear in the methods list like the following. If you’ve added multiple methods, you can set their priority by sorting them above and below one another.
#Step 4: Define Shipping Rates and Fees
We’re not done with our shipping methods before defining shipping rates and fees. Each shipping method provides you with the controls to set shipping rates easily. Let’s see how we can do that.
Local Pickup & Flat rate
Both Local Pickup and Flat rate shipping methods have similar options to set shipping rates. Go to the methods, and click the Edit button.
This will open another popup providing you with the options to change,
- Shipping method title/label
- Tax status to Taxable or None
- And cost that would be taxable.
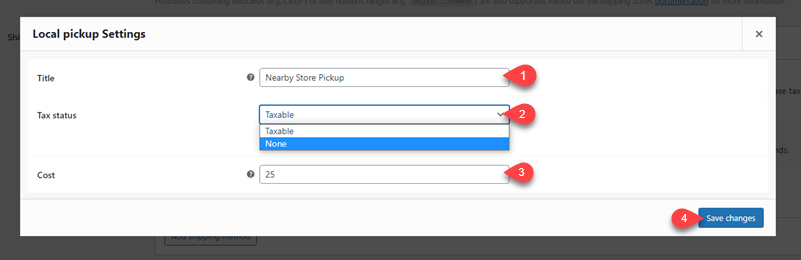
You can make changes as required and once done, click Save Changes. After this, your edited shipping method will appear like the following.
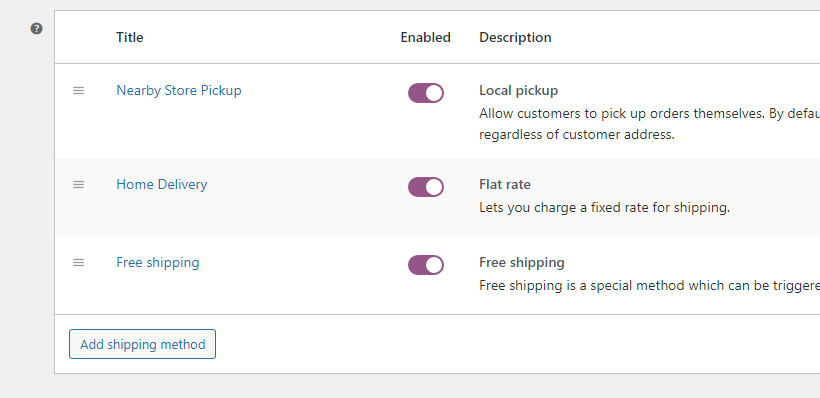
You can do the same to your WooCommerce Flat rate shipping method. Above, we’ve changed it to Home delivery.
Free shipping
The Free shipping WooCommerce shipping method has different options than the previous ones. When you edit the free shipping method, it provides you with 4 different choices that would make a particular order eligible for free shipping.
It includes the 4 free shipping requirements as,
- A valid free shipping coupon.
- Minimum order amount.
- Minimum Order amount OR a coupon.
- and A minimum order amount AND a coupon.
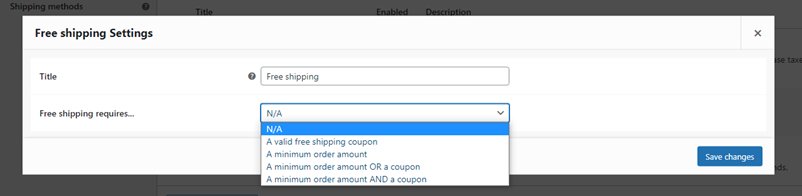
Besides, A valid free shipping coupon, when selecting a particular option from the above, you get a further set of options that lets you define free shipping profoundly.

Define the order amount and then click Save Changes. And that’s it; we have added our shipping zone, method, and rates. However, there’s more we need to do to make our WooCommerce shipping options function.
#Step 5: Configure Shipping Options for Calculations and Destinations
To make your shipping methods function more accurately, WooCommerce provides you with the Calculations and Destinations options. You can access them by clicking the Shipping options in the Shipping settings.
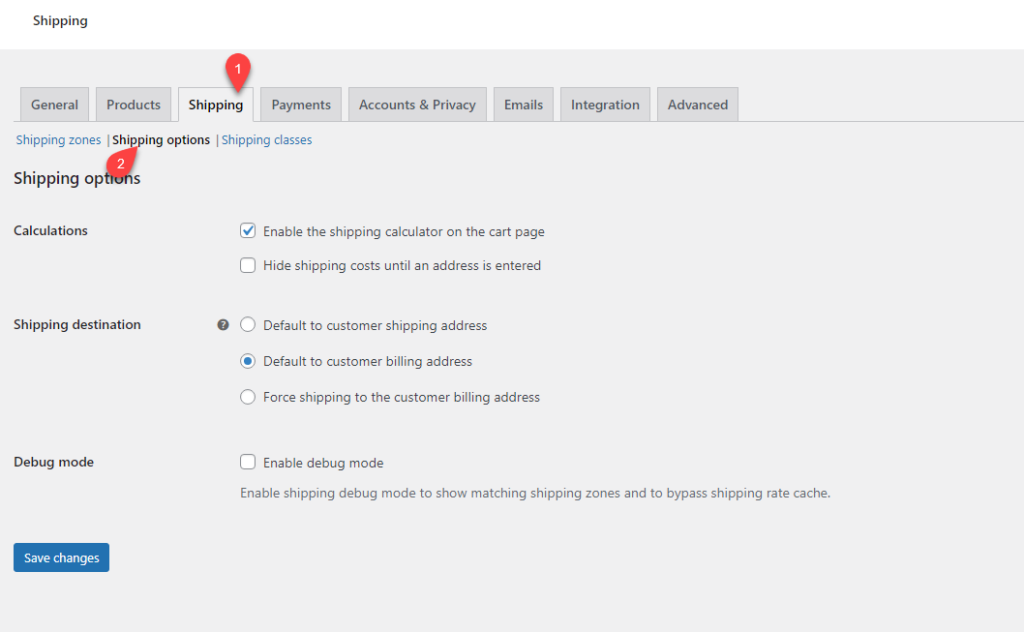
Using the WooCommerce Shipping Calcustions option, you can
- Enable/disable the shipping calculator on the cart page.
- And Hide shipping costs until an address is entered.
On the other hand, WooCommerce Shipping Destination option, allows you to
- Set destination default to customer shipping address.
- Or, default to customer billing address.
- Or, force shipping to the customer billing address.
In this way, you’ll more control over your shipping methods. Configure as per your requirements, then click Save Changes.
#Step 6: Add Shipping Classes
One of the amazing features of the WooCommerce Shipping Options is that, you can create classes to apply different shipping methods to different products or different groups of products.
To access this feature of WooCommerce shipping and enable it on your store, click Shipping Classes, then further click on Add shipping class.
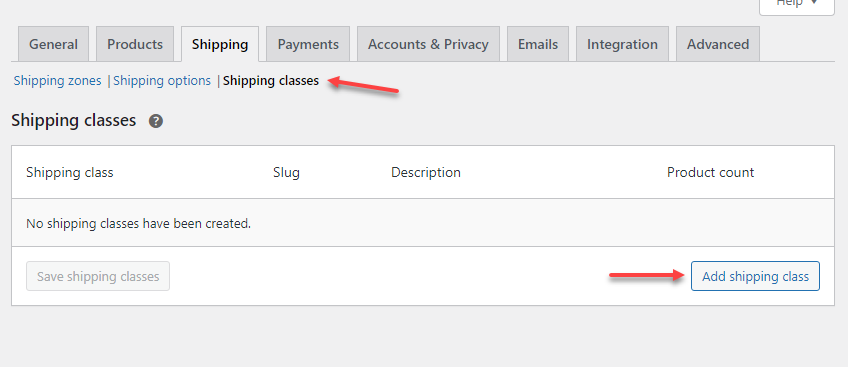
This will bring different fields to define your new shipping class. You can add Shipping class name, slug, and description. Once added the information, click on Save shipping classes.

Now, to utilize the shipping class, head over to the shipping zones, edit your created zone.
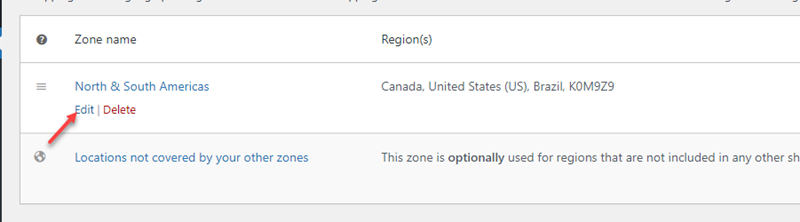
Then, edit your Flat rate shipping method and you’ll find the shipping classes fields in the popup.
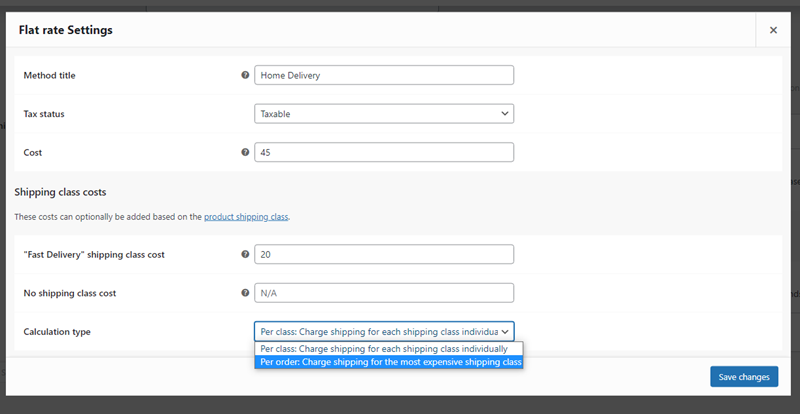
You can define shipping class individual price, no shipping class cost based on sum formula. For example, 10 * [qty], it means your customers will be charged an additional $10 per quantity if shipping class isn’t available.
Then further, it provides you with the Calculation Type that allow you to,
- Calculate shipping class cost per class: Charge shipping for each shipping class individually.
- Or, Per Order: Charge shipping for the most expensive shipping class.
Define the values and select calculation type per your requirements and then click Save Changes.
That’s it; we’ve set our shipping options in WooCommerce. To customize the checkout fieds easily, you can also use the Checkout Manager for WooCommerce Plugin.
#Step 7: Test Your Shipping Options
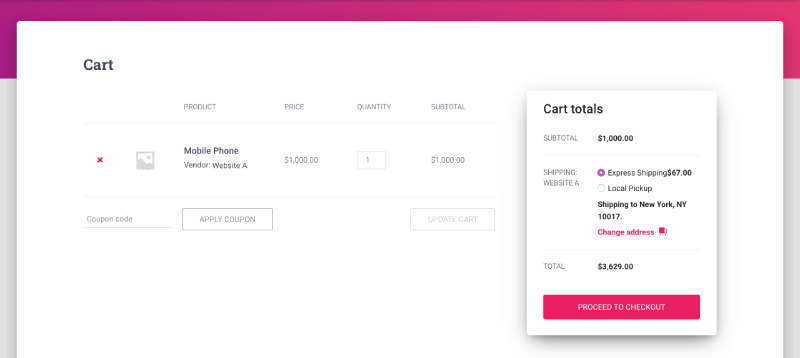
Before you make your WooCommerce store live for your customers, make sure the shipping methods you’ve created are working. And to test that, you don’t have to do much.
Simply go to your store, add products in the cart and either proceed to checkout or view products on the cart page. If everything’s fine, you’ll find the shipping options on the checkout page as the following.
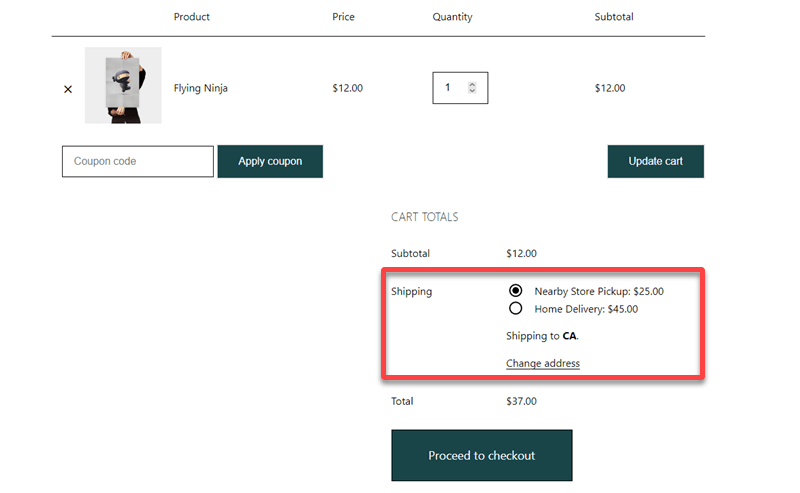
We’ve created our shipping method and tested it as well.
Additionally, you may add your favorite products to the WPMozo Wishlist for WooCommerce and purchase them at a later time.
Conclusion
With Shipping options enabled on your digital store, you can cut the cost you might have to pay to deliver the items.
Plus, you can boost the revenue with free delivery on minimum orders amount. Thus, you can take multiple advantages of your shipping option without making considerable changes to the website.
Therefore, open your WooCommerce store and enable this outstanding feature with no doubt.


0 Comments