We all want our online store to make tons of sales and bring a huge influx of money. But we often neglect a part that would decide our store’s future – performance reporting.
You see, analytics and reports allow you to dive into the nitty-gritty of each and every driving force of your business. This means that you can understand the past performance of your website and plan comprehensively for the future to maximize your results.
You can see if some products aren’t selling that much and some bring lots of sales. Then you can improve the product presentation and deployment according to those products that are generating more sales.
In this article, we will look at how to analyze these reports in WooCommerce and their importance in making the right decisions for the future according to those metrics.
Thus, with no further delay, let’s get started.
The Importance of Performance Reports for an Online Store
Before going into report analysis, we must understand the importance of performance reporting.
These reports provide you with the actual performance of your online store. And by the store’s performance, we mean how much sales it’s generating? How much revenue it’s earning? What is the condition of stocks? And are people transitioning from guest buyers to customers or not?
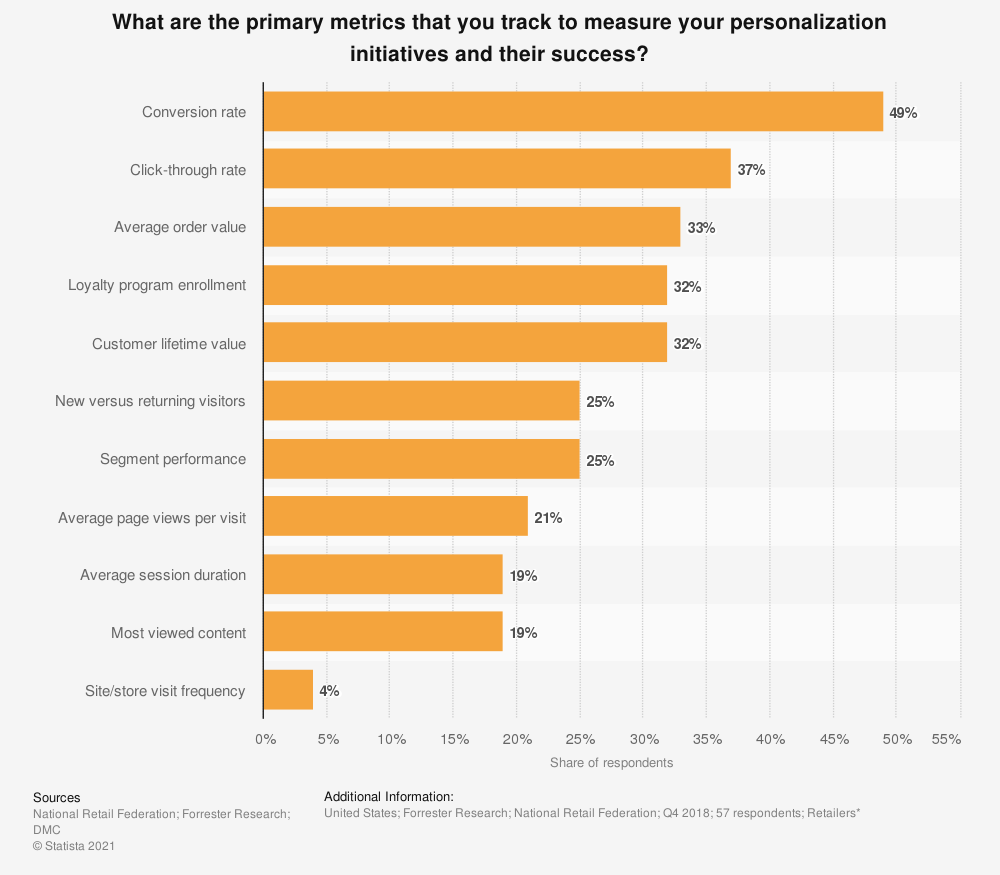
These metrics decide how well your online store is performing.
If any of them is in a bad state, then you have to start worrying about its rectification. Because if you’re not rectifying problems and improving constantly, the competition will outperform you for sure.
That’s why many new business owners fail to build their e-commerce empire and then blame fate. They don’t even feel like they need to keep tabs on their store’s performance.
These reports exist in WooCommerce, to tell you about what’s going south and what’s not.
Does Old WooCommerce Reports Panel Still Work?
Yes, it does, and for users who aren’t too good at interacting with new things, this is all they need. Using this particular section is simple for non-technical users.
Although the new Analytics section provides more details about your WooCommerce store’s performance, this old version is still enough to get all the crucial information.
Therefore, you can rely on WooCommerce’s Reports panel, if you’re not ready to get used to the new Analytics.
Navigate to WooCommerce Reports
First, you need to find the reports section in your WooCommerce Admin Panel.
Follow these steps:
- Log in to your WordPress Admin Panel.
- On the left sidebar of your WordPress Dashboard, hover over WooCommerce.
- From the bar on the right, click on Reports.
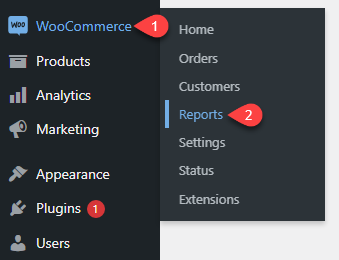
After you’ve navigated to Reports, a panel like the following should appear.
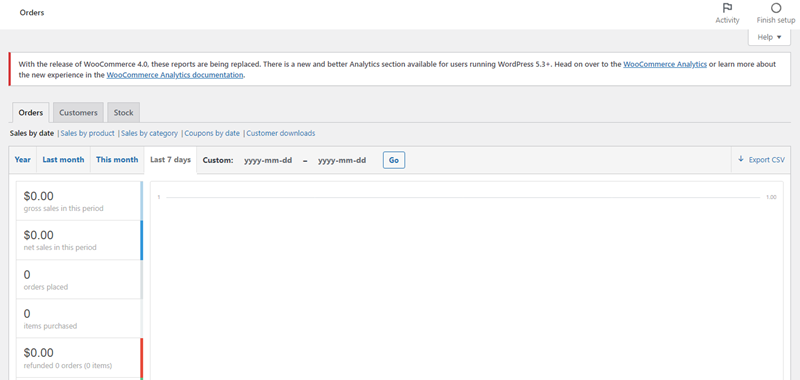
While you’re on this panel, you’ll see a notification saying that reports are being replaced with a new Analytics section, after the WooCommerce 4.0 version. So, where you can look for the new reports panel?
Well, for that, head over to the WooCommerce Dashboard, and click on Analytics to access WooCommerce’s new Analytics Section.
However, as this blog post is about the previous version, thus, we’re only going to discuss that. In old reports panel, you can see that three categories can be reported:
- Orders
- Customers
- Stock
Each reporting category can be analyzed with different options and periods.
Let’s take a look at all three of them one by one.
Order Reports
This is the first report category in your WooCommerce reports, and it is selected by default when you enter the reports panel. It reports the placed orders and sales of your store and their performance.
You would see several options/filters in the orders tab to see the reports.

From the image, you can see that those options are:
- Sales by Date
- Sales by Product
- Coupons by Date
- Sales by Category
And,
- Customer Downloads
You can check and see the individual order reports of these options by clicking on them.
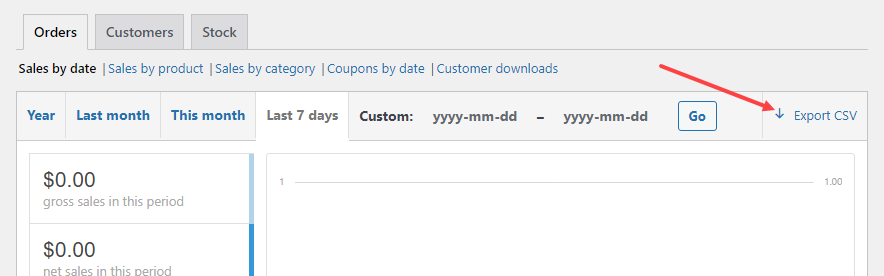
Sales by Date
The first option in Order Reports which is Sales by Date, gives you a clear idea of your store’s current state and provides performance reporting regarding your sales.
It uses a graph and some specific metrics to provide you with the data regarding sales.
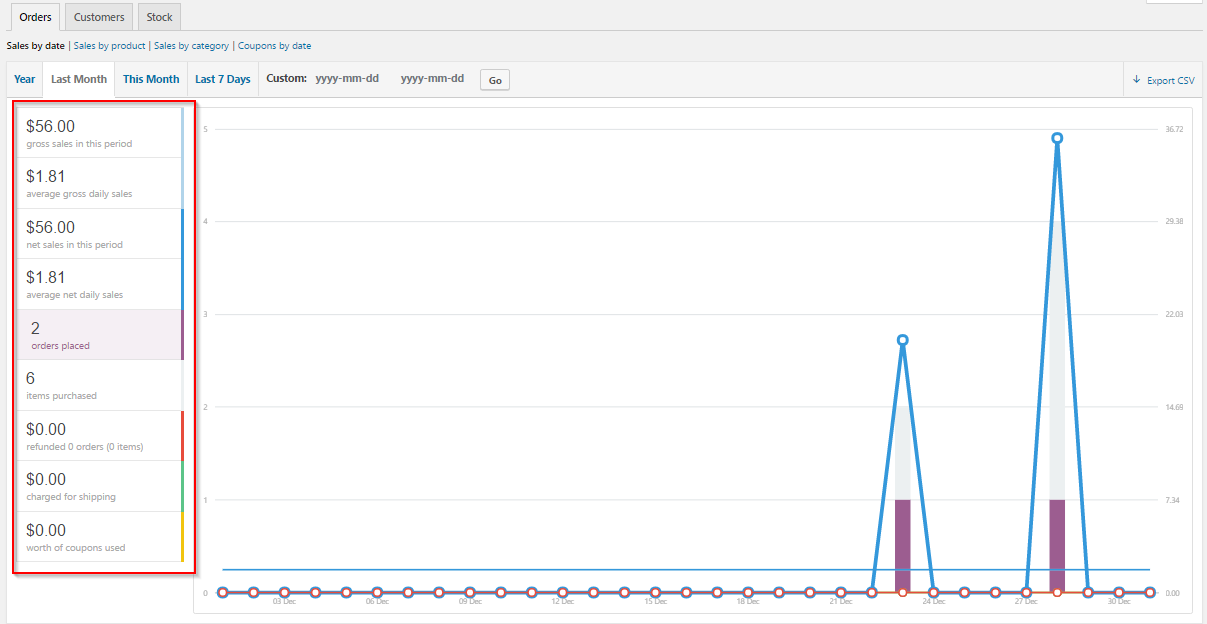
The graph is pointed out for each day, and the gross sales are made on that day.
You can choose the time period of sales from the past 7 days, this month, the previous month, or last year. Or, you can set a custom time period and set the starting and ending date according to your specific need.
Product Sales Report
As evident from the name, this category shows the sales according to specific products. You can search for any available product from your store and do its analysis.
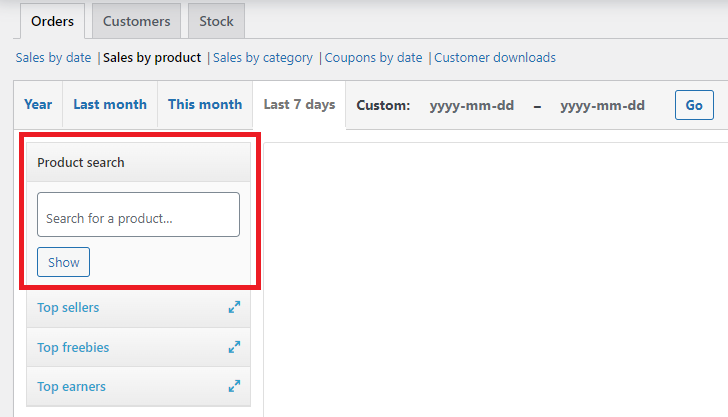
As before, the center of the panel will house the graph, and the left side will have metrics such as the number of sales, revenue earned from the product, etc.
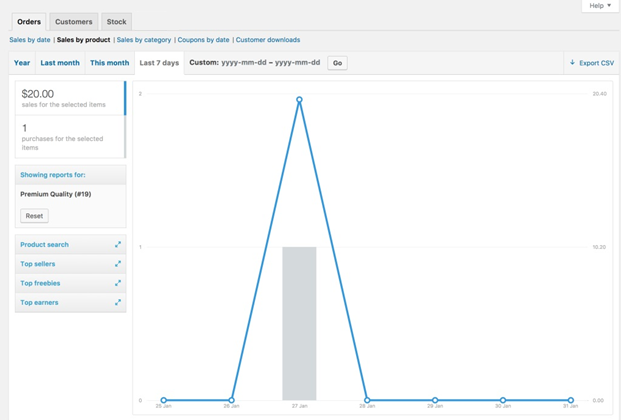
Other than searching the products, you can check the top-selling products in your store, any freebies, or most-earning products.
You can also choose between preset time periods and set a custom period just like before.
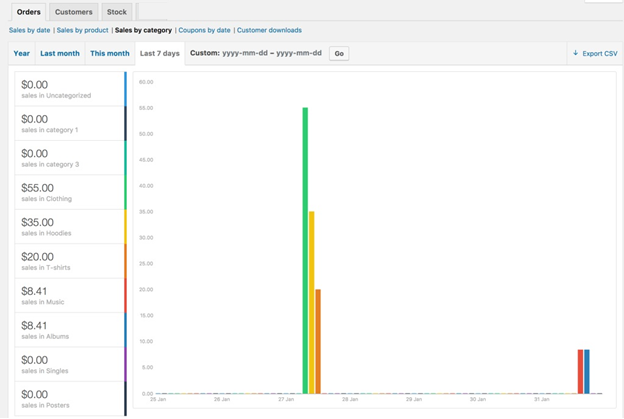
Sales by Category
If you’re not after the insights of a single product, you can search for a whole product category for its statistics.
You just have to enter the product category and the time period whose insights are required.
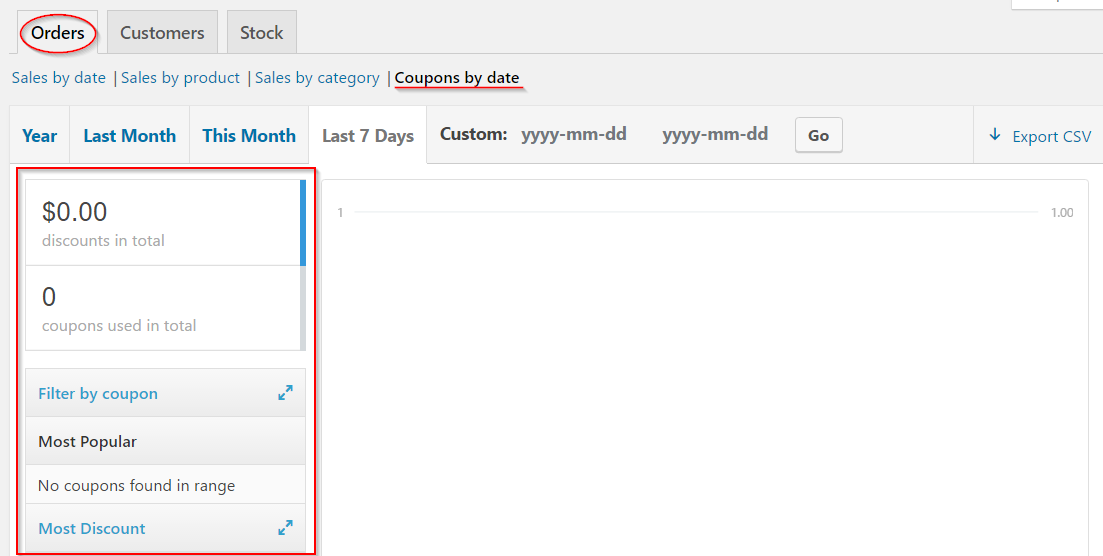
Coupons by Date
This option gives you detail regarding all the coupons used or in use on your online store.
You’ll be able to see the total amount of discounts given, the number of coupons used, coupons with the highest popularity, and coupons providing the most discount.
As before, these coupon reports can also be seen with different timestamps.
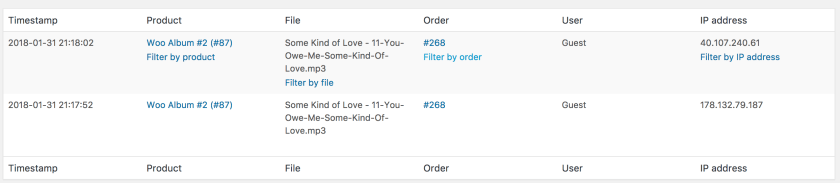
Customer Downloads
This is the last option in the Order reports category. It demonstrates the details about downloadable products in your store.
You can check what was downloaded, when it was downloaded, file name, order no., the user (guest or customer), and user’s IP address. With the user’s IP address, you can check their location.
As usual, you can use the time periods to check reports under that specific time.
And this wraps up our Orders category of WooCommerce reports.
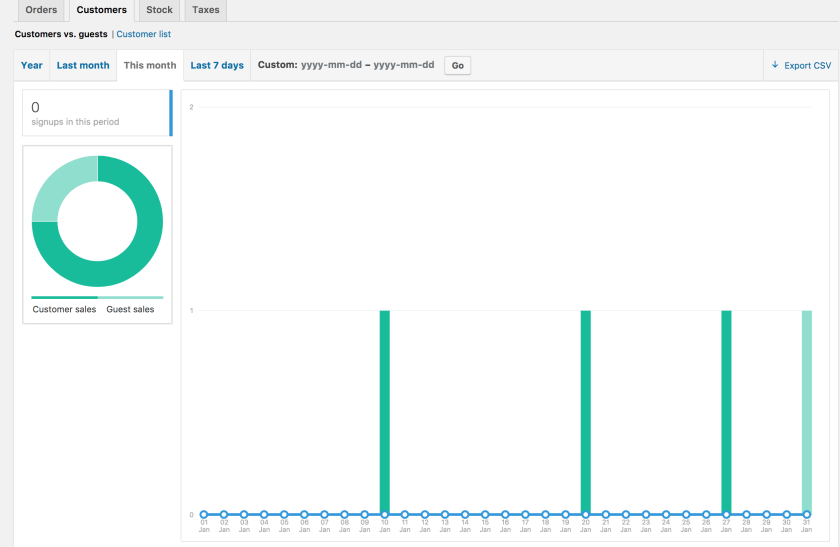
Customer Reports
Like the order reports tab showed the data regarding sales, this customer reports tab has data related to customers on the website. In this tab, the analytics about people making purchases on the website will be given.
There will be two divisions in customer reports:
- Customers vs Guests
- Customers list
The Customers vs Guests section contains data regarding both registered/subscribed users of your store and people who aren’t registered. You’ll have insights regarding purchases made from both registered and non-registered users here.
Now, it’s obvious that the Customers list section would contain only the data of registered users and the purchases made by them.
Stock Reports
Stock Reports is the final tab in WooCommerce reports. It provides the user with data on the stock at their website.
There are three options to select from your stock reports:
- Low in stock
- Out of Stock
- Most Stocked
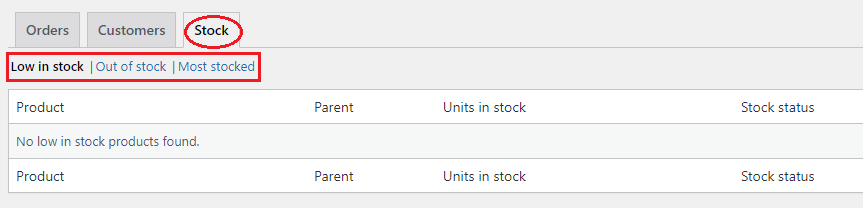
The option low in stock will show the products that are in small amounts in your website’s stock.
Out of Stock, as the name indicates means, the items currently not available in stock or sold out.
Most stocked means the products that are available in bulk in the stock.
Exporting CSV
Not only can you see the insights and performance reporting of your website, but you can also export its CSV reports using the Export CSV button on the right end of the report tabs.
You can download the CSV of Order reports section and Customer Reports but not of Stock Reports. Once you click the Export CSV button, if your browser supports downloading, then it will download the CSV report.
The CSV report of the section you choose would be downloaded.
If you click the CSV button in the Orders section, the CSV report of Orders would be downloaded, and if you click the CSV button in the Customer section, then the respective CSV report would be downloaded.
Resetting Reports
If there’s any purchase or order that you don’t like to be shown in your reports, then you have to reset the reports. Because you might have done some trial purchases yourself to check the initial functionality of your website.
To remove those purchases from your reports, you have to head over to the orders section under the WooCommerce panel and:
- Delete the purchase/s.
- Delete them permanently from the Trash folder as well.
- Clear the cache of your browser
Conclusion
Here you have it, guys, everything you need to know to manage the reports in WooCommerce.
This should give you a sound understanding of reports, their categories, and how to use them to improve your online store in the future. After reading this article, you should easily understand and handle your performance reporting in WooCommerce.
If you want, you can check out some best plugins for reporting in WooCommerce.


0 Comments