WooCommerce is an excellent plugin to turn your ordinary website into an extraordinary digital store in no time.
It provides you with different features that make it easy to maintain your digital store. For example, With WooCommerce, you can,
- Sell multiple kinds of products – Physical, Digital, Subscriptions, etc.
- Easily manage your store.
- Get paid securely through different payment gateways like PayPal and Stripe.
- View store performance through WooCommerce analytics.
- Add unlimited products to increase your revenue and much more.
However, to get the best of your WooCommerce store, you need to install it on your WordPress website. And only then you’d be able to sell different types of products to your customers.
If you’re asking, “Can I use WooCommerce without WordPress?” Then, for your clarification, No.
Because WooCommerce is a WordPress plugin; therefore, you need to have WordPress and the following requirements to initiate the installation process. If you can’t wait any longer, then we should get started.
WooCommerce Installation Overview (Prerequisites and System Requirements)
Installing WooCommerce isn’t complex; you can do that in the same way you’ve done with other WordPress plugins.
However, before doing that, you must check all the requirements to be installed on your WordPress site. Or failing to those requirements can tamper your website, and you might lose something unreplaceable.
It’s also possible that the plugin would get installed successfully but might not function properly.
Therefore, for WooCommerce to get installed correctly and function right, ensure that your website and its server has the followings,
- PHP version 8.2.0 or greater
- MySQL version 8.0.35 or greater | MariaDB version 10.11.6 or greater
- WordPress memory limit of 256 MB or greater
- HTTPS support
- And the latest version WordPress version.
If you don’t know whether your website and server meet the requirements, you can ask your hosting provider. If the server satisfies every requirement, you can continue the installation process.
Installing WooCommerce (3 Methods)
To install WooCommerce, there are mainly three methods that install it successfully and in the right way. Although, each method is more appropriate in different scenarios. So, accordingly, go with your suitable method.
How to Install WooCommerce Through WordPress Dashboard (Method 1)
For most users, installing WooCommerce right from the plugins menu is the prominent one. Whether you’re a developer or just a simple user trying to build an eCommerce store, it’s the fastest way to get your WooCommerce plugin.
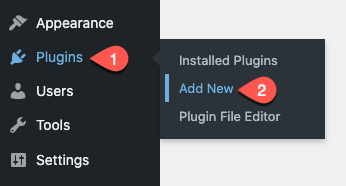
- First, on your WordPress Dashboard, you need to go to the Plugins → Add New.
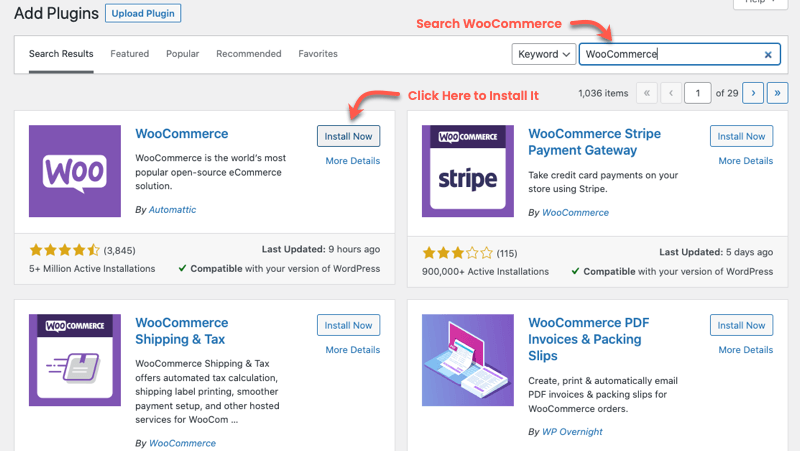
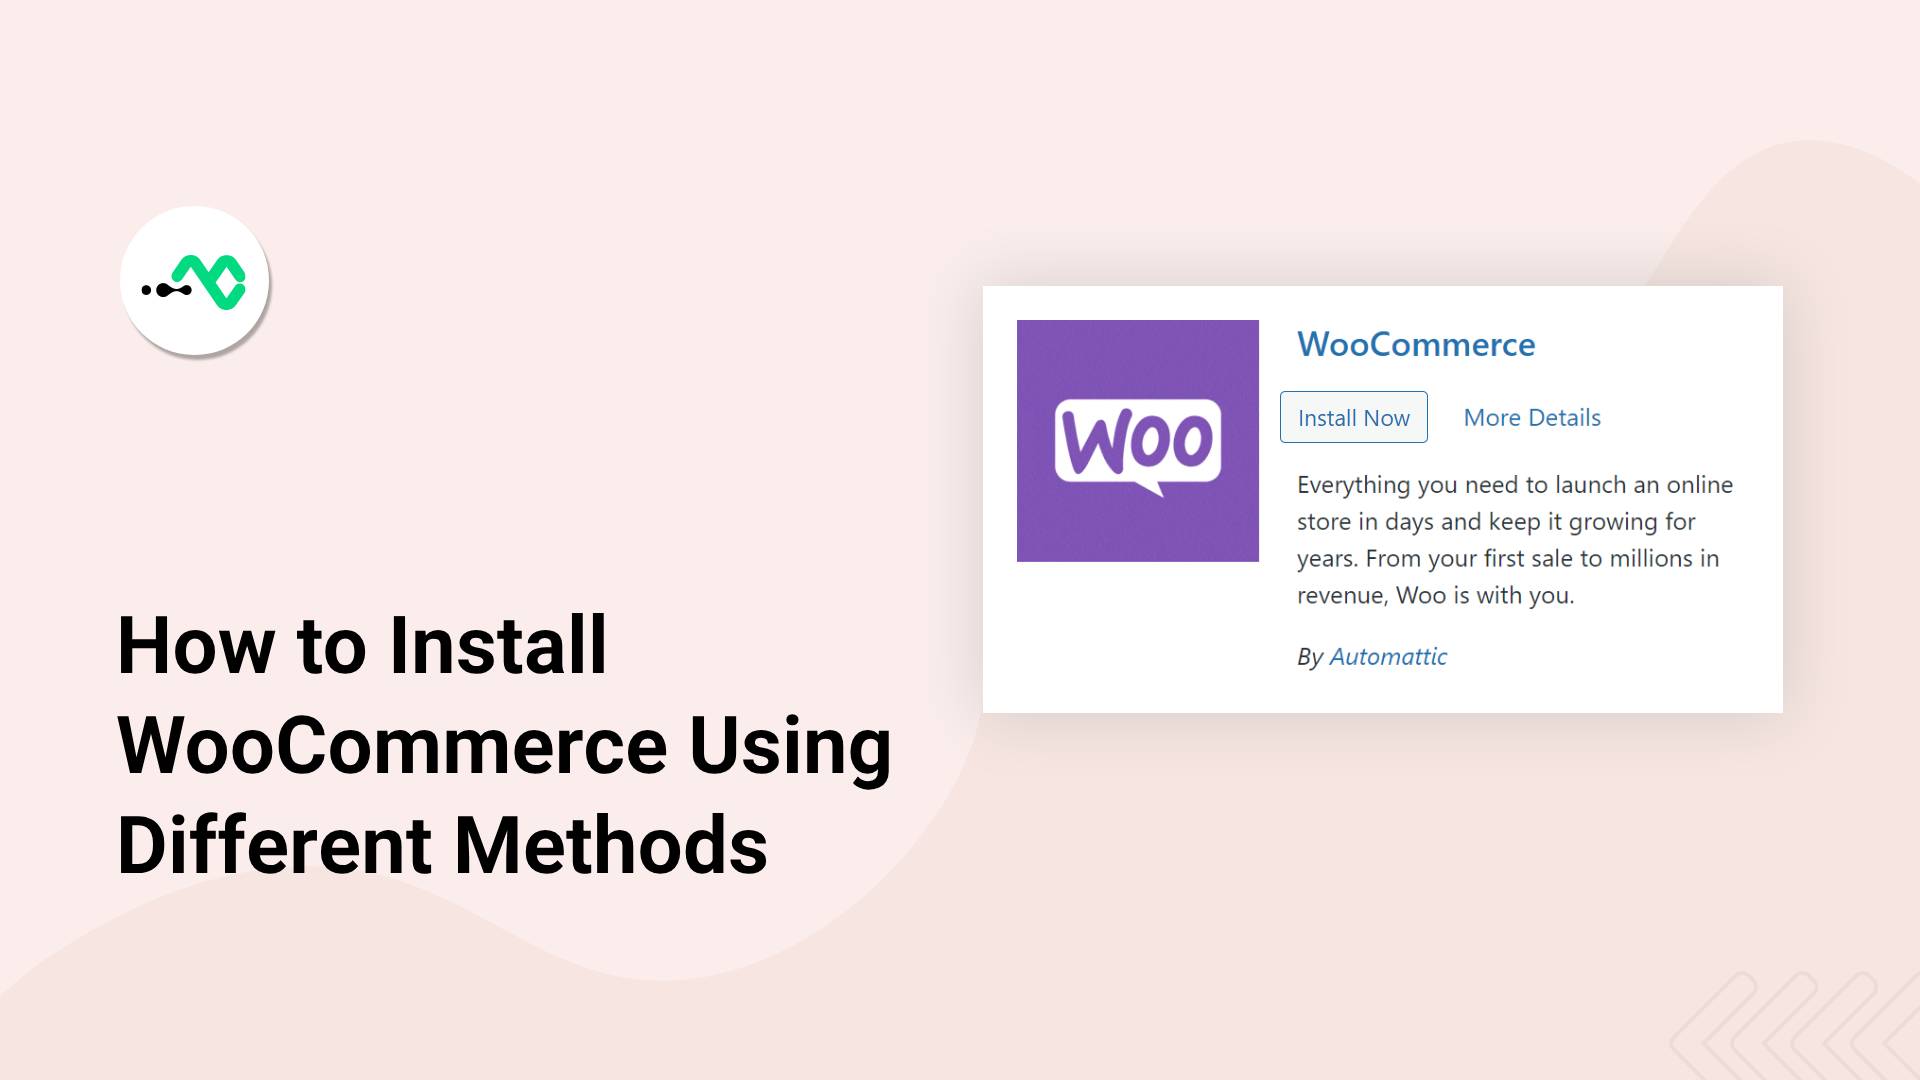
- Then, search WooCommerce and click Install Now for the following plugin.
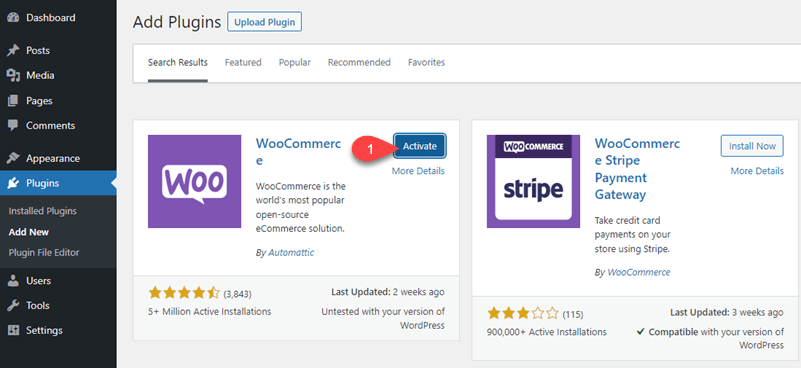
- Further, click Activate once the plugin installed.
As soon as you activate the plugin, WooCommerce will open a Setup Wizard to complete your WooCommerce store’s setup.
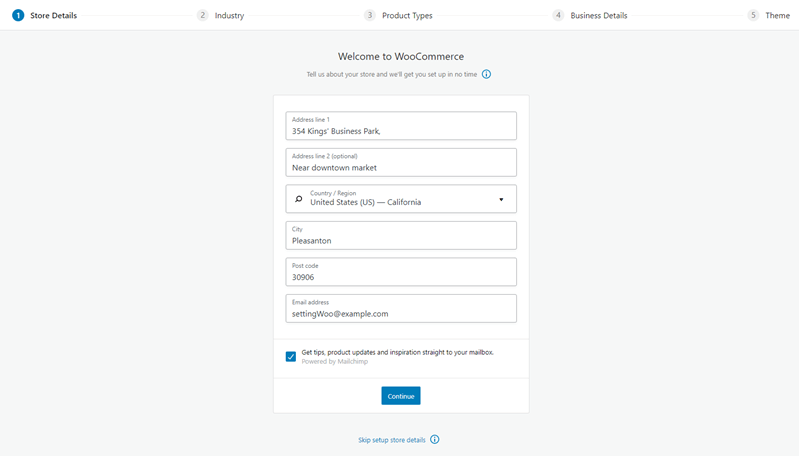
Simply complete the WooCommerce Setup Wizard’s steps one by one. And once you’re done with the setup, you’ll find new changes in your WordPress admin area.
Though, these changes appear as soon as you activate the plugin. However, before you interact with these new items, the best thing you do is complete the setup wizard.
The options you get are,
- New menu items such as WooCommerce, Products, Analytics, and Marketing.
- Custom post types and taxonomies for orders, products, and more.
- New widgets and shortcodes.
- User roles for shop managers and customers.
These would help you run and manage your eCommerce store effectively and successfully.
How to Install WooCommerce by Uploading the Plugin File (Method 2)
This particular method is best when Plugins’ Directory is down or unavailable. Or when you’re working on localhost and haven’t made WordPress use the direct Filesystem Method.
- So, in this case, visit WooCommerce’s page on WordPress repository. And click Download.
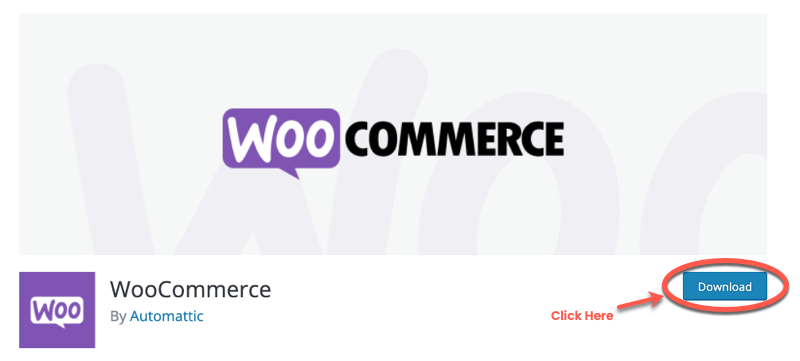
- This will download the latest version of WooCommerce. Now, to install it, you need to go to Plugins → Add New → Upload Plugin.
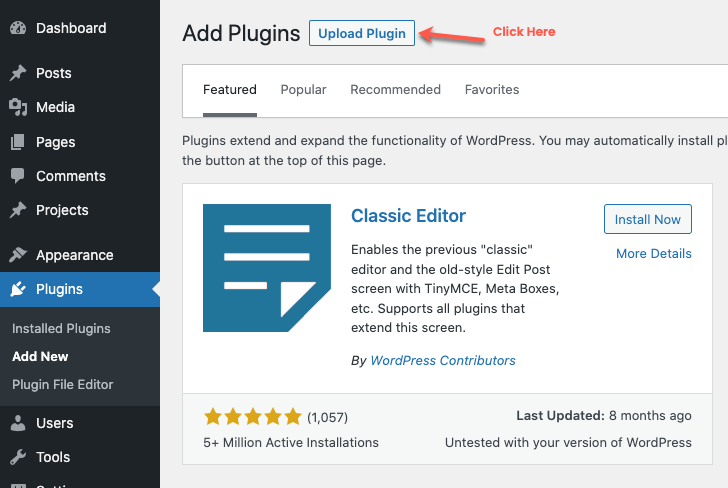
- It will open the plugin upload area, here, browse the plugin file you’ve downloaded by clicking the Choose file option. And after you’ve selected the file, click Install Now.

- This will install WooCommerce and you need to follow the same steps we’ve discussed in the 1st method.
In addition to installing the latest version by uploading the plugin, there’s one more reason why you might need to install WooCommerce manually. When you want to downgrade the WooCommerce version, you’ve to upload a previous version.
Let’s find out how we can achieve that.
Installing a Previous Version (Downgrade Woocommerce Version)
- Visit WooCommerce page on WordPress repository, then click Advanced View under plugin’s detail.
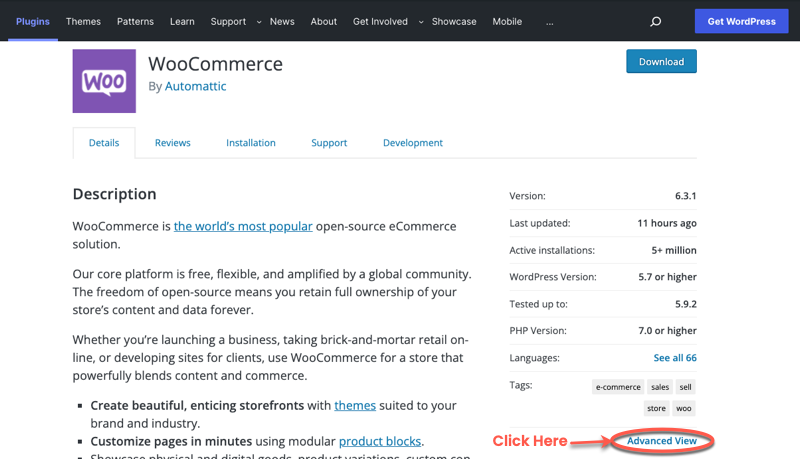
- The Advanced View has an ADVANCED OPTIONS section when you’ll scroll down. Here, you can download the older/previous version of WooCommerce.
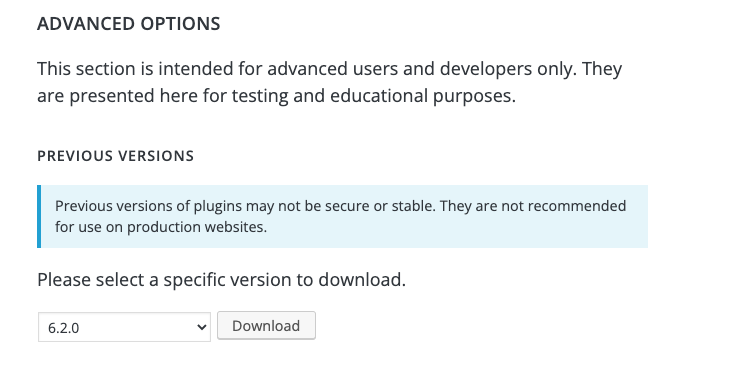
- Select the version you need and click Download. Then, follow the same steps to upload and install the plugin that we’ve followed in the previous step.
How to Install WooCommerce Using File Manager or FTP (Method 3)
This particular method is also recommended when you see a downtime at the WordPress repository. To install WooCommerce under this method, you need to download the WooCommerce plugin file and then access your cPanel to open the file manager.
You could also utilize an FTP client; however, going through would require setting up your server connection. Therefore, simply open your File Manager.

Different hosting providers offer different file managers.
So, you’d see a little difference in your cPanel while following these steps. But, they’re not highly unique, and you’d easily find the right option to complete the process.
Once you access the file manager, open the public_html directory.

Then, go to wp-content → plugins.
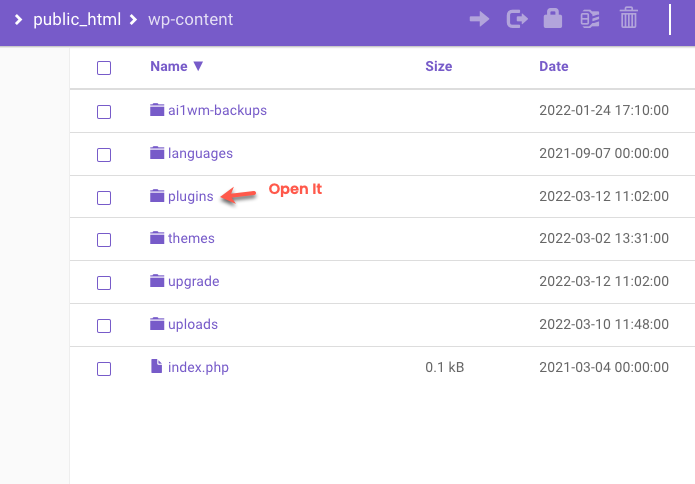
Now, inside the plugins directory, you need to upload WooCommerce files. However, don’t upload the zip; instead, upload a folder titled woocommerce containing all the files.
Look at the below screenshot to have an idea.
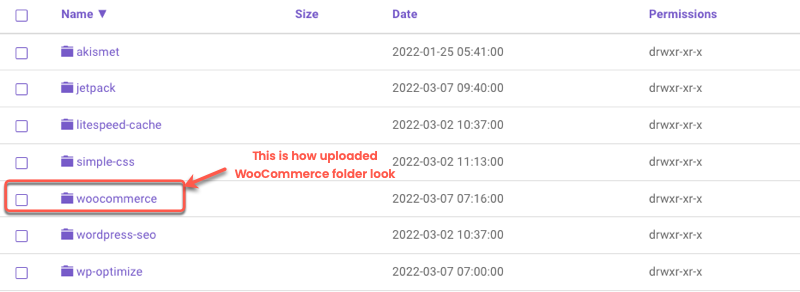
You’ve added the plugin; now it’s time to activate. Go to, Plugins → Installed Plugins -> scroll down till you find WooCommerce, and click Activate.

Once activated the plugin, you already know what to do next.
How to Uninstall WooCommerce
If you’ve installed WooCommerce and completed the setup, then there will be rare chances that you’d need to delete it.
Because its ultimate features truly make managing an online store easy and seamless. However, you can deactivate WooCommerce if you don’t need it for a short period of time. Otherwise, follow the below steps,
Go Plugins → Installed Plugins → scroll down till you find WooCommerce → Deactivate.

This will put WooCommerce off your site until you activate it again. And from here, you’ll be able to uninstall it. Simply click the Delete option under the WooCommerce title.

Though, it won’t remove the plugin’s data from your server. And if you want to remove them as well, before you deactivate and delete WooCommerce, you have to open the File Manager again. Then, go to public_html → locate wp-config.php.
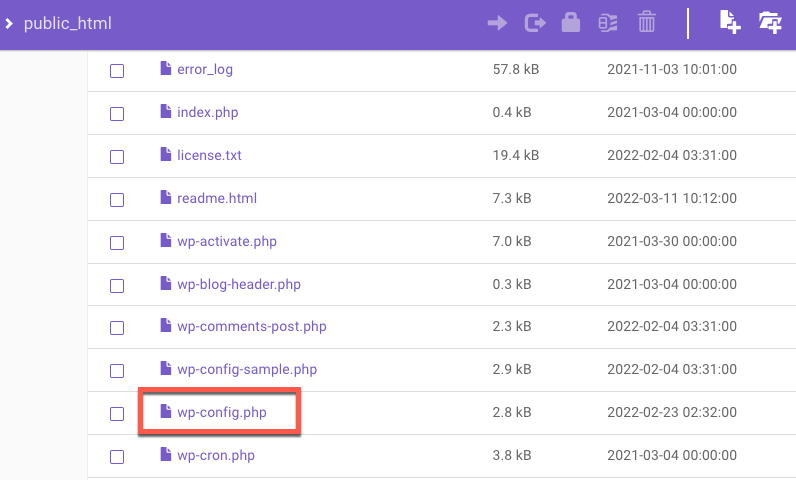
Make sure you download it on your system first, as in case something goes wrong, you could easily revert changes. Once saved a copy, open your wp-config.php file and scroll down until you find the “That’s all, stop editing” comment.
Above that comment, add the following constant,
define( 'WC_REMOVE_ALL_DATA', true );This is how it looks after you add it.
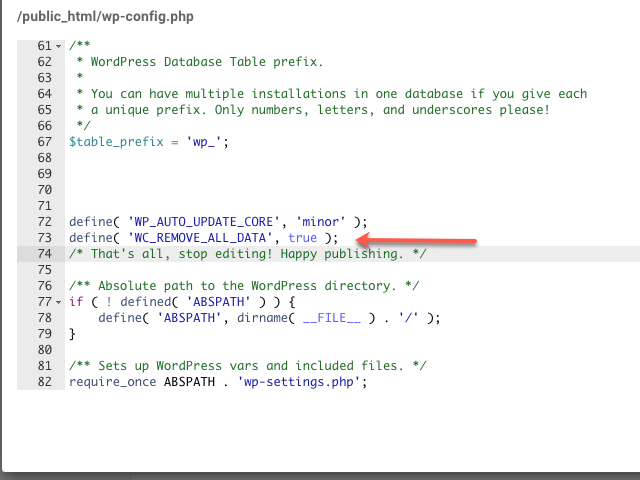
Now, after this, when you deactivate and delete WooCommerce, all of its data from your WordPress site database will be removed.
The Bottom Line
That’s it; this is how you can install and uninstall WooCommerce. We’ve looked at all primary methods that allow us to install WooCommerce on a WordPress site.
We hope this tutorial helped you learn how to install and uninstall WooCommerce easily. If you haven’t followed the steps yet, make sure you follow each step carefully, and before making any changes, create a backup if you’re following the 2nd or 3rd method.
In most cases, backup’s not necessary; however, having a safe side never creates trouble.

0 Comments