Before you add products to your WooCommerce shop, it’s essential that you configure the product settings first. So, when users arrive at your online store, they don’t find any trouble exploring the products and can make purchases easily.
If you’re looking to configure WooCommerce product settings, then this tutorial will help you do that effortlessly. You won’t miss anything, and all of the settings of your products will be configured right.
That’s it; let’s start the configuration process.
WooCommerce Product Configuration
Follow the below steps one by one, and in no time, you’ll configure your store’s product in the proper manner.
Step 1 – Open WooCommerce Products Settings
After successfully installing the WooCommerce plugin and completing the Setup Wizard, you find new menu items in the WordPress dashboard,
- WooCommerce,
- Products,
- Analytics,
- And Marketing.
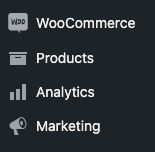
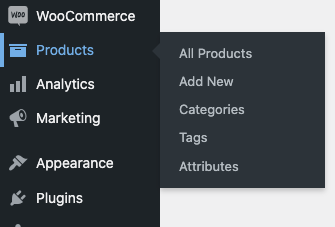
Each menu item allows you to perform different customizations to your WooCommerce store. For example, Products include options to add products, view all products, categories, tags, and attributes.
Like Analytics and Marketing settings provide you with different options to enhance the WooCommerce store’s functionality. However, for this tutorial, we don’t have to involve with them. Therefore, simply go to the WooCommerce → Settings.

And it will open the following window with multiple options.
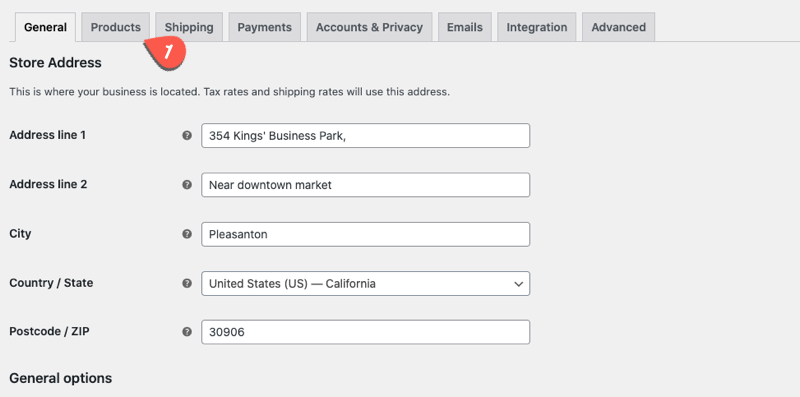
From here, click Products to access WooCommerce products settings.
The WooCommerce Products settings further contain the options that are General, Inventory, Downloadable Products, and Advanced.
The next will guide us to configure the General settings, first, and then subsequent steps help us configure other settings.
Step 2 – Configure Products General Settings
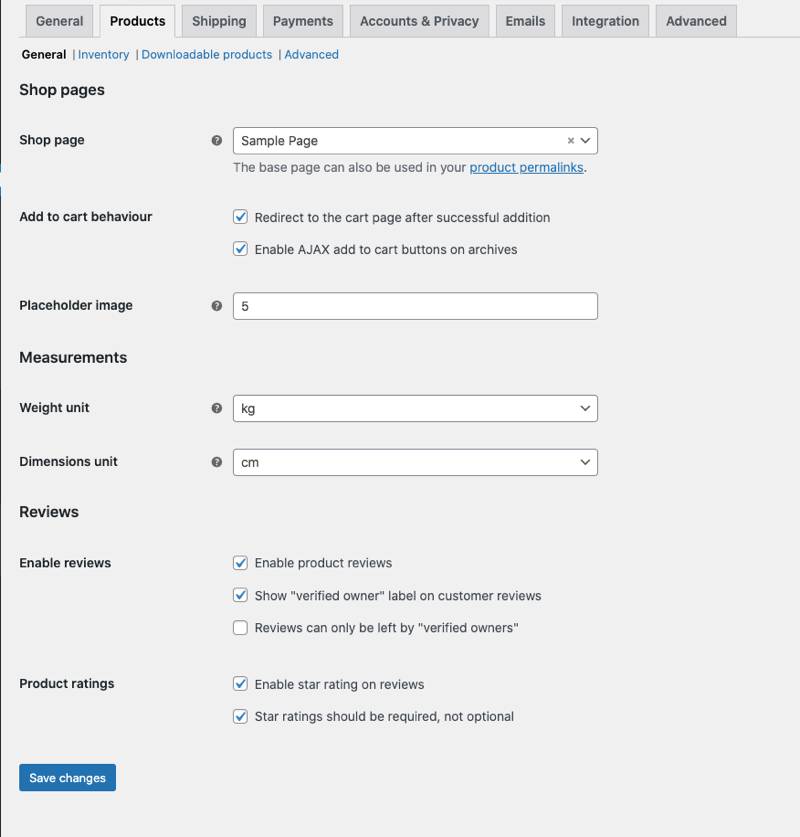
The General tab of the Products settings allows us to apply customizations under three areas that are Shop pages, Measurements, and Reviews.
Shop pages
Under Shop pages, we’ve got three options to configure products: Shop page, Add to cart behavior, and Placeholder image. Using the Shop page option, you set which page of your store should behave like the store’s shop page — the main page to display all of the products.
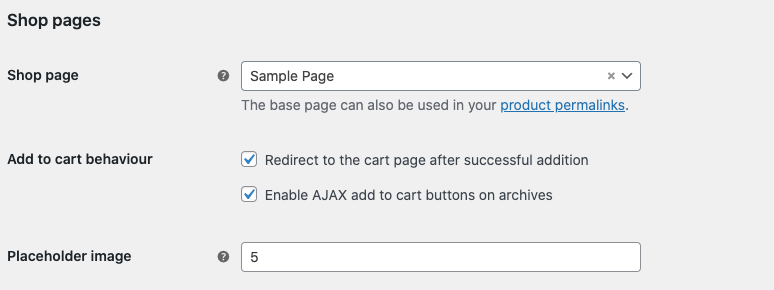
If you’ve created a custom page, you can select that; otherwise, WooCommerce by default creates a shop page to help you set up the store faster. Once you’ve chosen the shop page, you can utilize the next option, Add to cart behavior.

It offers two options,
- Redirect to the cart page after successful addition
- Enable AJAX add to cart buttons on archives
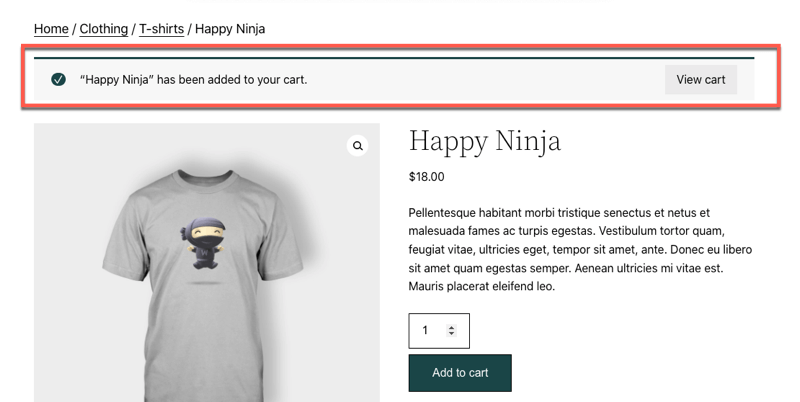
Using the first, you can redirect users to the cart page when they add a particular product. They won’t see any WooCommerce notification that informs them that their selection has been added to the cart, which they usually see right on the page like the following.
The second option lets you display the Add to cart button with AJAX on archive pages. If you enable this, your products archives such categories and tags would have the Add to cart button with AJAX.
Now the third option the Shop pages section has is the Placeholder image.

Using this particular option, you can apply a default image for the products that don’t have any dedicated image. Simply add an image URL, and you’re good to go.
Measurements
The Measurements section allows you to change the product’s Weight and Dimensions unit.
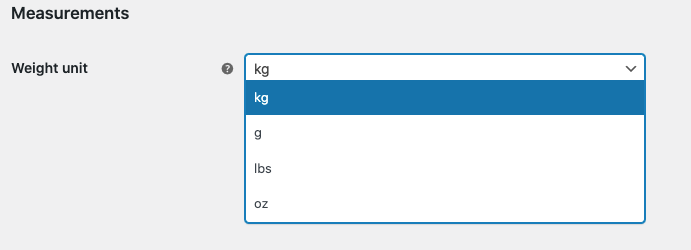
You can select the Weight Unit as kg, g, lbs, and oz. While the Dimensions Unit lets you set products dimensions as cm, m, mm, in, yd.

Reviews
We get the Reviews section on moving downwards, which consists of multiple options to configure reviews for WooCommerce product(s).
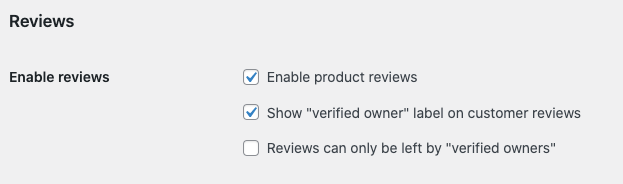
Here, you can enable product reviews, verified owner labels, and limit reviews to only verified customers.
Further, you can also decide whether customers can leave a review on product pages or not. With that, it also provides you with the option to make reviews compulsory.
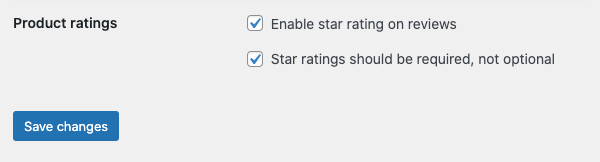
Once applied the changes, click Save Changes and switch the settings tab to inventory.
You can also use Wishlist for WooCommerce plugin to allow users save their favorite products.
Step 3 – Configure WooCommerce Products Inventory
The Inventory tab of WooCommerce Products settings includes multiple options to enhance the store’s product management.
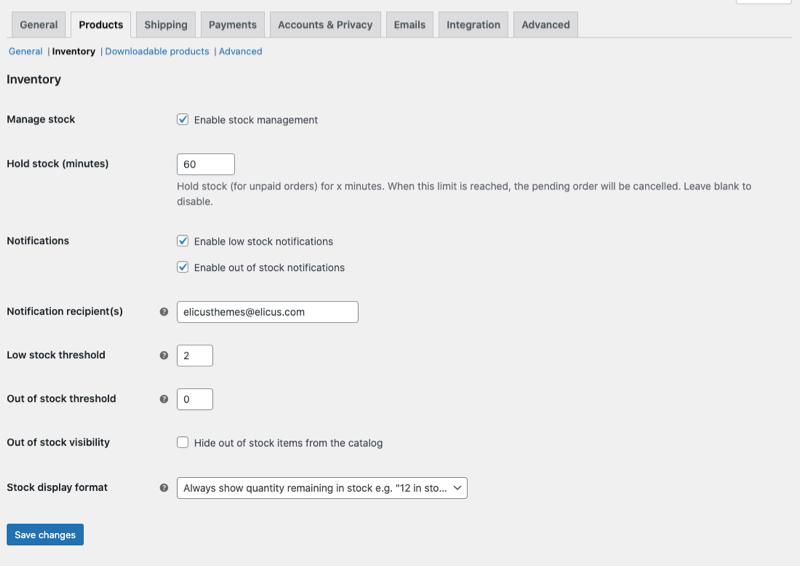
Here, you can configure whether to enable or disable the stock management for WooCommerce products. If you choose to enable it, you get options like Hold stock, Notifications, Notifications recipient(s), Low stock threshold, and out of stock threshold.
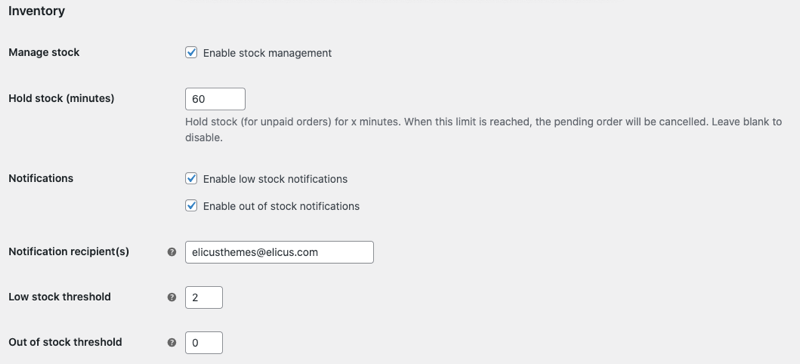
Hold stock – It allows you to minus products from stock per customers order quantity for unpaid orders for a particular period. For example, if you set 60, then it will not display a certain number of products for 60 minutes.
Notifications – It consists of two options that allow you to enable notifications for low and out of stock products.
Notification recipient(s) – Here, you can set who’ll receive the notification email.
Low stock threshold – It allows you to set the minimum number for low stock when you should receive a notification.
Out of stock threshold – Likewise, Low stock threshold, you can set out of the stock threshold number to receive a notification.

In addition to the stock management options, the Inventory tab also includes Out of stock visibility and Stock display format options.
Out of stock – Here, you can choose whether to keep out of stock products displayed or not.

Stock display format options – Using this, you can set stock display format as
- Always show quantity remaining in stock, e.g., “12 in stock.”
- Only show quantity remaining in stock when low, e.g., “Only 2 left
- Never show quantity remaining in stock
Per your requirements, apply the changes and click Save changes. Then, move to the next step.
Step 4 – Configure WooCommerce Products for Downloadable
If you’re offering downloadable products, then Downloadable products settings are of great use. Here, you get options like File download method, Access restriction, and Filename.
File download method
Using the File download method, you can configure the store to provide customers the file under 3 methods,
- Force downloads
- X-Accel-Redirect/X-Sendfile
- Redirect only (insecure)
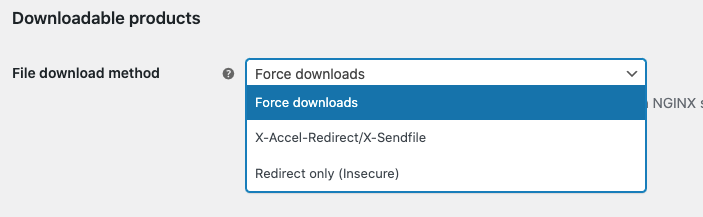
Further, you configure the store to use redirect mode as the last option if the Force downloads and X-Accel-Redirect/X-Sendfile doesn’t work.
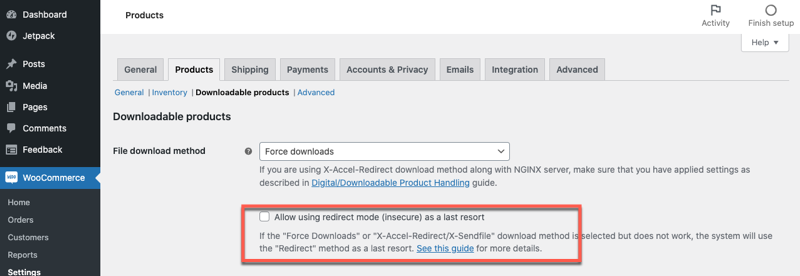
When you choose your download method, it’s recommended that you should go with Force downloads. However, you should follow the WooCommerce guide to Digital/Downloadable Product Handling for the lateral.
Access restriction

In this particular products settings, you define whether customers can download the file after login or not. Further, you can also enable/disable the option to Grant access to downloadable products after payment.
Filename

Here, you can choose to apply a string value to the file’s name for security purposes. By default, it’s enabled, and if you don’t want that, simply uncheck Append a unique string to filename for security.
Likewise, previous step, once satisfied with your customizations, click Save Changes and move to the next step.
Step 5 – Advanced WooCommerce Products Settings
In this particular tab of the WooCommerce products settings, you get options to enable table usage and direct updates.
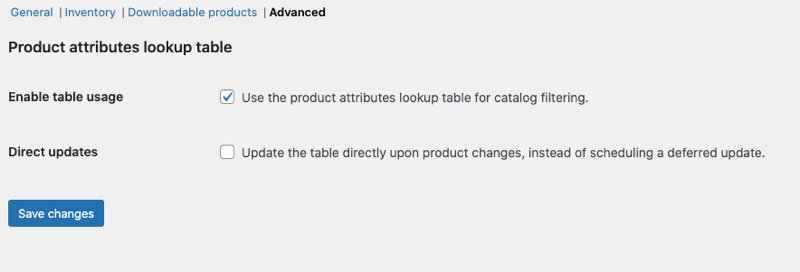
If you want your WooCommerce store to comply with these, you can choose to keep them enabled; otherwise, uncheck the options.
After configuring these options, simply click Save Changes, and you’re done with your WooCommerce Products configuration. You can also customize the checkout fields as per your requirement using CheckOut Manager for WooCommerce plugin.
Wrapping Up
As we followed the above steps, it’s clear that configuring WooCommerce products settings is easy and takes only a few minutes. Whether you’re a beginner or advanced user, understanding these settings is not a tough task.
Once started, you’ll find yourself more than an experienced user. We hope this tutorial helped you set your store’s product settings in the same way you wanted. When you apply these changes, make sure every time you click the Save Changes button; otherwise, it could become a tedious task to apply those changes again.
Because there’s no autosave capability, you have to be cautious. Nevertheless, for other outstanding features WooCommerce provides, clicking a button won’t take much time.
That’s it; have a splendid online business!


0 Comments