Floating image widgets in Elementor can make your website visually interesting by segregating large blocks of text and placing animating images around them. You can draw user’s attention to important content easily using the Floating image WordPress widgets. These help keep the users engaged and give them a realistic content experience.
In this post, we will demonstrate how to add a floating image in Elementor easily using the WPMozo Floating Image Widget. We will also provide an overview of some similar floating widgets that can enhance the overall appearance of your website with floating image effects.
Note: Before starting, make sure you have installed the WPMozo Addons for Elementor plugin.
How to Create a Floating Image using Elementor
Creating an image section that floats using Elementor is not a tedious task and a beginner with basic knowledge of Elementor can create it easily. Let’s explore how to do that.
Open the webpage and edit it using Elementor. Search for the WPMozo Floating Image Widget.
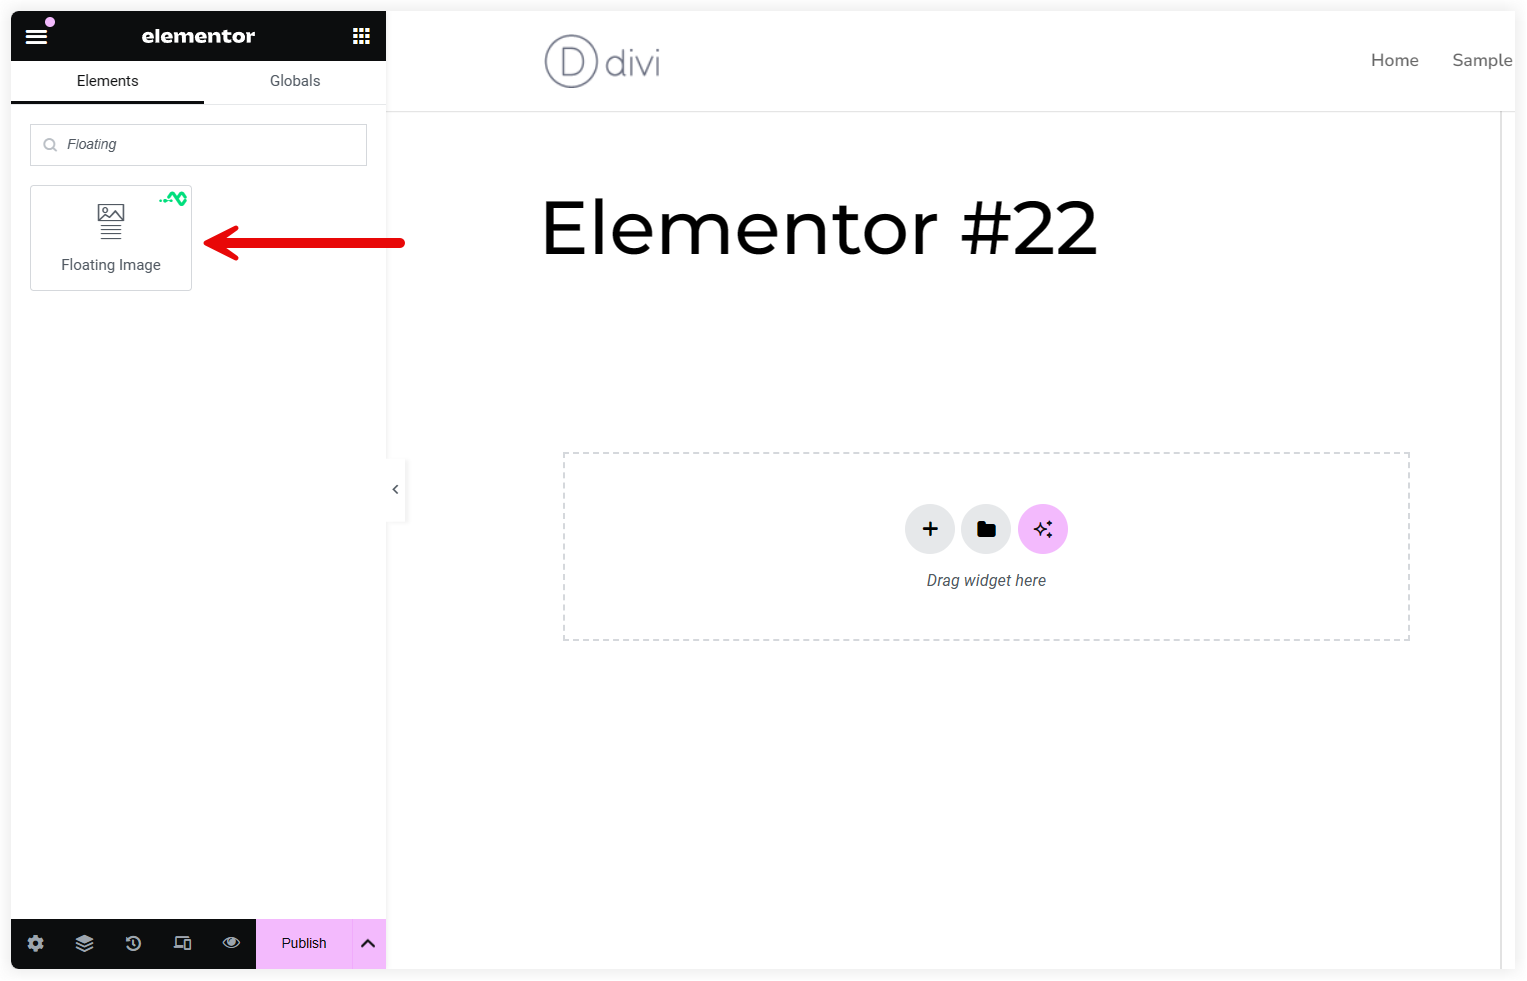
Upload and Position Floating Images
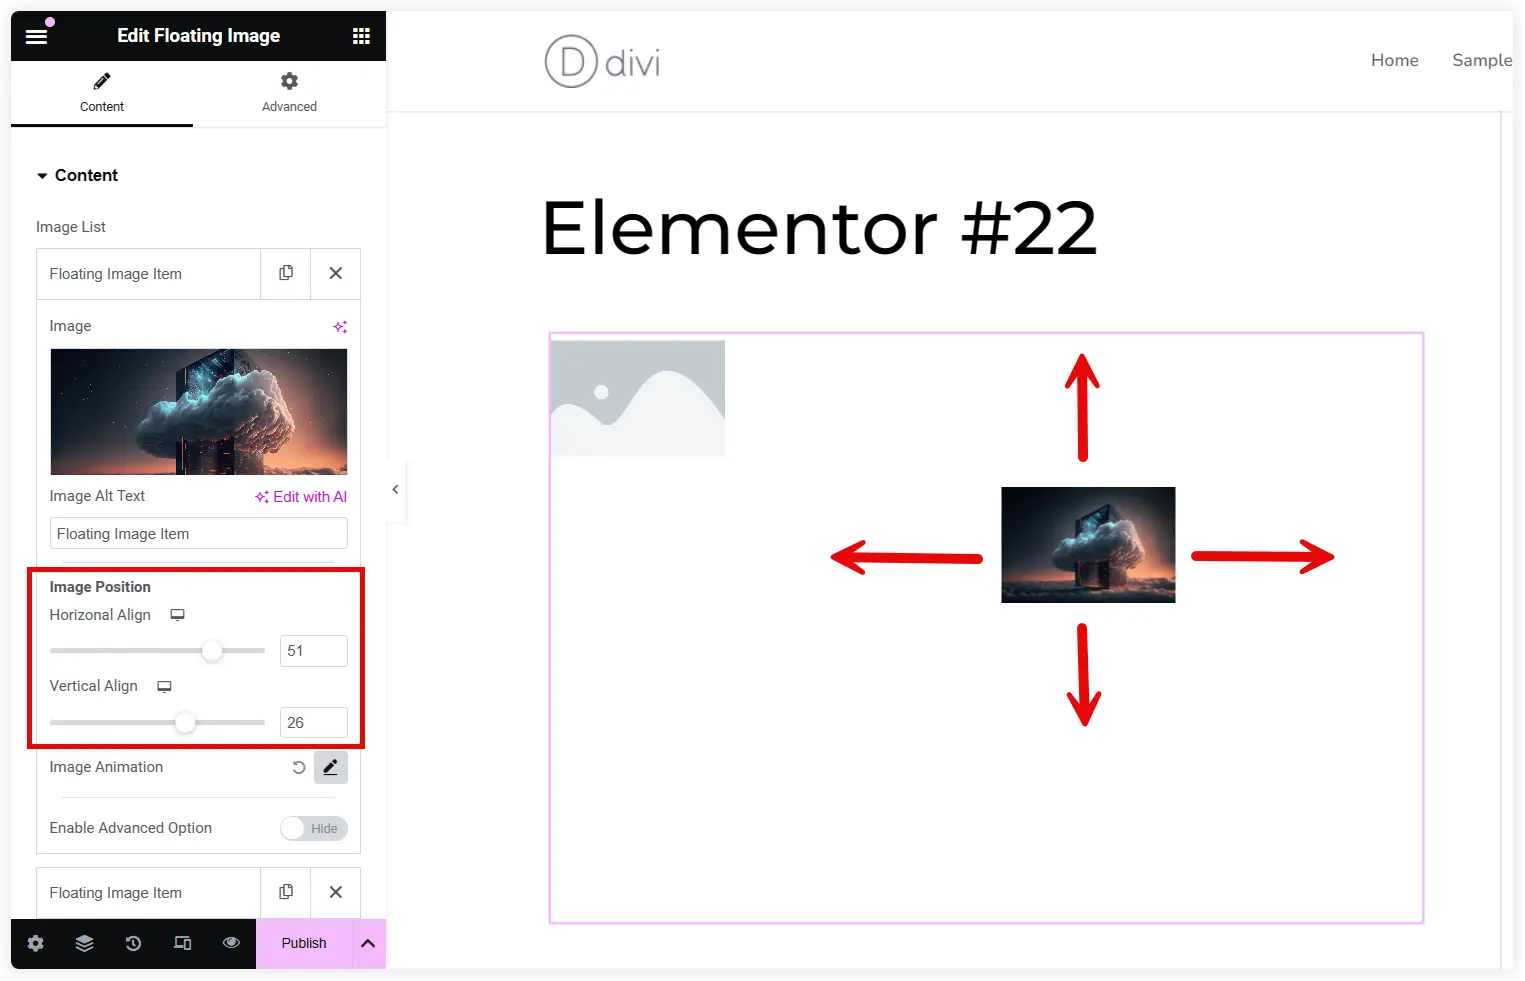
You can see the list of Floating Image Items that you can utilize to create a animated image section. Upload a suitable image to convey vibes of content. Align it horizontally and vertically within the container using Image Position options. Analyze the floating section design you want to create and adjust the position accordingly.
Tune Up the Image Animation Options
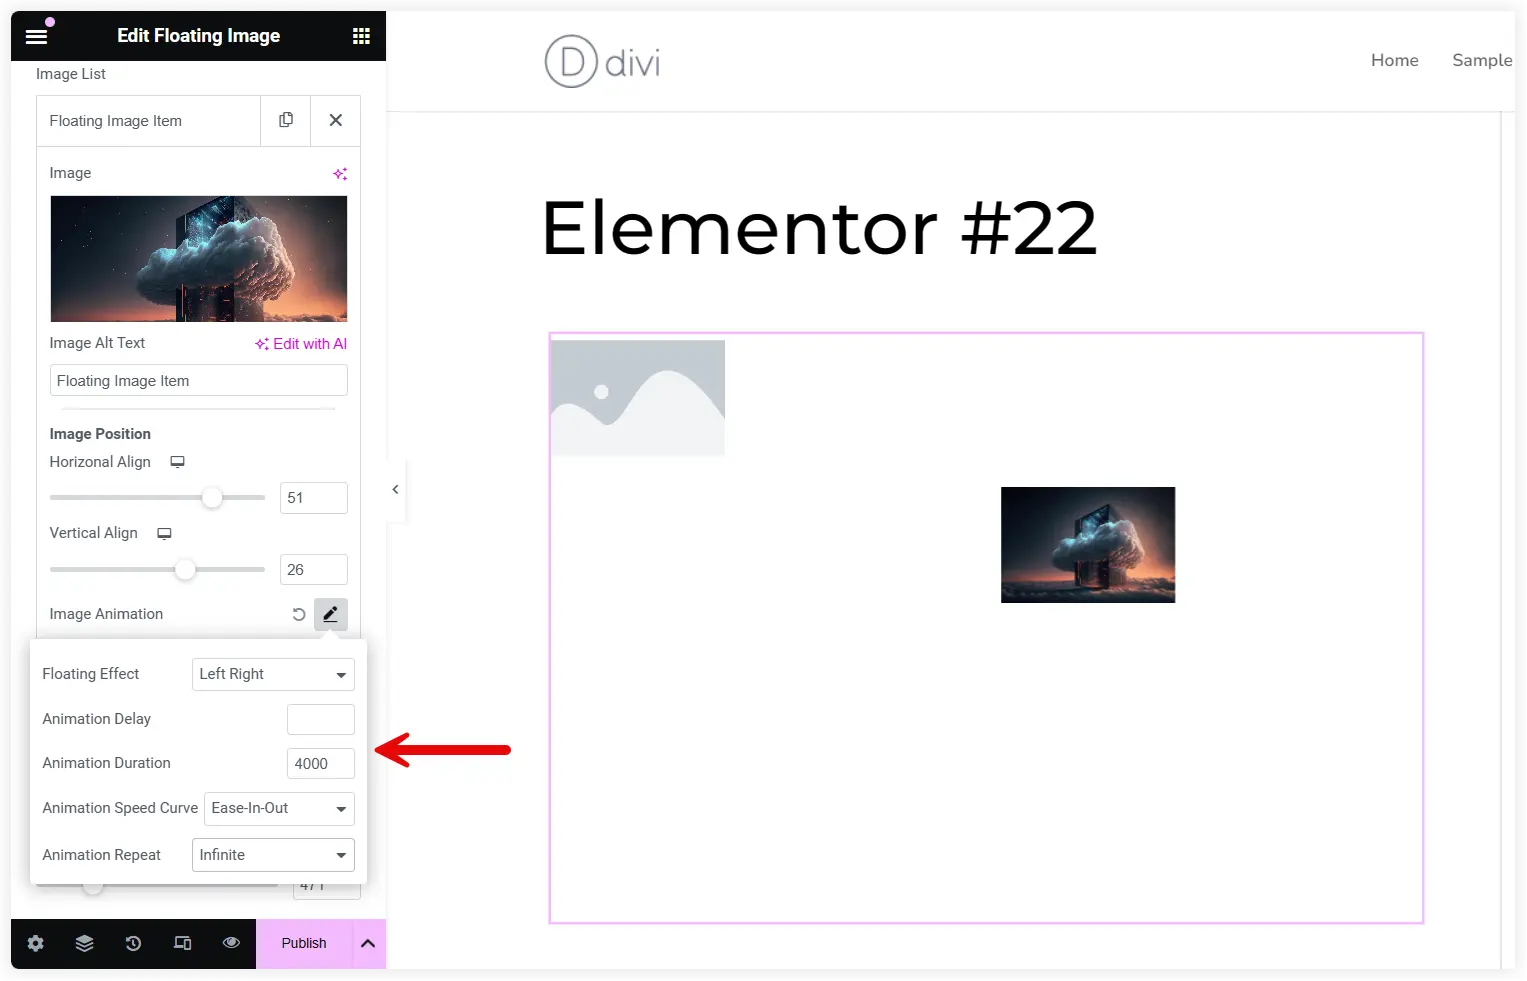
Utilize the Image Animation options to configure the action of images. The Floating Effect allows you to move the image in a left-right or up-down direction delivering an eye-catching experience to visitors.
Tune up the Animation Delay and Animation Duration to control the floating movement of the image. Animation Speed Curve will let you choose the animation pattern. Keep the Animation Repeat ‘Infinite’ to continuously display the floating effects.
Configure the Advanced Options
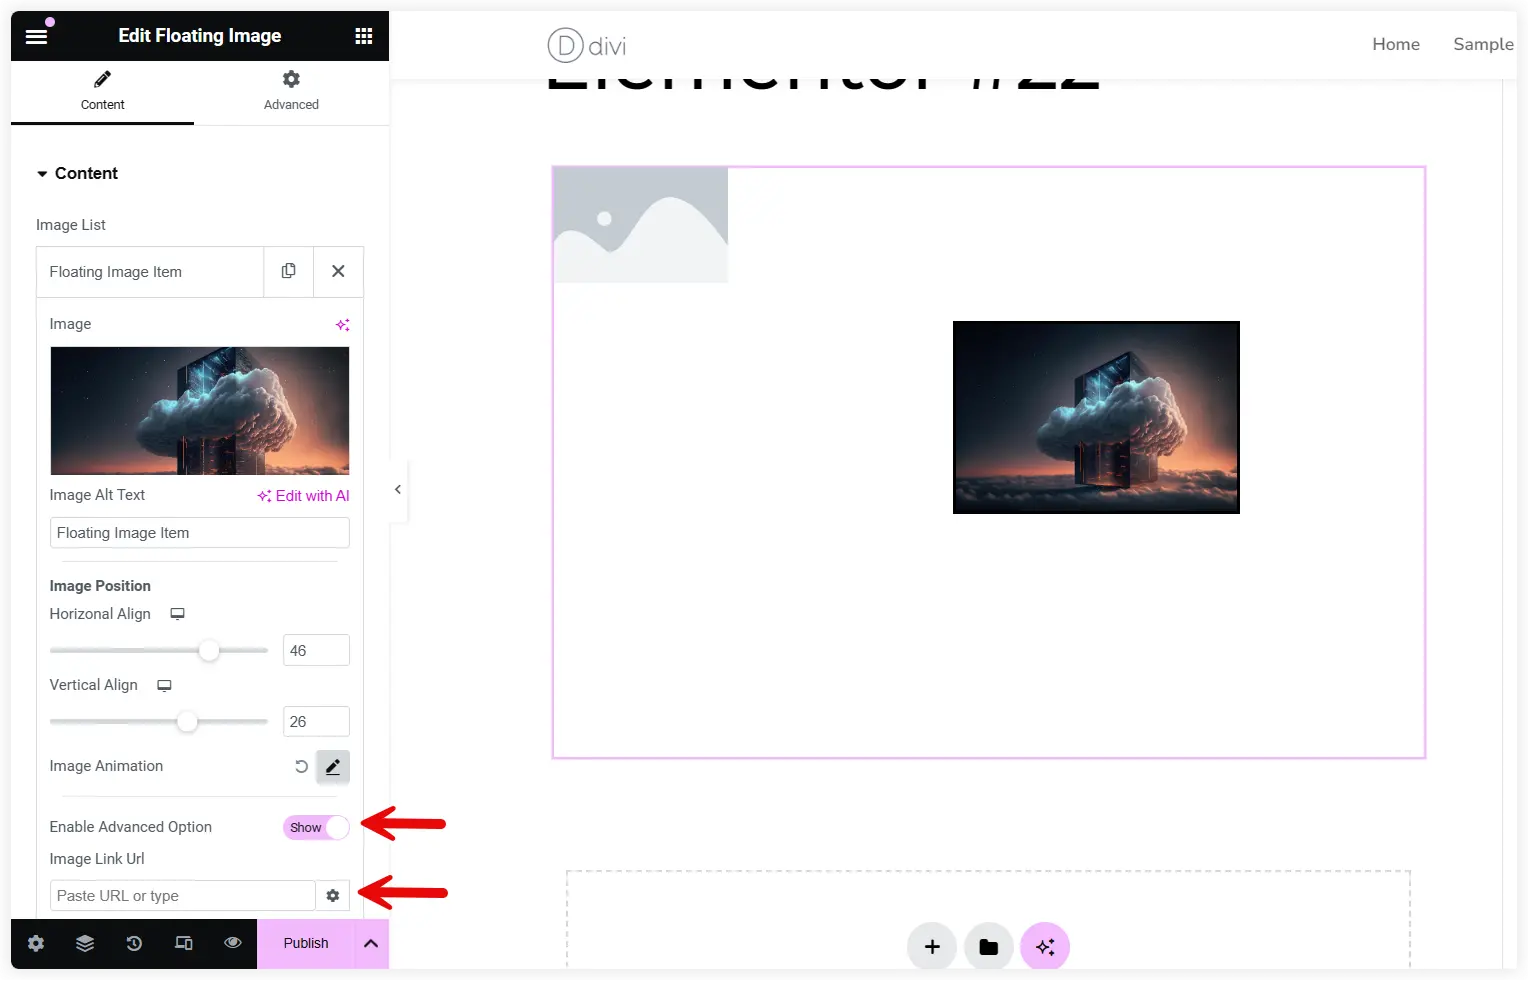
The Advanced Options of this widget will let you customize your floating image section in detail. Paste an Image Link URL if you want to redirect users to any other place.
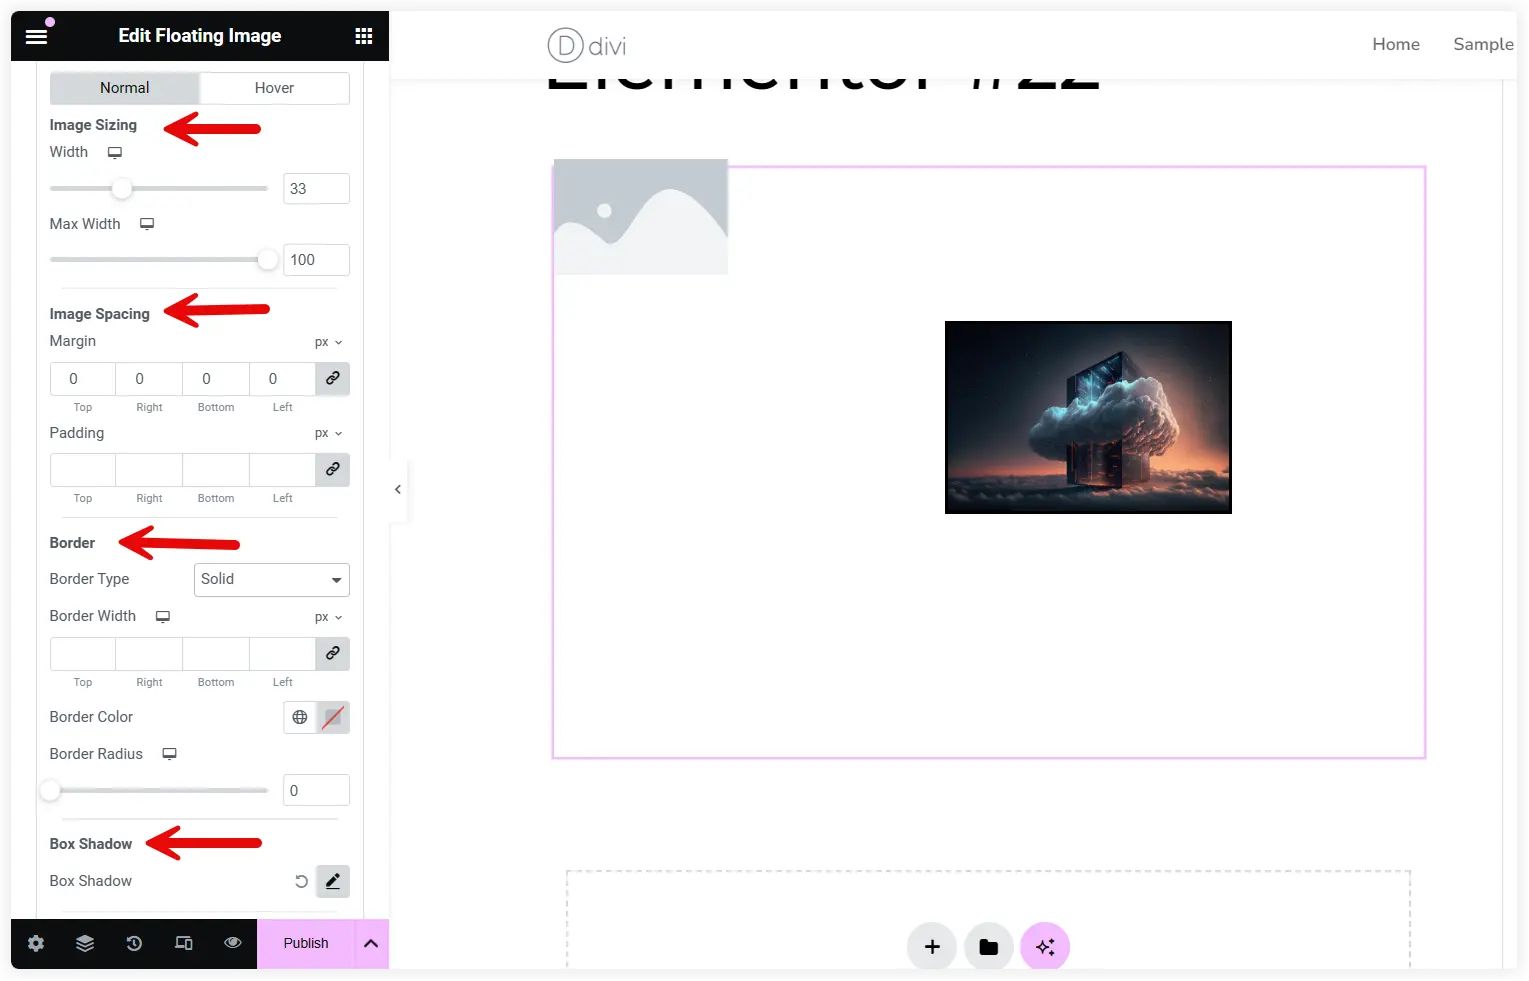
Leave the Background Type for now and proceed to further options. Image Sizing lets you customize the width of the floating image. Image Spacing helps you to display the floating effect clearly by tweaking the margin and padding.
Polish the aesthetics and make it stand out from the surrounding content by applying a border. Apply a Box Shadow and differentiate the image with extended clarity.
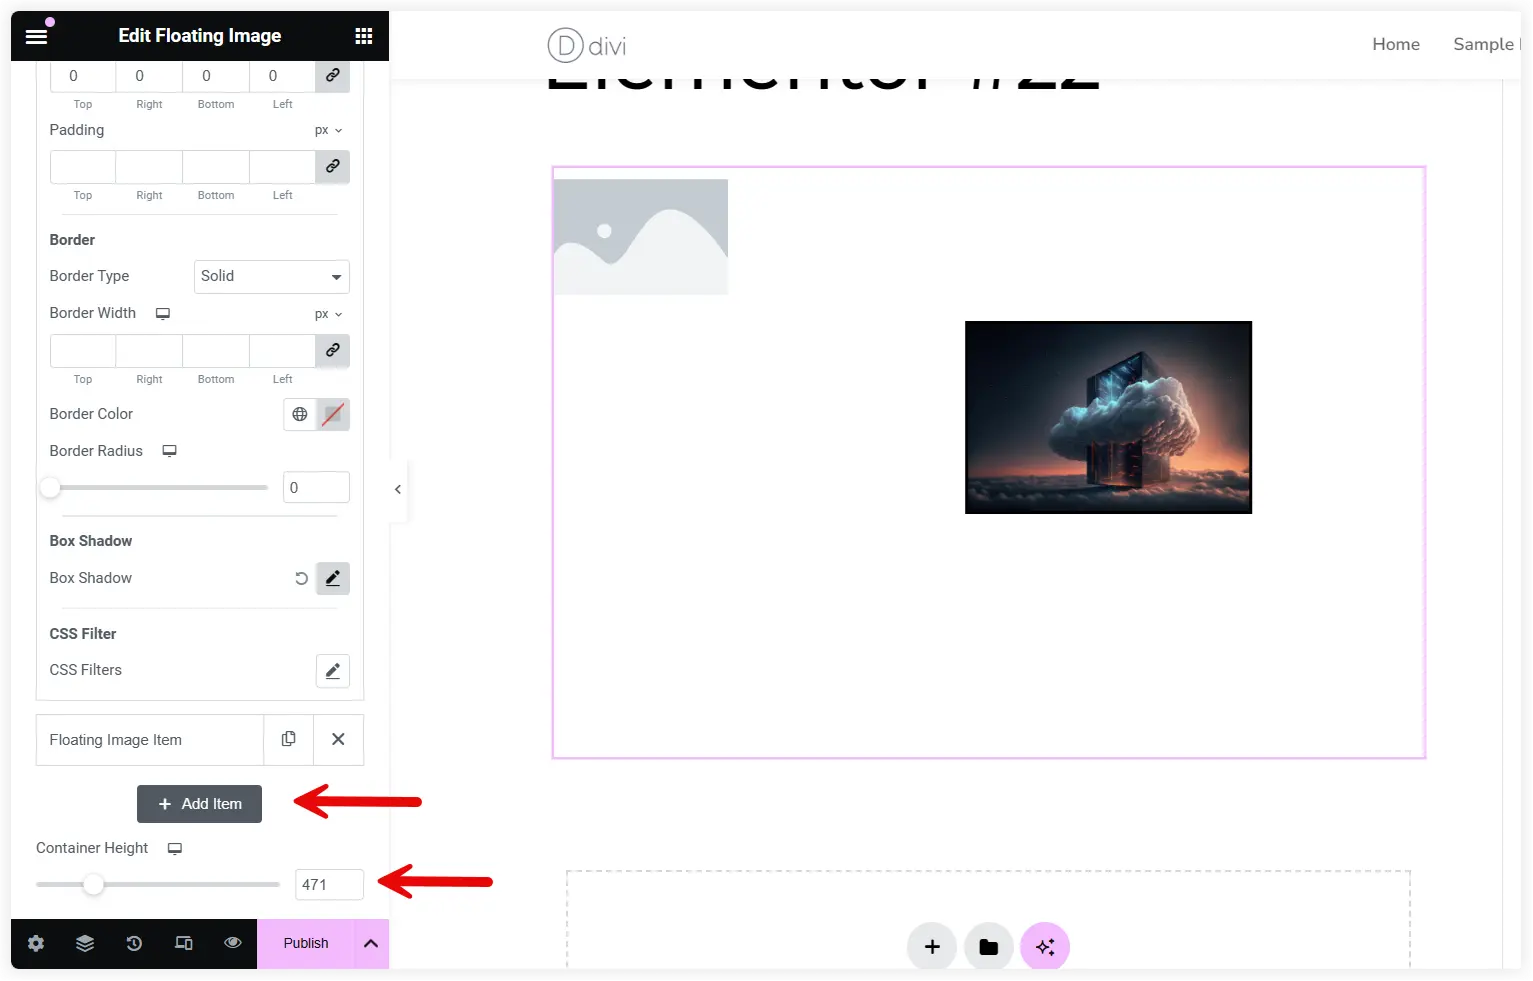
Similarly, you can add more Floating Image Items to introduce more images in this section. Last but not the least is the Container Height of the floating section. Tune it in such a way that accommodated floating content looks superb and amazing.
If you want more creativity, simply use a background image that forms a blended combination with the floating effects to make the overall experience sensational.
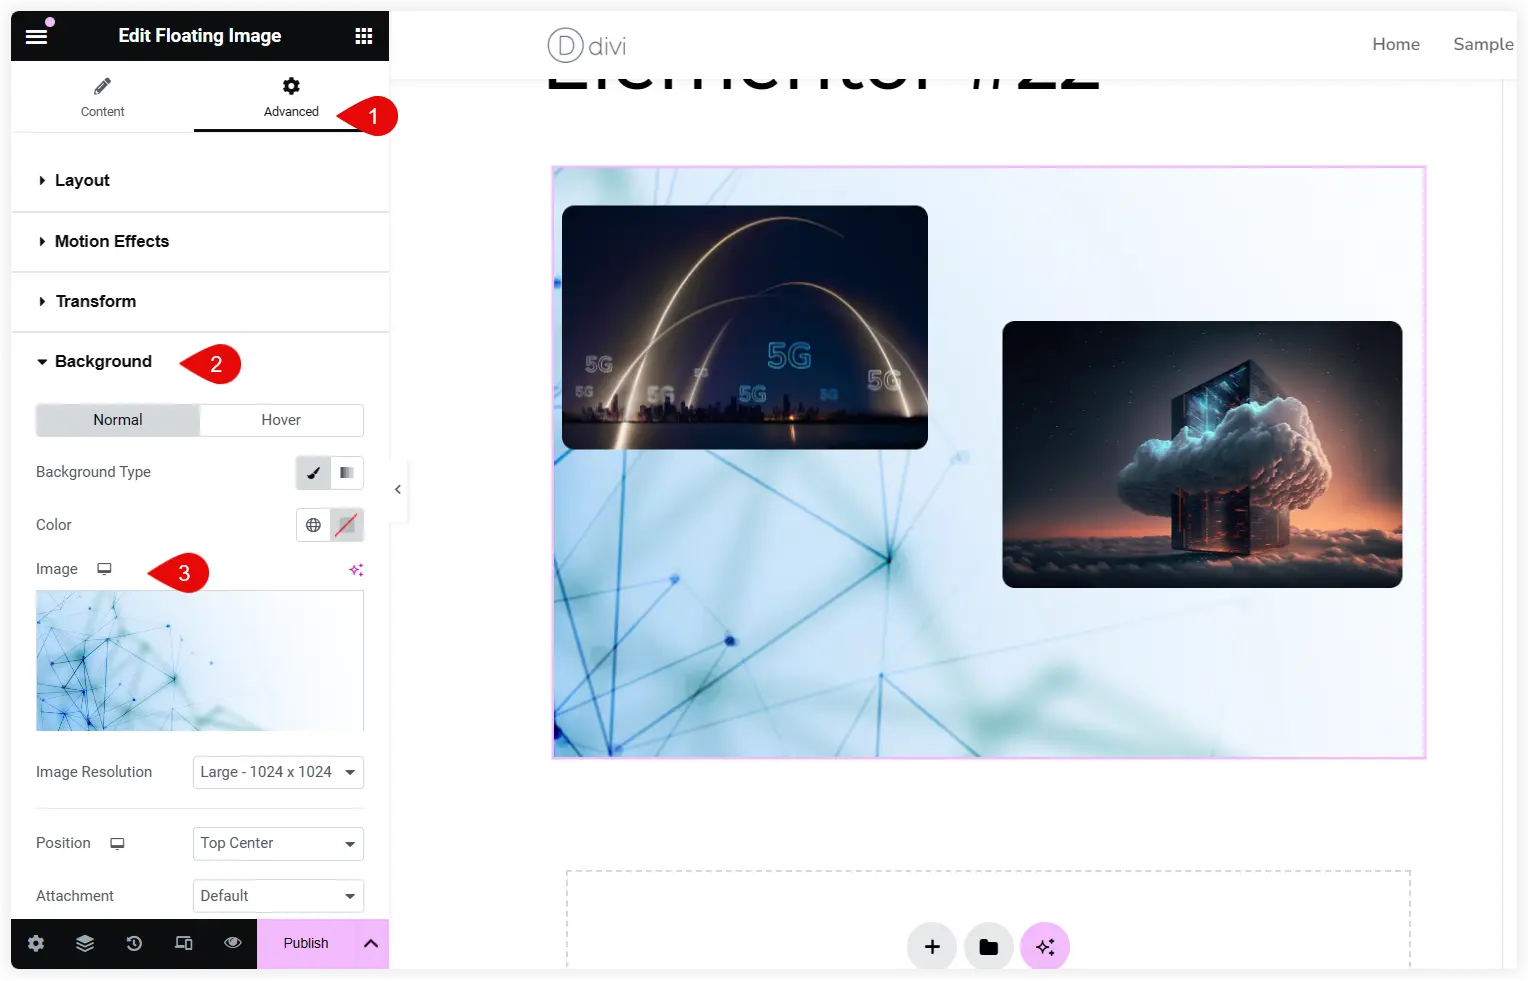
That’s all. See this superbly designed floating image section in the front end.

This dynamic image section is more engaging and communicative as compared to the dumb static images. That’s why it is a great choice and a huge necessity for modern websites to incorporate floating sections.
Design a Fish Aquarium using Elementor Floating Image Widget
If you have a creative thinking and your imagination is beyond limits, you can craft innovative things for your website using floating image widget. Take a look at the below example.
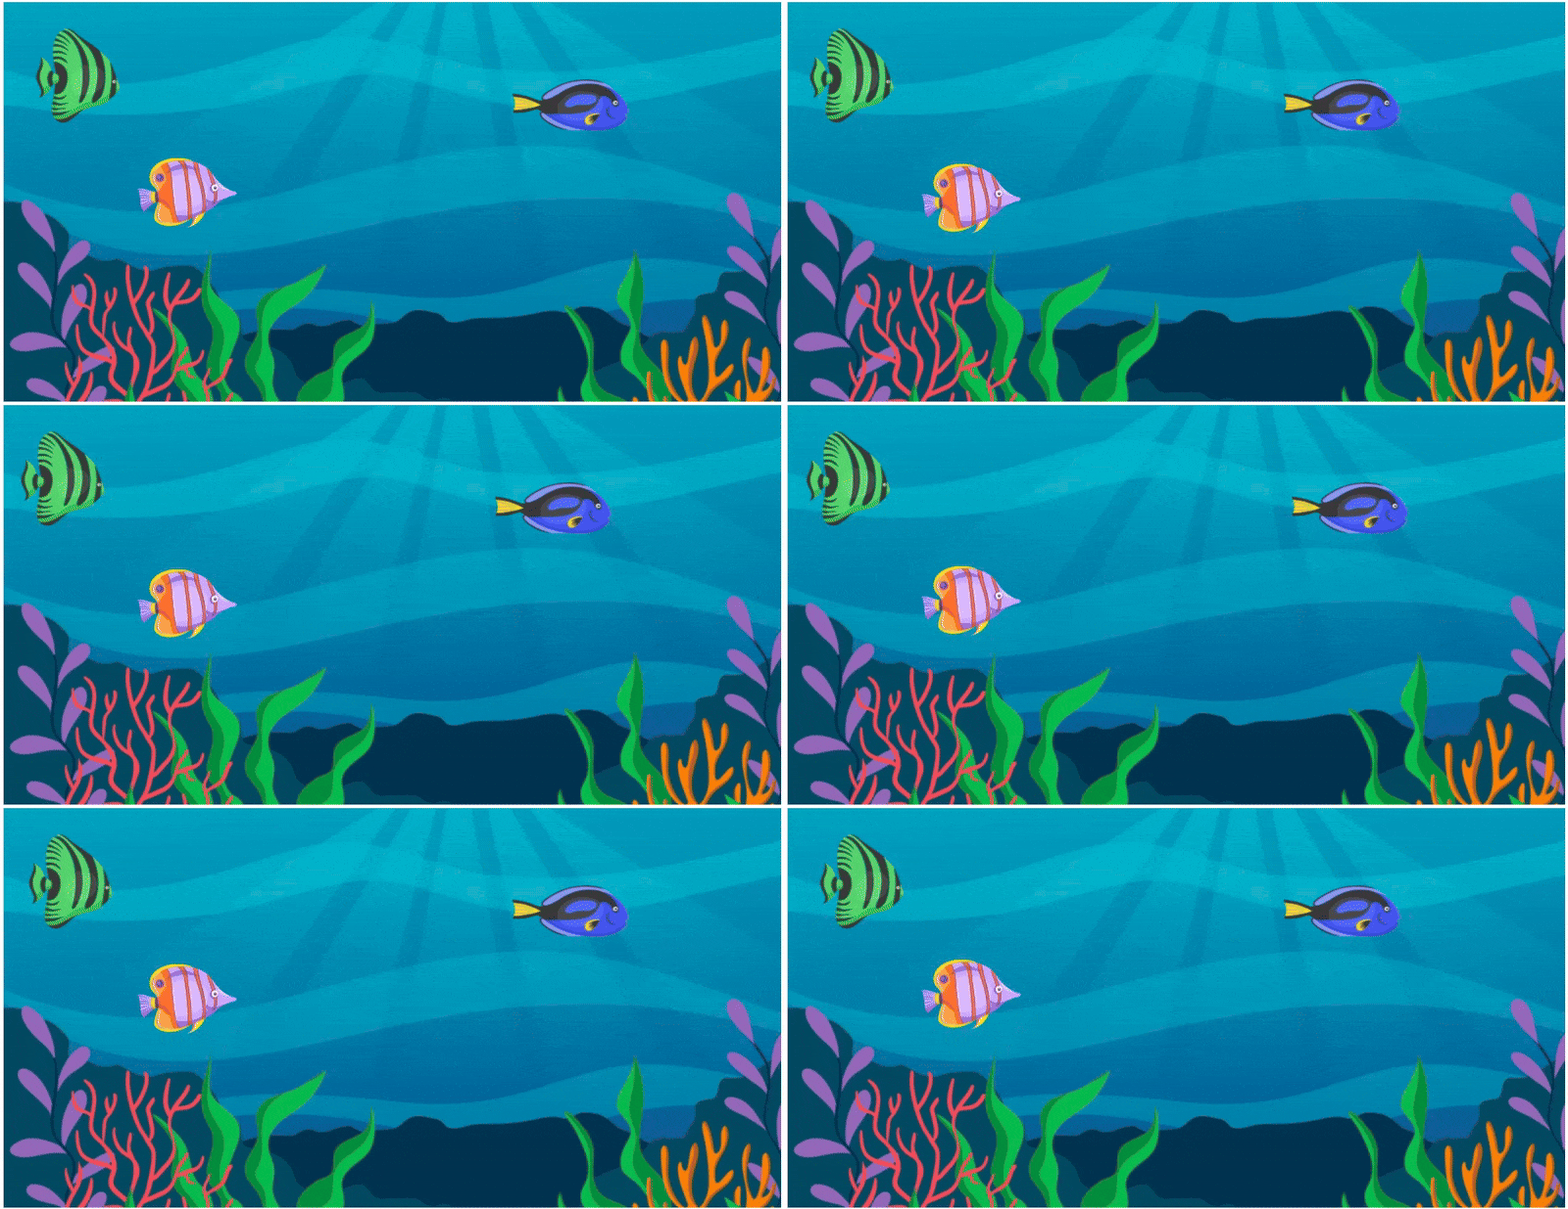
Excited to know how to create this fish tank aquarium using Floating Image Widget for Elementor? Its very easy and you only need to follow some simple steps to create this wonderful design.
1). Get some transparent images of animated fishes.
2). Use these images as Floating Image Items and position these images using Horizontal and Vertical Align.
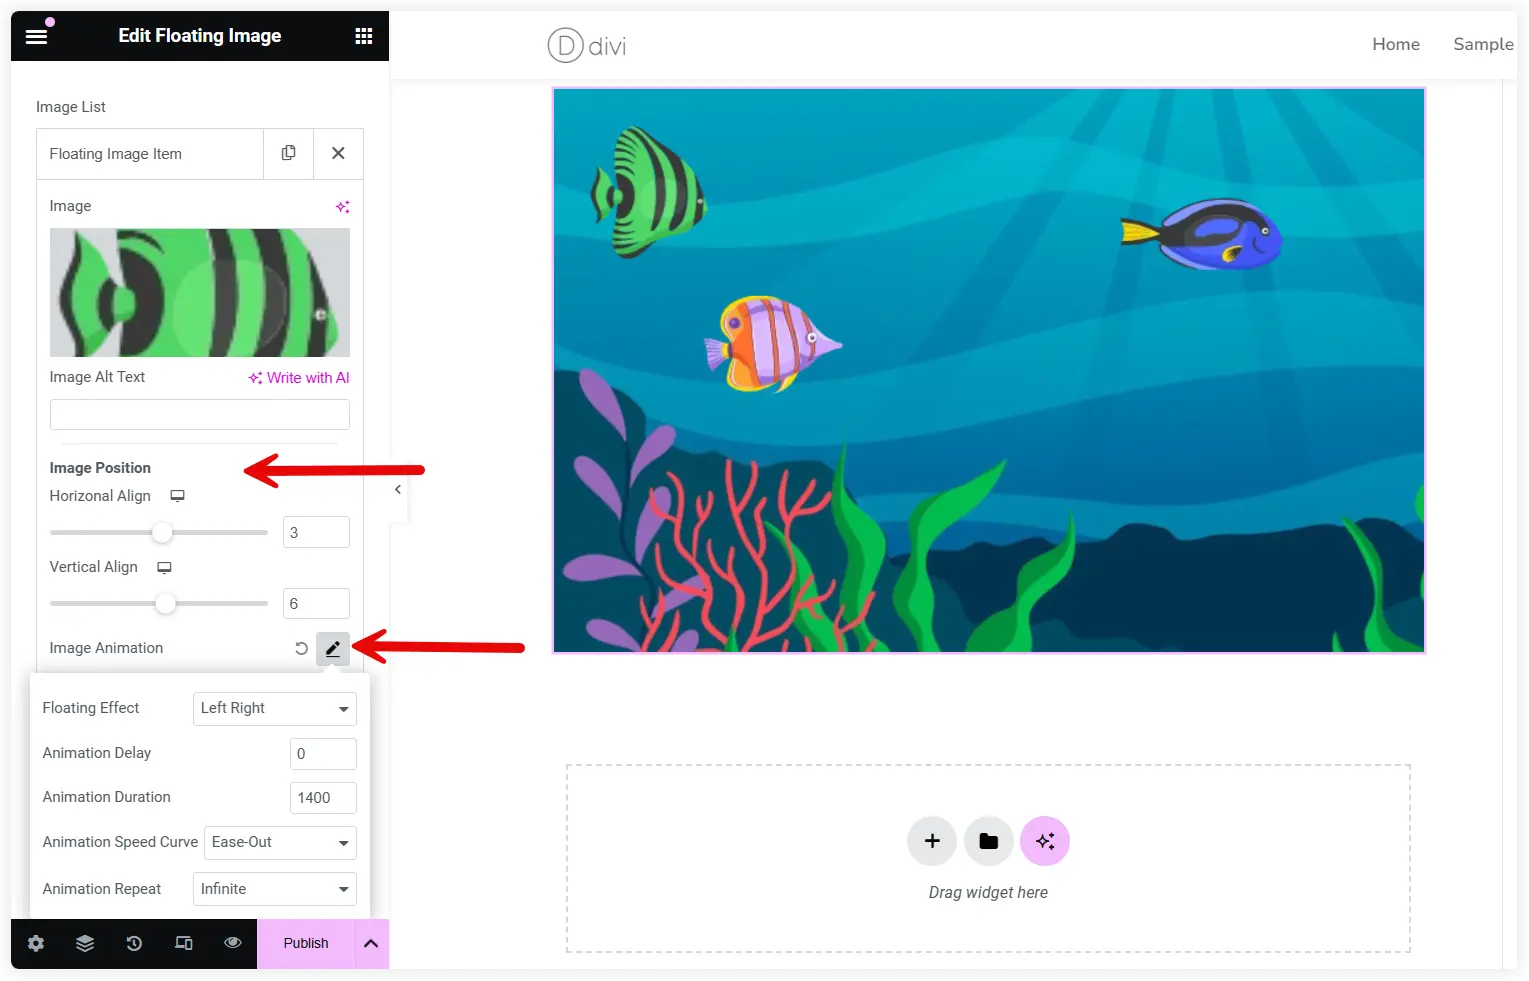
3). Click on the Image Animation and select Floating Effect as Left Right or Up Down for fish images.
4). Bring down the Animation Duration value under 1500.
5). Keep the Animation Speed Curve as Ease-out to visualize realistic motion of fish.
6). Select ‘Infinite’ for Animation Repeat for a continuous floating movement of images.
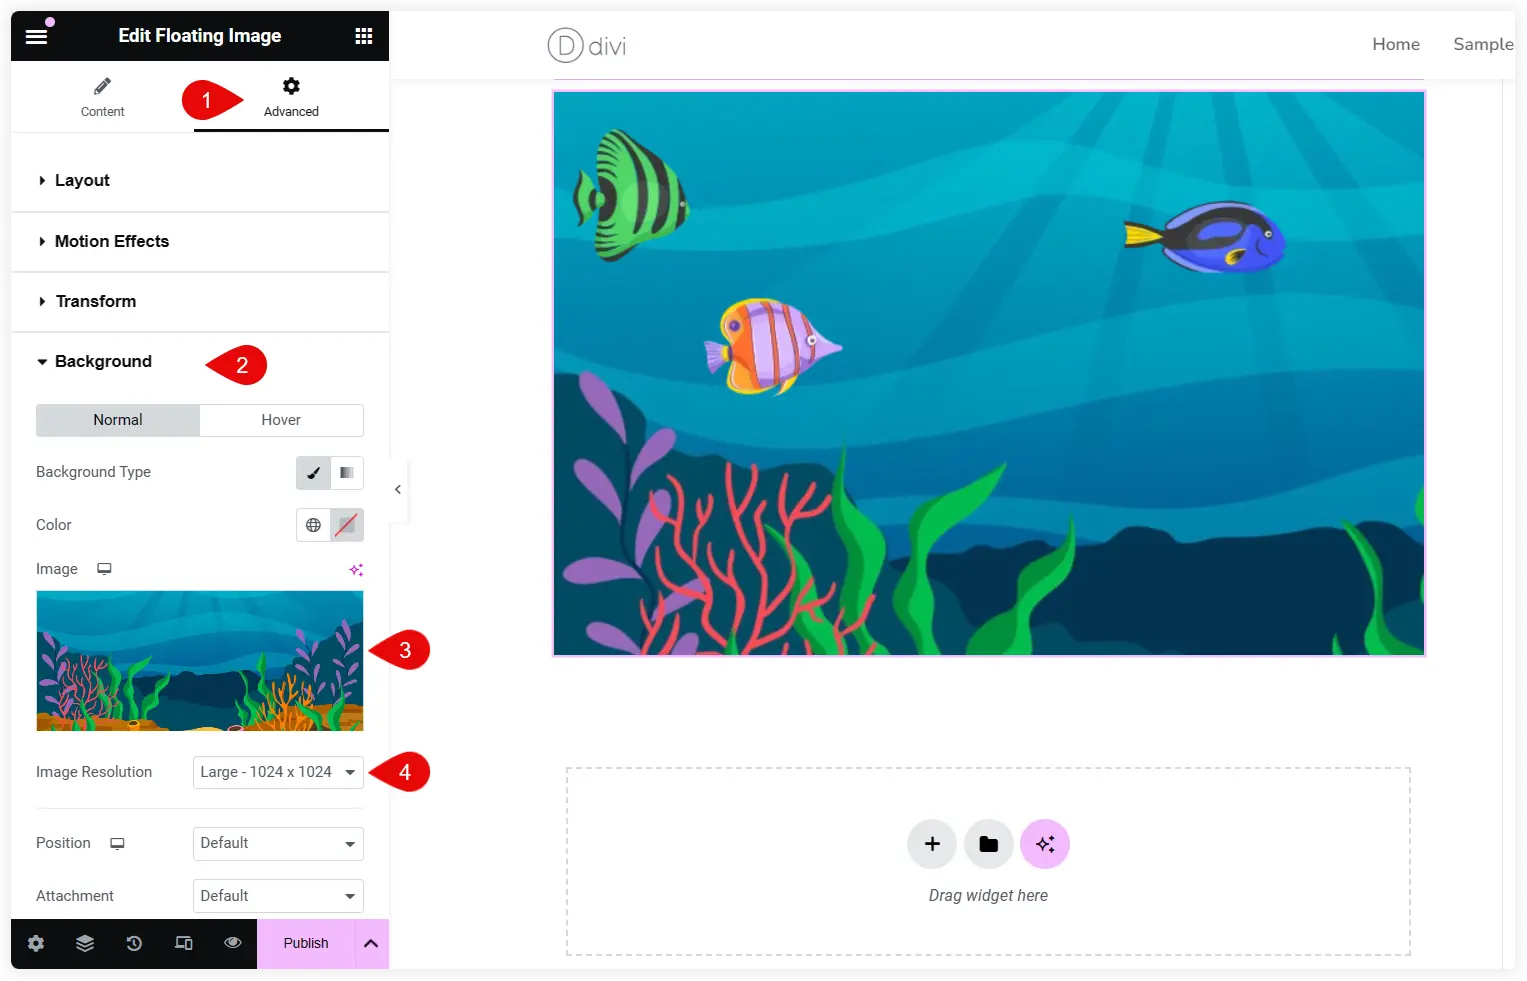
7). Lastly get an underwater background image and upload it using the Background option. Select ‘Large’ Image Resolution to fit it perfectly in the container.
Some More Useful Elementor Floating Widgets
These are some other interactive Elementor Floating widgets that will help to enhance visual interest and add an interactive experience to your WordPress website.
1. Exclusive Addons Floating Widget for Elementor
This Elementor Floating animation widget makes your WordPress website fascinating by crafting unique fancy animated shapes. It provides you with an easy solution to animate elements without messing up with CSS codes. That’s helpful for beginners who want to add animation with floating elements on their websites.
Key Features
- 11+ pre-built default shapes.
- Random floating animated shapes.
- PNG or SVG images.
- Fully customizable design.
- Option to use shapes as section background.
- Completely responsive.
You need to install the pro version of the Exclusive Addons for Elementor plugin.
2. Qi Addons Floating Effect Widget for Elementor
This Elementor floating widget transforms your website with an eye-catching presentation of floating background images. It can be the best choice for photography and portfolio websites to visualize everything engagingly. Online stores can also use this floating widget to showcase their products sensationally.
Key Features
- Place floating background images.
- Use fixed overlays.
- Multiple positions for overlay title.
- Many images can be used with overlay.
- Show text information on hover using item layouts.
- Put links on images.
Purchase the pro version of Qi Addons for Elementor to experience the advanced features of this widget.
The final verdict of this post is that if you want an innovative design to mesmerize visitors with its visual appeal, it can be created with floating image widgets. The dynamic images immediately capture visitor’s attention and increases the average time spent by visitors on a website. Moreover, it emerges as a smart tool to bring your design imagination to reality on your website. There are several plugins that you can use and it completely depends on your design needs. Say bye bye to the conventional passive images and let your website speak with the amazing floating images.


0 Comments