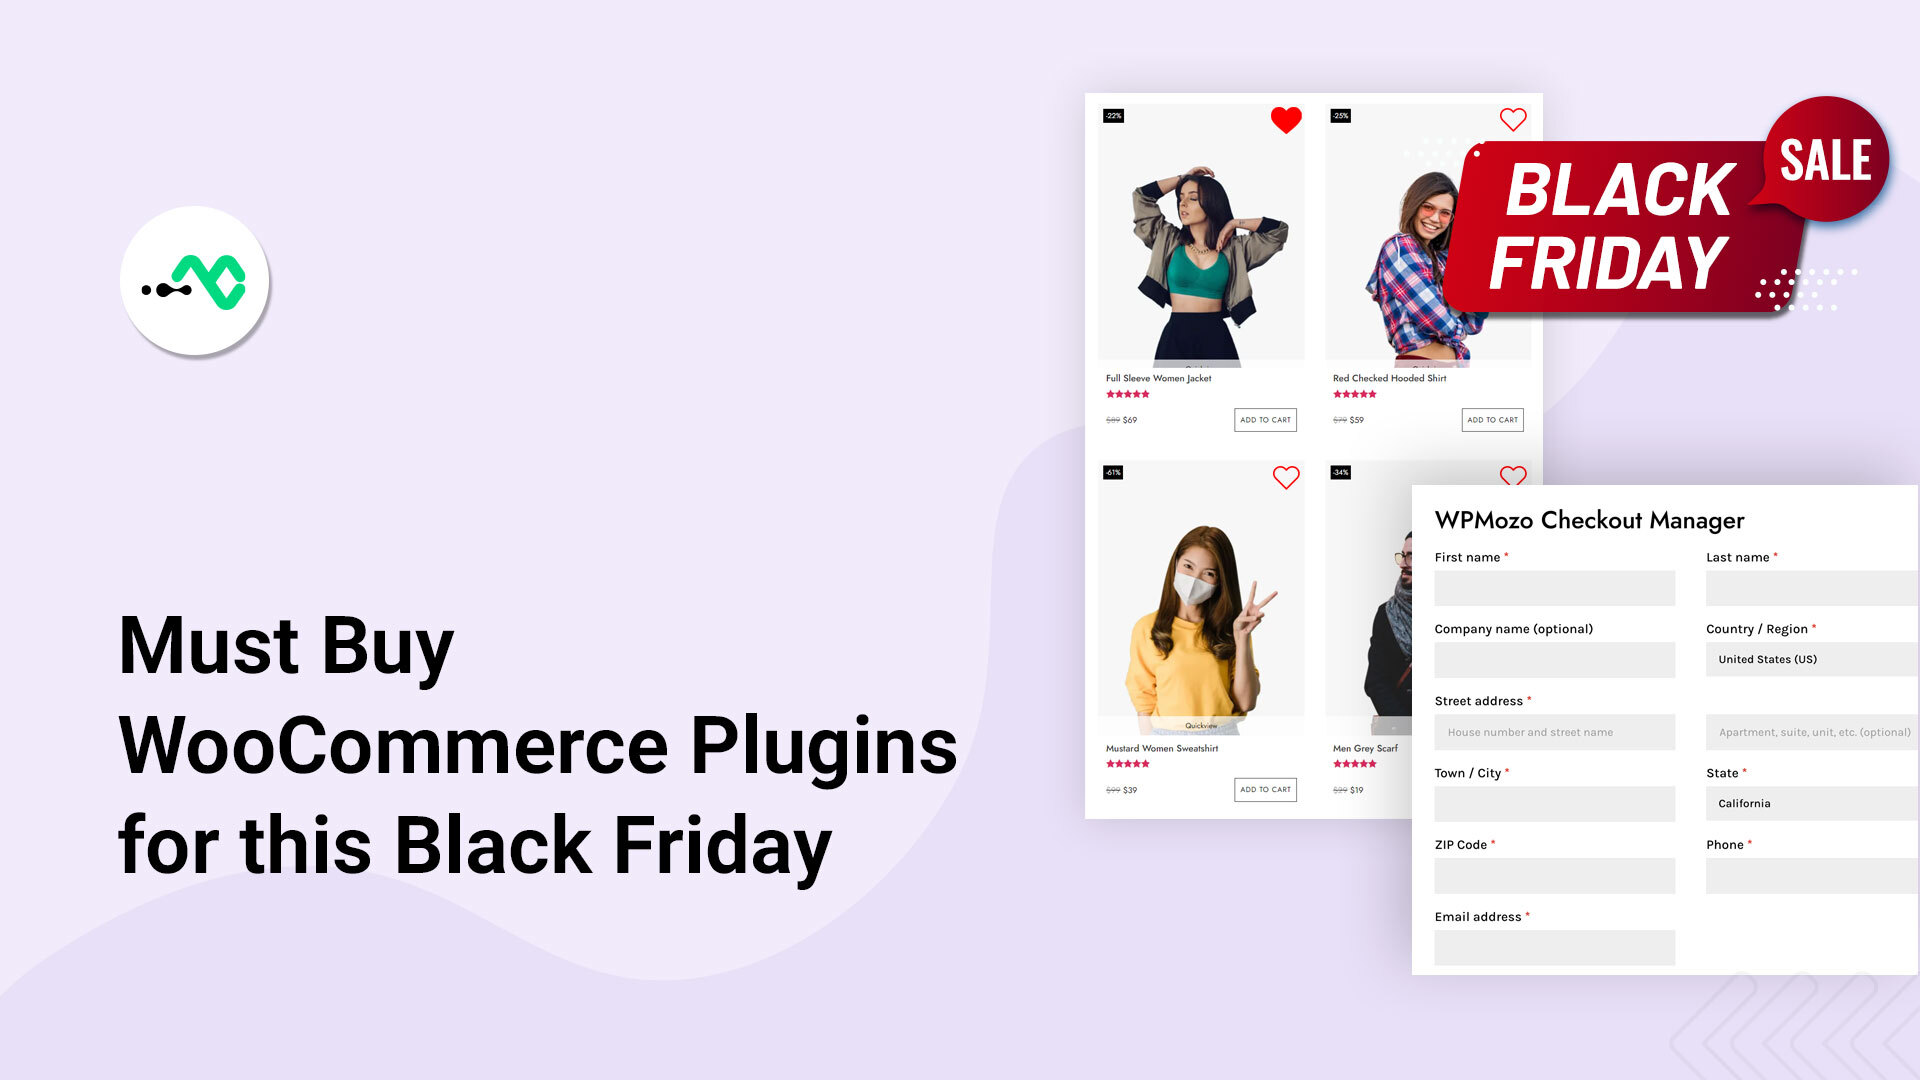
Are you searching for the best useful WooCommerce plugins this Black Friday to upgrade your WordPress website? Your search ends up here. Turn this Black Friday memorable with outstanding WooCommerce Plugins by WPMozo. Get these useful WooCommerce plugins on WPMozo at a Flat 40% discount this black Friday. Moreover, you can also get the same Flat 40% discount on all the products at WPMozo.
Let’s take a quick look at some of the WooCommerce plugins that you can grab this Black Friday.
WPMozo WooCommerce plugin for wishlist
This WooCommerce plugin allows users to add any product to their wishlist from multiple places on your e-commerce store. The wishlist buttons are deployed at those places where you want to give a provision to add a wishlist to the customers.
1. Use text, icons, or both to add wishlists
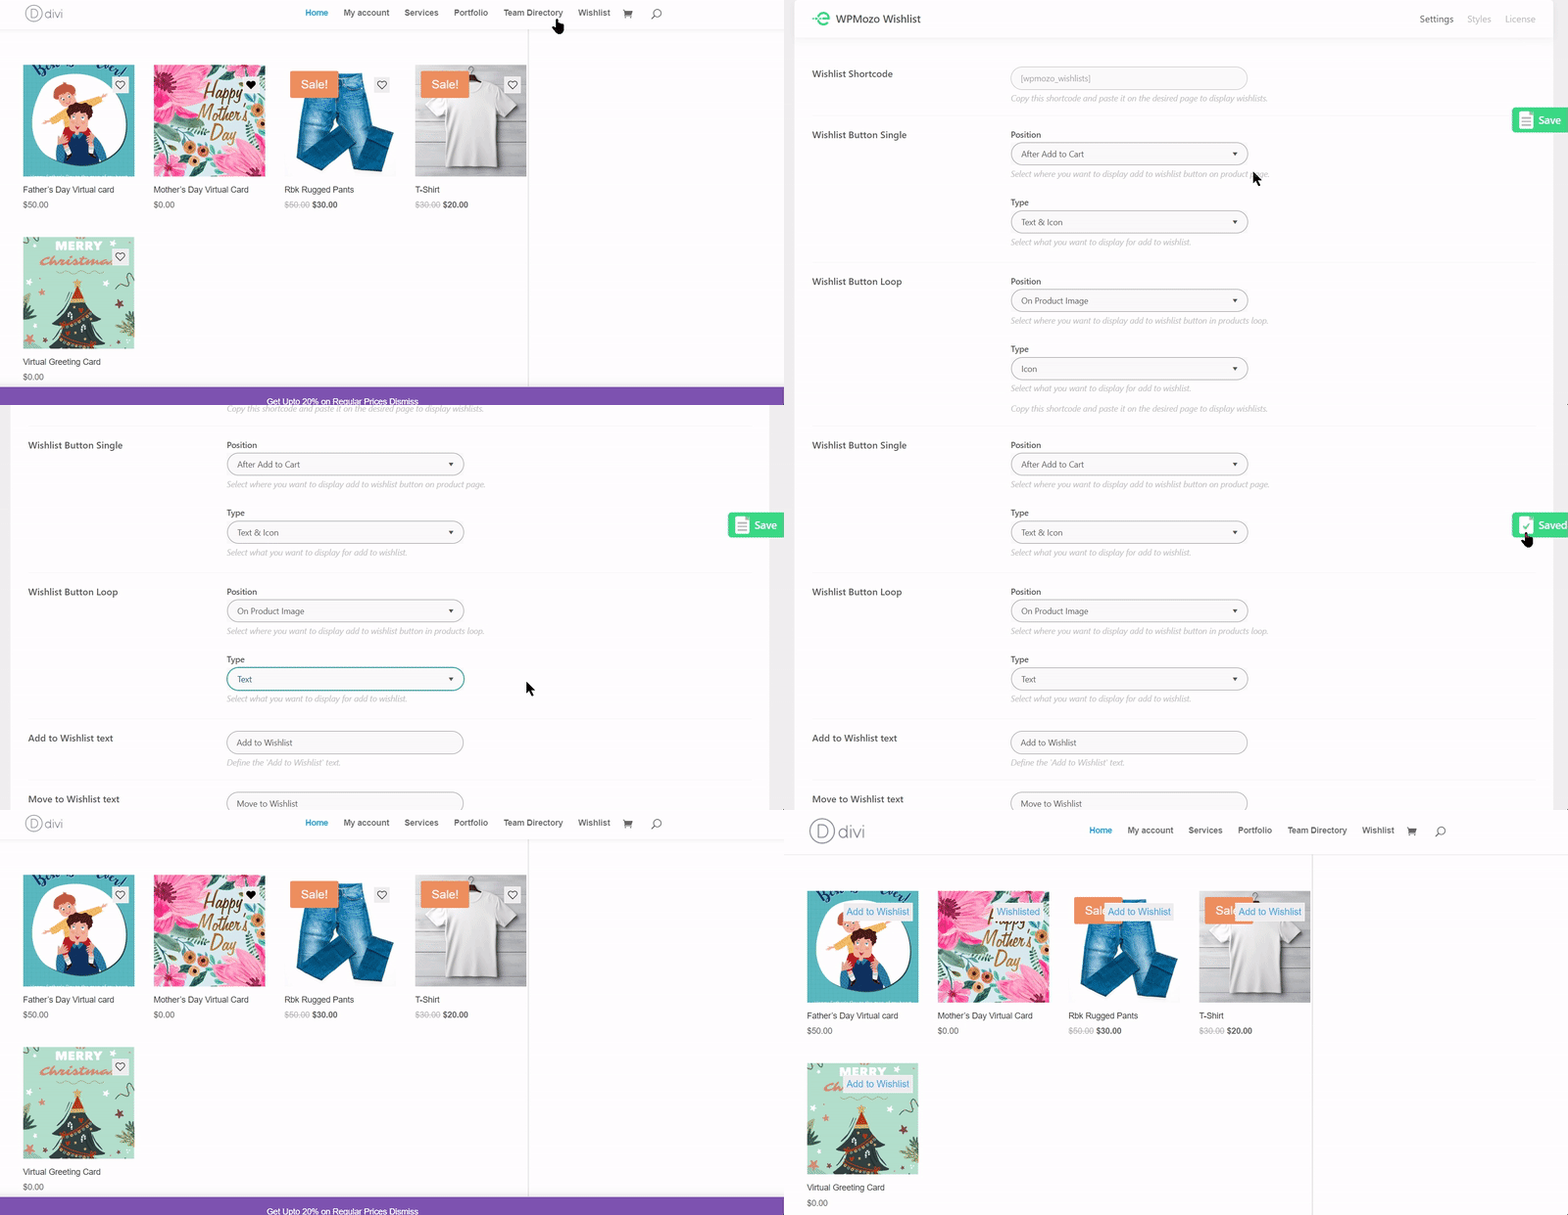
It’s up to you what you want on your product display for adding a wishlist. Place a custom text or the wishlist icon or you can use both. You can select the desired option anytime you want.
Here we have changed the wishlist icons and selected the text.
2. Move the products to the wishlist directly from the cart
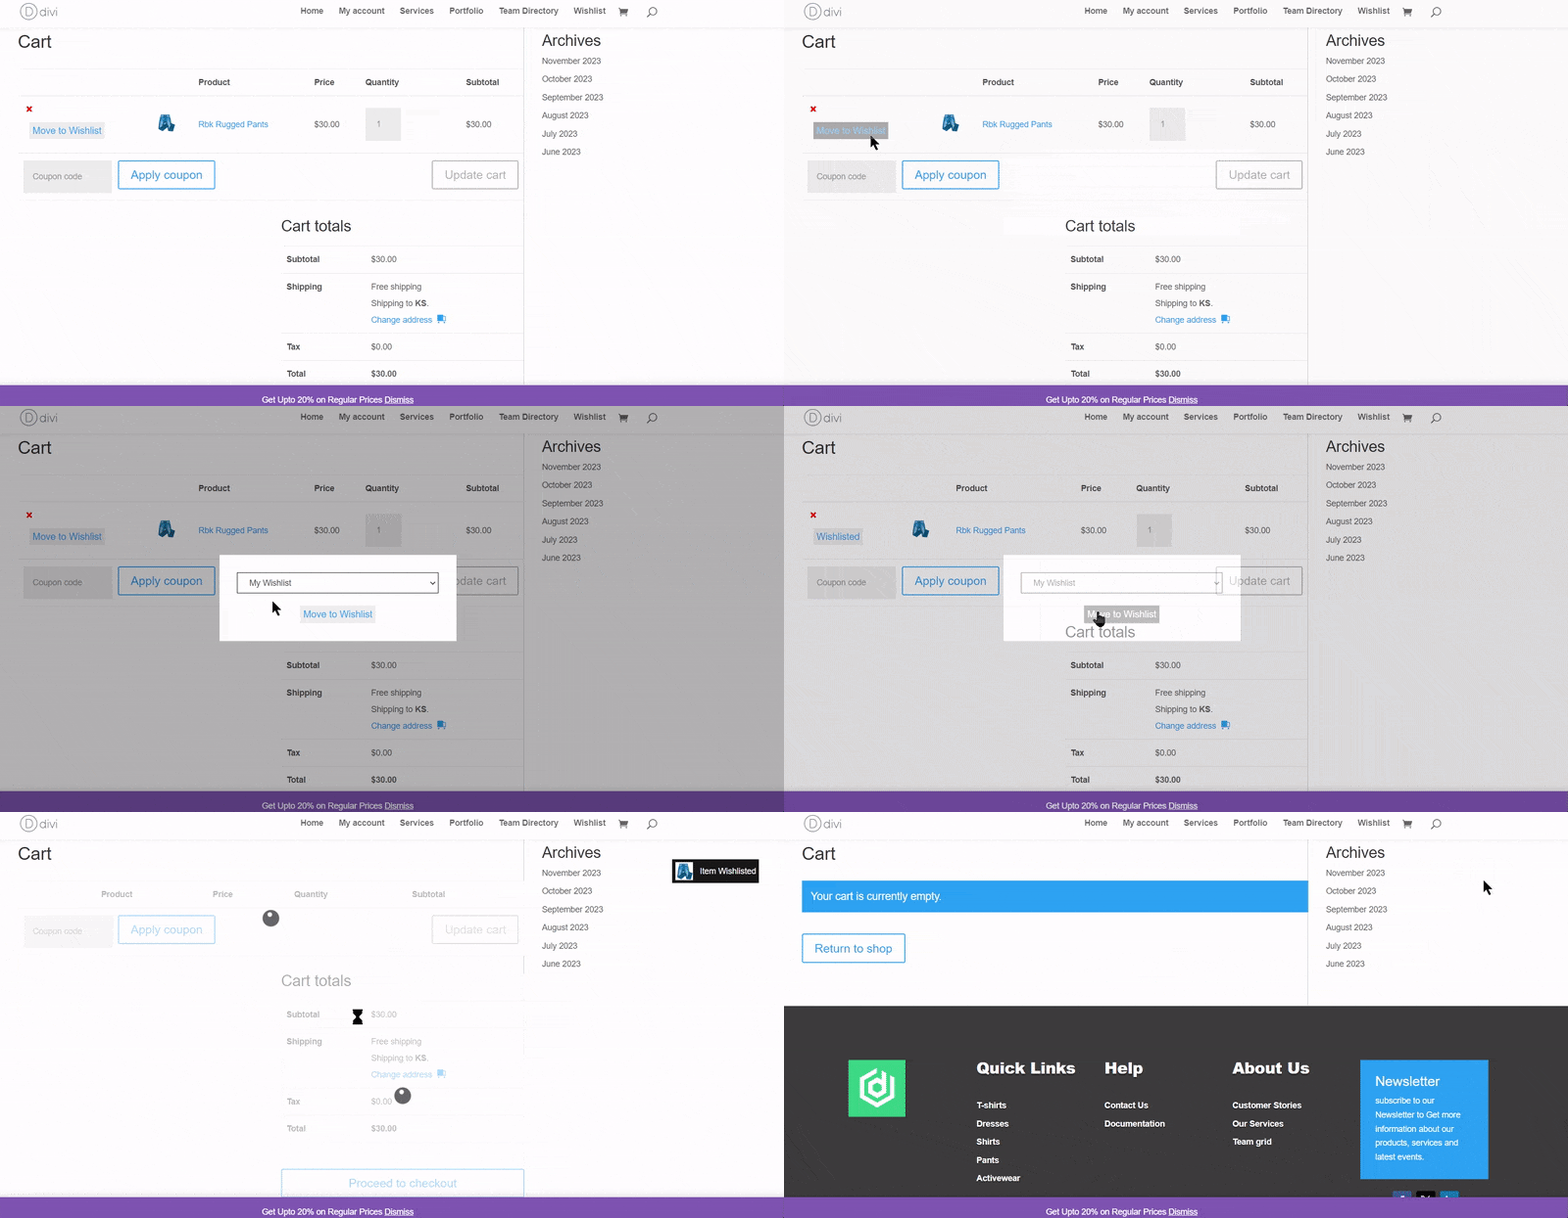
You can wishlist your favorite product straight from the cart if you haven’t already done so from the main store page. The items will be placed on your wishlist with a success pop-up on the right side. Later on, you can add them to your cart whenever you need.
3. Can create multiple wishlists
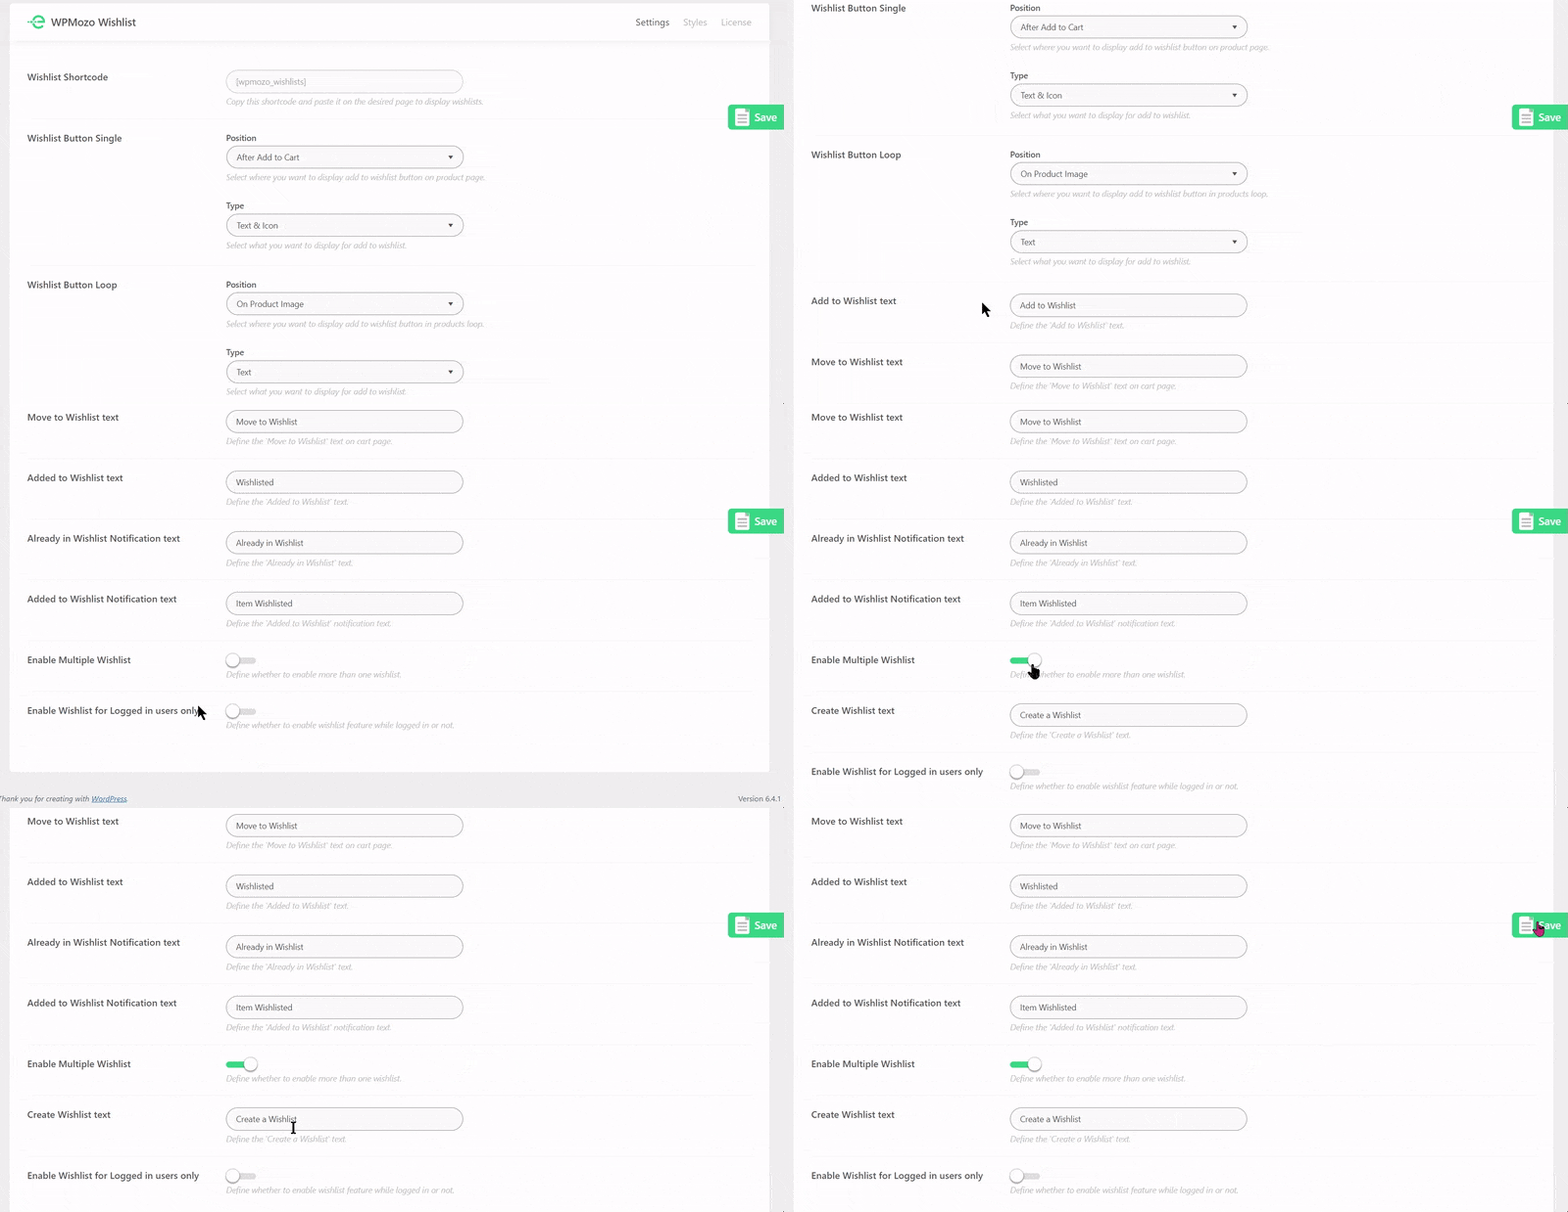
If you want to save your products based on different categories then you can create multiple wishlists for that. You only need to enable it from the settings. After that every time a product gets added it will ask you about the wishlist you want to use or create a new one.
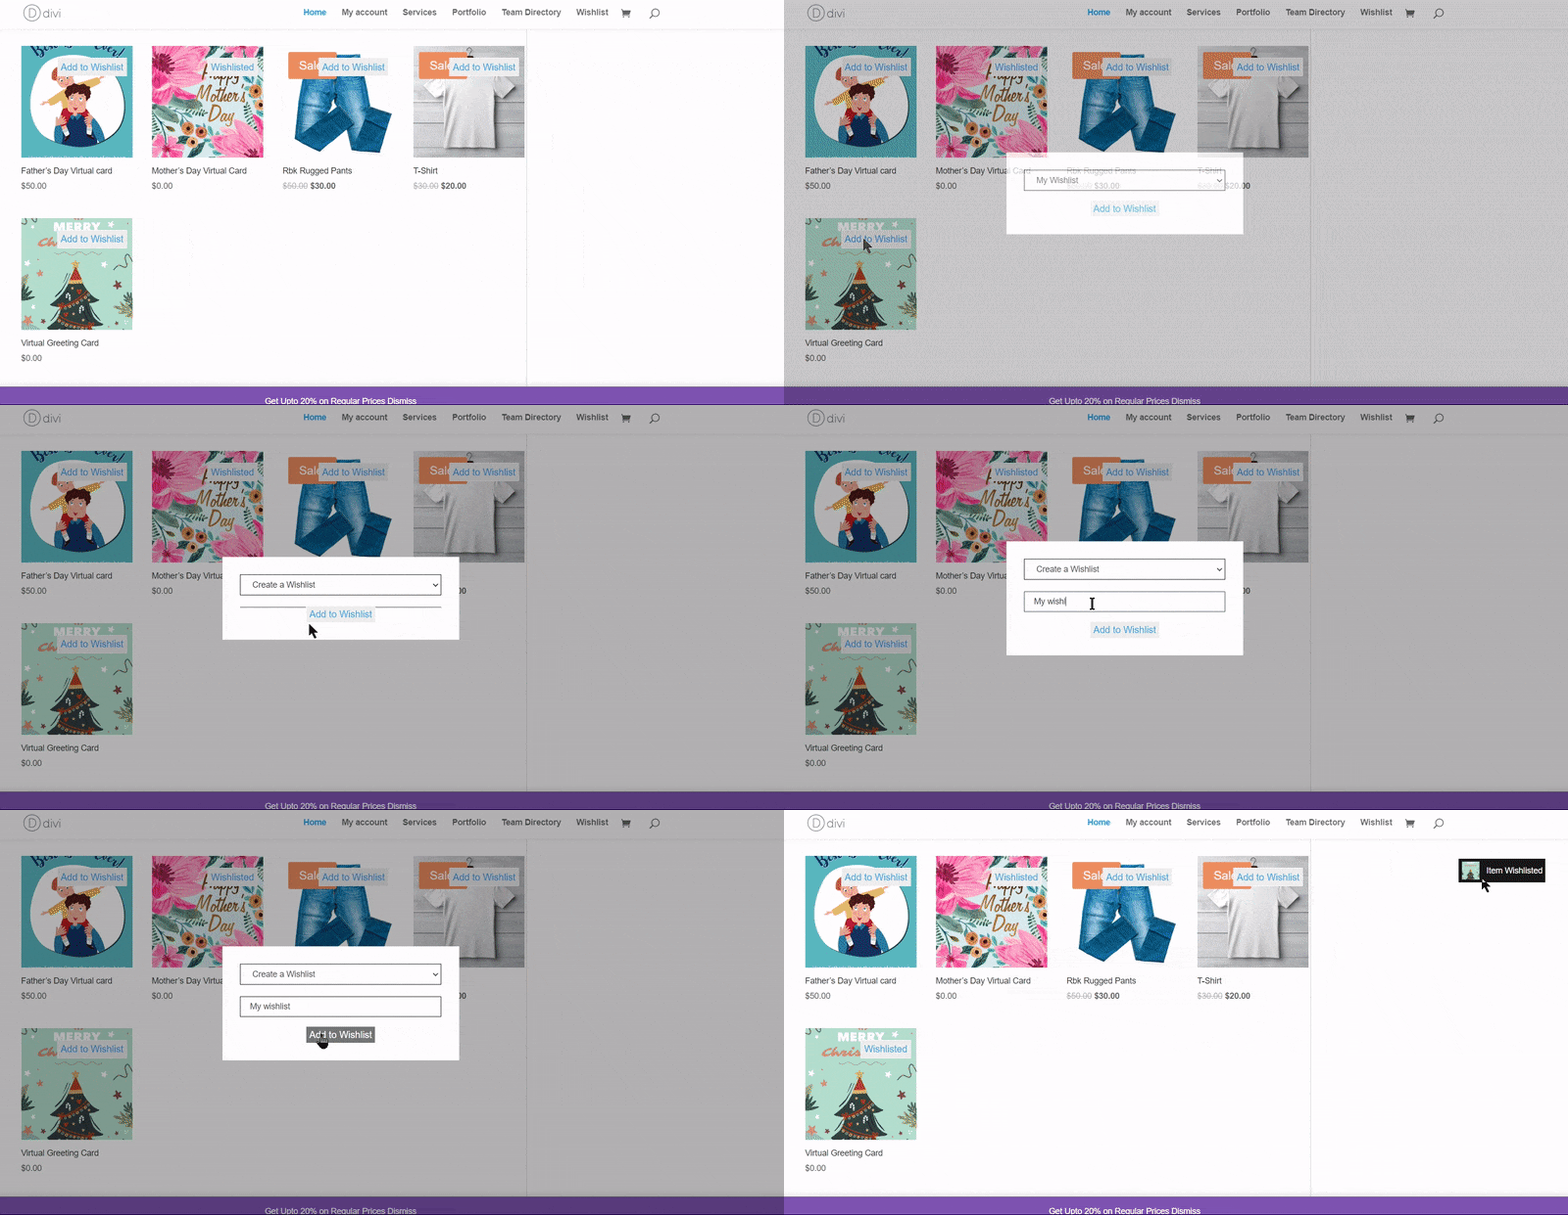
See how we have added a new wishlist to our store.
Now add the products to your favorite wishlist.
4. Display wishlists on a separate page using a shortcode
To have a clear look at the wishlist products, we can use the shortcodes. Create a new page and paste the wishlist shortcode into it. Now access the wishlist by placing any link on the website or menu bar.

Notice that all the products in the wishlist are displayed on that page. In case of multiple wishlists, you can check out both of them from the same page.
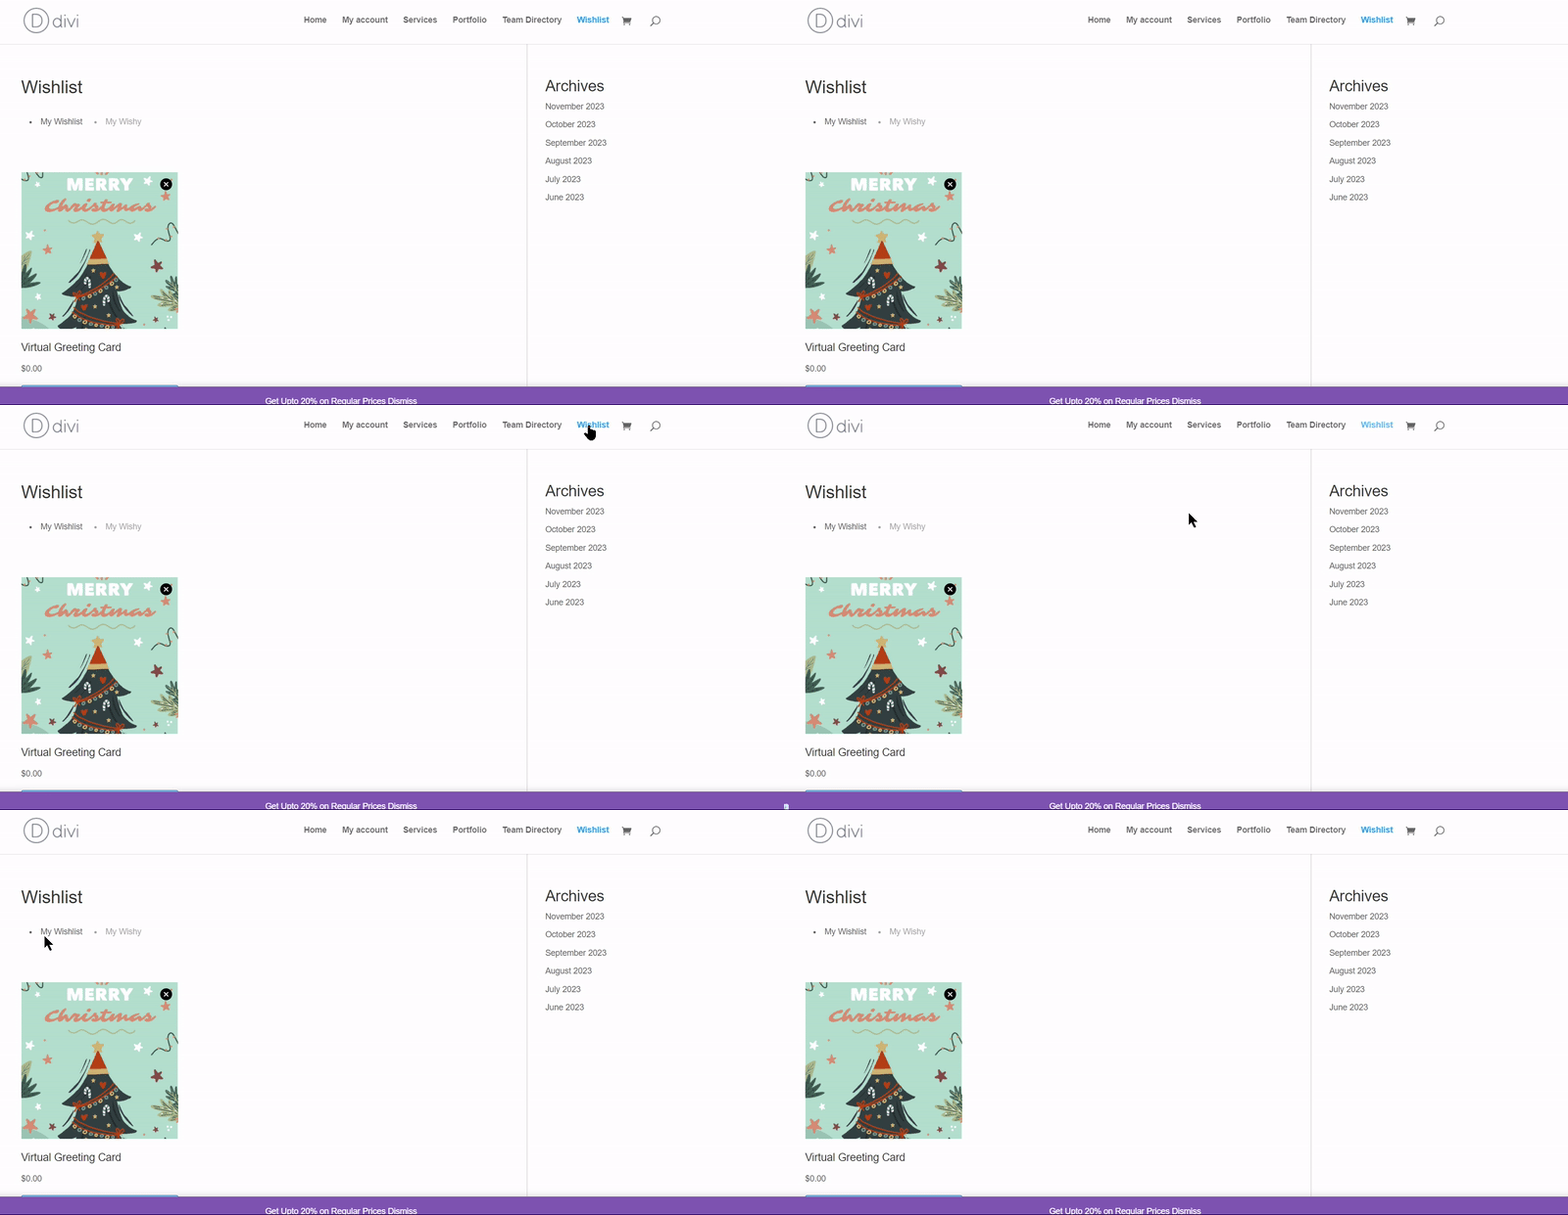
5. Style the wishlist in your desired way
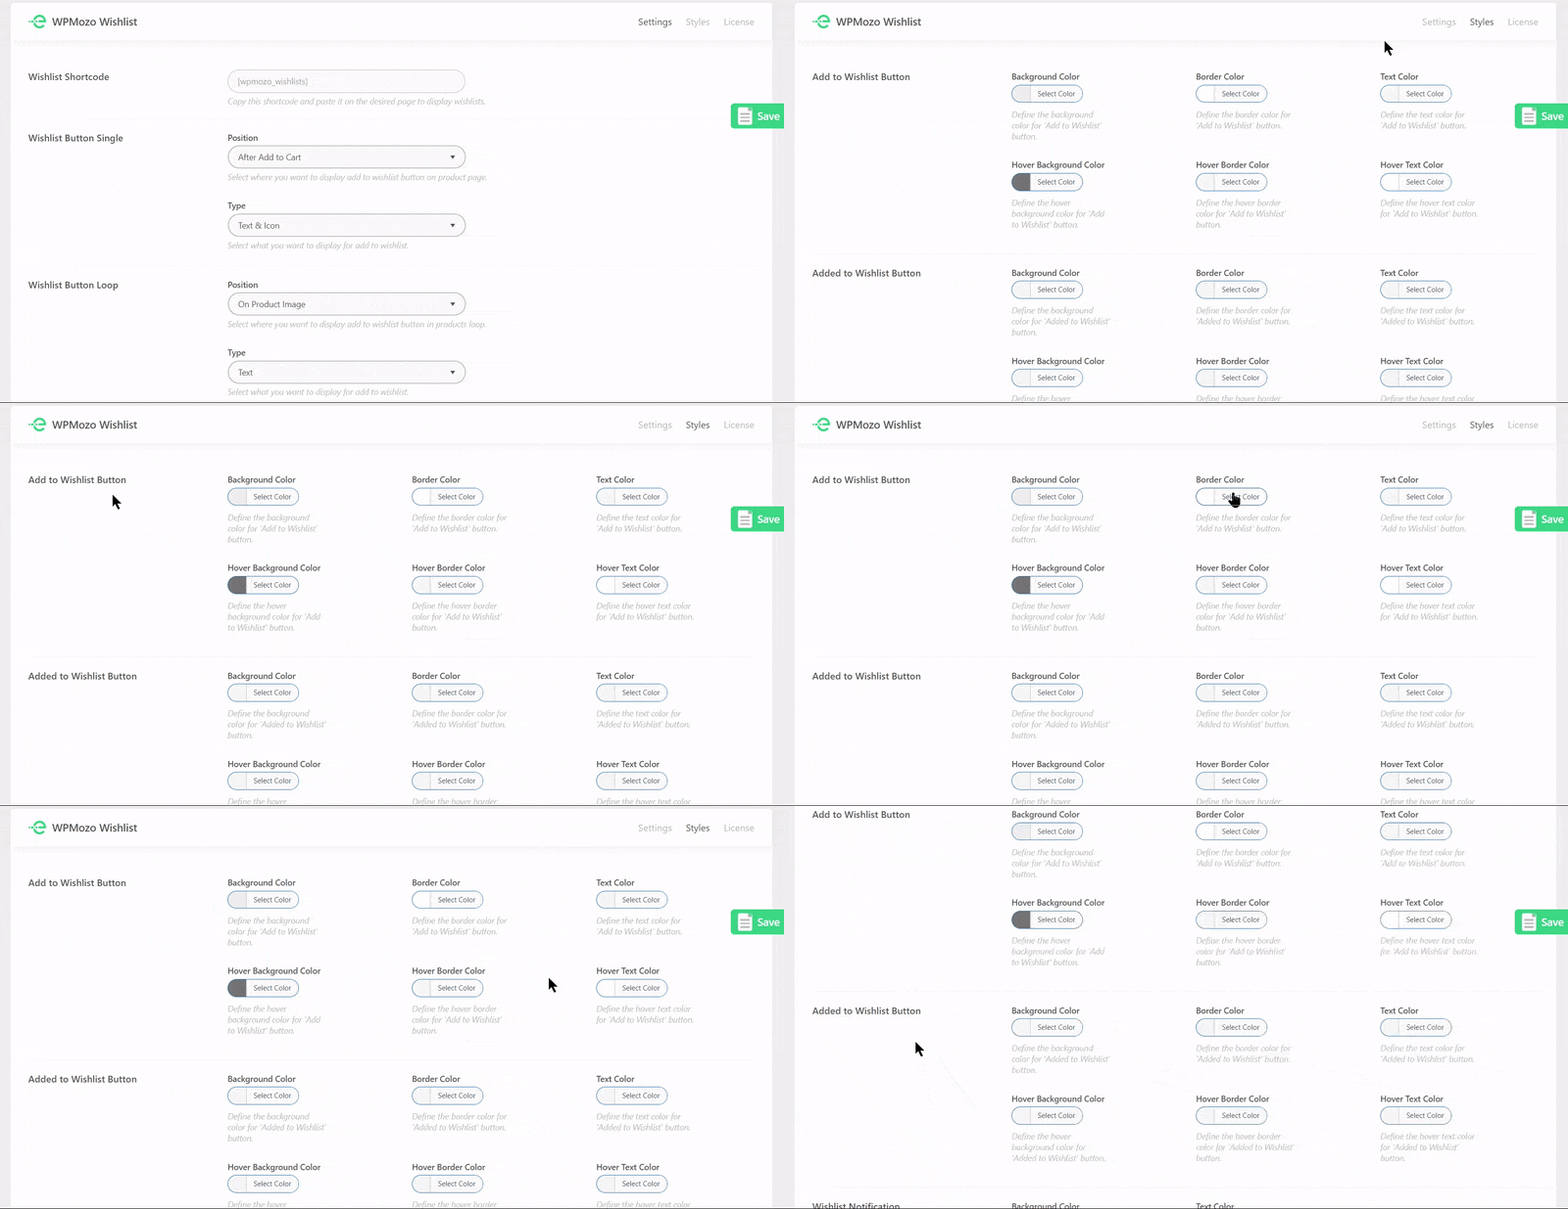
There are tonnes of customization options available in this WooCommerce Wishlist plugin. You can style almost all the elements of the wishlist in your desired fashion. You can customize the various properties of the wishlist buttons and notification elements. You can tune up the
- Border Color
- Text Color
- Hover Background Color
- Hover Border Color
- Hover Text Color
Take a quick look at the styling option of the WPMozo WooCommerce Wishlist plugin.
Let’s move to the second useful WooCommerce plugin by WPMozo.
WPMozo WooCommerce plugin for checkout management
This WooCommerce plugin gives you the power to customize the checkout page as per your needs. Now you can manage your checkout page in a more detailed way using the clear and easy interface of this WooCommerce plugin.
Let’s take a quick glimpse at some of the functions offered by the WPMozo Checkout Manager.
1. Add new custom fields to the checkout page
WPMozo WooCommerce Checkout Manager allows you to add new custom fields easily without involving you in messy codes. Select text, radio, text area, checkbox, and many others from the available field types. Many other settings are also offered to set the default value of a field or make it compulsory.
Here, We have added a text field Cell Phone using this checkout plugin.
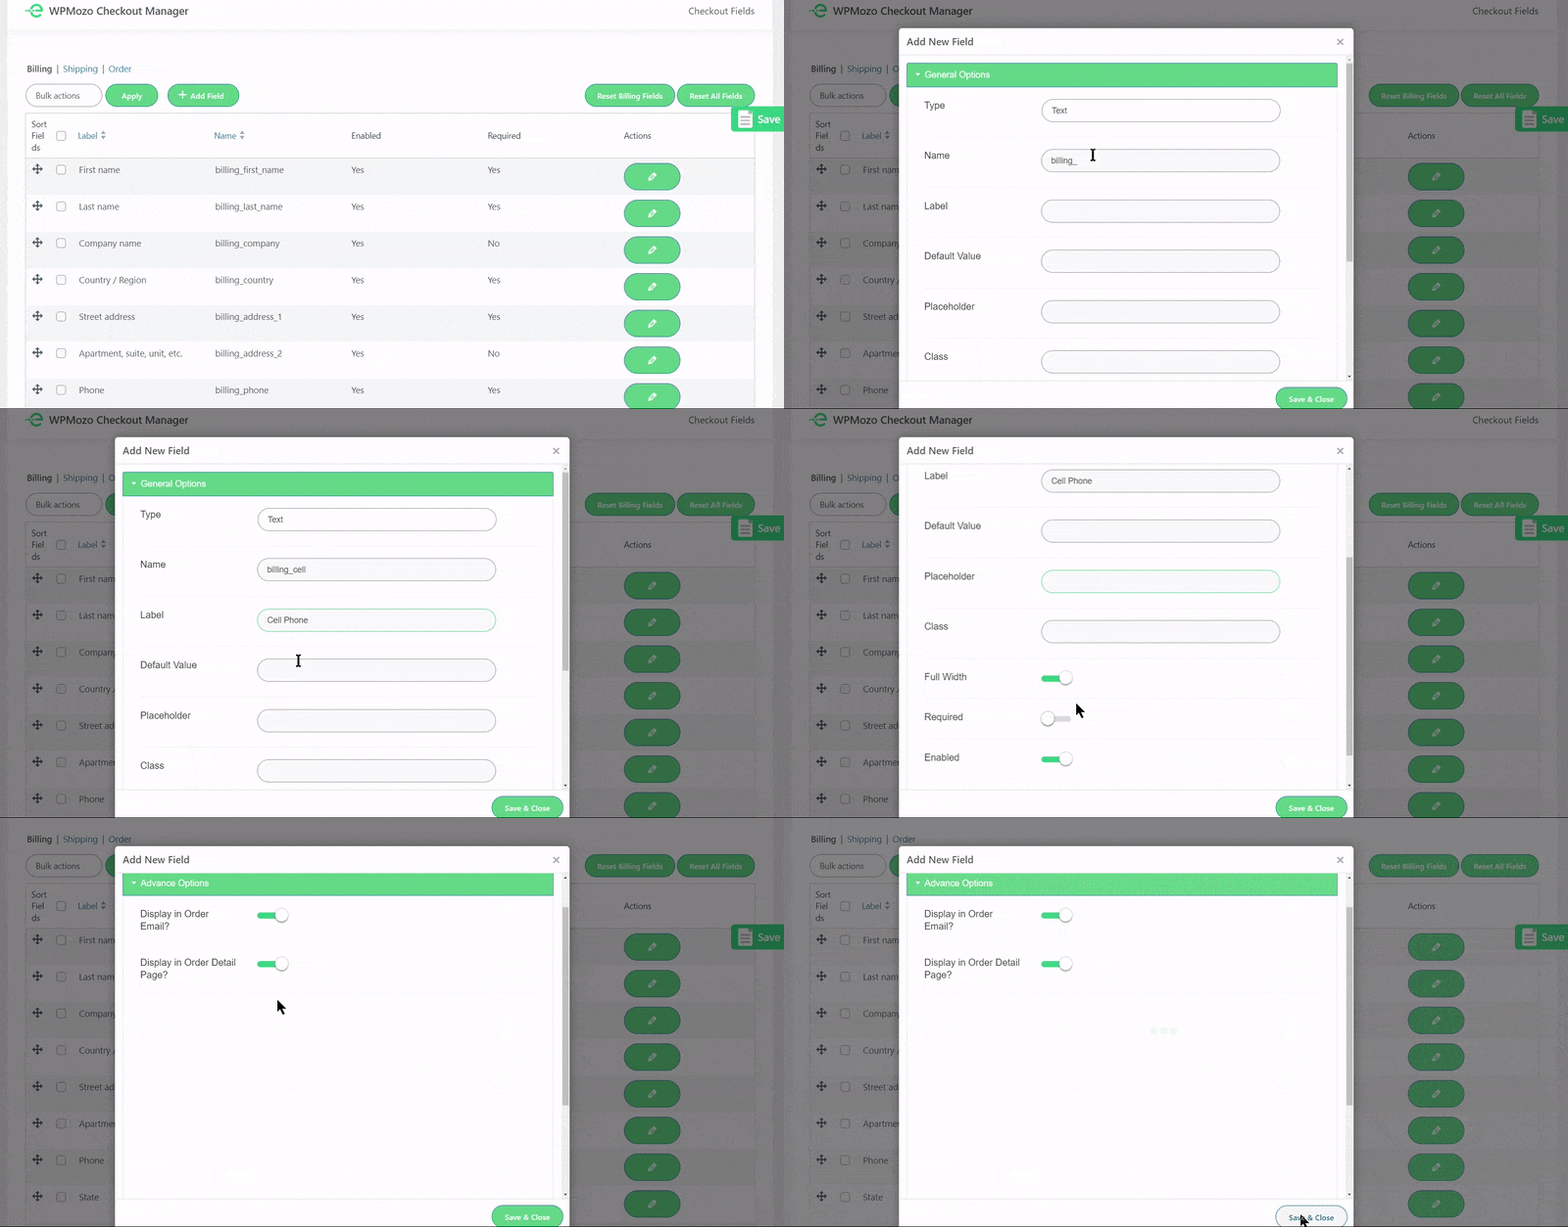
After adding the text successfully, let’s see how it looks on the checkout page.
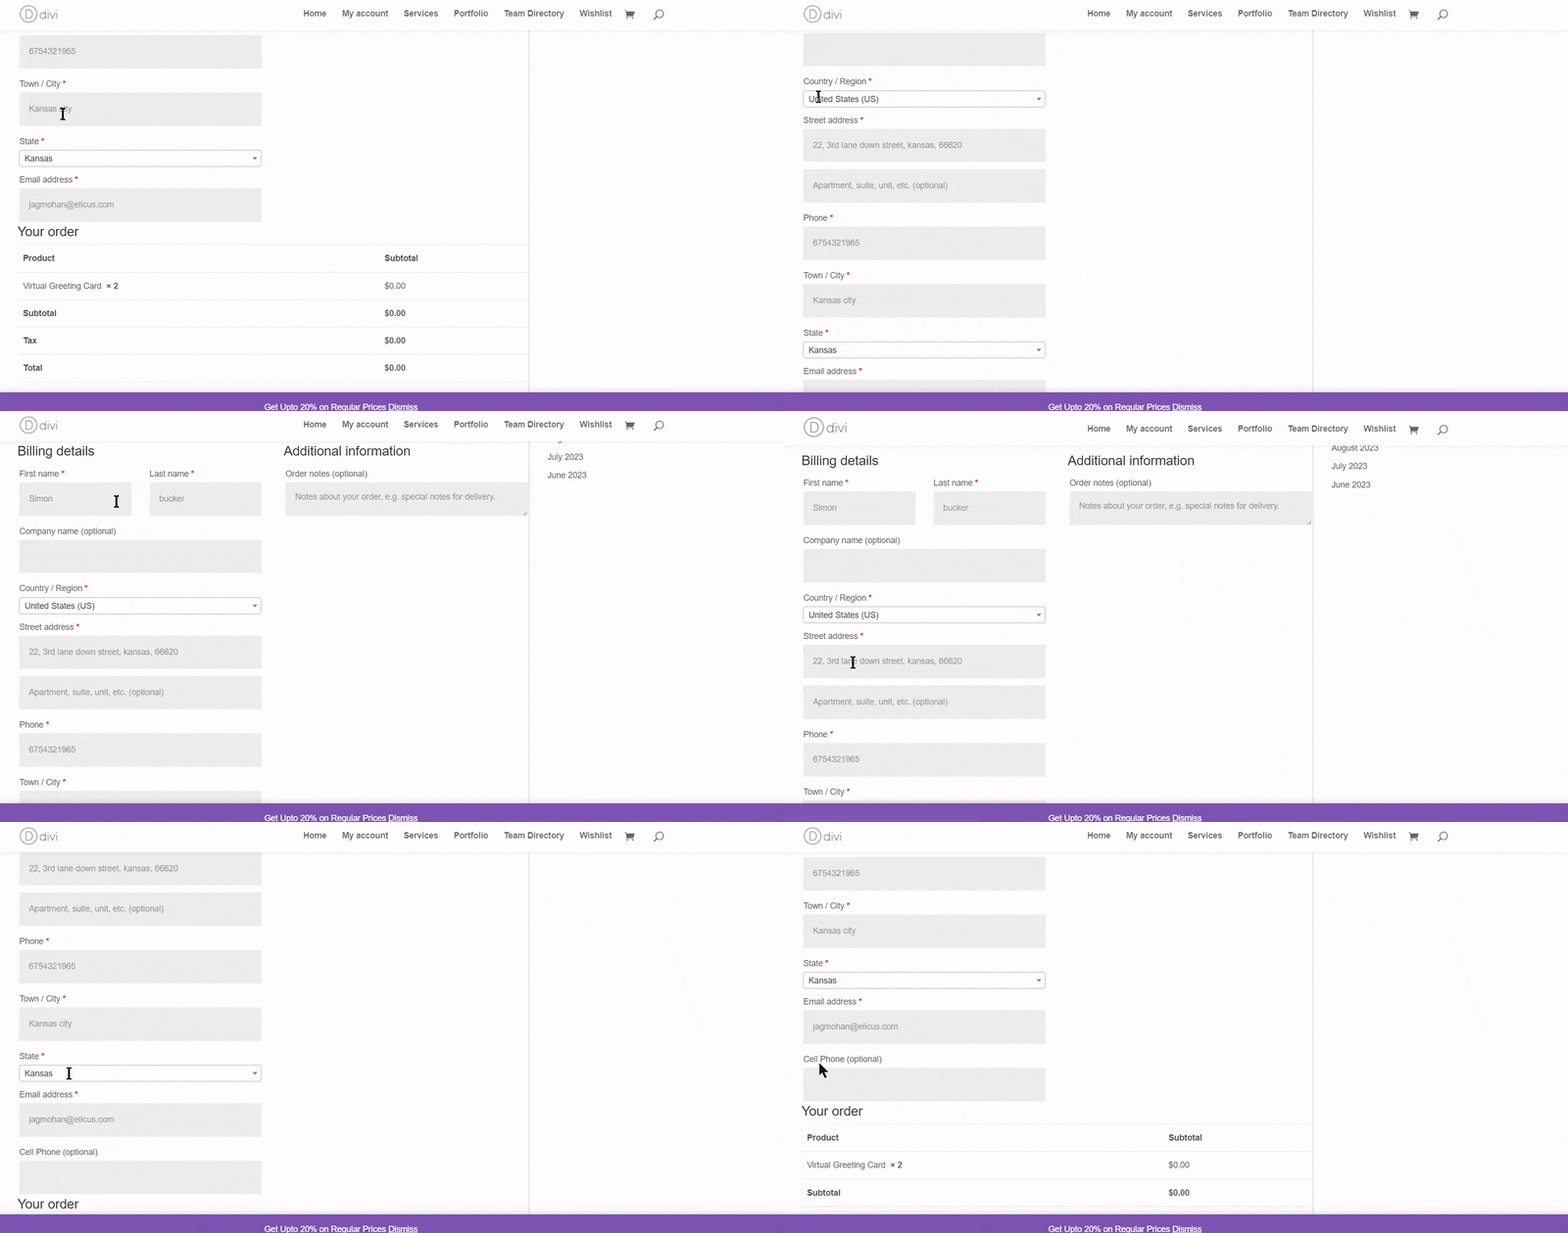
2. Rearrange fields the way you want
This WooCommerce checkout manager plugin allows you to rearrange the fields as per your needs. Fields can be positioned above or below with a drag-and-drop.
Here we have rearranged the position of the same ‘Cell Phone‘ field to an above position on the checkout page.
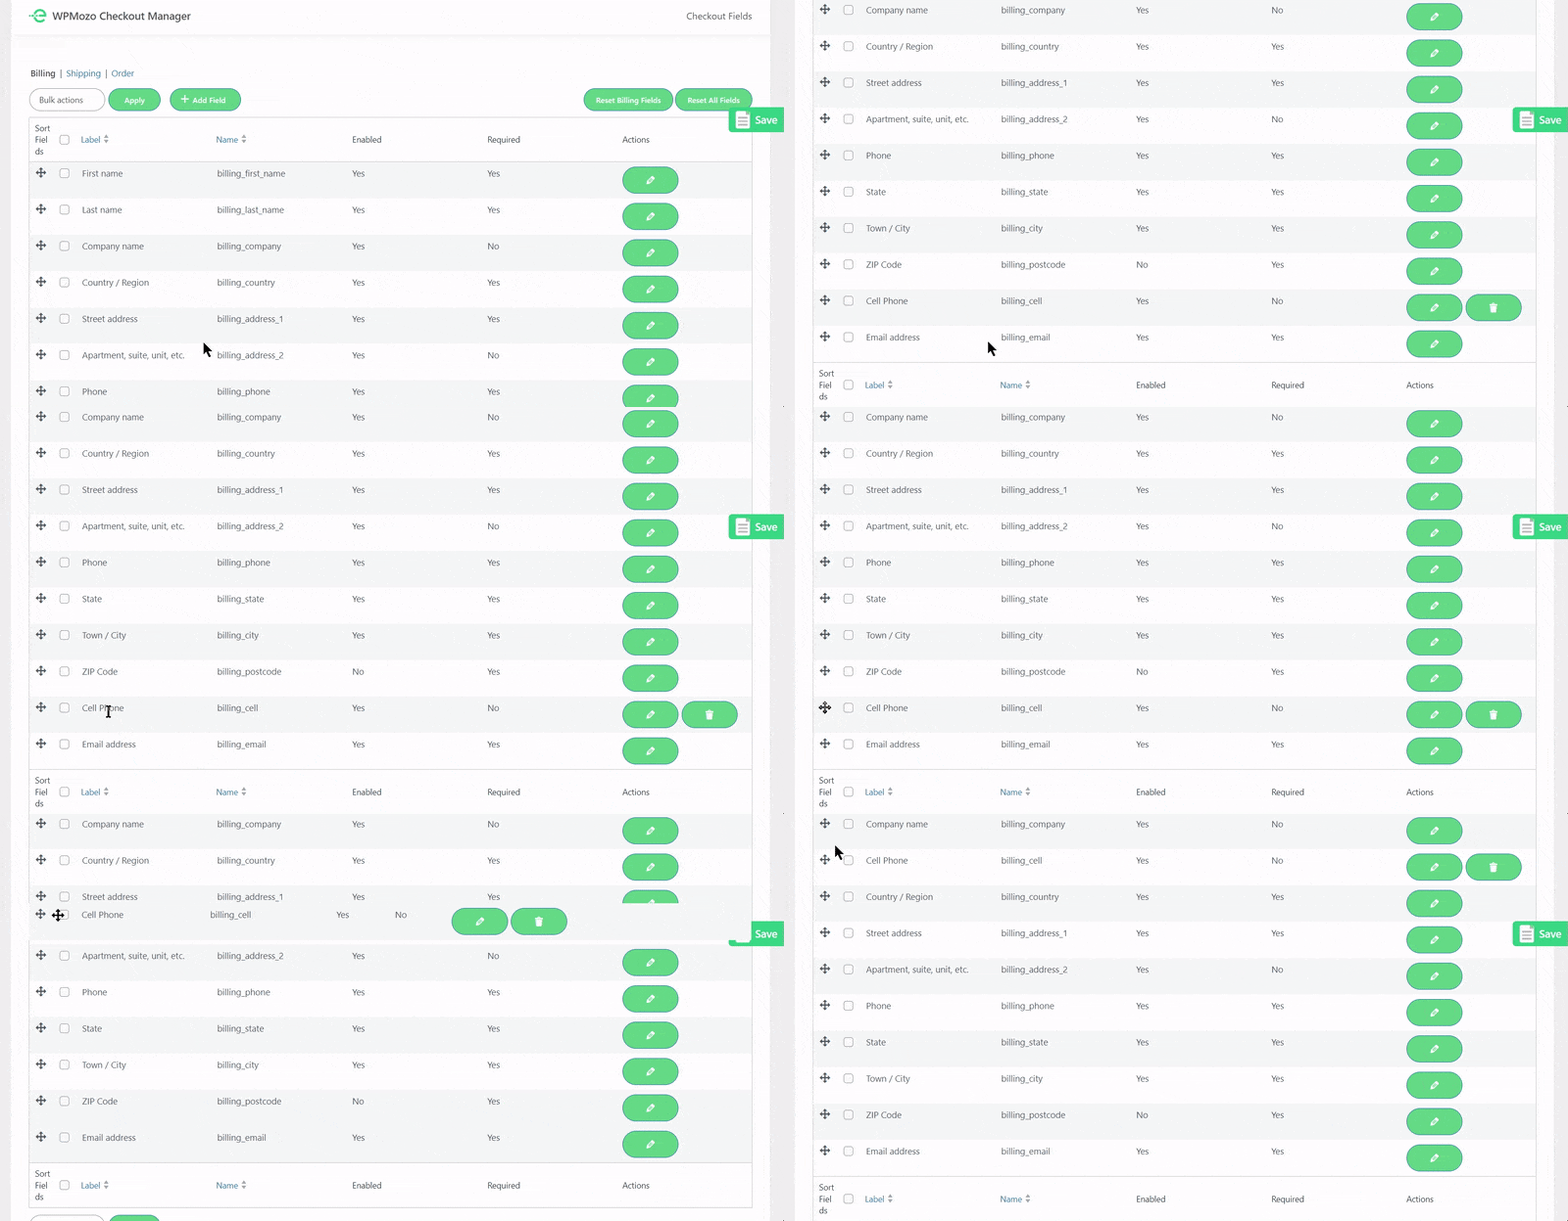
After doing this let’s observe the changes on the checkout page. You will notice that the Cell Phone field appears at the bottom before those changes.
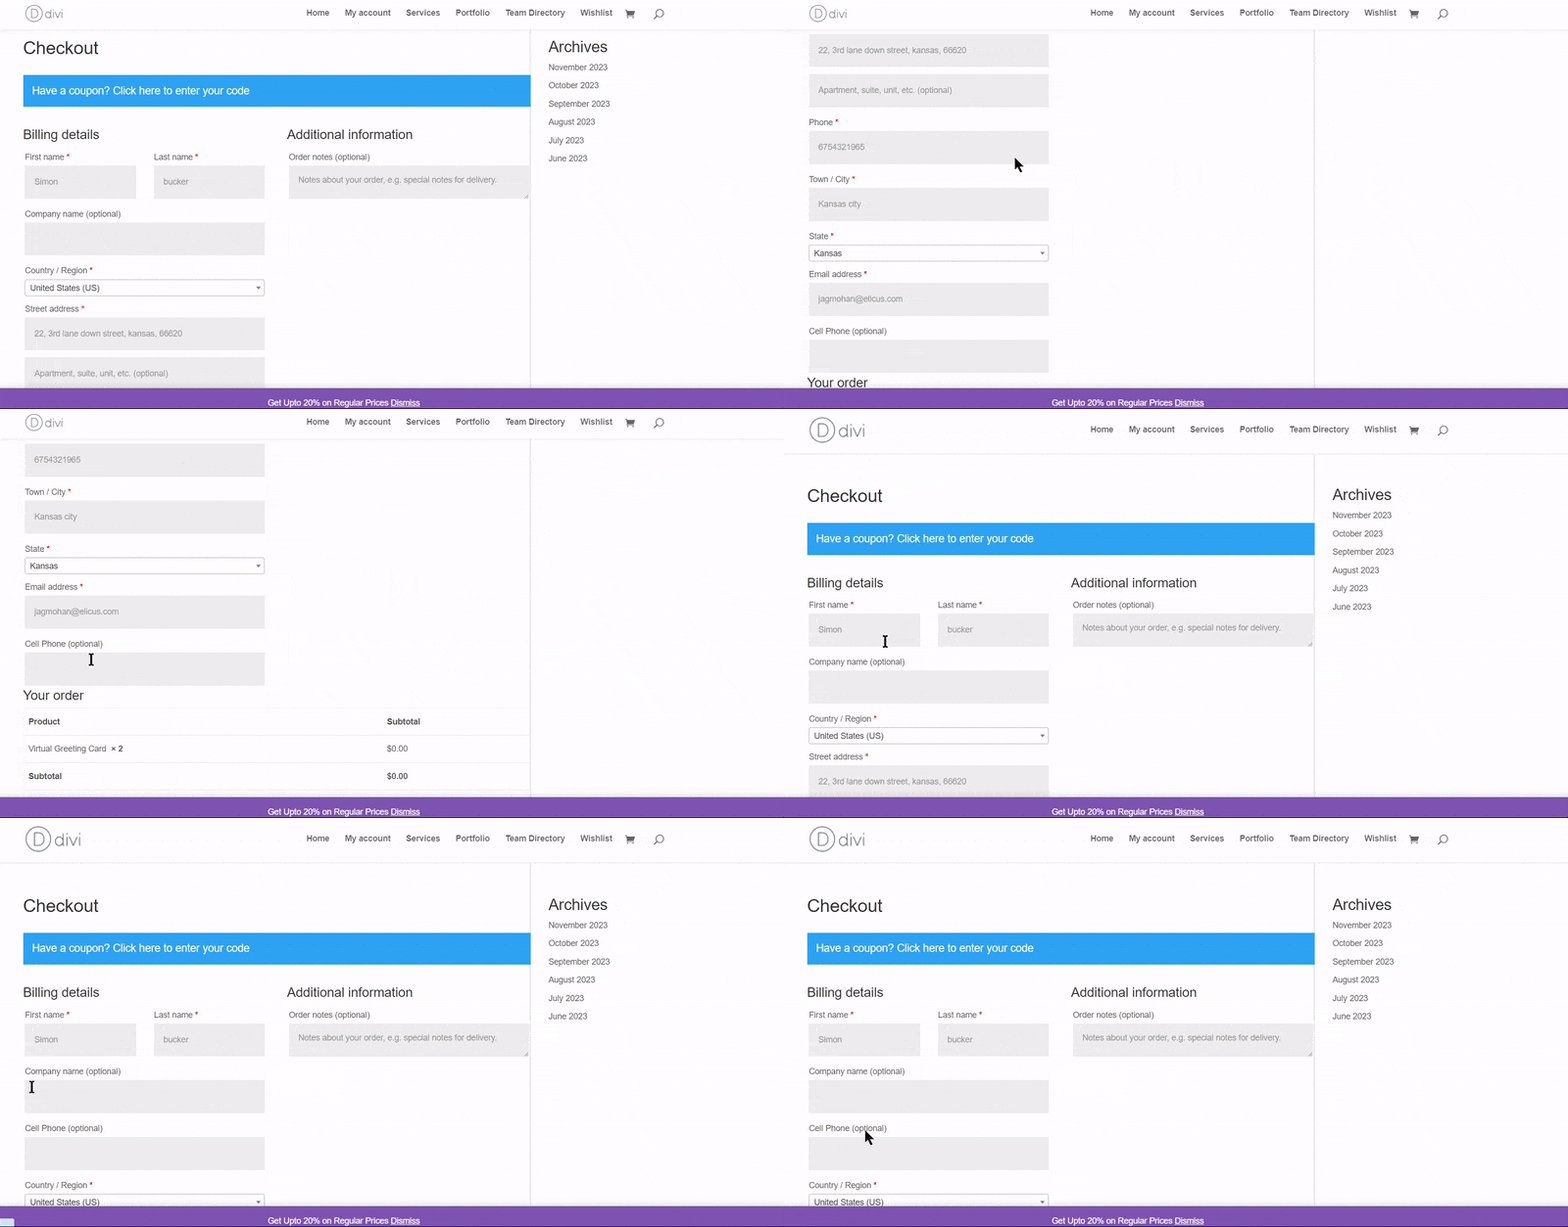
But after reloading the page, you will see the Cell Phone field positioned at the third place from the top of the checkout page.
3. Enable or Disable fields temporarily
This WooCommerce checkout plugin also gives you the functionality to Disable or enable the checkout field whenever you want. Suppose you have a field that is enabled now, but you don’t want that field. You can temporarily disable any field until you don’t need it. This gives you the power to block a field without removing it permanently.
Here we have disabled the Cell Phone field to block its visibility on the checkout page.
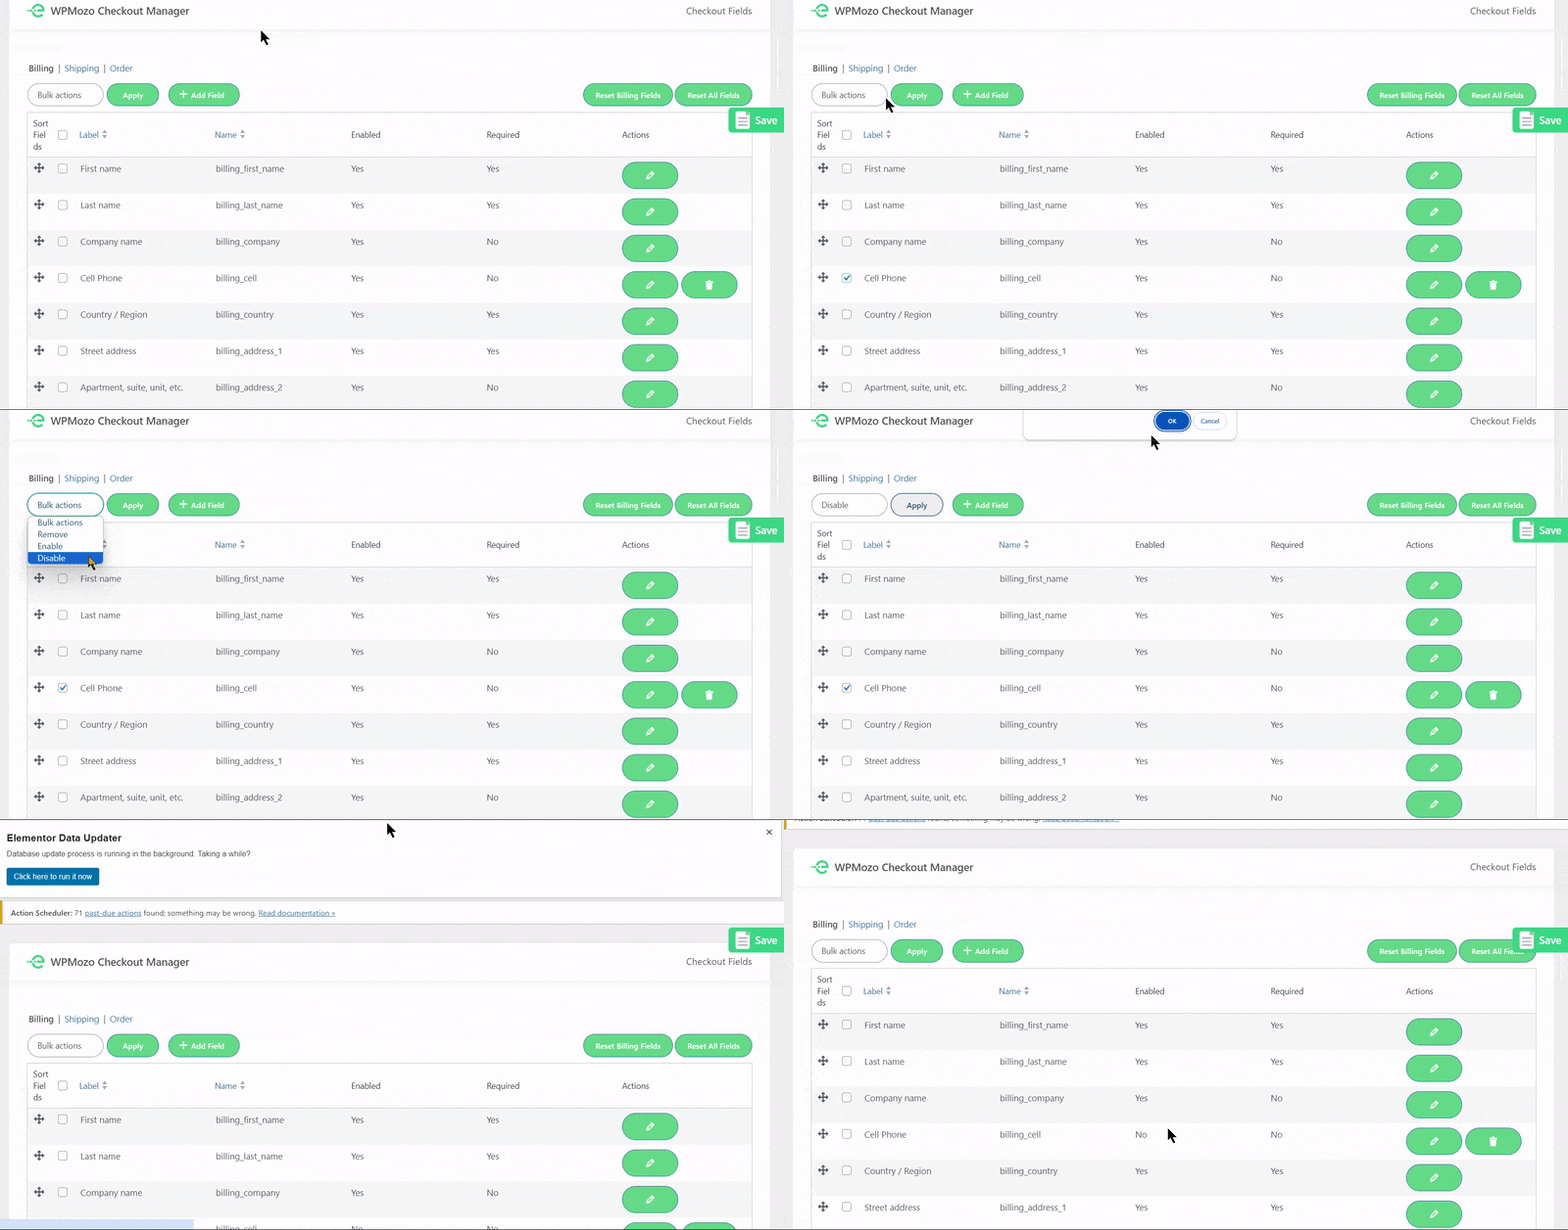
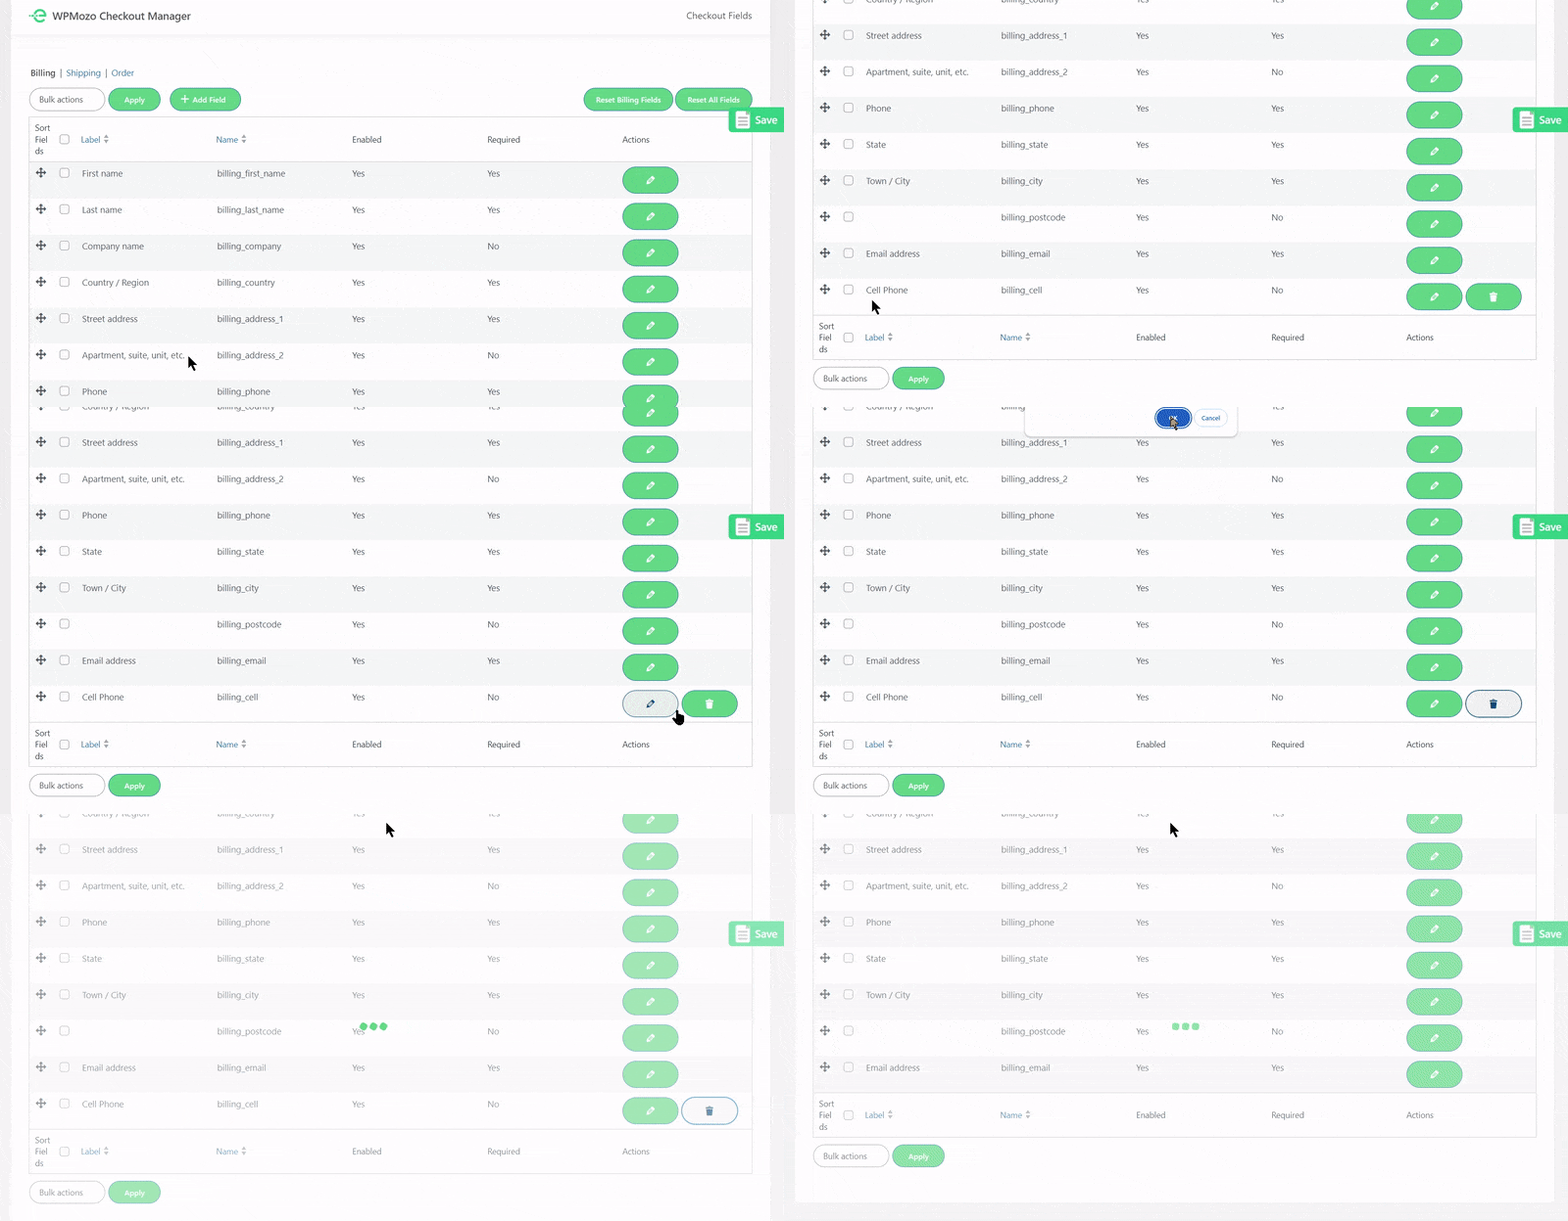
4. Delete unwanted checkout fields
When you come to know that a field is no longer required and is completely obsolete, you can remove it permanently with this WooCommerce plugin.
Additionally, you can look here if you want to examine all of the features in depth.
Grab all these plugins at a huge discount. The WPMozo Black Friday Sale is for a limited time. Unlock a Flat 40% discount on all the WPMozo products at this grand shopping event.


0 Comments