You can captivate your audience with Elementor’s visually stunning gallery. With customizable layouts, striking captions, and seamless mobile responsiveness, Elementor enables you to create an immersive visual experience that will keep your users coming back for more. These essential Elementor Gallery tips would prove to be helpful while designing a beautiful gallery.
In this post, we have discussed the 7 Elementor Gallery tips that are worth keeping in your mind before you get your hands on the Elementor.
Elevate your visual experience with these 7 Essential Elementor Gallery Tips
Now lets start discussing all the Elementor Gallery tips for using Elementor Gallery one by one.
1. Choose the Right Gallery Type
When it comes to showcasing your work or products, selecting the right gallery type can make all the difference. Elementor Gallery offers a range of options to cater to diverse needs and design preferences.
- Grid: The grid layout is classic and versatile, perfect for displaying images or videos in an organized manner. It allows for equal-sized thumbnails, creating a neat and cohesive gallery.
- Carousel: If you want to create a dynamic and interactive gallery, the carousel layout is an excellent choice. Users can navigate through the gallery by swiping or clicking on navigation buttons, providing a seamless browsing experience.
- Masonry: The masonry layout, also known as Pinterest-style, is ideal for websites that prioritize visual appeal. It arranges images with varying heights and widths in a cascading style, creating an eye-catching and unique gallery.
- Justified Grid: This layout is designed to bring a sense of balance and harmony to your gallery. It automatically adjusts the size of the images to fit the available space, creating a visually pleasing alignment.
Each gallery type offers distinct advantages, so it’s essential to consider the nature of your content and the desired user experience when making a selection.
You can also use WPMozo Add ons for Elementor that pack up outstanding Elementor Masonry Gallery widget.
2. Select Eye-Catching Images
When it comes to creating a visually stunning gallery in Elementor, one of the most crucial elements is selecting eye-catching images. High-quality visuals not only grab the attention of your visitors but also leave a lasting impression.
- Using high-resolution images ensures that your gallery looks professional and polished. Crisp details and vibrant colors instantly elevate the visual appeal of your website, making it more interesting for users to explore.
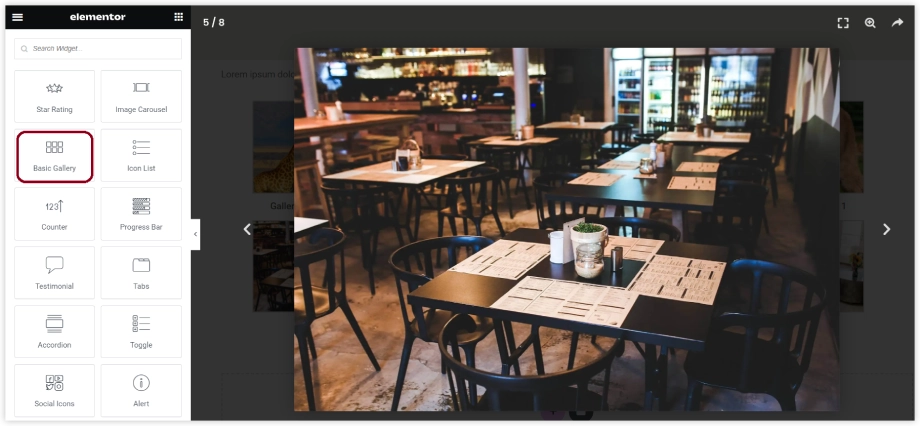
- Choosing visually appealing images that align with your brand and message helps to create a cohesive and engaging experience. Whether it’s showcasing products, portfolio pieces, or blog post thumbnails, selecting images that resonate with your target audience helps to establish a connection and enhance user engagement.
Like in the below-showcased gallery we just used the relevant thumbnails of animals and birds, which goes perfectly with our wildlife gallery.
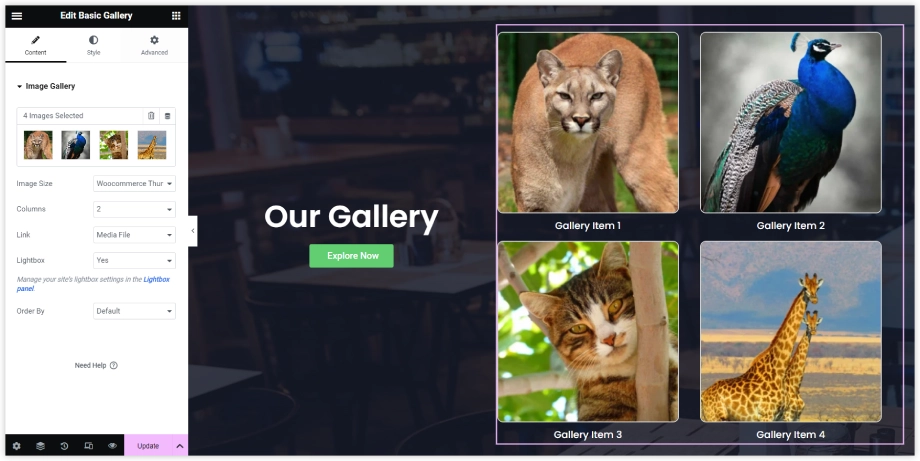
- Incorporating a variety of image types, such as photographs, illustrations, or graphics, adds depth and interest to your gallery. Mixing different styles and formats can create a visually dynamic and captivating experience for your visitors.
3. Optimize Image Sizes and Formats
The significance of optimizing image sizes and formats in Elementor Web Builder cannot be overstated. By ensuring that your images are optimized, you can achieve faster page loading times, leading to improved user experience and better website performance.
- To optimize your images, start by resizing them to fit the desired dimensions, reducing the need for browsers to scale them down. Compressing your images without compromising quality can significantly reduce file sizes.
- choose the appropriate file formats: JPEG for photographs and PNG for graphics with transparency. By following these tips, you can enhance your website’s speed and provide visitors with a seamless browsing experience.
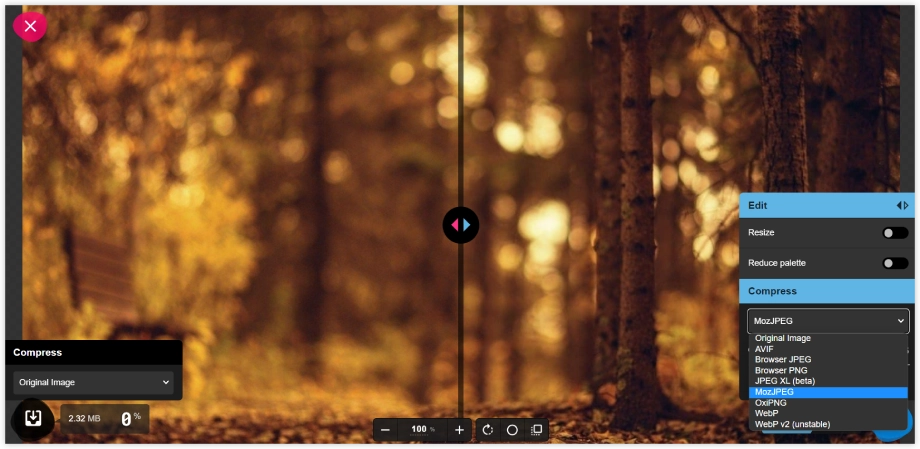
The Best image formats that you can use in an Elementor Gallery are WebP, JPEG, PNG and OxiPNG.
Some free tools for resizing and optimizing image without losing its quality
- Squoosh – Image file saving (JPEG around 68%)
- JPEG Optimizer – Image file saving (JPEG around 95%)
- Tiny PNG – Image file saving (JPEG around 95%), (PNG around 82%)
Just have a quick glance on the Squoosh tool and its image optimization options.
4. Incorporate Hover and Animation Effects
Incorporating hover and animation effects is the perfect way to enhance visual interest and captivate your audience. Here’s how you can do it.
- Explore Elementor’s Vast Library: Elementor Web Builder provides a vast library of animation effects that can be easily applied to your gallery items. From subtle transitions to eye-catching movements, you’ll find a range of options to suit your style.
These are some available options for the animation effects that you can try on your Elementor Gallery.
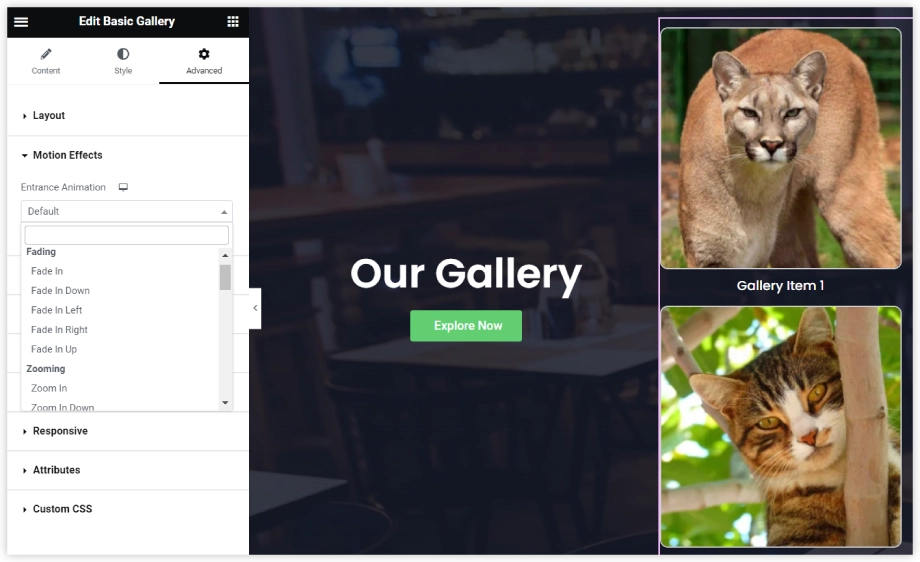
We have tried out the Fade-in Right animation and see how this effect completely changed the presentation of our gallery.
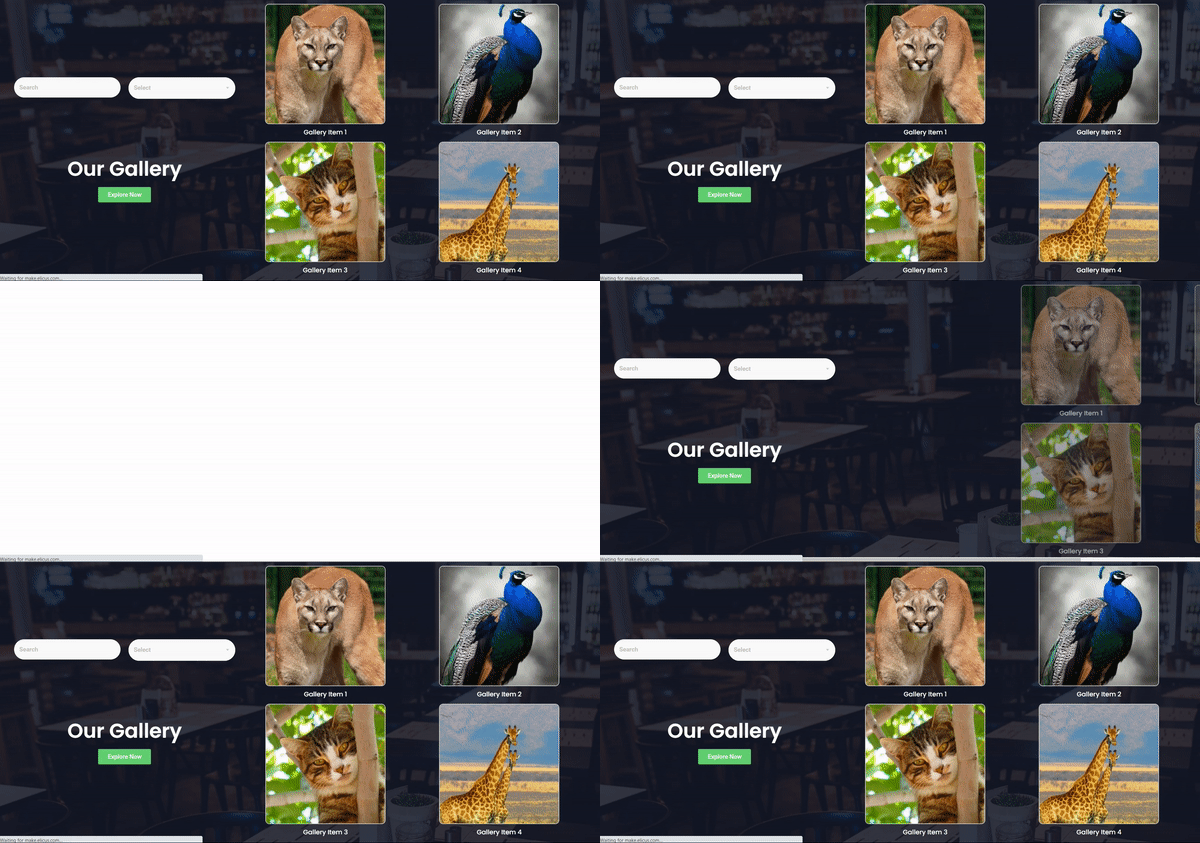
- Engage with Dynamic Effects: By adding hover effects, you can create interactive experiences for your visitors. Imagine images that zoom, reveal additional information, or change colors when hovered over. These dynamic effects not only grab attention but also make your galleries more memorable.
You can try out some of the suitable hover options and combinations available in the Elementor Gallery.
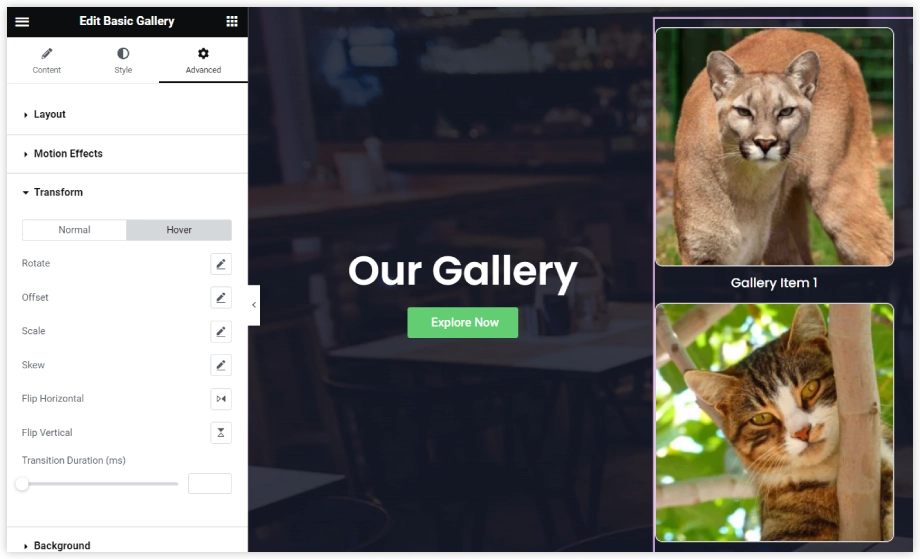
Here we simply enabled the Flip Horizontal option and see what it has done to transform the overall visual appeal of the gallery on a hover action.
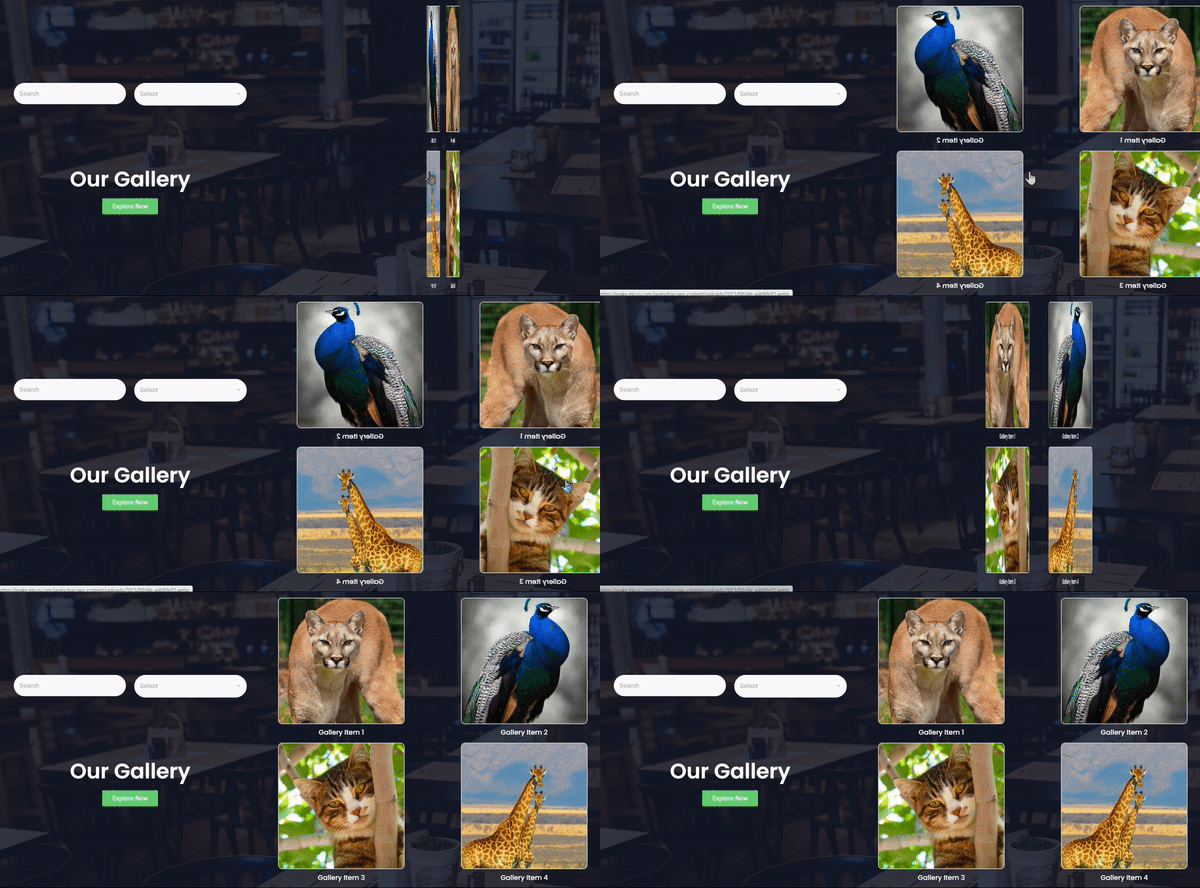
5. Add Captions and Descriptions
Captions serve as valuable pieces of information that complement your images, providing additional context and enhancing user understanding. Here’s why adding captions in Elementor Gallery is essential.
- Contextual Clarity: Captions offer a concise description or explanation of an image, making it easier for users to grasp its purpose or meaning.
- Accessibility: Captions play a crucial role in improving accessibility for users who may have visual impairments or rely on screen readers.
- Brand Messaging: You can use captions to reinforce your message, evoke emotions, or even provide a call to action, creating a stronger connection with your audience.
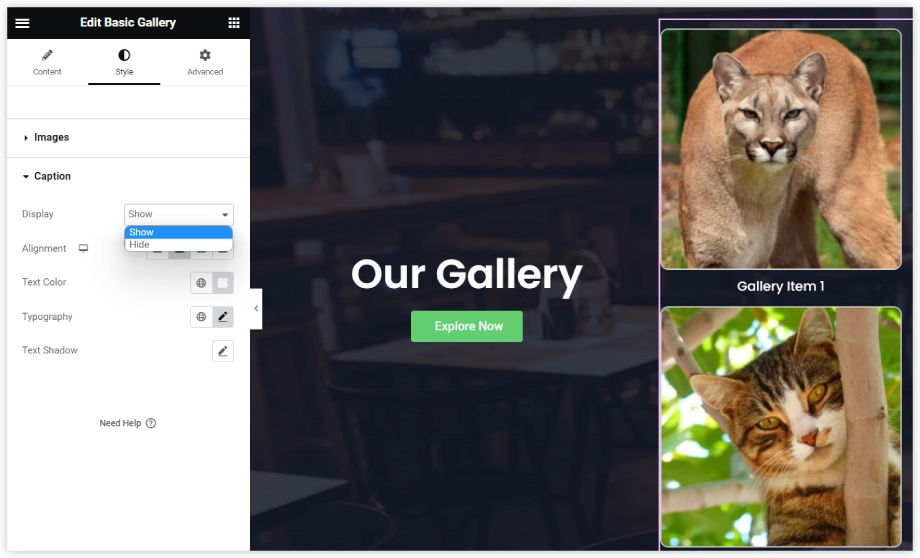
You can easily enable the caption to get displayed with the images from the Caption section of the gallery. Here Gallery Item 1 is the caption for that image.
6. Enable Lightbox and Fullscreen Mode
Enabling Lightbox and Fullscreen Mode is the key to providing your visitors with an immersive viewing experience. Here’s why you should enable these features:
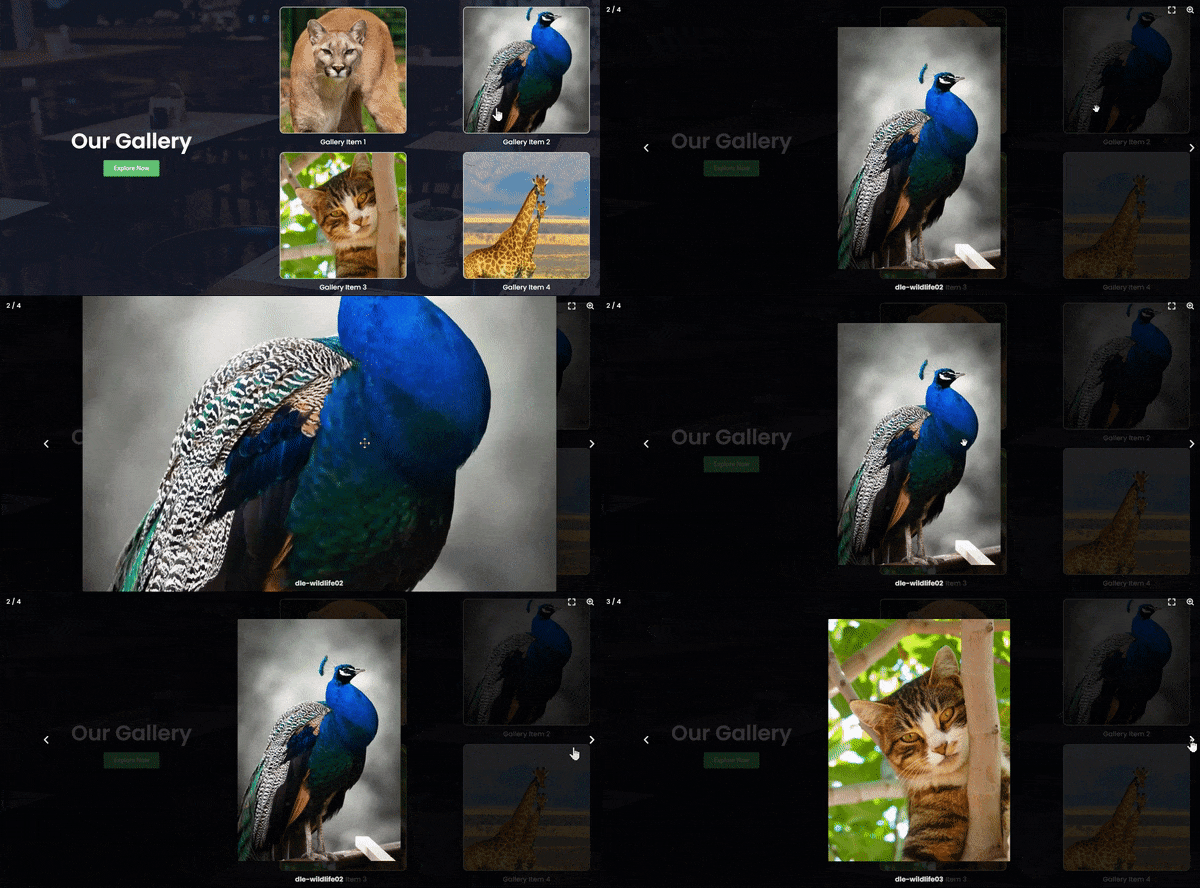
- Focus on Individual Images and Videos: With Lightbox and Fullscreen Mode, users can focus solely on the content they’re viewing. No distractions, no clutter. This allows for a more engaging and enjoyable experience for your audience.
- Enhanced Visual Appeal: Lightbox and Fullscreen Mode showcase your images and videos in all their glory. Users can appreciate the details, colors, and textures without any limitations, creating a visually stunning experience.
- Seamless Navigation: By enabling these features, users can easily navigate through your gallery, going from one image or video to another with a simple click or swipe. It enhances usability and keeps visitors engaged longer.
- Increased User Interaction: Lightbox and Fullscreen Mode encourage users to interact with your content. They can zoom in, play videos, and explore every aspect of your media, increasing the time spent on your website.
You can simply enable the Lightbox from the site settings and can play with all the available options such as fullscreen, zoom, counter, etc.
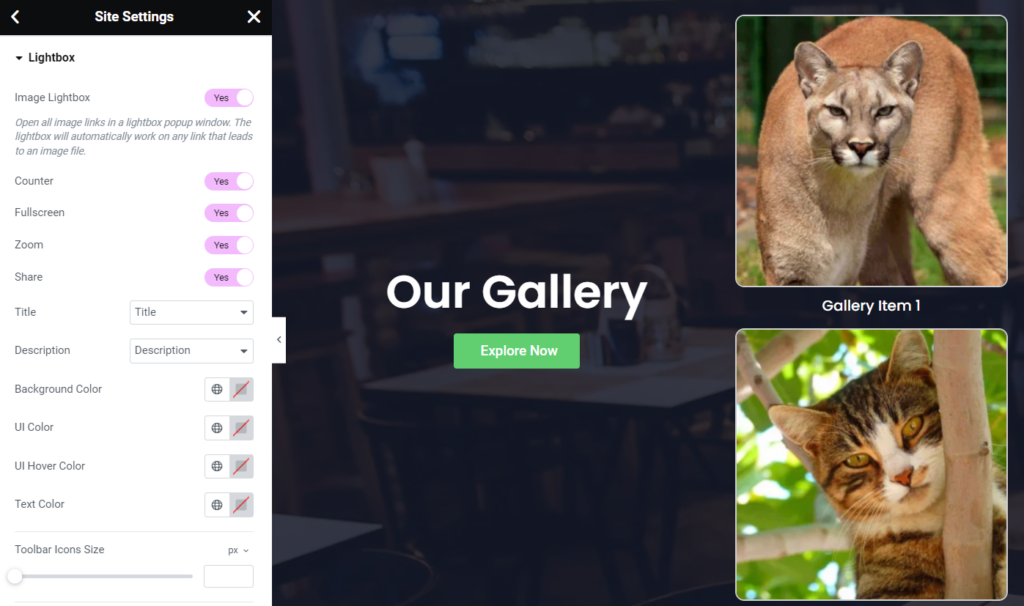
We just enabled all the switches for the lightbox configuration including zoom, counter, fullscreen, and share. See what happened after that.
7. Implement Filtering and Sorting Options
Implementing filtering and sorting options can greatly enhance the user navigation and browsing experience. Here’s why you should consider adding these interactive elements.
- Streamlined Content Discovery: Filtering and sorting options allow users to quickly find the specific images or videos they’re looking for. They can narrow down their search based on categories, tags, or other custom parameters, saving them time and effort.
- Improved User Engagement: By giving users the ability to filter and sort through your gallery, you empower them to engage more deeply with your content. They can explore different categories, sort images by date or popularity, and truly interact with your gallery in a meaningful way.
- Enhanced User Satisfaction: Providing filtering and sorting options in your Elementor Gallery shows that you value your users’ time and preferences. It creates a seamless and enjoyable browsing experience that keeps visitors coming back for more.
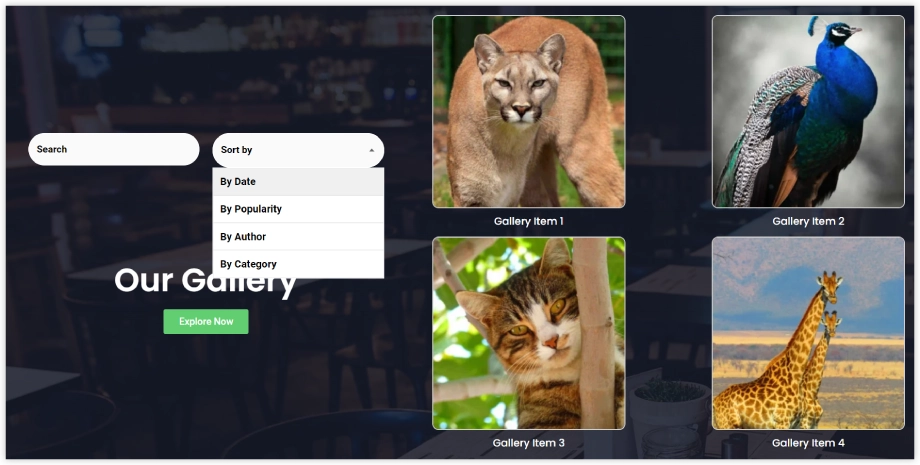
Take advantage of Elementor’s powerful features to implement filtering and sorting options in your gallery.
Conclusion
With Elementor’s vast library of effects, creating dynamic and engaging galleries has never been easier. Elevate your visual storytelling and captivate your audience with stunning galleries that leave a lasting impression.

0 Comments