WordPress has made it very convenient to build blogs and websites. If you have an exclusive blog that you want to offer only to signed-up members, it is possible with the help of available free-to-use plugins from the WordPress repository. Many membership plugins in WordPress provide options to manage access to content for different users.
In this article, we’ll use the WP-Members, one of the most popular free-to-use membership plugins for WordPress. We will demonstrate the basic setup of the WP-Members plugin and see how it is configured to restrict content access to your blog to only signed-up users.
Step-by-Step Guide to Creating a Members Only Blog in WordPress
Let’s start with the step-by-step guide to creating a member-only blog in WordPress. This also includes installing and configuring the WP-Members plugin.
1. Install WP-Members plugin
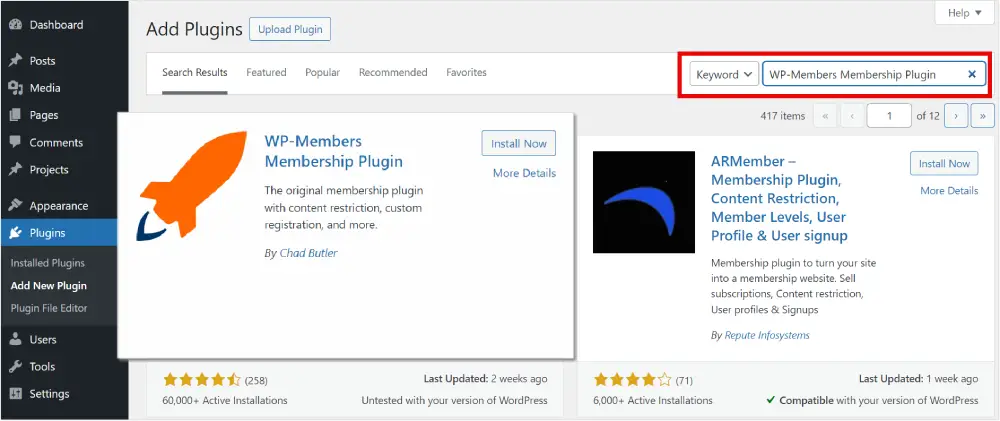
Go to plugins and click on Add New Plugin. Search for WP-Members Plugin. Click on Install. After installation click on Activate. Now the WP-Members plugin is activated on your blog website.
2. Optimize WordPress for a member-only blog
After activating it, we need to configure some highly recommended WordPress settings for using this membership plugin. A notice message will appear on the WP-Members Settings page if these recommended settings are not configured.
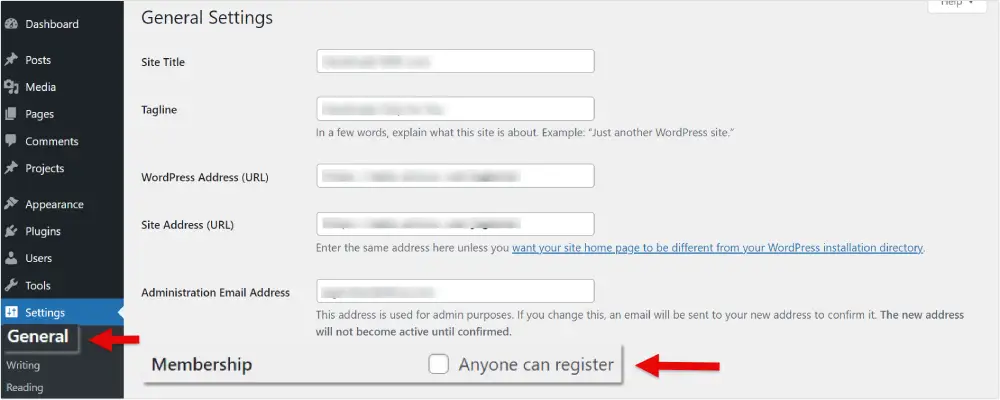
(a). First, navigate to General settings. Uncheck “Anyone can register”. This configuration stops open registration through wp-login.php.
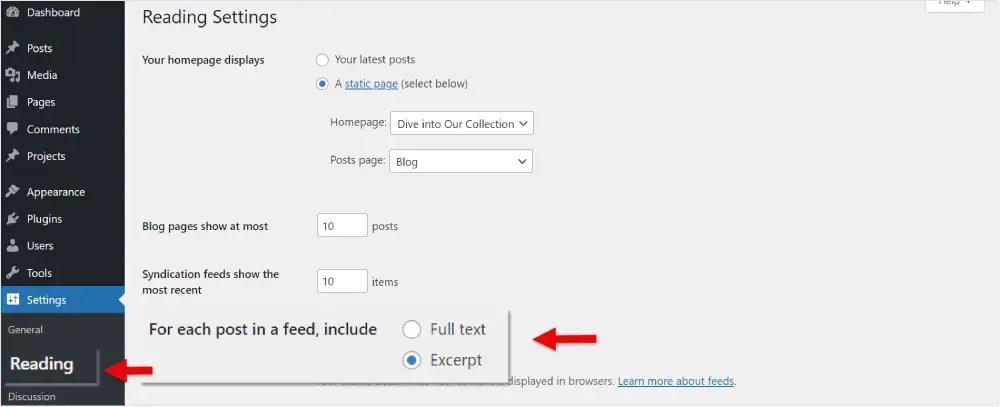
(b). Next, locate the Reading settings. Keep the ‘excerpt’ radio button selected. This will hide your full content and only show excerpts in the RSS feeds.
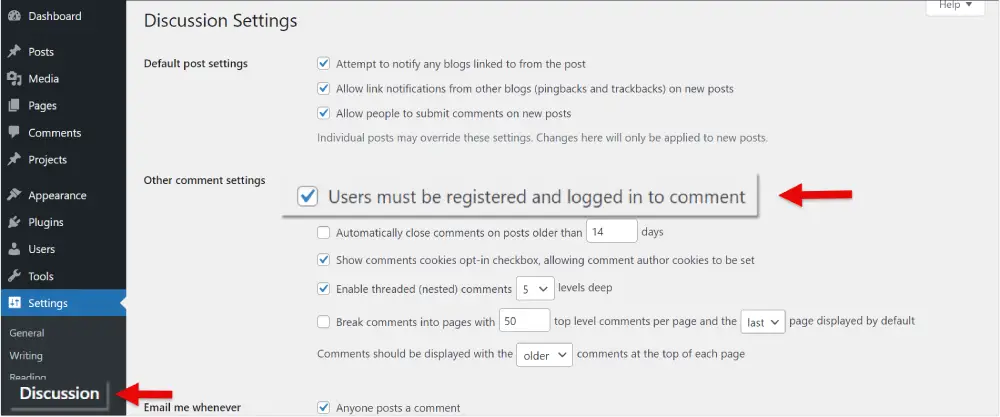
(c). The last recommended setting is Discussion. Uncheck “Users must be registered and logged in to comment”. By doing this, comments from users who are not registered will be blocked.
3. Configure WP-Members plugin
Now, Let’s move to WP-Members plugin settings. This post will only discuss the WP-Member settings in building a member-exclusive blog.
(a). First of all, let’s view the Options tab. Here you will find useful settings to restrict the content on your blog.
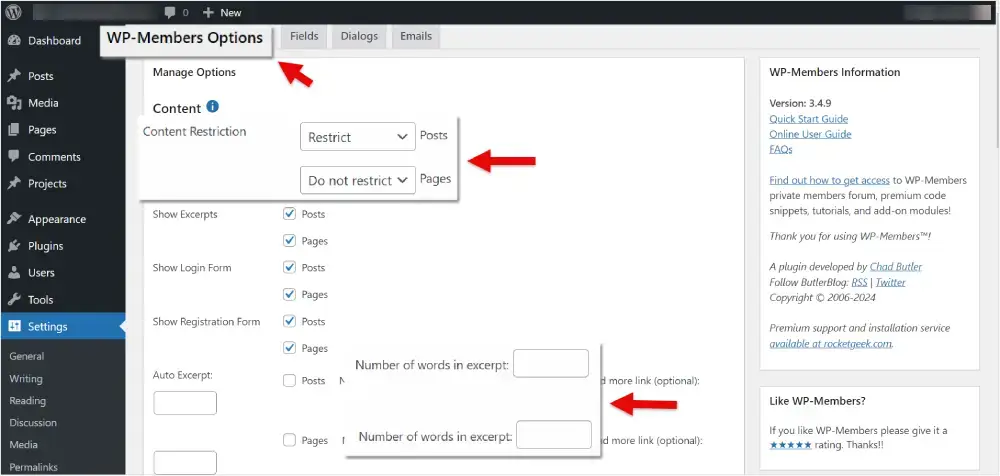
Select ‘Restrict’ in the first drop-down to restrict the display of the post’s content. Keep ‘Do not restrict’ selected in the 2nd drop-down to display the pages. If you choose to ‘Restrict‘, a signup form will appear in place of the content on your blog’s pages.
(b). Enable the following checkboxes.
- Show Excerpts – To display excerpts on posts and pages.
- Show Login Form – To place login forms on posts and pages.
- Show Registration Form – Display the registration form on posts and pages to users who are not logged in.
- Auto Excerpt – You can set an excerpt’s word count with the Auto Excerpt option, and it will appear automatically on all pages and posts.
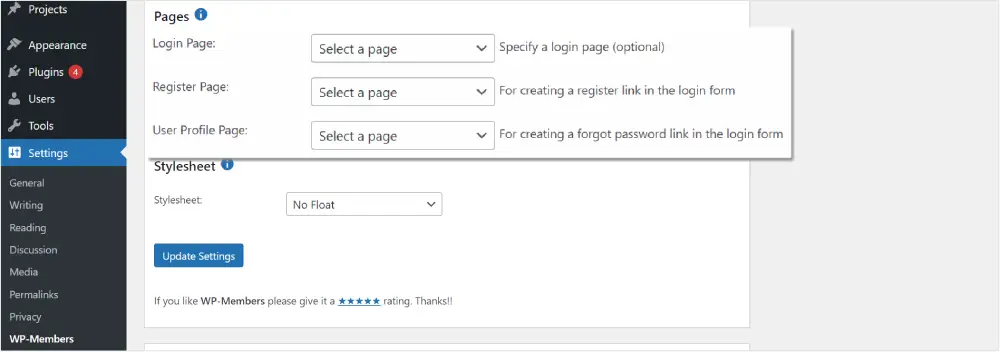
You can also set separate Login, Registration, and User Profile pages from these drop-down lists. If you go with the default settings the login and registration form will appear after excerpt on every blog post.
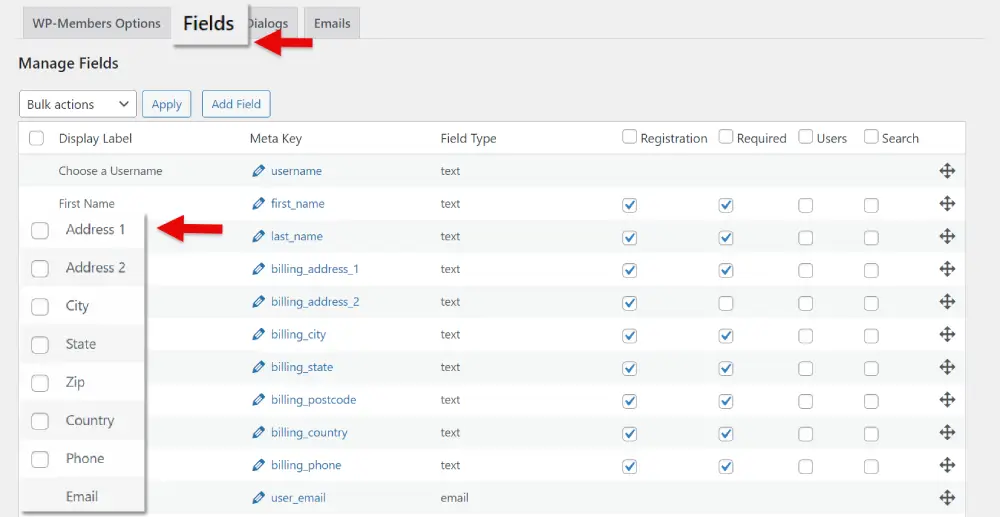
(c). From the Fields tab, you can add, remove, modify, and rearrange fields in the registration form as per your needs.
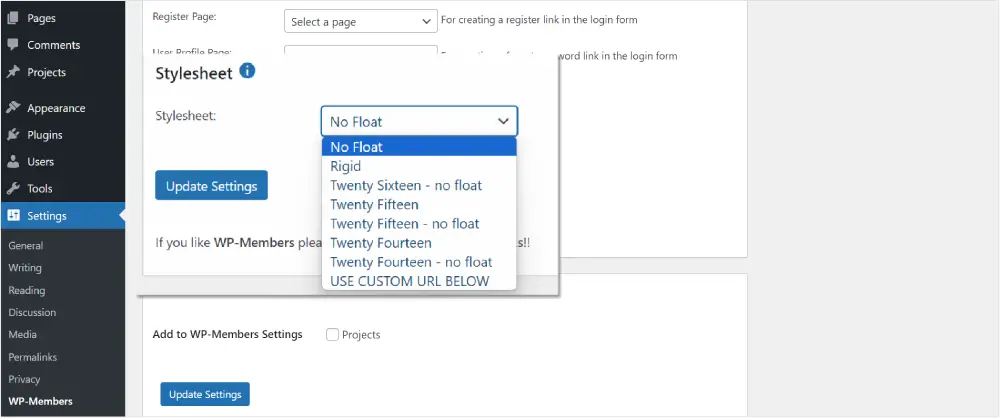
(d). Choose an appropriate stylesheet that suits your blog design. Several pre-built stylesheets are provided by the WP-Members plugin. There is also an additional option to use a custom stylesheet.
4. Verify the working of the WP-Members plugin
After doing all these settings and configurations, navigate to the homepage of your blog where all posts appear in an archived form.

Login and registration form will appear on the homepage if you have selected ‘Restrict’ in the topmost Content Restriction options for the page as shown in step 3.
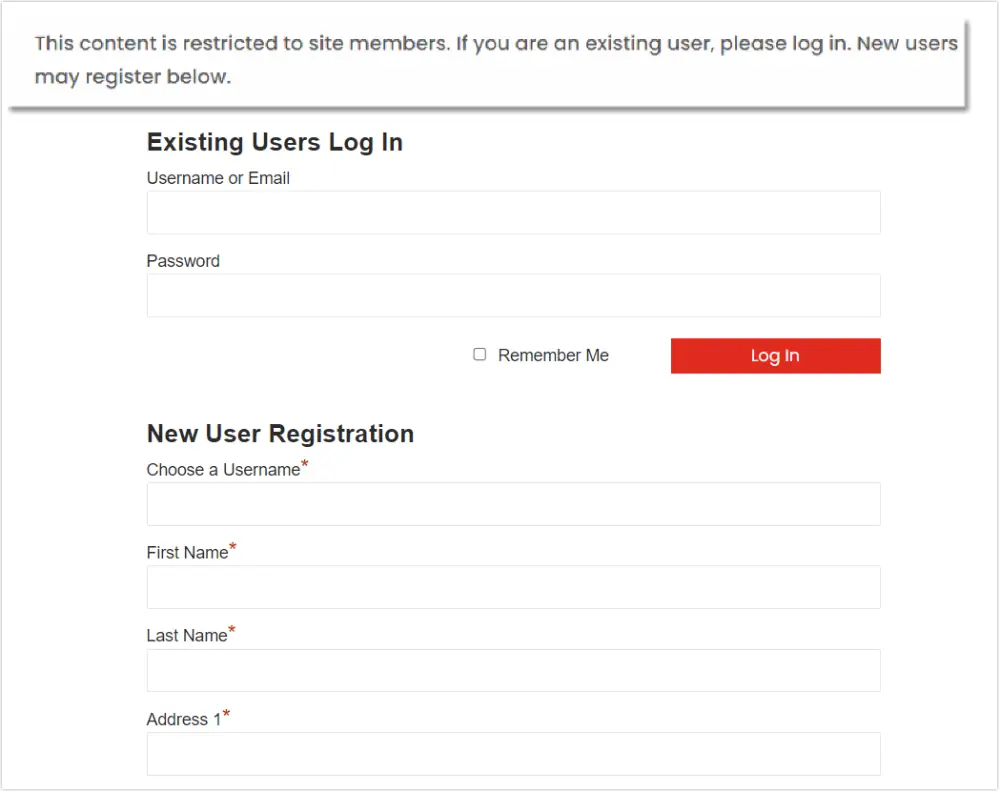
These forms would not be visible on your homepage if you create and choose separate pages for each as shown in step 3 (b).
5. Exclude certain posts or pages
If you want to exclude some posts or pages from the restricted content and want to show them to your readers, you need to edit the post or page. There you will find the content restriction options at the bottom. Select
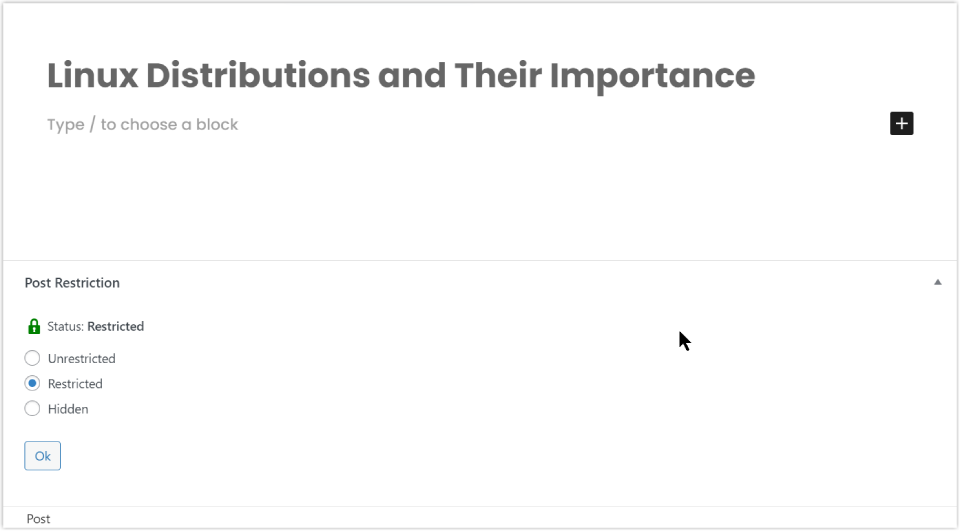
Unrestricted – To display the page or post on your website. This option allows the visitors to access the post or page content.
Restricted – Completely blocks the access of page or post access on the website.
Hidden – This completely hides a post or page for the logged-out users.
After doing all these settings, let’s check if these are working or not. Now click on any of the read more links to open a post from the homepage. You will see that the content is restricted and you need to log in or register to continue reading the post.
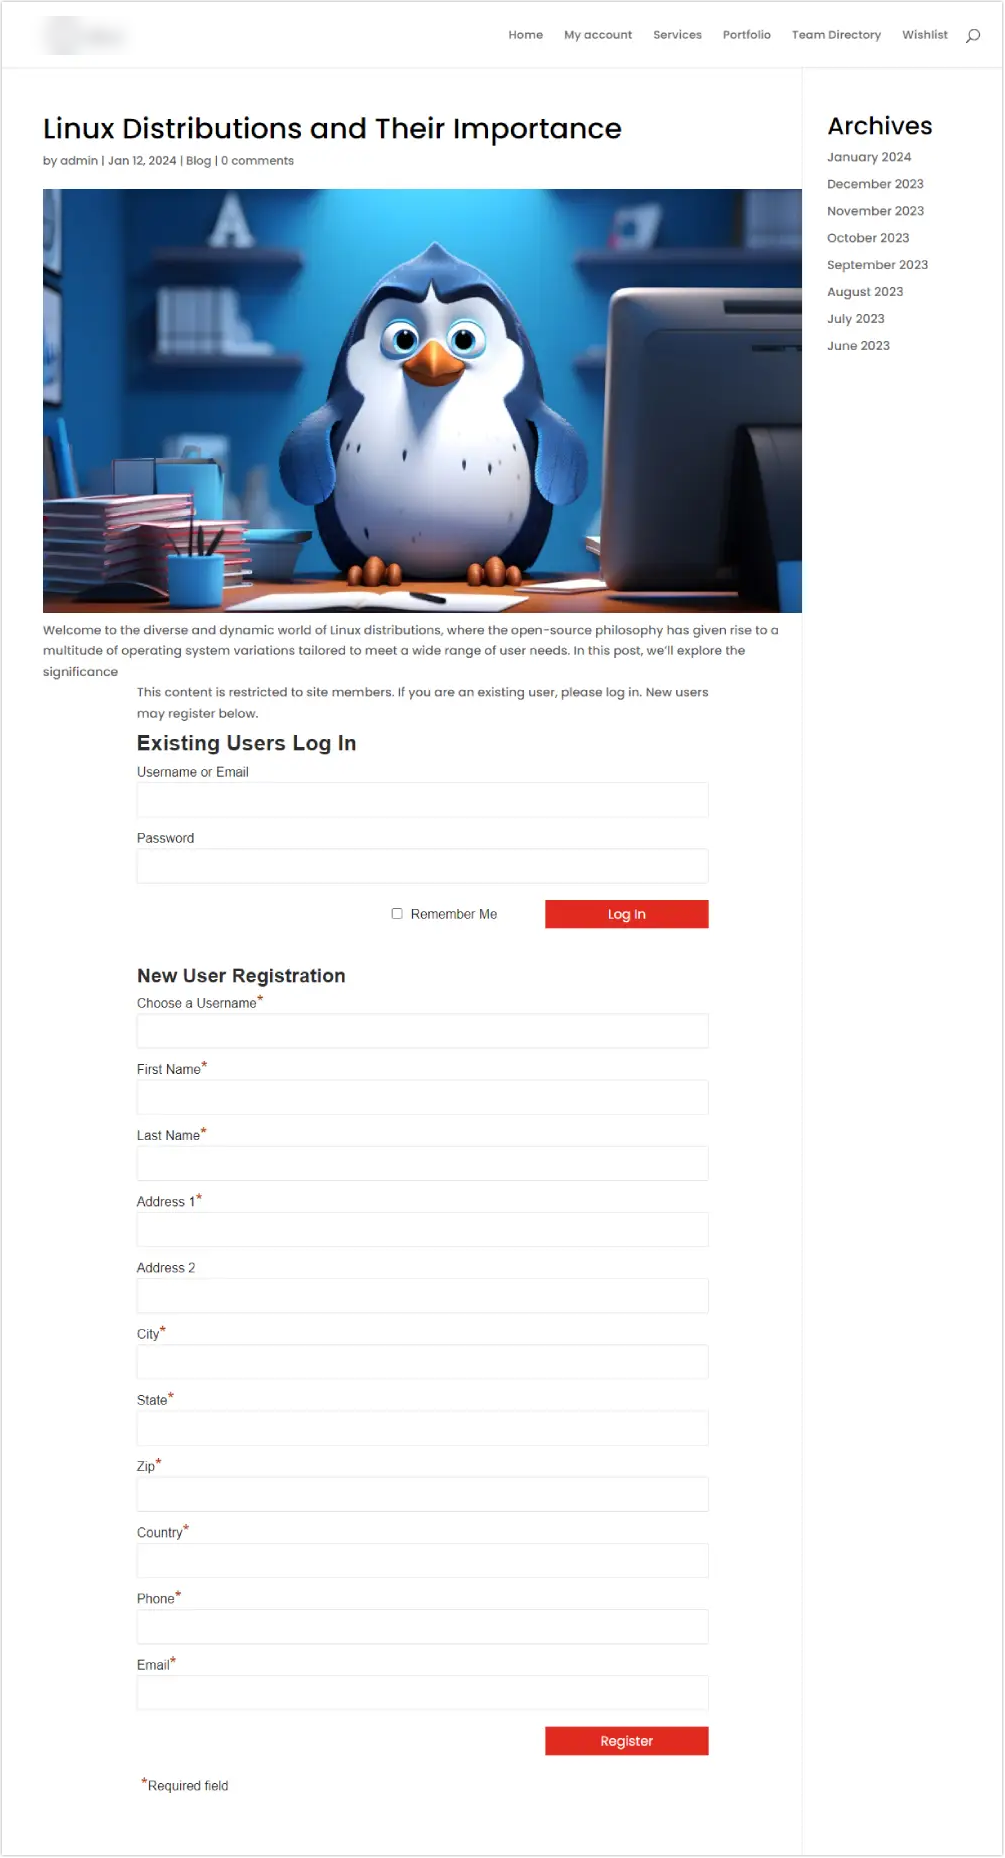
Finally, you have created a member-exclusive blog where only the registered users are allowed to access and read the blog posts. WP-Members plugin can be an ideal option to create a blog website with restricted content access. I hope this will prove to be a helpful post to demonstrate the idea of content restriction on a blog website.

0 Comments