Do you have a service website? Do you offer solutions to problems that require mastery? Is there any need to display numbers that explicitly represent your experience in a particular field? If yes, then using bar counters, it’s highly possible to do that. And if your website is built on Elementor, then with the help of the Bar Counter widget, you can do that efficiently.
What’s a bar counter, and how can it help you display your expertise in a beautiful manner?
So, what exactly is a bar counter?
It’s a visual element that uses a line (mostly) to represent numbers. These numbers can be anything from your years of experience to your skill levels. In this post, we’ll explore the different types of bar counters, their benefits, and how you can effectively use them on your website.
If you’re ready, let’s get started!
What Are Bar Counters (Progress Bar)?
Bar Counters on a website is a statistical element that showcases numbers in a creative way. Their use is simply to display figures that would look dull if written generally. For example, you want to display how many years of work experience you have. Now, if you write that down simply, it would not bring any creative flare on the website.
However, by using bar counters, you can make those years look creative and highly visible. Something that visitors will definitely notice. Plus, you can use them for multiple reasons in addition to your years of experience.
For instance, use bar counters:
- To display how many clients you’ve worked with.
- To display projects.
- For showcasing locations of your business.
- Highlight skills.
- Count the number of services you offer.
And there are many use cases for which you can use bar counters on your website.
Bar counters work very straightforwardly. Using a web page builder, such as Elementor or Gutenberg, you can add them to a page and define the number that should be displayed on the front end.

Bar counters on the front end will count the number from zero and stop at the number you’ve defined, the same as you can see in the above example.
Type of Bar Counters
Generally, there are two types of bar counters:
- Line bar counter (Linear)
- Circle bar counter
You also have two types of linear bar counters—one horizontal and the other vertical. The latter is good for displaying statistics, such as revenue, temperature, and people.
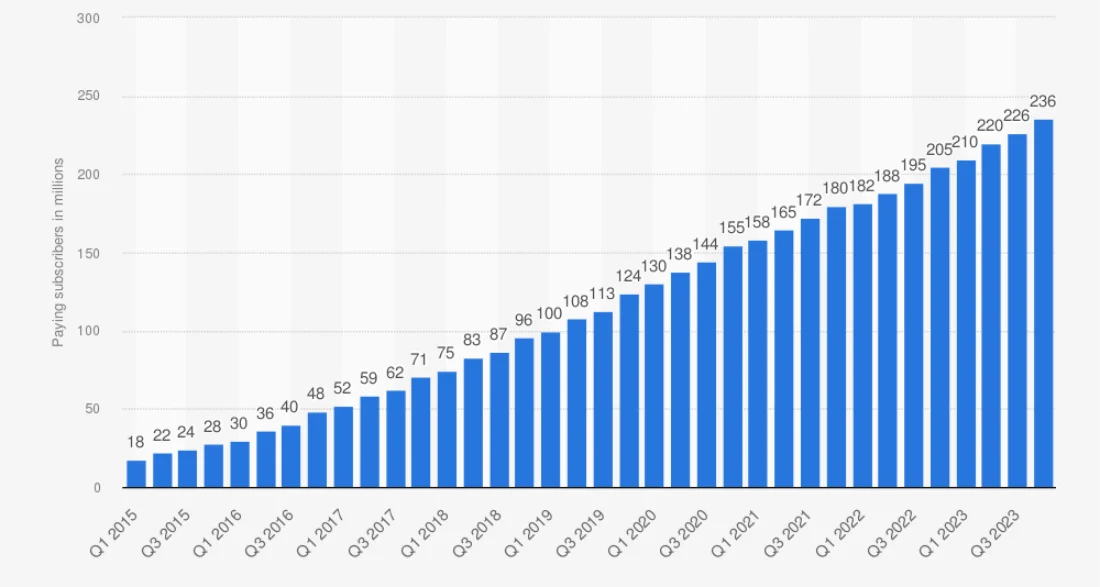
The horizontal and circle number counters are good when you need to highlight the skills, experience, and number of projects done. The linear bar counters work to display the number counter by filling the space vertically and horizontally.
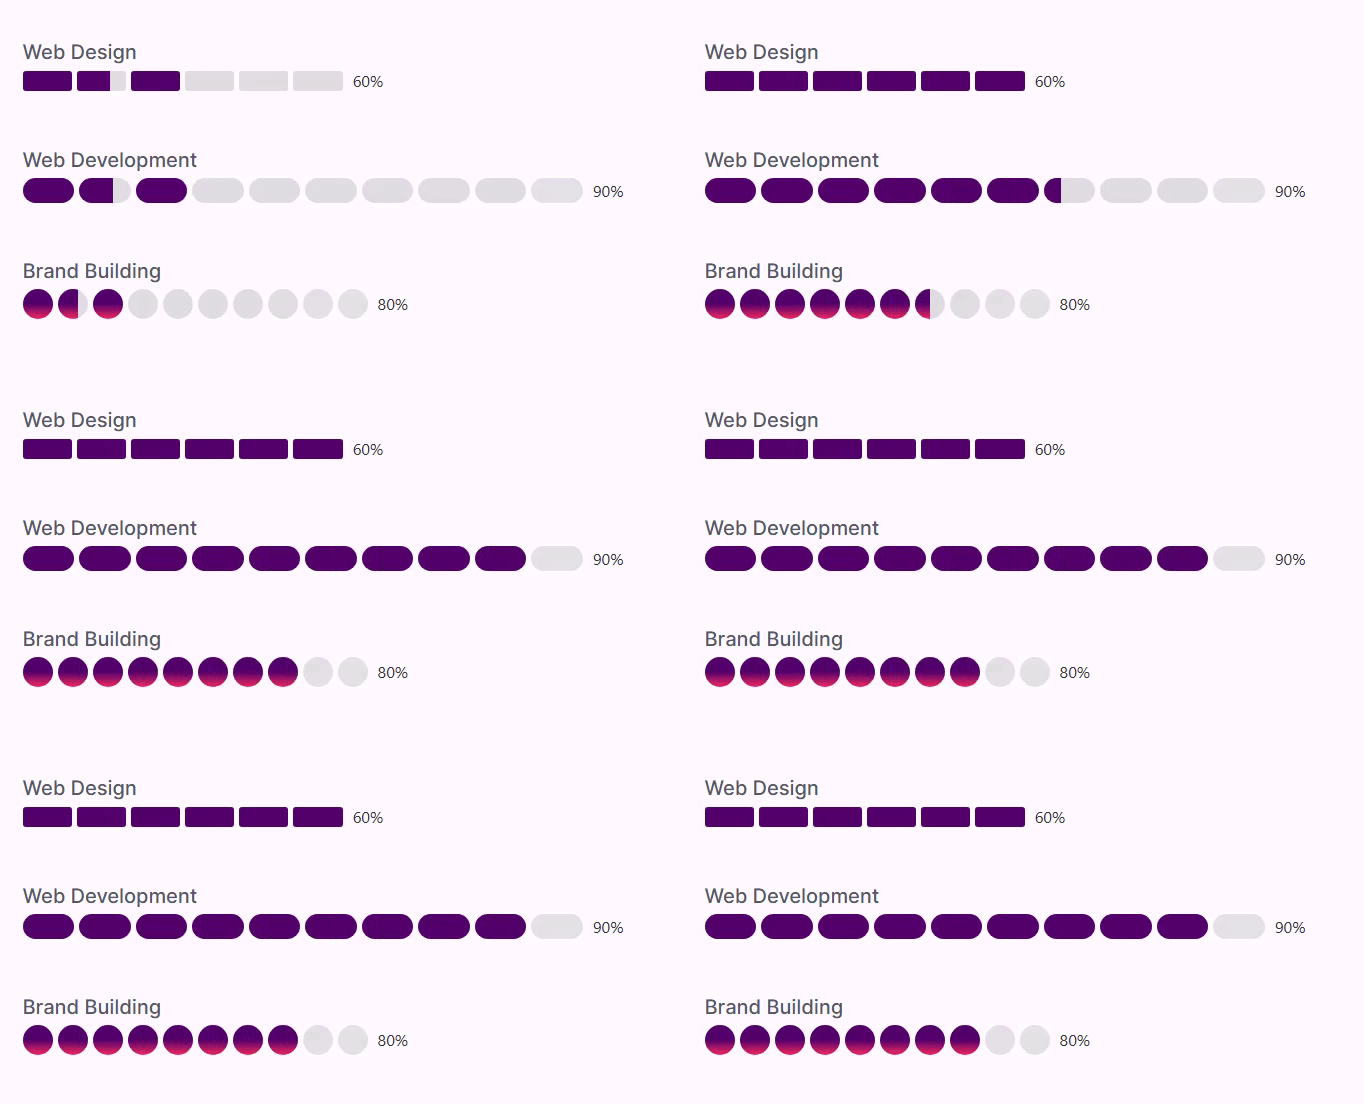
In contrast, the circular bar counter fills the element circling itself. A round animation takes place when it’s a circular bar counter.
Why Use Bar Counters In an Elementor Website (Benefits)
Numbers and percentages hold great significance if you want to make a point about something. If you are offering services in a particular field, then the number of years of experience and skills build trust and authenticity.
And by using a bar counter, it’s easier to do that. Plus, you can make it creative, which will gain more attention.
Apart from trust and authenticity, bar counters also help you:
- Do clear communication.
- Establish transparency.
- Do a comparative analysis.
- Add dynamic content.
And give rise to the modern look.
With all these benefits, a bar counter can be essential to your website design and content presentation.
Are you thinking of adding them to your Elementor website? The Bar Counter widget would be the easiest way to do so. Let’s see how to utilize it.
How to Display Progress Bars In Elementor for Free (3 Simple Steps)
The following steps use the Bar Counter widget for Elementor of the free version of the WPMozo Addons for Elementor plugin.
It includes a total of 14 widgets for Elementor that allow you to easily create engaging and necessary webpage elements using Elementor.
For instance, you can create:
- Before and after image slider.
- Masonry image gallery.
- Clutter-free pricing tables.
- Team slider.
There are also other widgets that let you add requirement-specific elements. It also offers a premium version that includes 20+ easy-to-use Elementor widgets that can be used to improve WooCommerce stores, showcase Instagram feeds, turn a simple blog into a highly functional one, and much more.
Learn more about the plugin here.
To add the progress bar counter, follow the below steps.
Step 1 – Install Bar Counter Widget
To create a progress bar counter, you first need to install the widget, which is done by installing the WPMozo Addons for Elementor Lite plugin. You can also install the premium one to get more features.
But for this post, we’ll stick with the free version. Therefore, to install it, go to Plugins → Add New Plugin
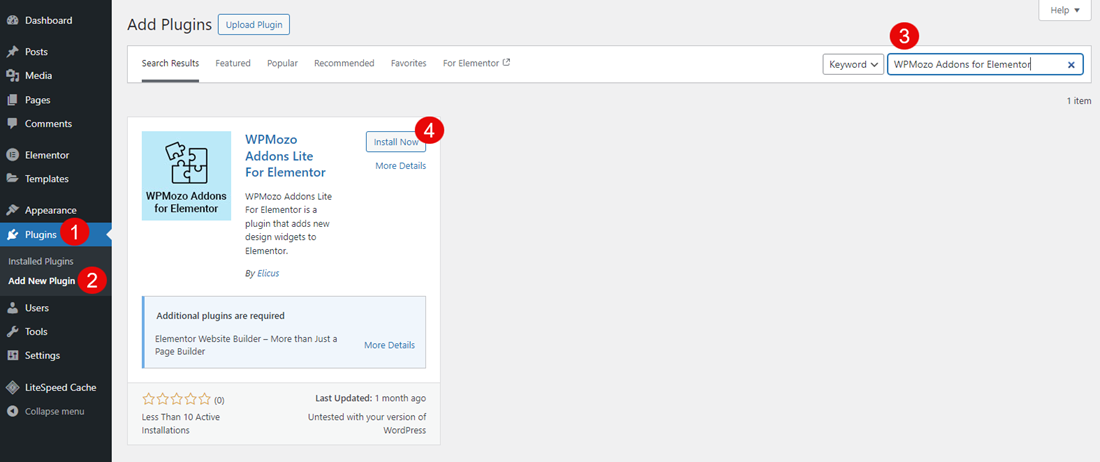
In the plugin’s repository, search for “WPMozo Addons for Elementor,” and click Install Now for the above.
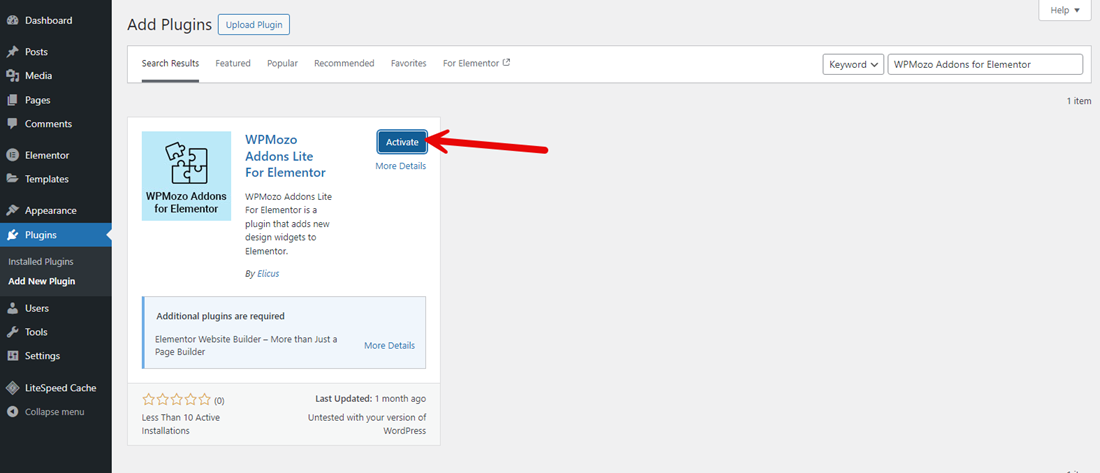
Once the plugin has been installed, click Activate. After activating the plugin, move on to the next step.
Step 2 – Insert the Widget On a Page
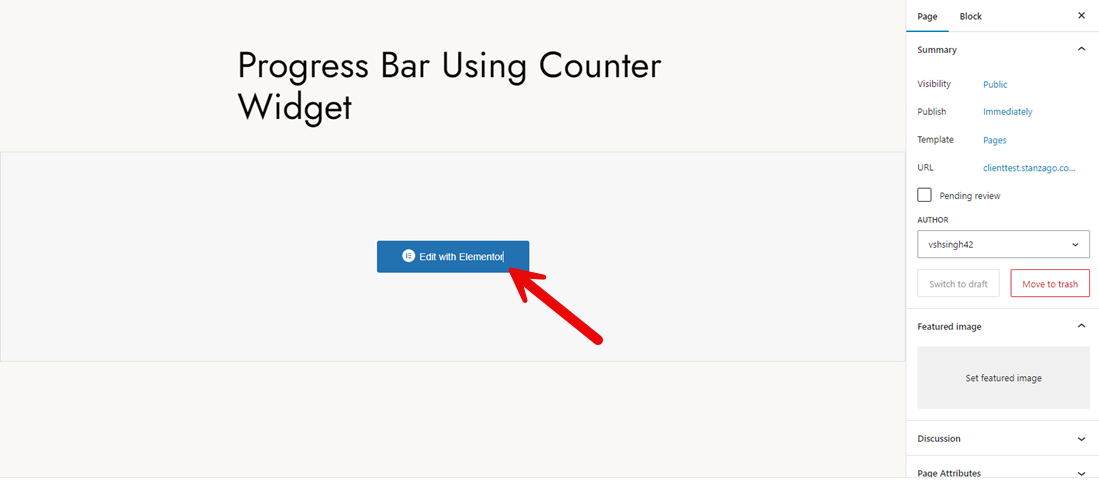
In this step, you need to insert the widget on the page where you want to display the progress bar. Create a new page or edit an existing one. Choose to Edit with Elementor.
Once the Elementor canvas is loaded, go to the widgets left sidebar and scroll to the WPMozo section. From there, pick the Bar Counter widget.
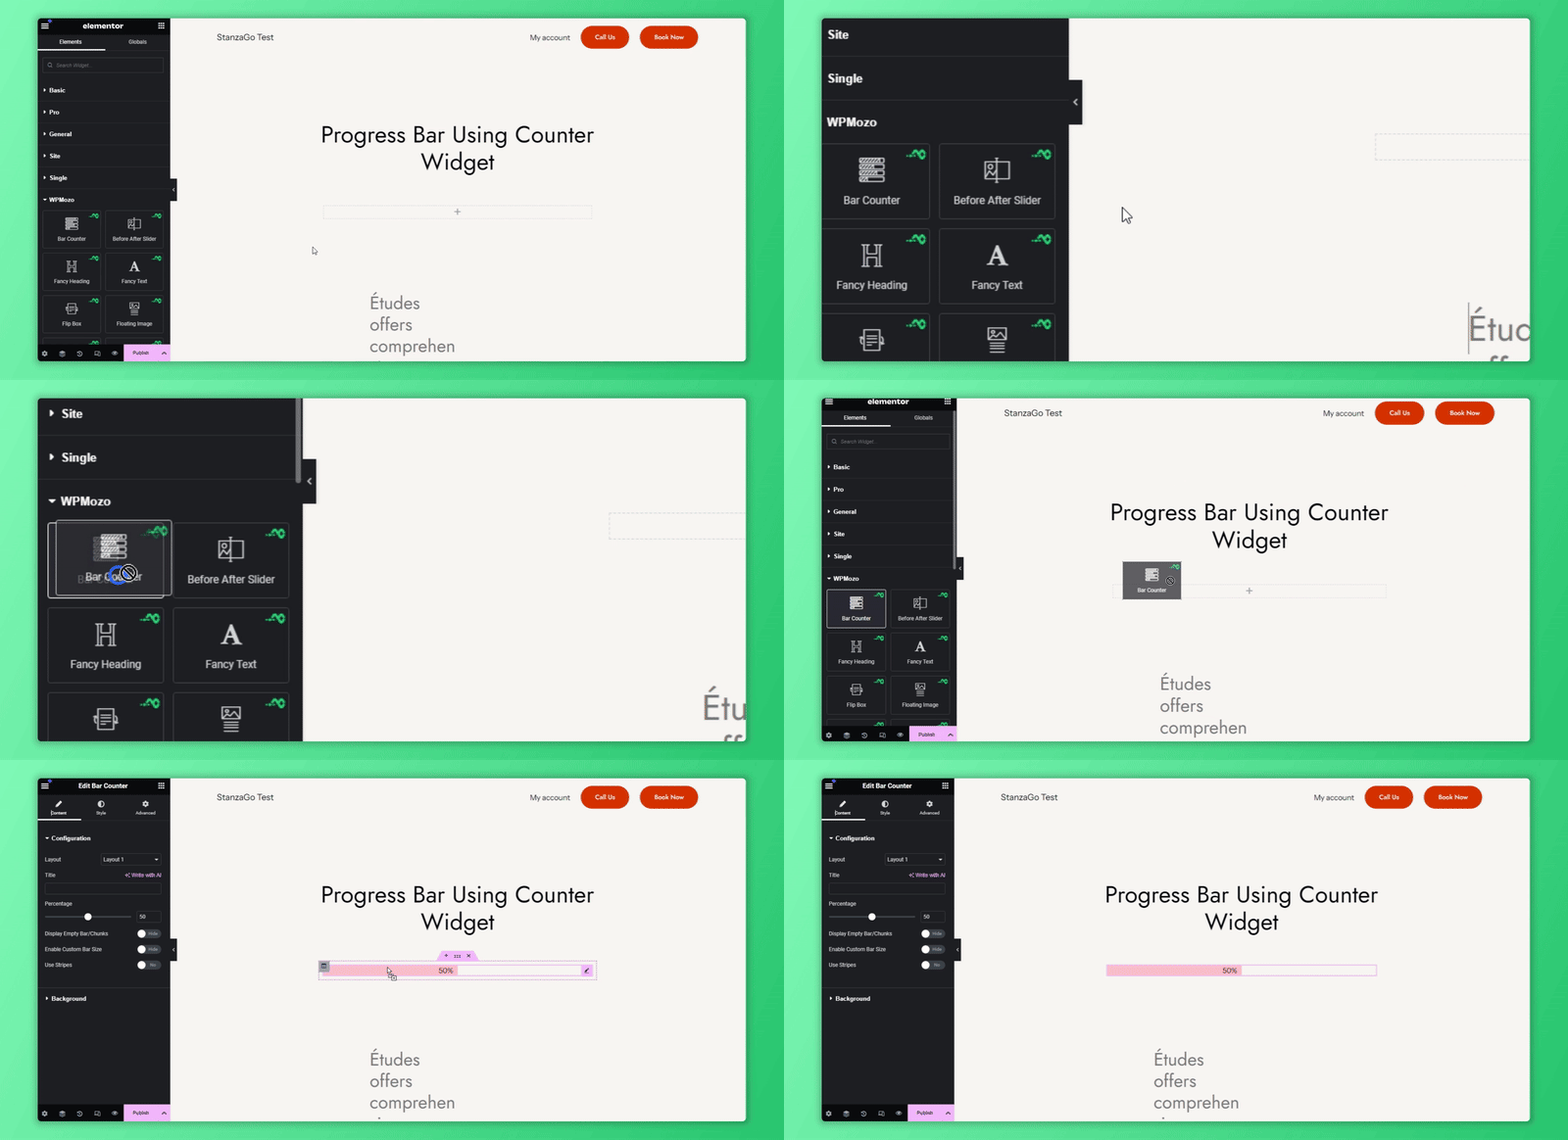
As soon as you do that, you’ll see a progress bar just like the following.
The default might not fit your website’s design scheme. Therefore, you need to customize the widget for the better.
Step 3 – Customize the Progress Bar Counter Widget
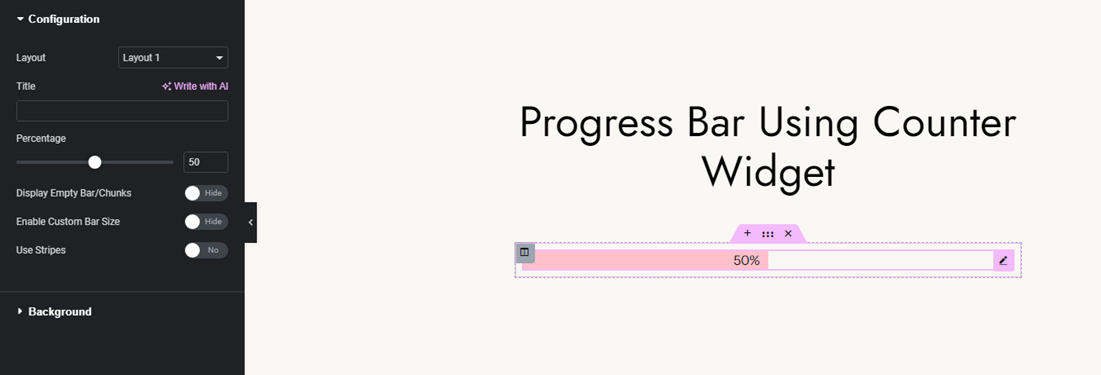
Once the bar counter widget is added to the page, you get the controls in the left sidebar as the following:
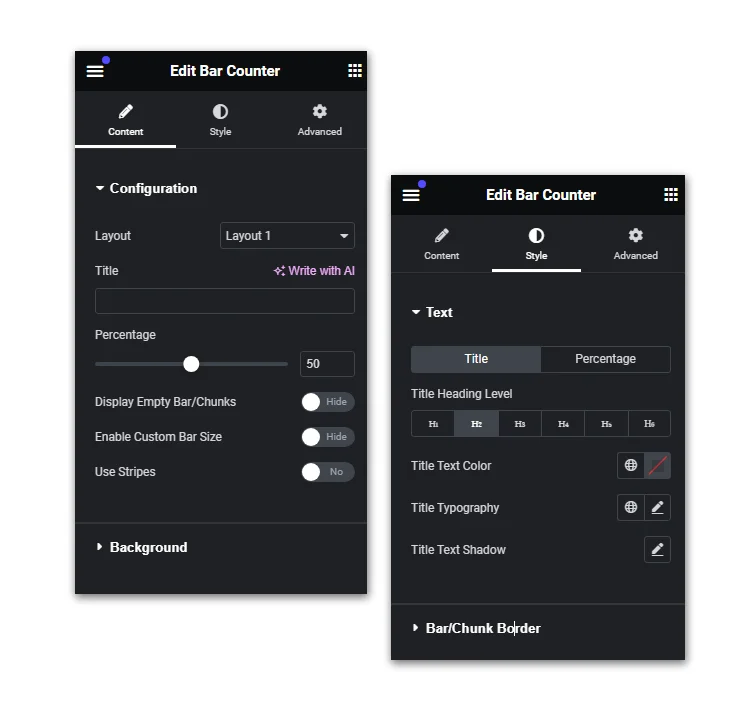
These controls, let you configure and style the progress bar easily according to your requirement. The first tab, Content, includes Configuration and Background controls.
Using the Configuration options, you can:
- Change the progress bar counter’s layout.
- Define the title.
- Add percentage value.
- Display or hide empty bars/chunks.
- Enable custom bar size.
- Use stripes.
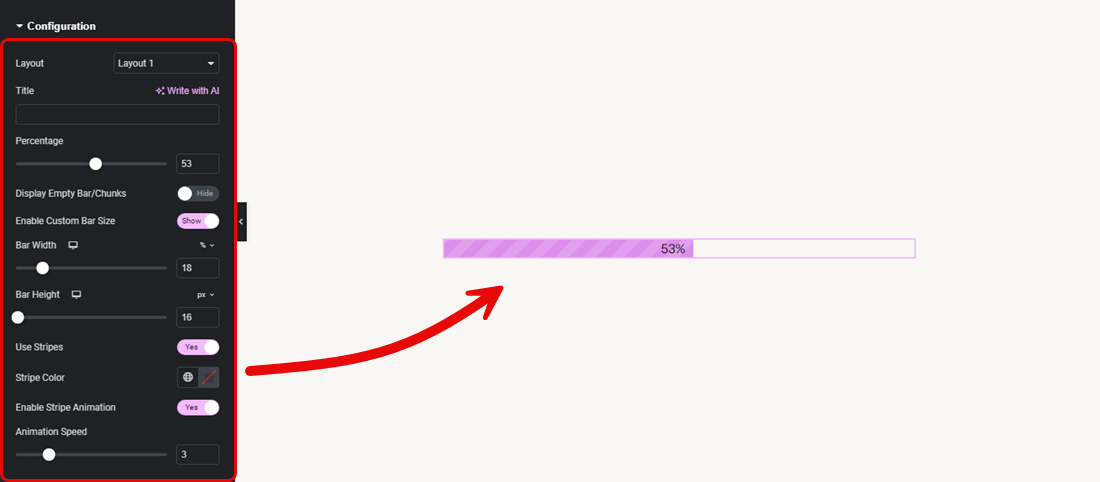
If you use layout 1, you can display the bar stripe and apply separate colors with animation.
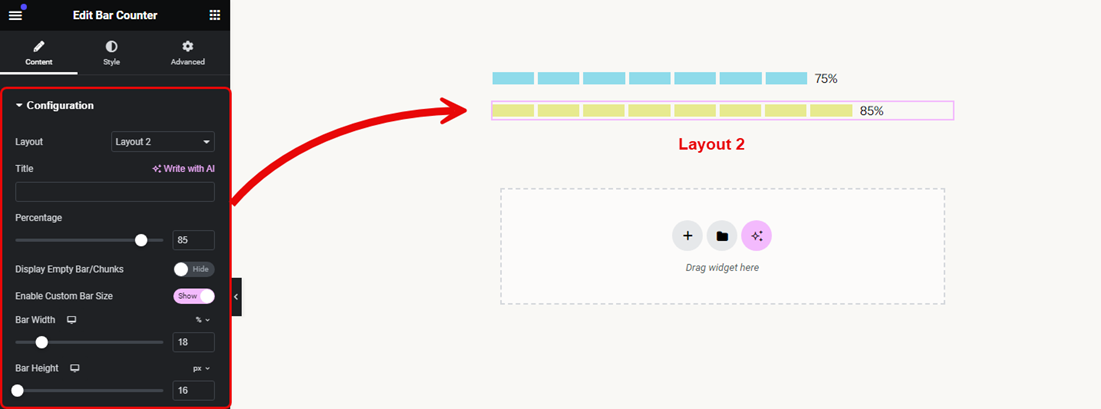
With layout 2, you can display the progress bar in chunks that get filled automatically on the front end.
Both layouts support background customization for the empty space in the progress bar with color, image, gradient, and video.

According to your requirements, you can add the background to the progress bar. Once you have customized the content, move to the Style tab to make changes in the Text and Bar/Chunk Border. Here, you can customize the Title text’s:
- Heading level.
- Text color.
- Typogrpahy.
- Text shadow.
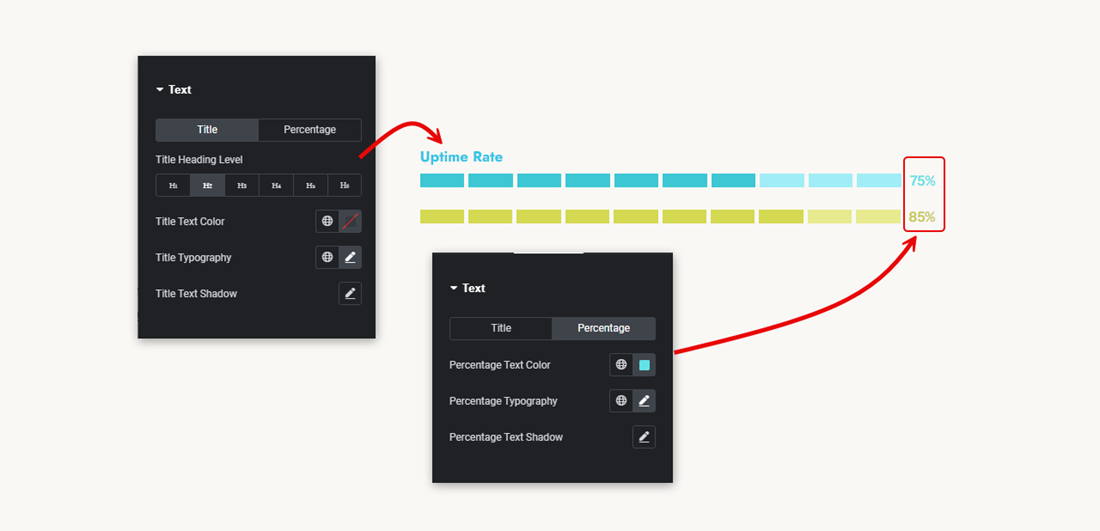
It also lets you customize the progress bar’s percentage. You can change percentage text’s color, typography, and shadow.
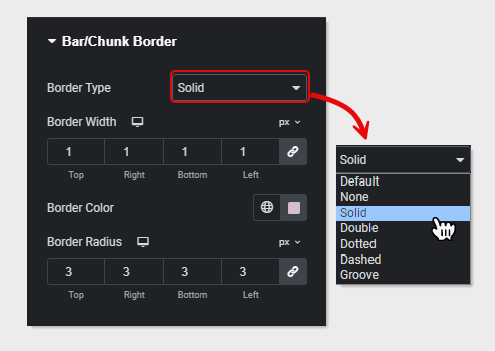
Using the Bar/Chunk Border options, you can easily add a border to the progress bar. The border you’ll add can be one of the 5 borders that are available. In addition to the border, you can define the width, color, and radius as well.
By customizing all the options, you can have progress bar in Elementor like the following examples covering various industries.
Some Examples of Bar Counters to Get Inspiration
You can use the Bar Counter widget in Elementor to fulfill design requirements for different progress bars. The following are some examples to help you get inspiration and design your own.
- Professional Skills

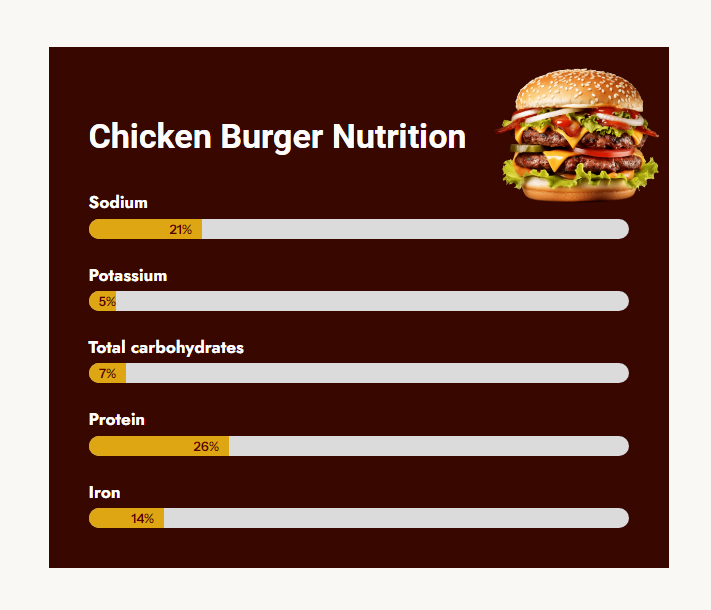
- Food Nutrition Values
- Hosting Statistics

Bottom Line
With the help of the above steps, you can effectively use the Bar Counter widget to create progress bars in Elementor. The plugin, WPMozo Addons Lite for Elementor, makes building other webpage elements in WordPress intuitive and highly engaging.
If you’re solely going to create progress bars, you can still prefer the plugin, as it boasts lightweight widgets that won’t create any speed issues.
We hope this post helped you learn more about progress bars and counters, why you should use them, and how to do so. Try the plugin today—it’s free—and let us know your experience in the comments.
If you require advanced options, you can also go with the premium version.


0 Comments