
Adding schema markup to your website is a great way to improve your site’s visibility in the search engines, whether Google, Yahoo, Bing, and whatnot. Furthermore, it’s easy to do.
All you need to do is add a few lines of code to your website’s HTML.
Or use an SEO plugin if your website is on WordPress, and the rest will be taken care of by search engines.
If you’re new to schema markup and not sure how to add schema markup to your website, worry not. The internet is full of resources that can help you get started. And the best part is that this blog post is one of them.
In this post, you’ll find a quick overview of schema markup in brief words before moving to SEO schema, website schema, and markup code.
Let’s get started!!
Schema Markup: What Is It in Simple Terms?
Schema markup is a code that you add to your website’s HTML to help the search engines understand what your site is about. It provides important information about your sites, such as the title, description, and keywords, which the search engines can use to index your site correctly.
Schema markup also makes it easier for people to find your site in the search engines because it provides additional information about your site that the search engines can use to rank it.
Adding schema markup to your website is a great way to improve your site’s visibility in the search engines, and it’s easy to do.
Here’s how it looks:

Uses and Benefits of Schema Markup
Schema markup is used to improve the visibility of web pages in search engine results pages (SERPs).
It can help increase click-through rates from SERPs, and it can also help increase the organic search traffic to a website.
Schema markup can also help to improve the quality of search engine results by providing more relevant information to users.
Additionally, schema markup can be used to improve the appearance of search engine results pages.
In general, it offers the advantage of enabling your web pages to appear in richer search results or more prominently in SERPs.
Consider, for instance, how the first page of the SERPs looks for the keyword phrase Target.
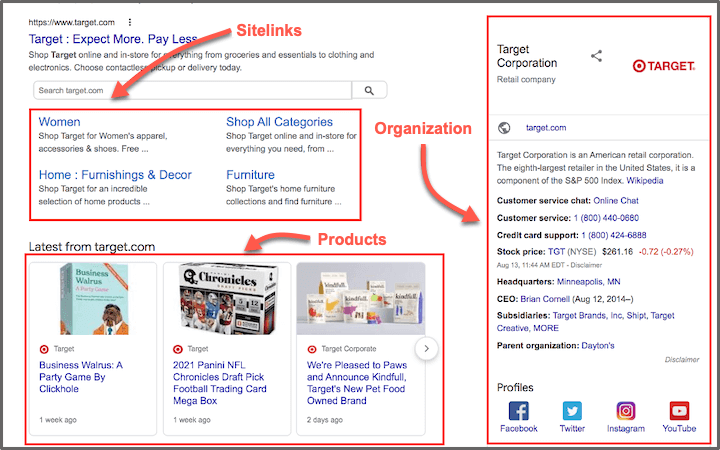
Unlike the standard SERP result with the blue, clickable page title and the accompanying meta description, this SERP displays many rich results in both the top and bottom sections.
Rich schema.org markup powers all of these results.
In addition to improved SERP rankings, adding schema.org to web pages has other benefits.
Let’s have a look at them:
- A rich result has an average click-through rate of 58% compared to 41% for a non-rich result. With some rich results, CTR can reach 87%, according to research done by the Search Engine Journal.
- Reach audiences looking to book events, buy products, or make bookings with rich results: If you’re trying to convince users to book events, buy products, or make bookings, rich results can help you.
- Having your brand listed at the top of the page and in more prominent real estate can build brand awareness.
- Get a call-to-action from Google: Some rich results will include a call-to-action like Get Now or Call Us. This will drive more clicks and conversions.
How to Implement Schema Markup for Most Websites – Using a Tool
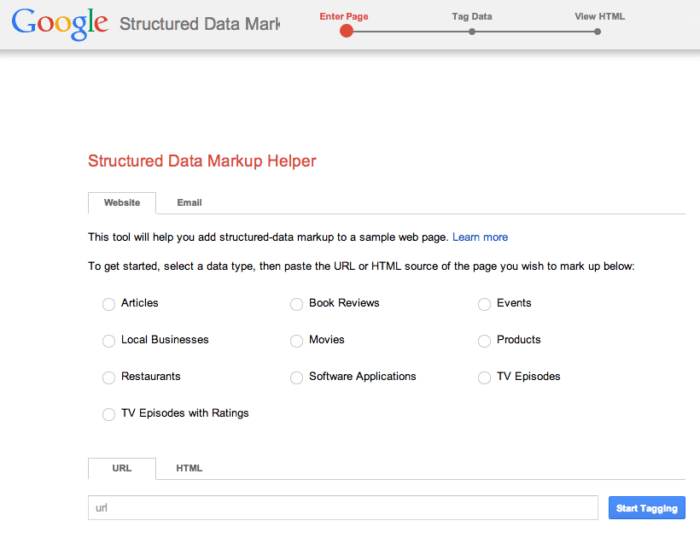
Step 1: Select a Tool
Select a tool such as the Google Structured Data Testing Tool or the Screaming Frog SEO Spider.
Step 2: Input Your Website’s URL
Put the URL and view the data that’s been parsed from your site.
Step 3: Load the Page
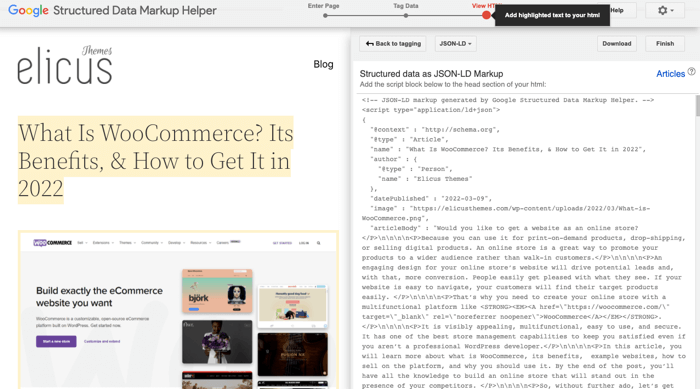
In the markup tool, the page will load, and you will be able to begin tagging items in the next phase. There will be a left pane with your web page and a right pane with the data items.

Step 4: Mark Up the Desired Elements
To add the Name markup, I will highlight the article’s title. I selected Name from the tooltip after I have finished highlighting.

When I select Name, the tool adds it to Data Items in the right pane.

Step 5: Add More Markups
Add the other items to the markup list by highlighting them in your article following the list of data items. Probably not all of the items on the list can be tagged. Include whatever you can or create the HTML.
Step 6: Design the HTML
Click Create HTML when you’re finished.
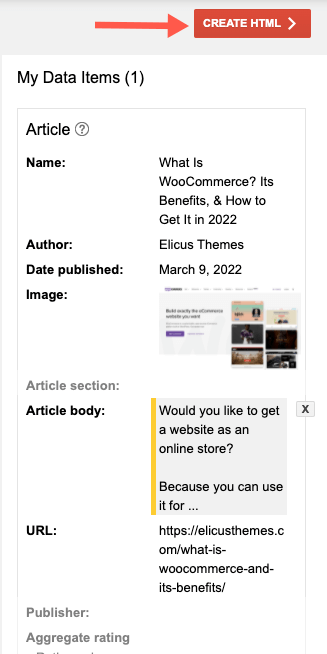
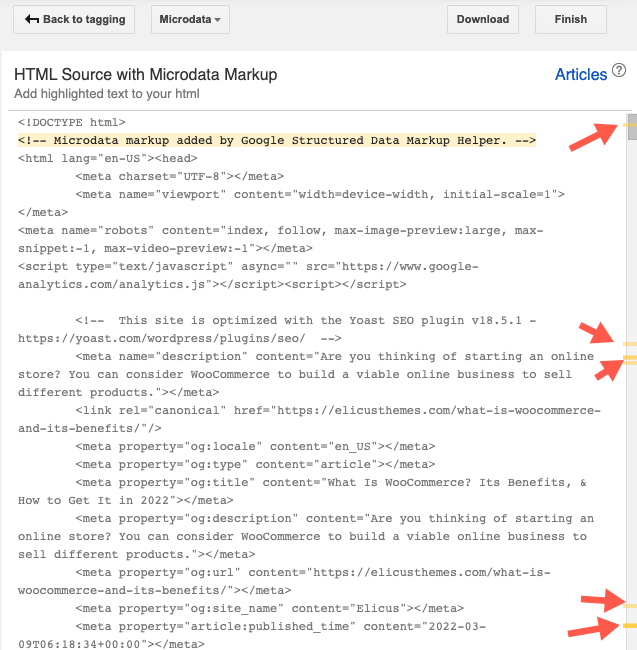
Upon clicking through, you will see the HTML of your page with your selected microdata inserted into the relevant spots.
Step 7: Make Your Site Schema-Compliant
You will then add the highlighted snippets to your CMS (or your source code if you aren’t using a CMS). The schema markup code can be found by finding the yellow markers on the scrollbar.
The automated HTML file can also be downloaded and pasted into your website’s CMS or source code.
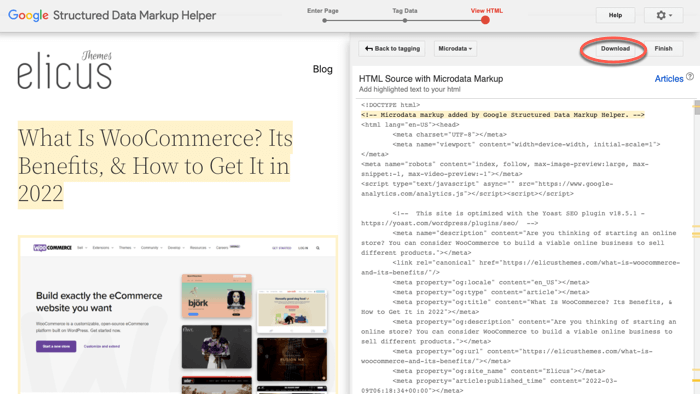
Following the Finish button, you will be presented with several Next Steps.
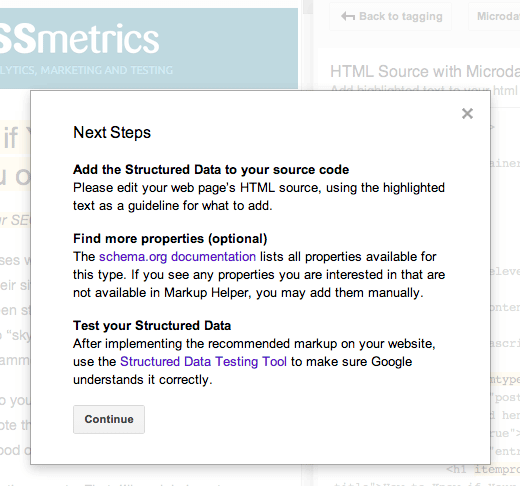
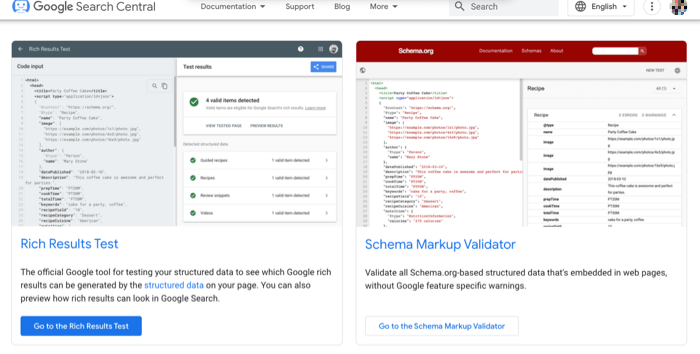
Step 8: Validate Your Schema
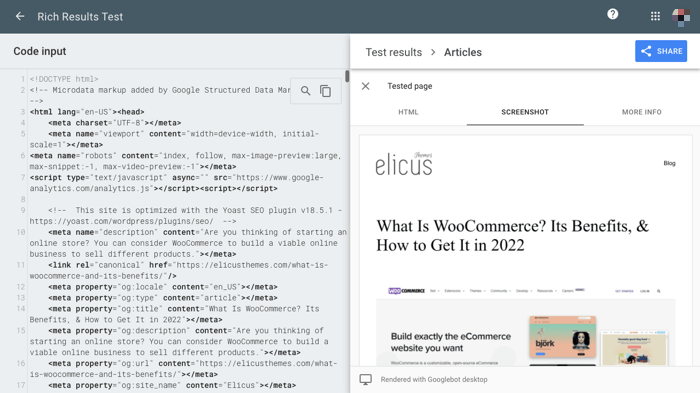
Using the Rich Results Test (previously Structured Data Testing Tool,) you can test how your page will look with the added markup.
The tool generated a page for me, and I downloaded it. Instead of analyzing the published page, I’ll examine the generated code.

Following the code paste, I click TEST CODE. The testing tool displays the article as it would appear in Google search results:
Additionally, through the validator.schema.org tool, I am able to inspect all markup elements I have added.
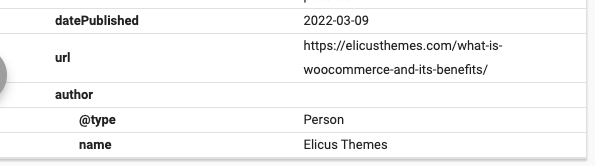
I can update the schema and preview results again if necessary by editing HTML directly in the testing tool.
How to Markup a WordPress Site?
If you want to add Schema Markup to your WordPress site, then the easiest method is to use an SEO plugin. You could also install the Schema plugin; however, the SEO plugin will help you more than the other.
As your SEO plugin, you could select any, for instance, Yoast SEO, All-in-one-SEO, RankMath, or SEOPress.
Each provides amazing features that you can utilize to boost your WordPress site’s SEO.
Keeping this idea in mind, we’ll show you how to do it using Yoast SEO. So, first of all, install Yoast on your site if you haven’t already.

Then, complete its setup wizard, and once you’ve completed it, go to SEO → Search Appearances → General.
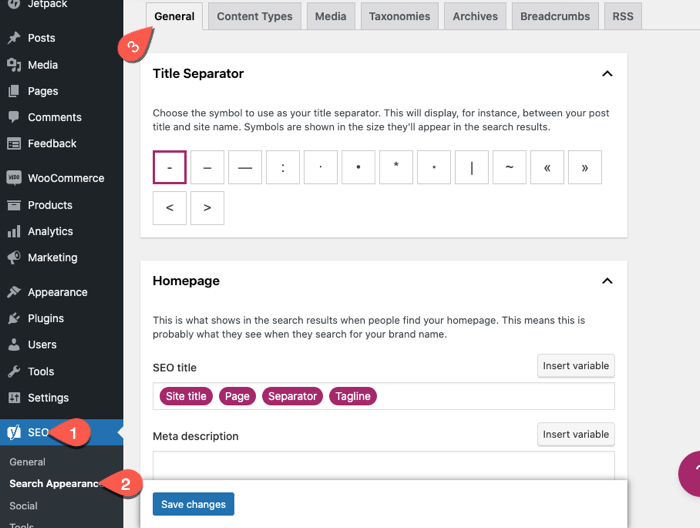
Here, section by section, define the details and then scroll down to the Knowledge Graph & Schema.org.
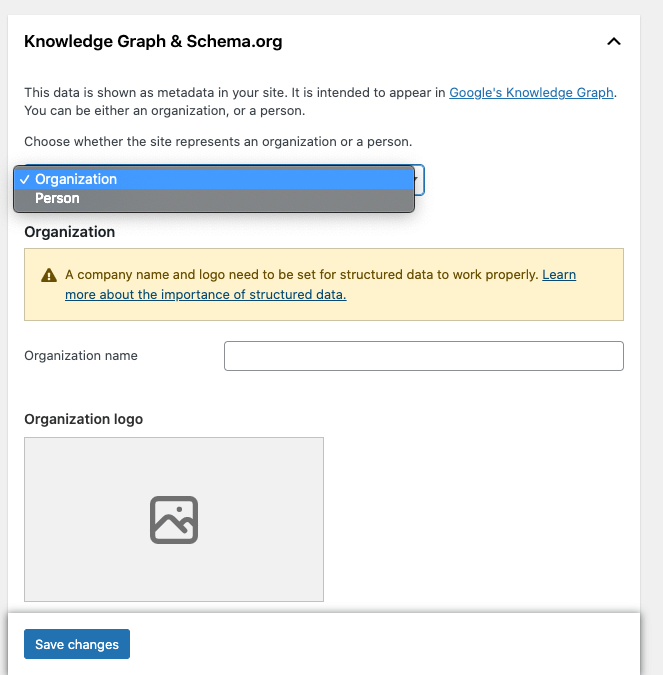
Now, this particular section is to configure schema markup settings for your entire website. For instance, what your website presents as in Organization or Person. Once you’ve configured this setting, simply click Save Changes.
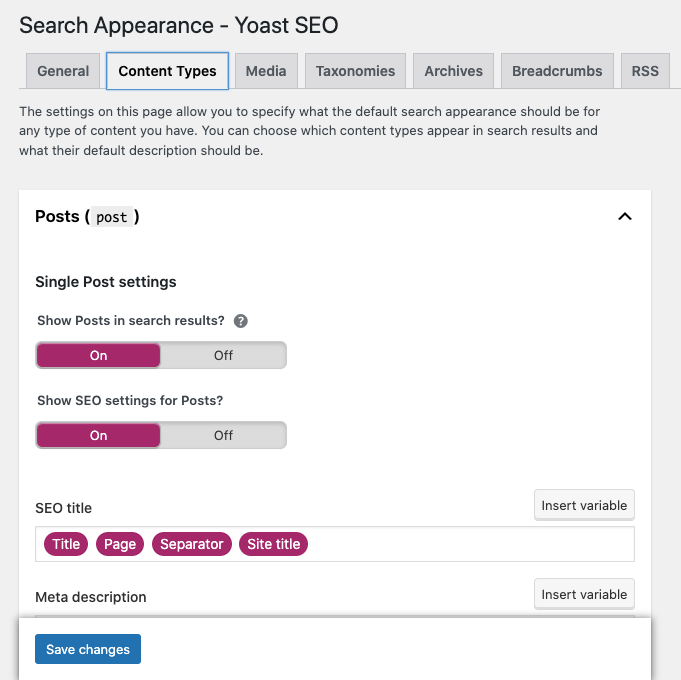
Then move to the Content Types tab to configure Schema Markup for your Posts, Pages, and Products.
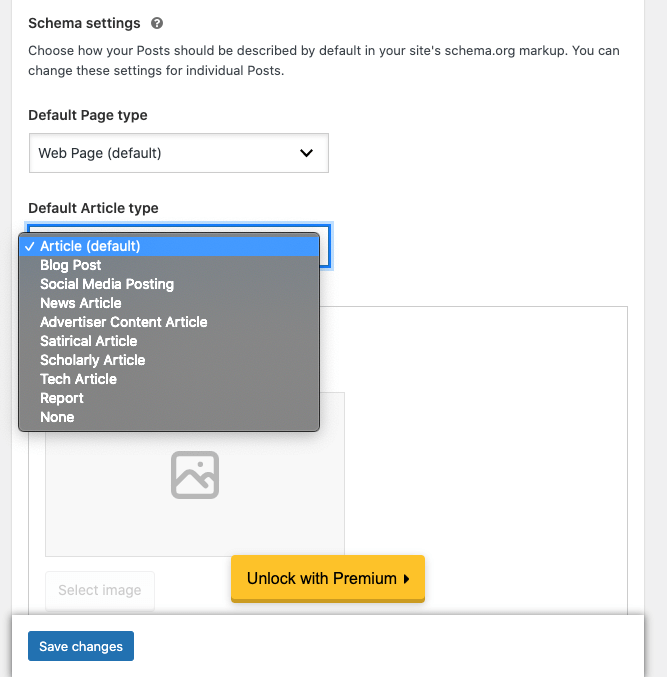
Likewise, in the previous tab, here you get the options to define schema markup settings. You can configure page title, meta descriptions, and Schema options such as Page Type, Article Type, etc.
Once you’re done with configurations, click Save Changes.
Similarly, you can configure schema markup for different website aspects, as in Media, Taxonomies, Archives, and more.
And that’s it; this is how you can quickly markup your WordPress site.
How to Choose the Schema Markup That Has the Most Impact?
There’s no one-size-fits-all answer to this question, as the best schema markup for your site will depend on the specific content and audience you’re targeting. However, there are a few things to consider when making your decision:
1. Choose That’s Relevant to Your Content
Use the most relevant schema type. When selecting a type, make sure to choose the most relevant one to your content.
For example, if you’re writing about a product, use the schema for products rather than for articles.
2. Go With the One That’s Supported Everywhere
Choose a schema that is supported by all major search engines. Every search engine supports not all schema types.
Make sure to choose one supported by Google, Bing, and Yahoo!
3. Keep Schema Always Updated
Use the most recent version of the schema.
While all major search engines support some version of schema markup, they are all continually updating their specifications. Use the latest version of the schema to ensure that your markup is as up-to-date as possible.
4. Keep Schema Easy-to-Understand
Keep your markup concise.
One of the benefits of using schema is that it can help to improve your site’s search engine visibility. However, this only works if your schema is concise and easy to understand.
Don’t include too much information in your markup, as this can have a negative effect on your ranking.
5. Don’t Forget to Test
Test your schema markup. Once you’ve implemented schema on your site, be sure to test it using the Google Structured Data Testing Tool.
This will help you ensure that your markup is working correctly and that the search engines interpret it in the way you intended. If you’re not sure which schema type is best for your content, or you’re not sure how to implement schema markup, consult with a professional web developer.
They can help you select the right schema type and implement it correctly on your site.
Additional Tips for Using Schema Markup for SEO
There are many different ways to improve your site’s SEO, and using schema markup is one of them. Here are some tips for using schema markup to boost your SEO:
1. Make sure that your pages are properly marked up with the correct schema.
2. Use as much detail as possible when marking up your content.
3. Make sure that your schema is updated to match the latest search engine guidelines.
4. Test your schema markup to ensure it is working correctly.
5. Be patient – it may take some time for your schema markup to impact your SEO.
6. Keep track of your website’s search engine rankings and traffic levels to see if there is any improvement after implementing schema markup.
7. If you’re not sure how to use schema markup, there are plenty of resources online that can help you get started. JSON-LD Generator by Hall Analysis is one of the best ways to make this job done quickly.
This slimmed-down tool will do the job for most basic schema markup requirements, even though it doesn’t include as many options as Merkle and Schema App.
<script type='application/ld+json'>
{
"@context": "http://www.schema.org",
"@type": "WebSite",
"name": "Elicus",
"url": "https://elicusthemes.com"
}
</script>
8. Don’t forget to use other SEO techniques, such as keyword research and link building, to improve your site’s rankings further.
9. Stay up-to-date with the latest search engine trends and changes to ensure that your schema markup is always working correctly.
10. Enjoy the increased traffic and rankings that schema markup can bring to your website!
Wrapping Up
So, that’s our take on What’s Schema Markup, its benefits, how you can implement it on your website, and some additional tips to utilize it in a good way.
Schema Markup is an excellent way to make your website’s pages and posts make an impact on the search results. It powers ordinary pages in a way that captures user attention at the first moment.
Once people are attracted to your piece, they’ll most likely interact with it. Thus, bringing more traffic to your website. And later potential leads that eventually convert. Therefore, optimizing websites with Schema Markup is a must in today’s digital world. And we hope the above solution will help you do that effortlessly.
After all, it’s about reaching as many people as you can and growing your business the way you want. With Schema Markup, you somewhere achieve that idea.


0 Comments