
If you want to visualize your product development journey on your WordPress website an interactive timeline section displaying the product roadmap is an incredible solution. This section brings transparency and creates a sense of excitement in the customers for your product. If you own a product-based business website working on WordPress and built with Elementor, you can visualize every crucial phase of your product development in an eye-catching manner.
The Elementor timeline widget is the perfect tool to showcase your product development and introduce your vision for the product to customers. You can also explore some other timeline Elementor widget addons if you’re looking to design a specific timeline. But for most, the suggested timeline widget for Elementor can do the jo effectively.
This post will guide you through the steps to create a section that visualizes the product’s development journey using a timeline widget for Elementor.
Before starting, let’s see what things you can display on your product development roadmap section.
What Can you Show on a Product Roadmap Section using Elementor Timeline Widget
When you display a product roadmap section using the Elementor timeline widget, these key components need to be structured clearly and engagingly.
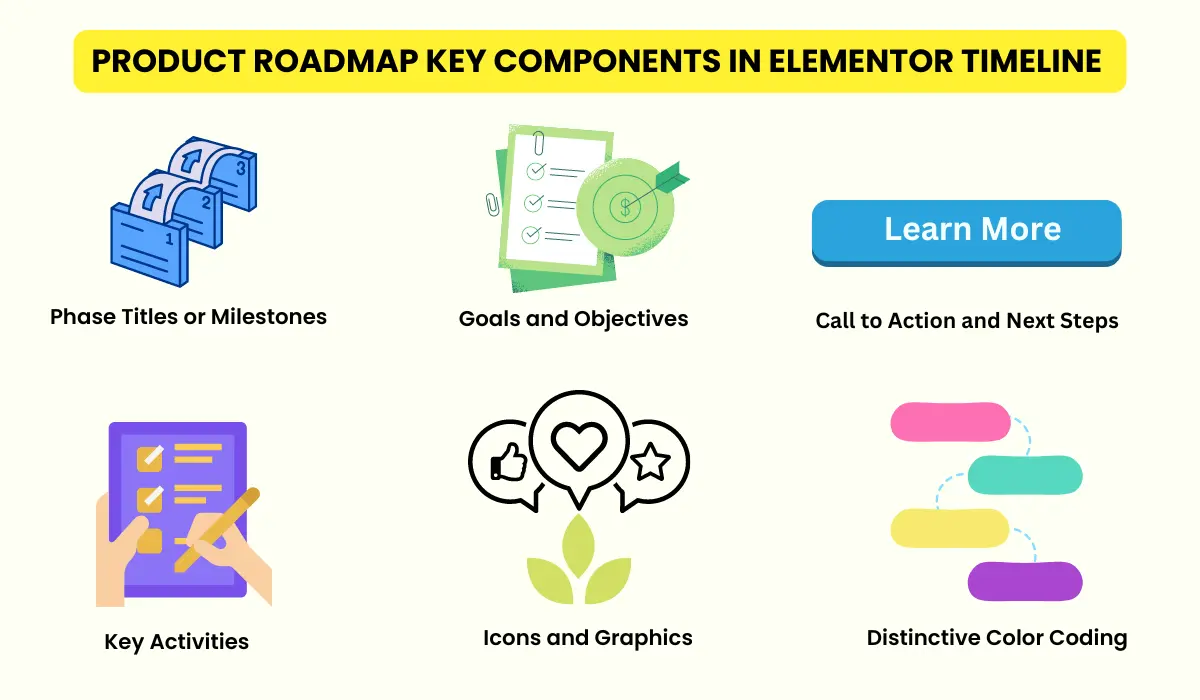
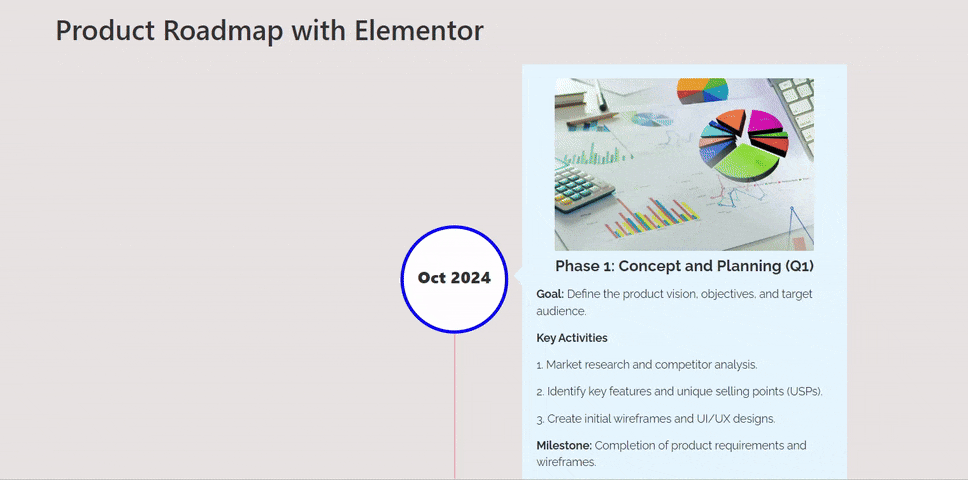
1. Phase Titles or Milestones
Include the phase titles or milestones and mention the timeframes in the form of specific dates or quarters (e.g., Q1 2023, June 2023).
2. Goals and Objectives
Highlight the primary goal and elaborate the objectives or deliverables for each phase clearly. This will portray the things going to be achieved after every phase.
3. Key Activities
Display the list of the major tasks planned to be completed within every phase. You can also highlight the significant features of that phase.
4. Icons and Graphics
Use the relevant icons and graphics to resemble each phase. Incorporate images that closely reflect each milestone or phase.
5. Call to Action
Including the call to action such as “Learn More” or “Explore Now” will be helpful for the users to get a detailed overview of each phase.
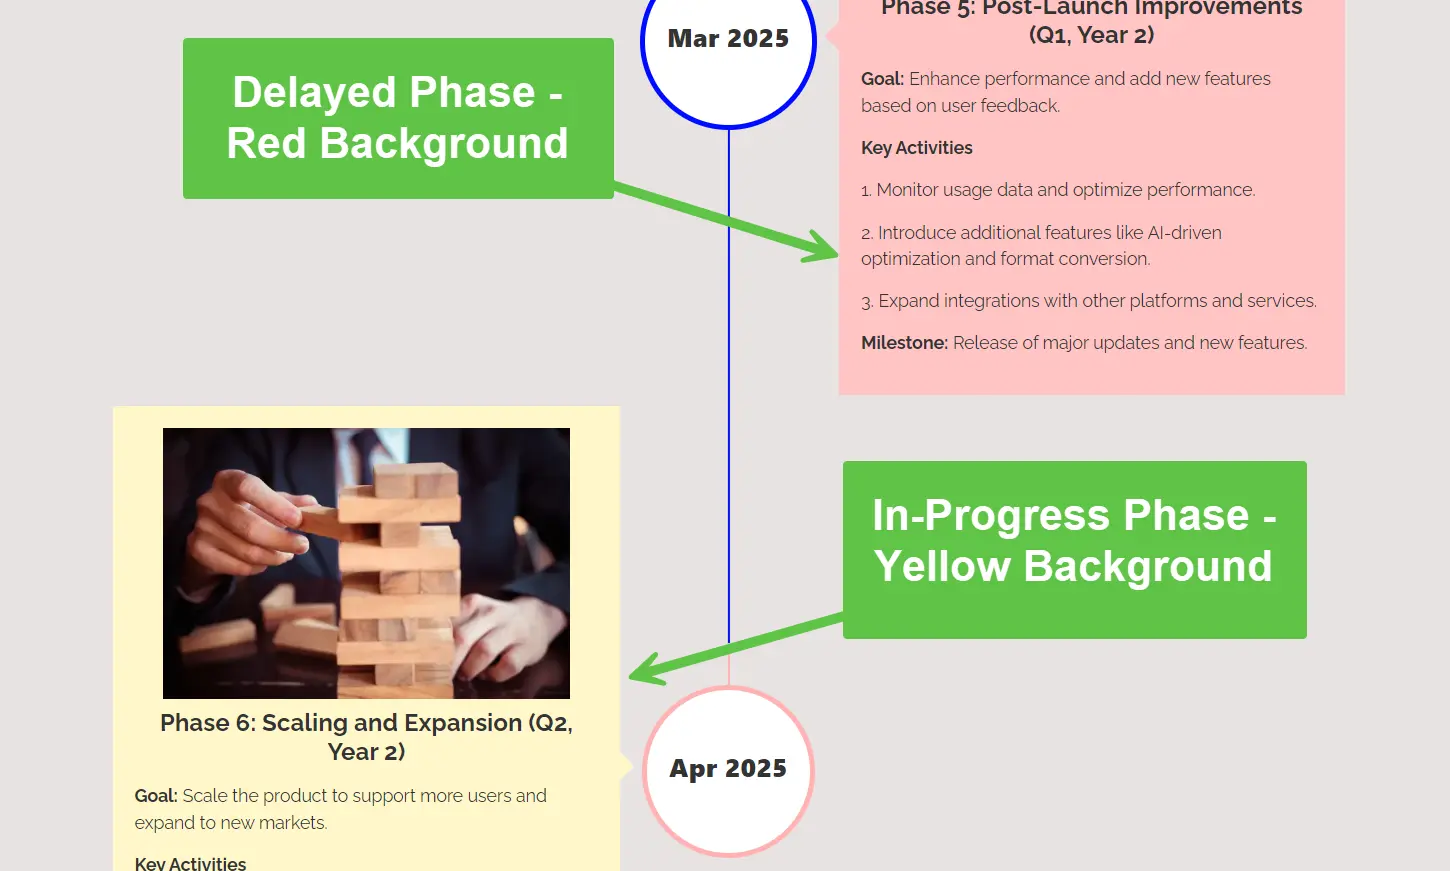
6. Phase Status with Color Coding
The completed phases can be represented with different colors. The completed phases can be illustrated with a dull and faded color while a radiant eye catchy color tone can be used to highlight the in-progress and delayed. (Red for delayed and Yellow for in-progress)
After understanding the key components of a product roadmap built with the Elementor timeline widget, let’s start its design process.
How to Display Product Development Using the Elementor Timeline Widget
We will design a product development roadmap section, where the phases are going to be placed on both sides of the timeline in an alternate sequence. The timeline stem moves vertically down and reveals every phase with its useful information.
Without any further delay let’s start.
Note: We are using the WPMozo Addons for Elementor Timeline Widget to demonstrate the creation of a product roadmap. Please make sure you have the WPMozo Addons for Elementor plugin installed on your WordPress website so that you can use the Elementor process steps widget, aka, timeline.
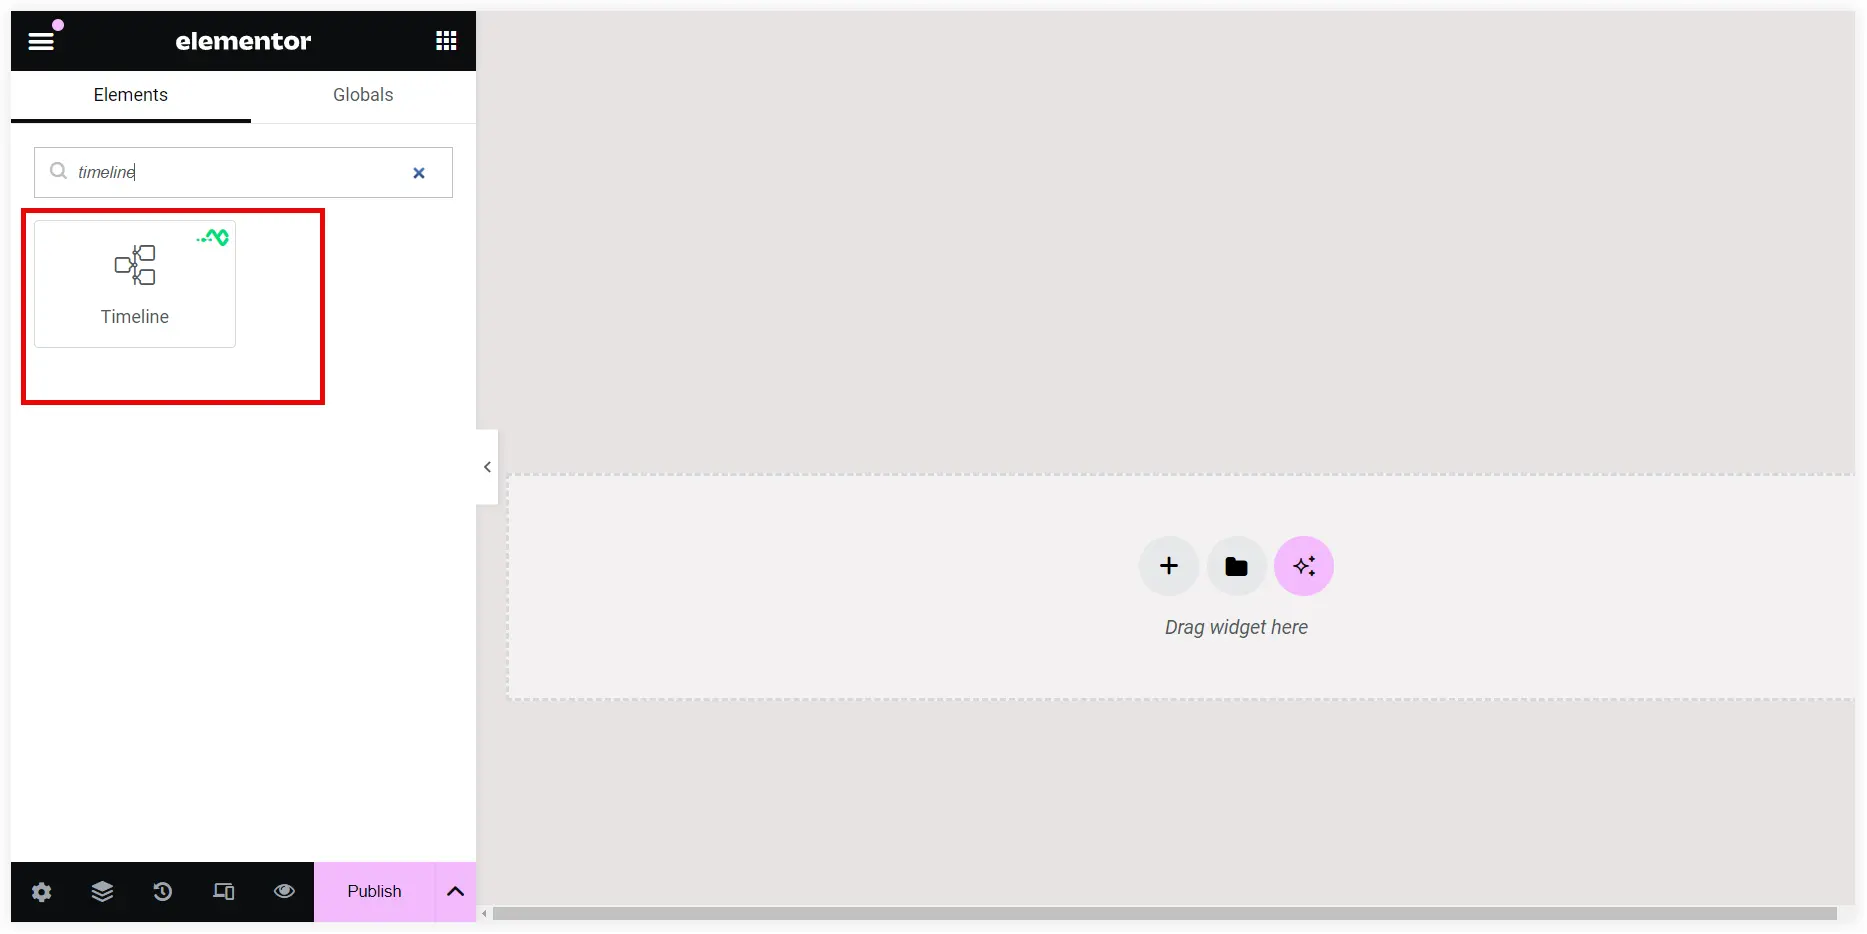
Insert the Elementor Timeline Widget Addon
Go to your Elementor dashboard and search for the WPMozo Elementor timeline widget. Drag and add it to your Elementor builder.
Click on an Add Item to create the first element of your Elementor timeline product roadmap.
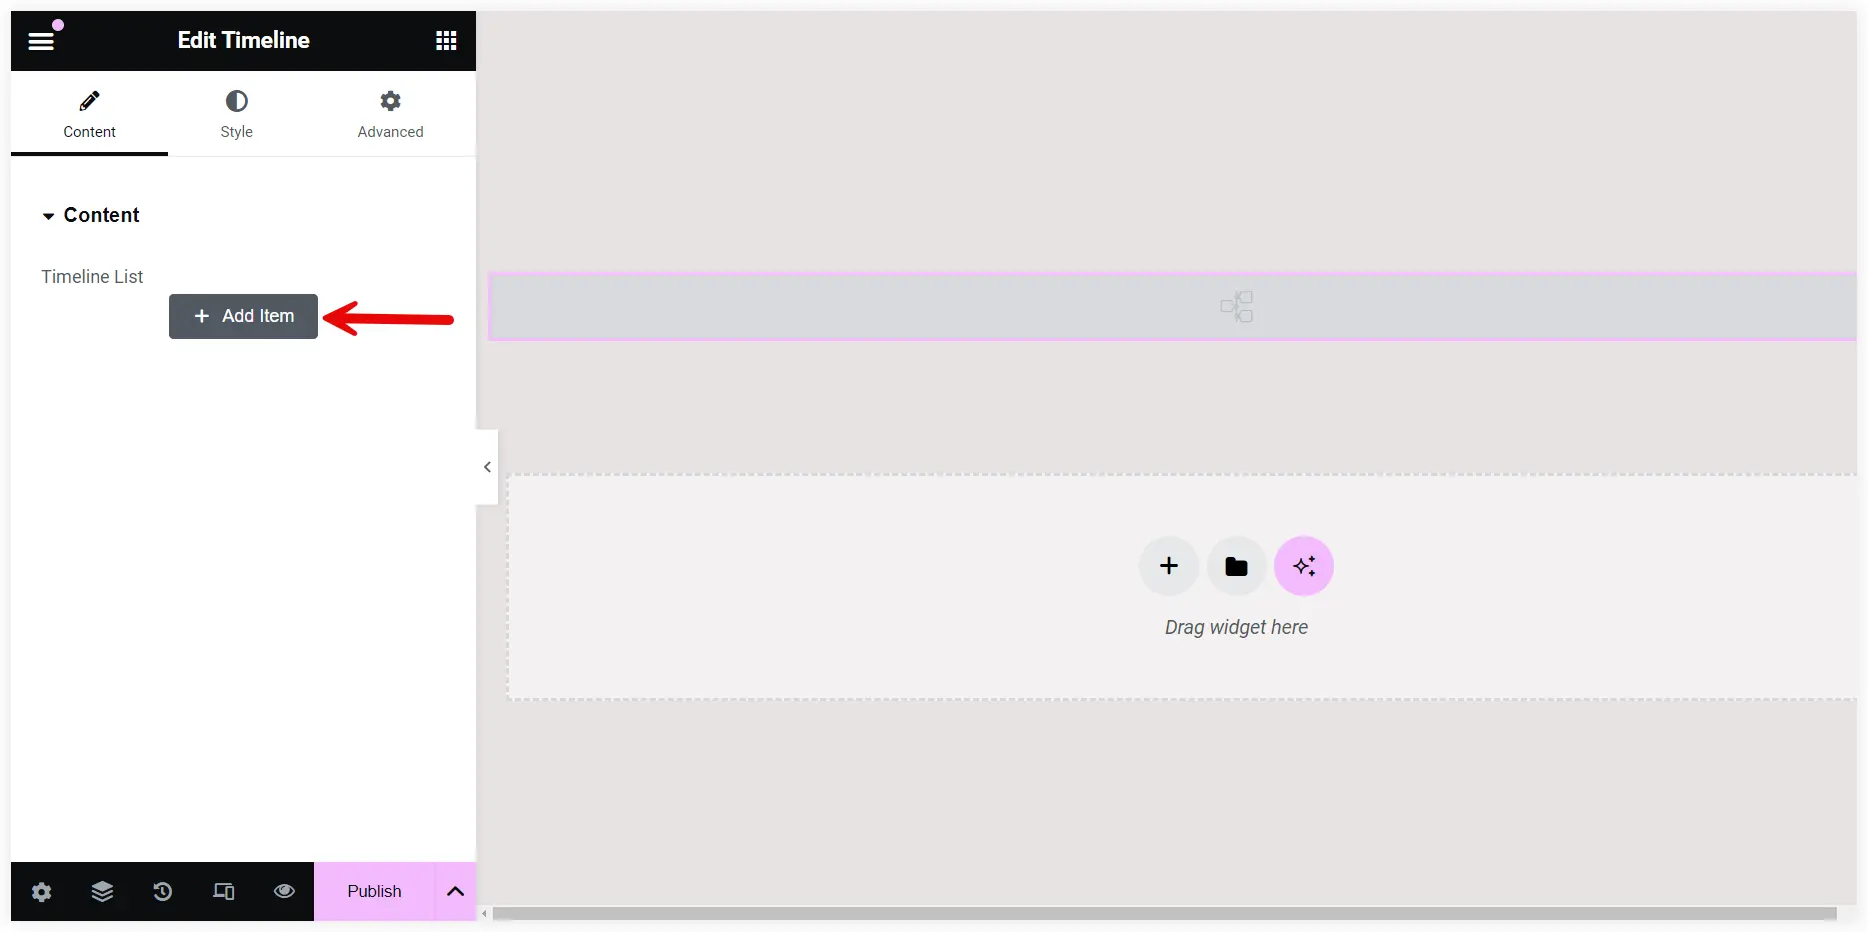
Adding Content to Elementor Timeline Product Roadmap
Enter the Phase as the Timeline Title. Define the Goals, Key Objectives, and Milestones in the Content Area.
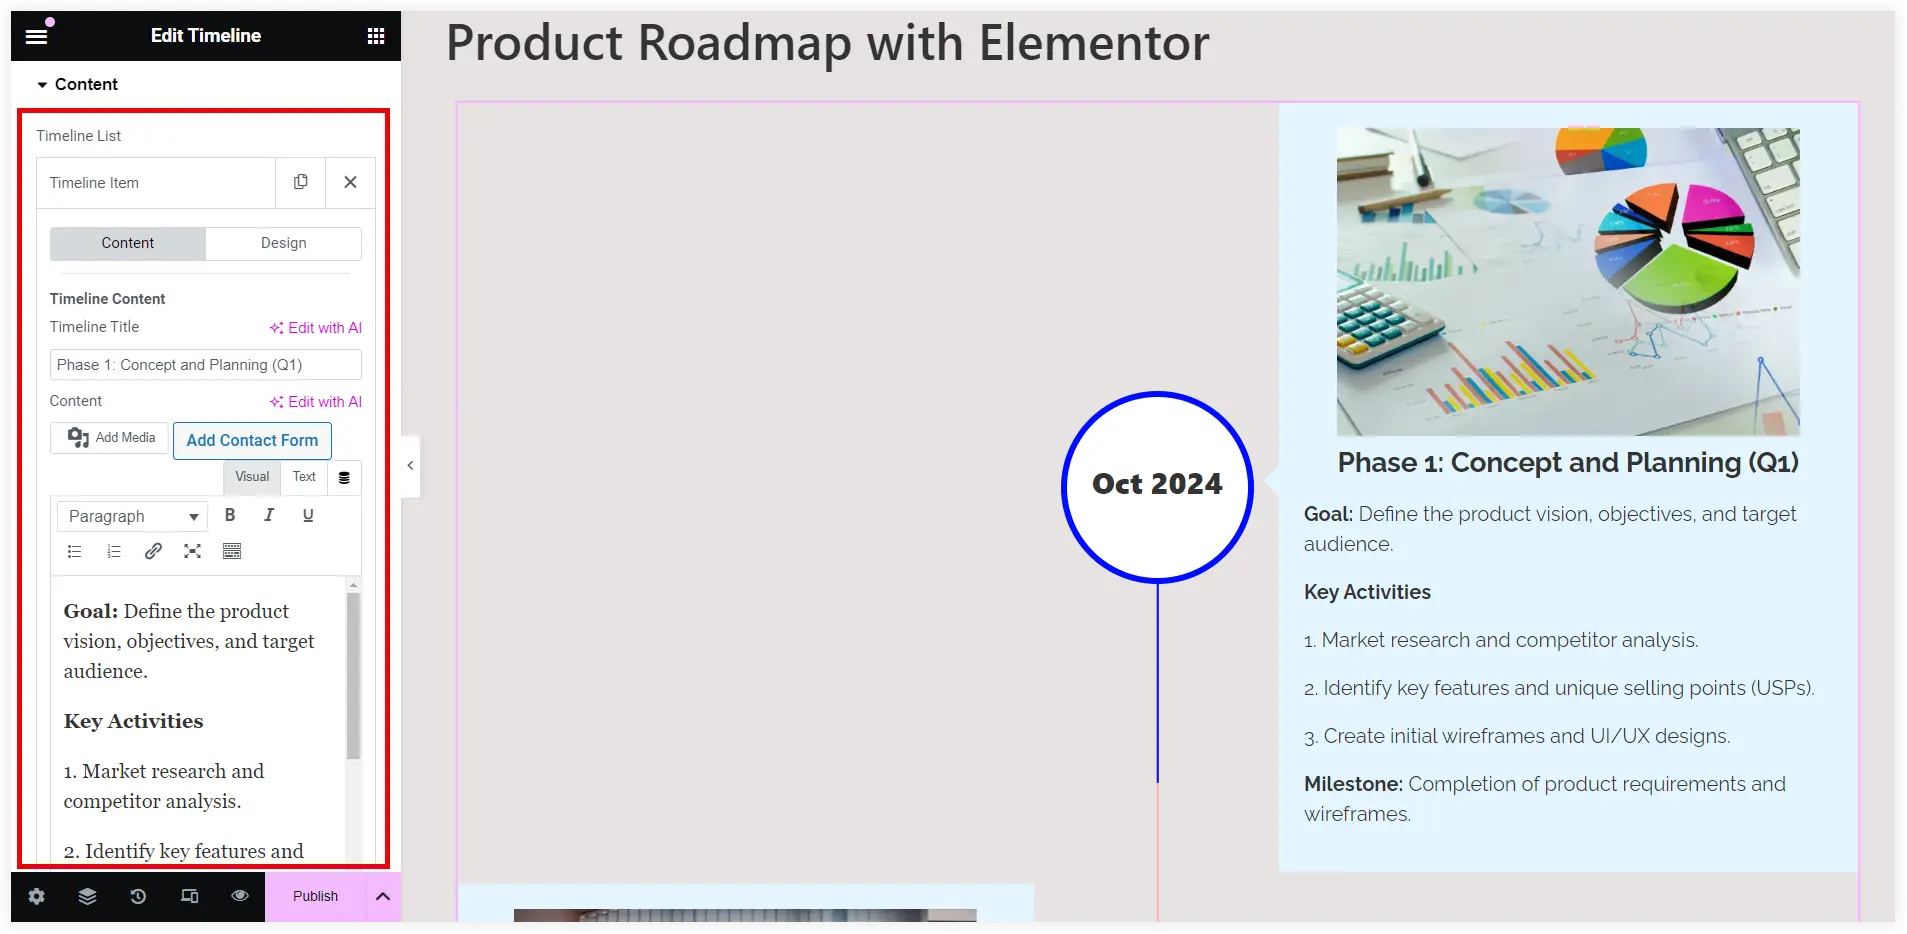
Enable Display Time and select Custom Time in the drop-down. Enter the Custom Time. In a Elementor product roadmap timeline, images play a significant role in enhancing user experience.
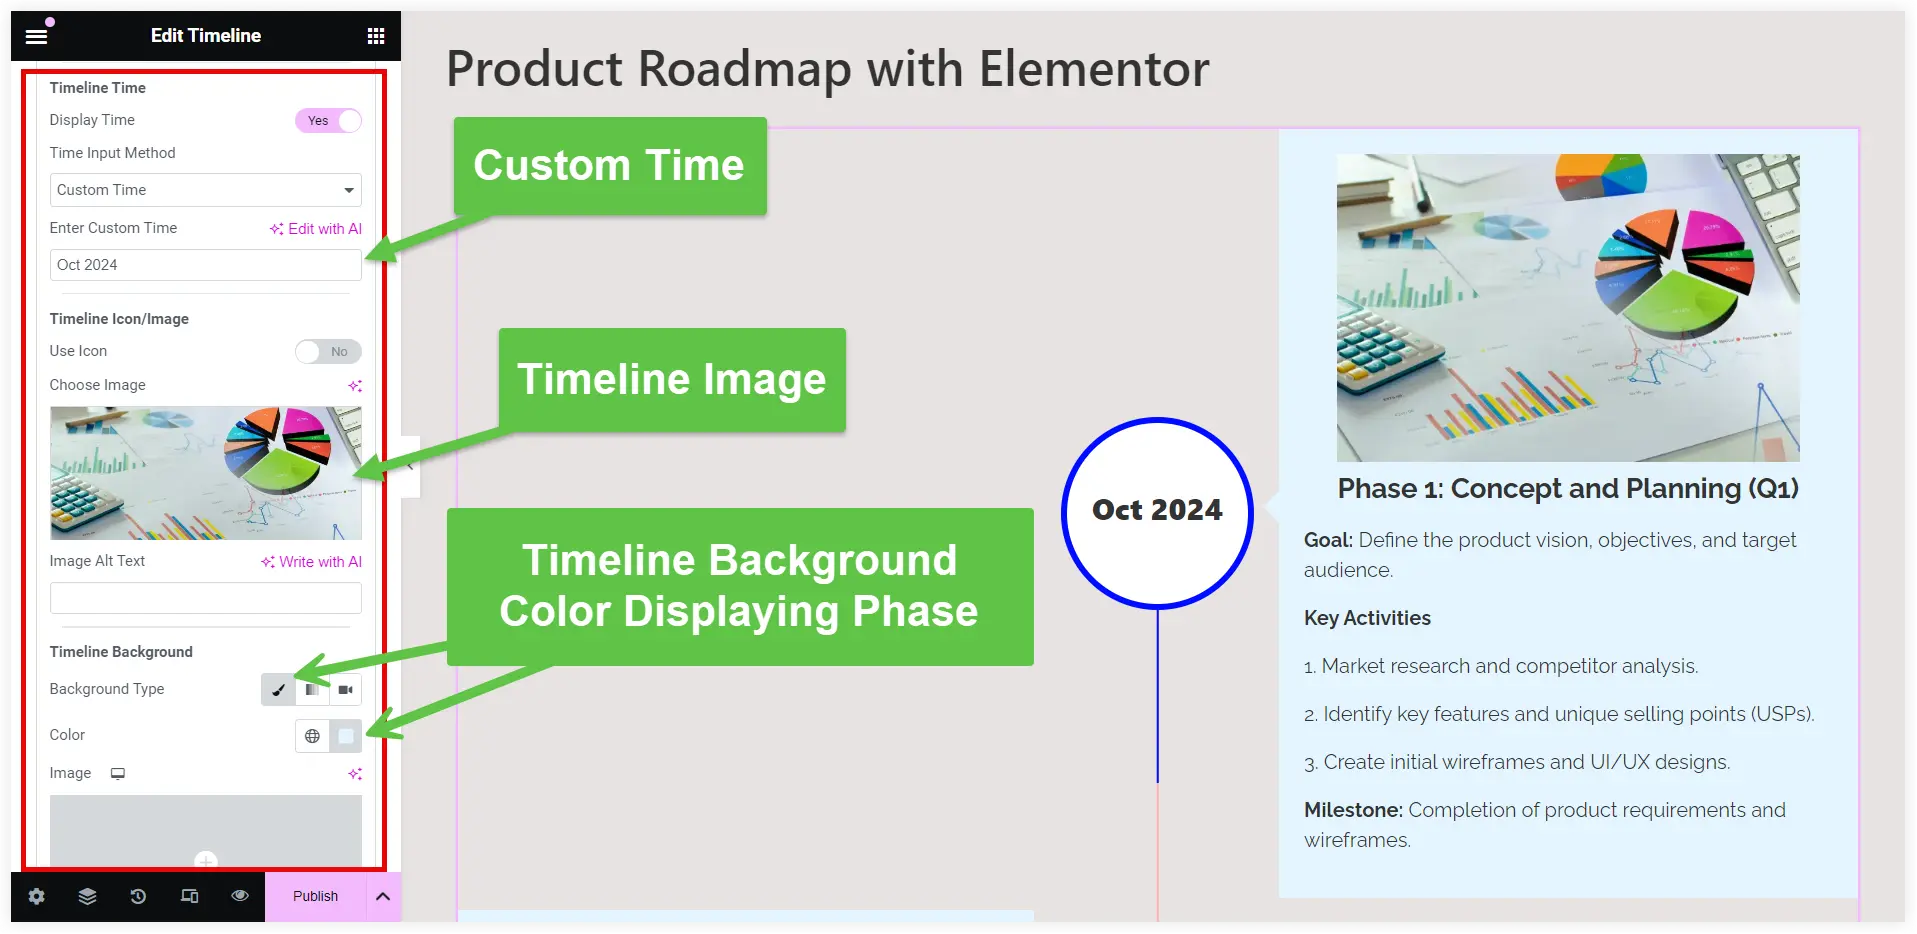
Keep the Use Icon Disabled and choose a relevant image that resembles the current phase.
The Background Color can denote the working status of that phase. You can go with a bluish tone to display completed, red for delayed, and yellow for in-progress phases. The timeline Elementor widget also allows adding a background image but you can select an image that doesn’t disturb the readability.
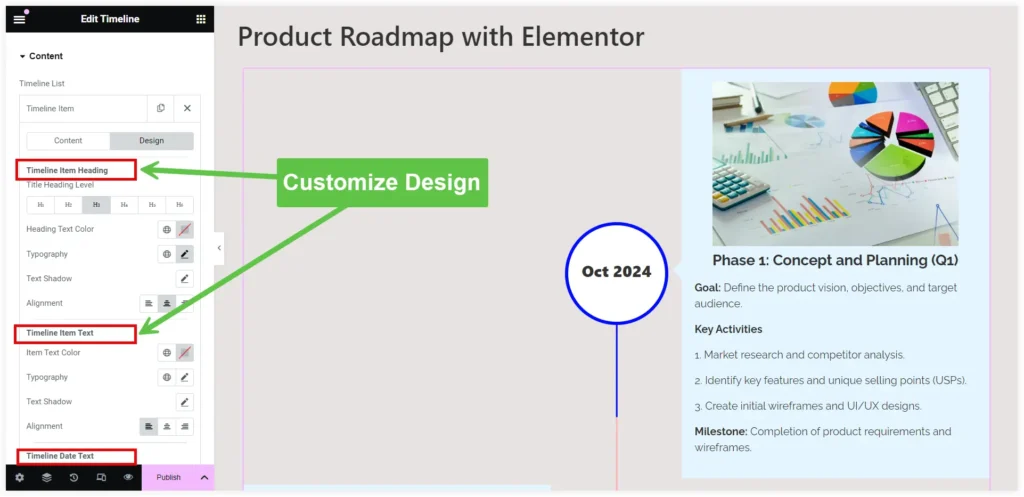
Customize Product Roadmap Design
In the design section, you can select the Title Heading Level(H1, H2, H3, etc.) of the Timeline Item. We kept it to the H3 level for a better view. Customize the color, typography, spacing, and alignment of Timeline Item Heading, Timeline Item Text, and Timeline Date Text. Keep the Timeline Item Heading center aligned and the Timeline Item Text left aligned. You can also perform the customizations at the global level to maintain uniformity in the design of all the timeline items. We will see those options later in this post.
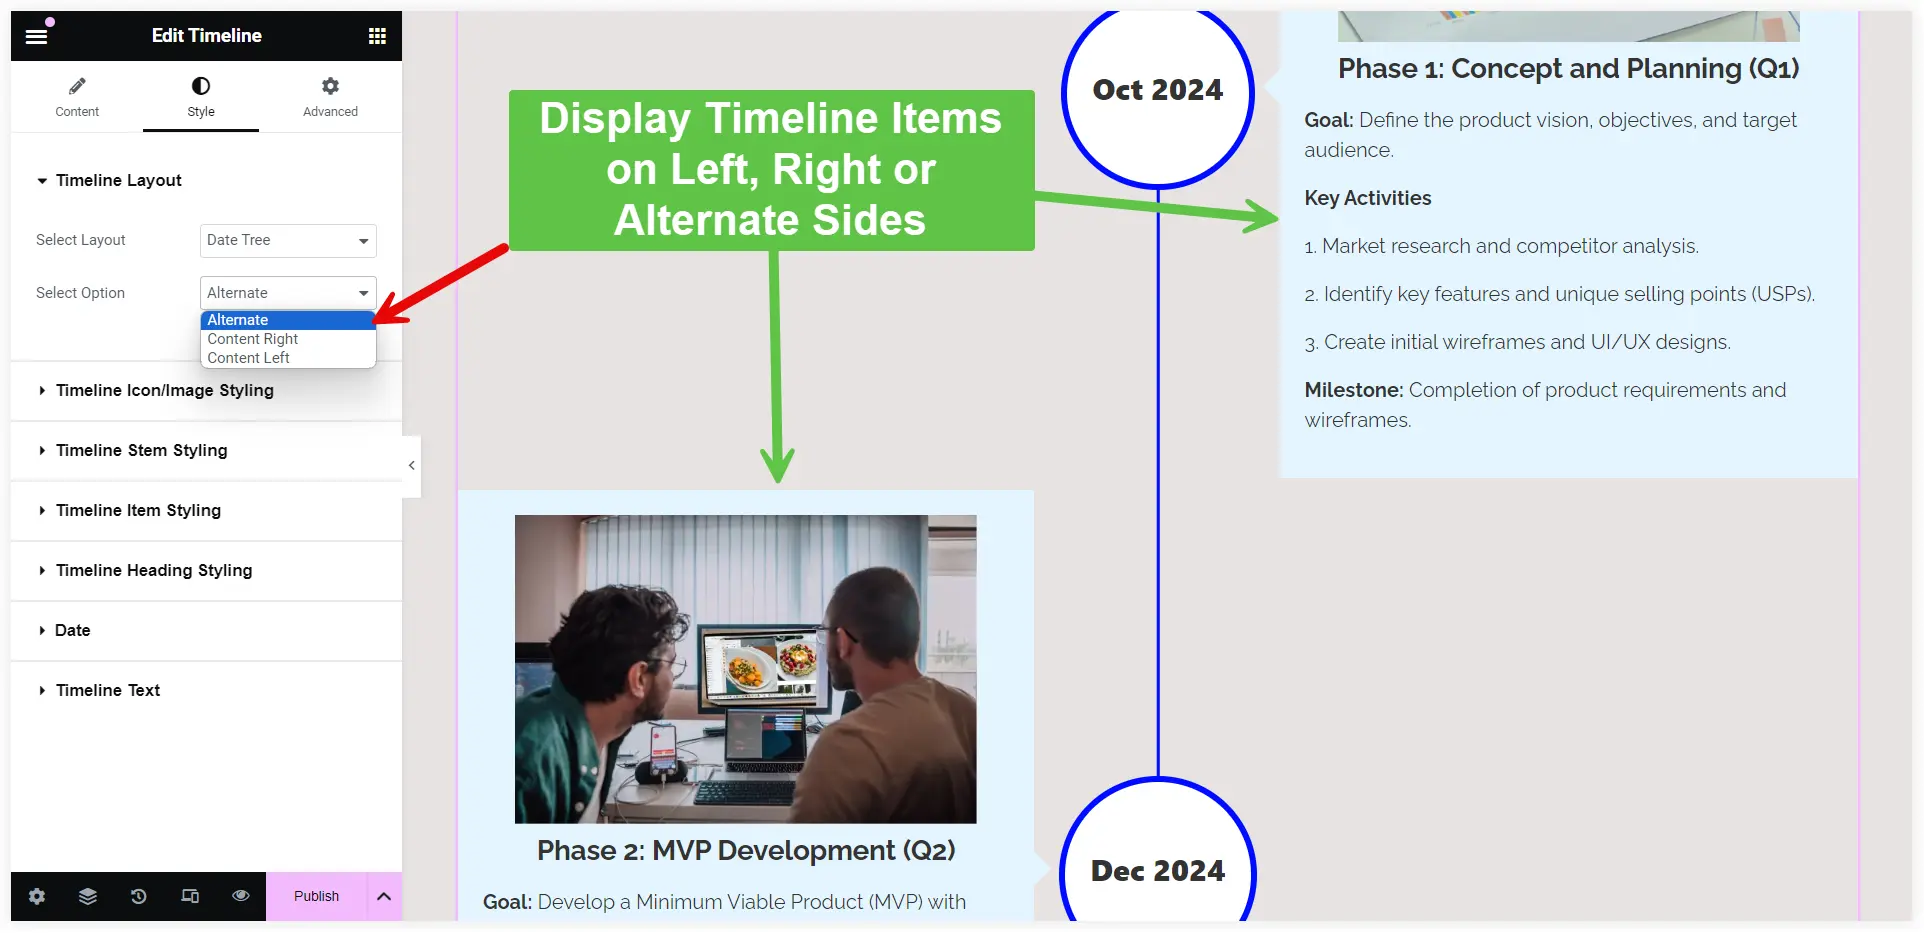
Choose the Timeline Layout
The WPMozo Elementor timeline widget offers you two layout options: Icon Tree and Date Tree. The major noticeable difference between these two is that in Date Tree layout the dates are highlighted on the timeline tree. Check the Date Tree Layout.
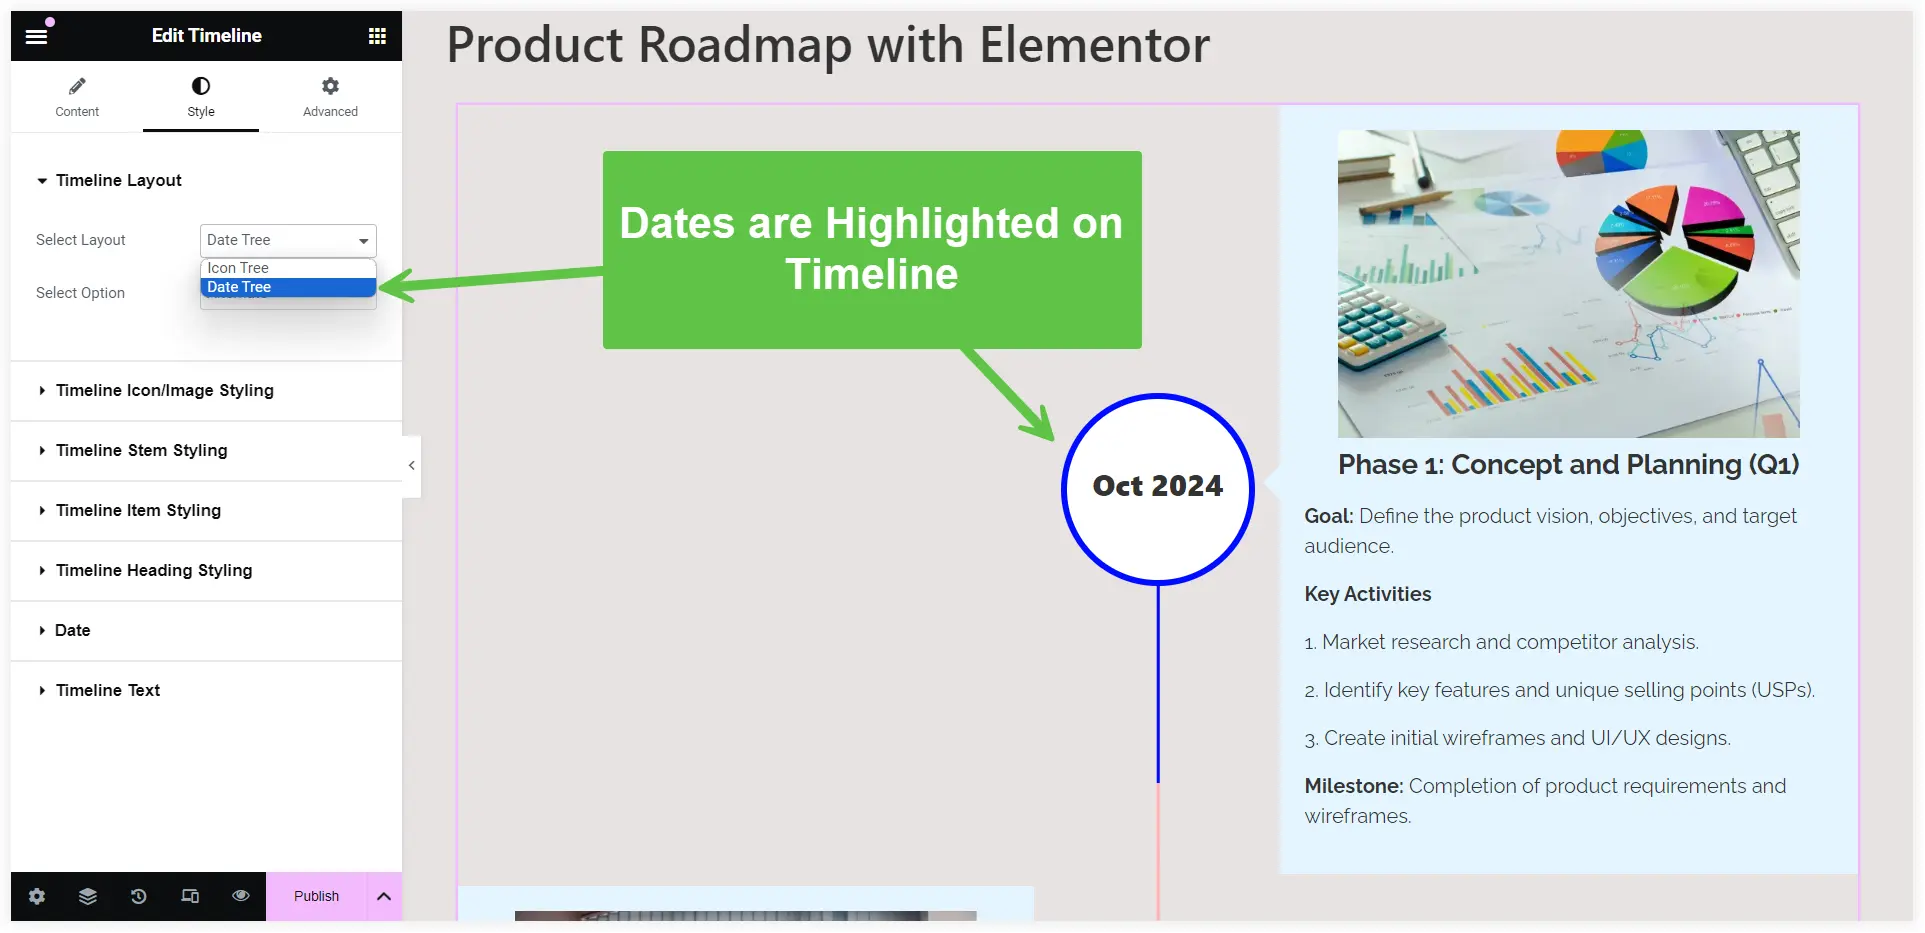
On the other hand, the Icon tree prioritizes the icons on the timeline. Now in our case we used images instead of icons, that’s why they are highlighted on the timeline tree.
Next you can use three display options for these timeline layouts. You can align them on both sides of the Elementor timeline alternatively. We have done the same thing. Another option is to display them on either the left or right side of the product roadmap timeline.
The available layout and display side options give you an innovative chance to try different variations for your product roadmap timeline.
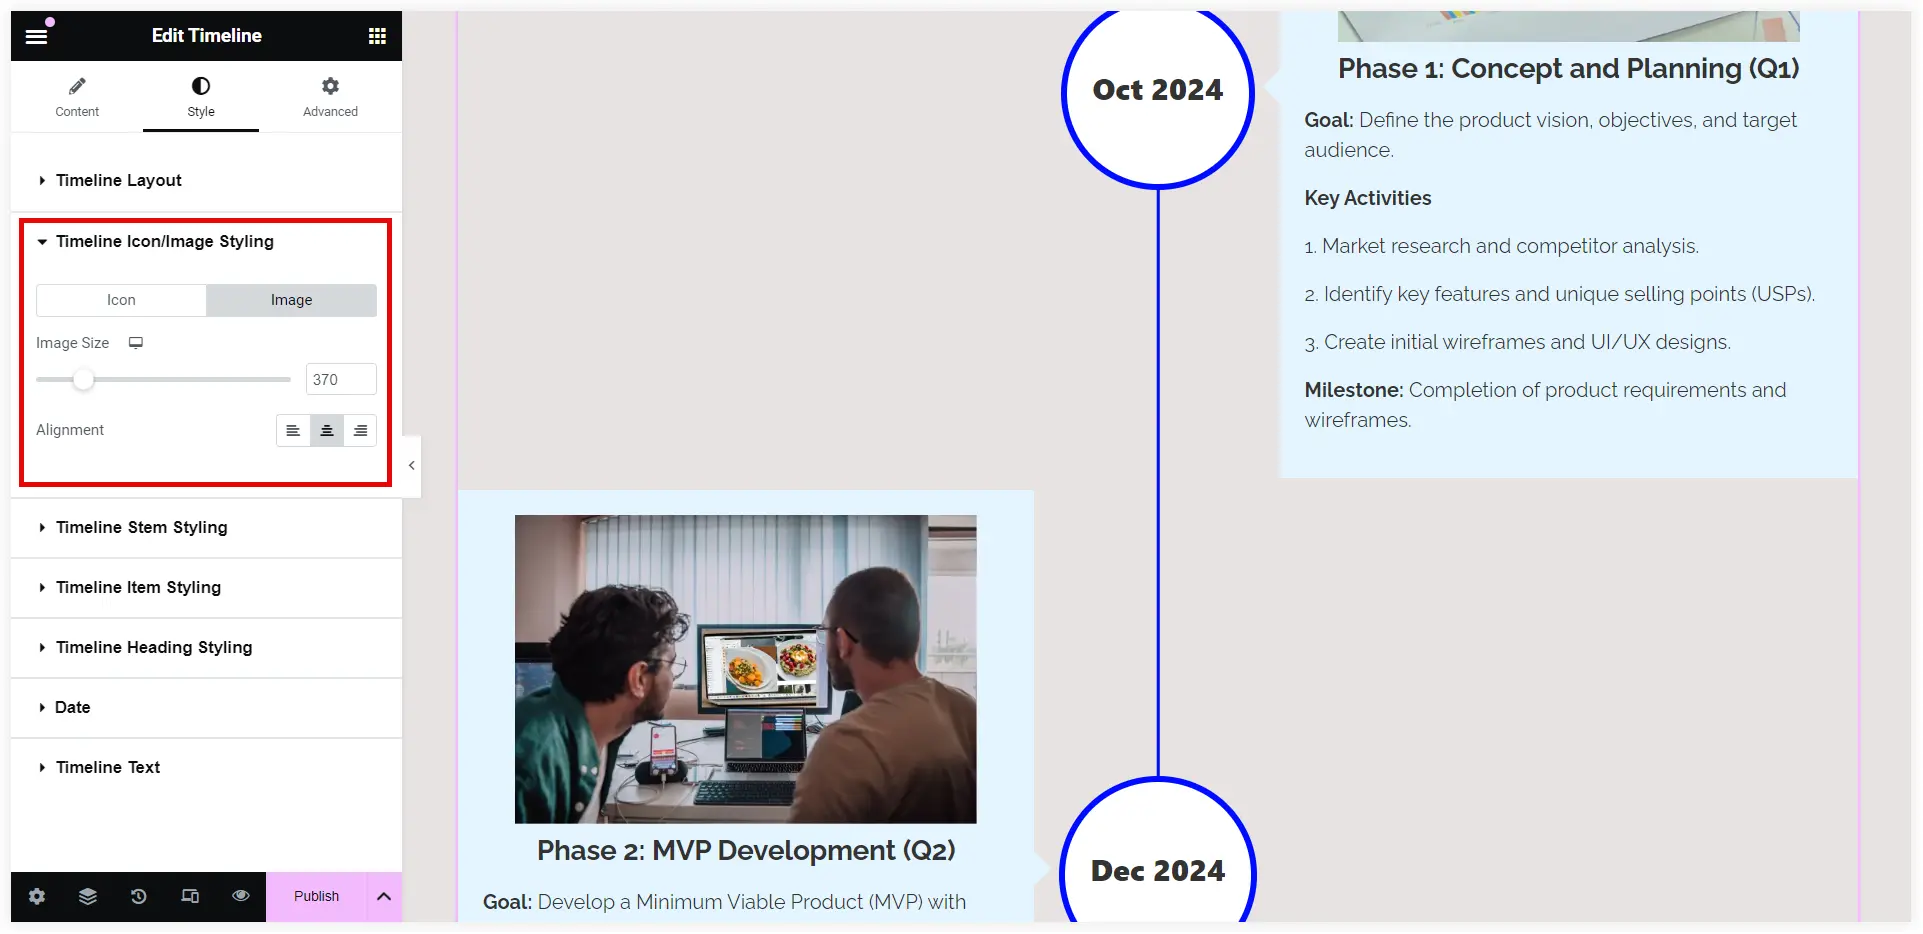
Global Styling for Timeline Icon/Image
Customize the color, font size, and shape of the Icon.
For Images, you can configure the global size and alignment. We have used an Image and aligned it to the center of each timeline item.
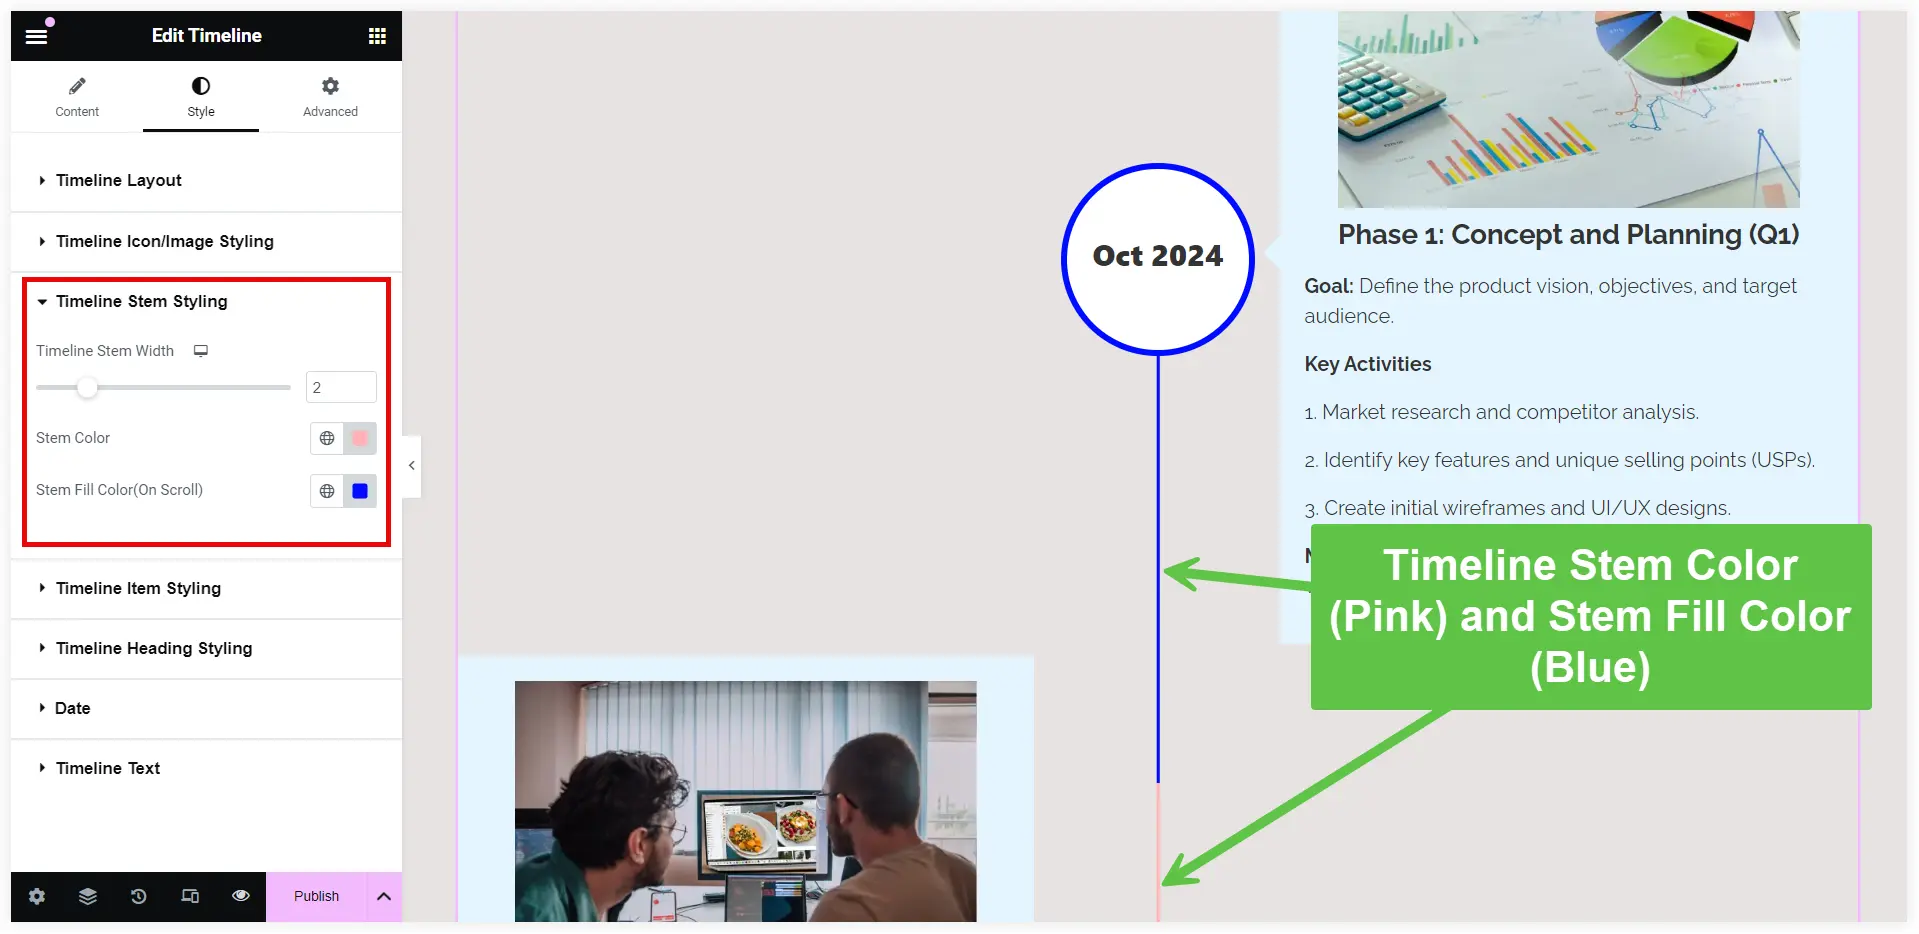
Timeline Stem Styling
This is the crucial setting that lets you customize the overall appearance of your timeline. It highlights the movement or progress of the timeline using colors for the timeline stem. The Stem Color highlights the timeline when it is not in progress while the Stem Fill Color catches the attention by filling it with a color on a scroll action.
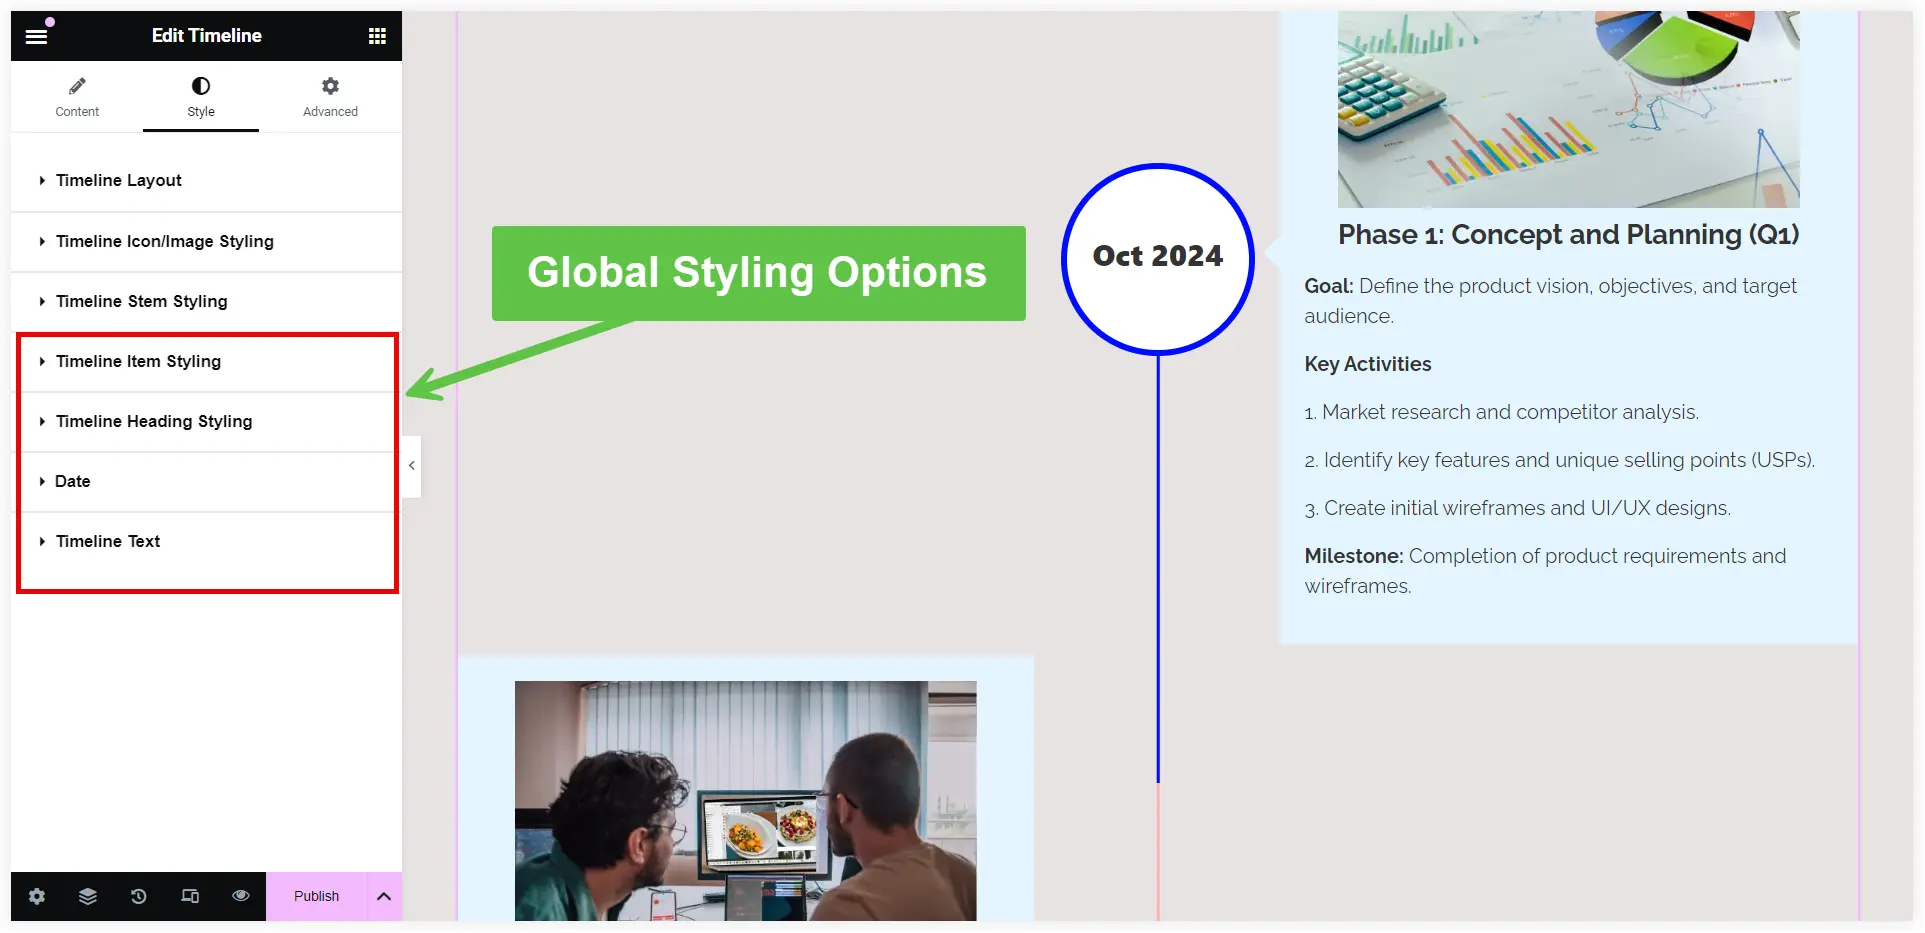
Global Styling Options for Timeline Elements
Though we have already seen the styling options for individual timeline items, we can also set the global styling standards for the entire timeline items. These include Timeline Item, Timeline Text, Timeline Heading, and Date.
These options let you customize the global settings for typography, text color, alignment and other similar styling elements.
After finalizing all these configurations we got an interactive timeline that portrays each phase of the product development in an interesting informational way.
Final Takeaway
Finally we can conclude that it is an excellent idea to visually communicate your product’s journey and future plans to the users by crafting an interactive product roadmap with the Elementor timeline widget. You can follow the easy step by step process to highlight the key milestones, development phases, and future goals of your product on a timeline. WPMozo Elementor timeline widget offers you enough personalization options to craft it and present your product’s story in a compelling format.


0 Comments