
Showcasing discounts on your website is crucial to capture users’ attention and drive conversions. Special promotions, offers, and limited-time deals also come under the same category. All these need to be presented engagingly as they directly impact your sales. According to Google Marketing Strategies, discounts are a key factor in bringing people to online shopping on their mobile phones. Considering this fact, discounts need to be the focus while designing the pricing tables. For that purpose, the Elementor pricing table widget offers plenty of customization possibilities and a user-friendly interface to create eye-catching pricing tables with highlighted discounts on your WordPress website.
In this post, we will show you innovative strategies for using the Elementor Pricing Table widget to highlight discounts, deals, and special offers.
Before we start let’s understand how showcasing discounts perfectly matters.
Why Showcase Discounts Perfectly in Pricing Table?
These are some strong reasons that support the approach of showcasing discounts effectively. Go through these to understand this concept in a better way.
Psychological Impact: Showing discounts engagingly can create a sense of urgency and will drive users to make quick purchase decisions. The FOMO(Fear of Missing Out) strategy comes into play and encourages them to act fast.
Boosting Conversions: A proper and effective pricing table can give a clear view of regular and discounted prices and display the savings users can enjoy. This will lead to an increment in conversion.
Builds Trust: When transparent discounts are presented using strikethrough pricing, percentage reductions, or bundled savings, it helps in building trust and long-term loyalty in the customers
We will use the WPMozo Pricing Table for Elementor widget to create a pricing table showing discounts. It comes bundled with the WPMozo Addons for Elementor plugin, so make sure you have installed it before moving to the next step.
Step-by-Step Guide to use Elementor Pricing Table Widget Showcasing Discounts
This post will be a clear guide explaining every crucial step in detail to create a pricing table in Elementor and highlight discounts effectively.
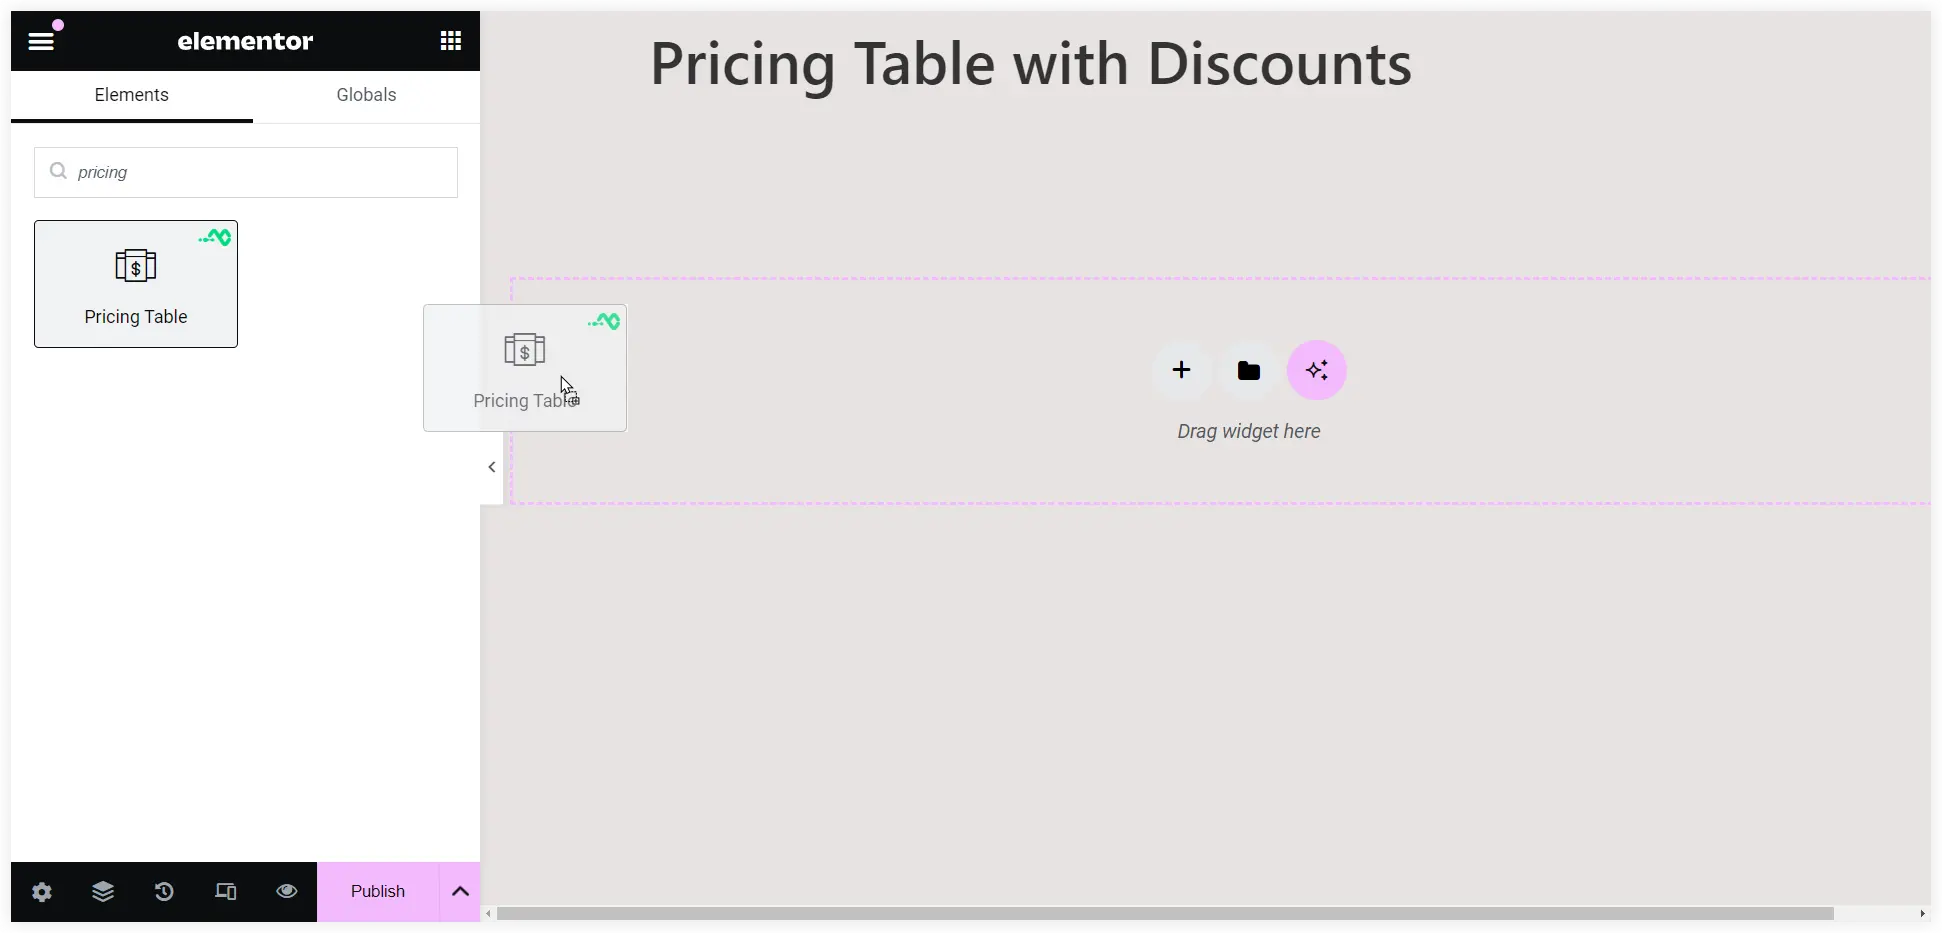
Add Pricing Table in Elementor
Search for the WPMozo Pricing Table widget and add it.
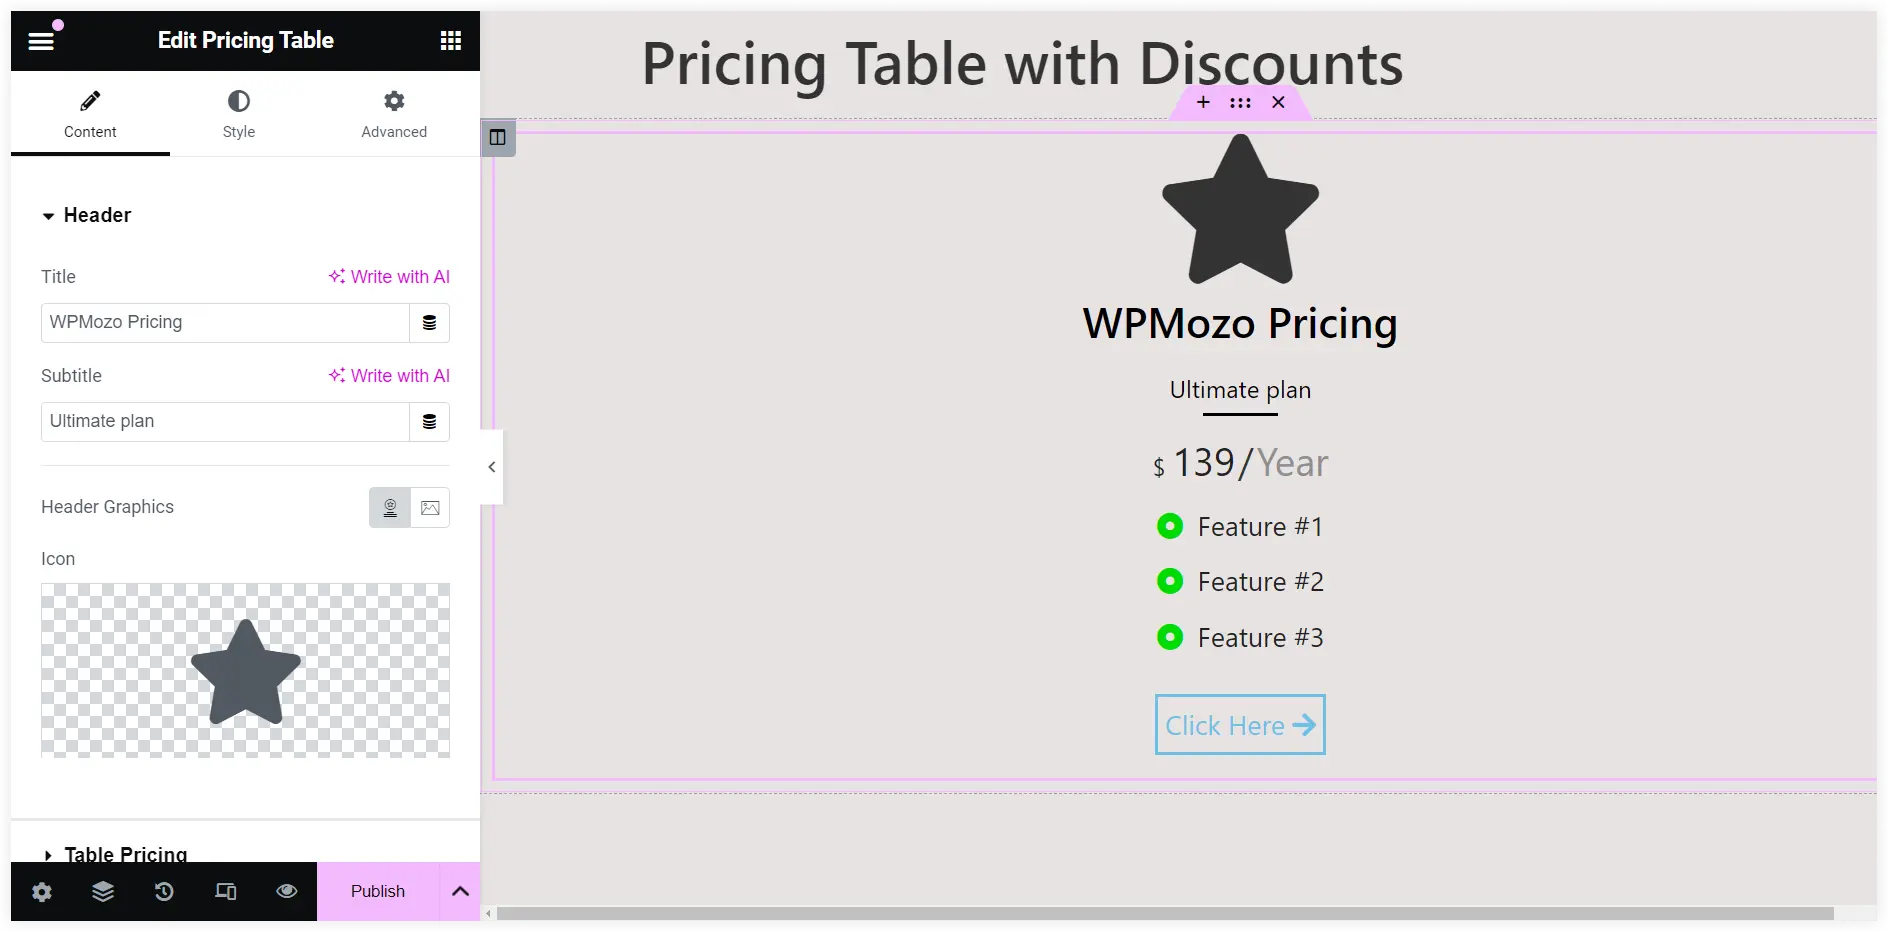
You will get a default pricing table layout as shown below.
The first step is to organize the pricing tiers such as basic, standard, or premium. This will help users compare the offerings easily with a single glance.
Mention the Title as the Plan type such as Basic, Starter, Essential, etc. Write a Subheading(For newcomers, For simple needs, etc.) to indicate the users it caters to. You also have the option to add an icon or image that closely resembles the pricing tier.
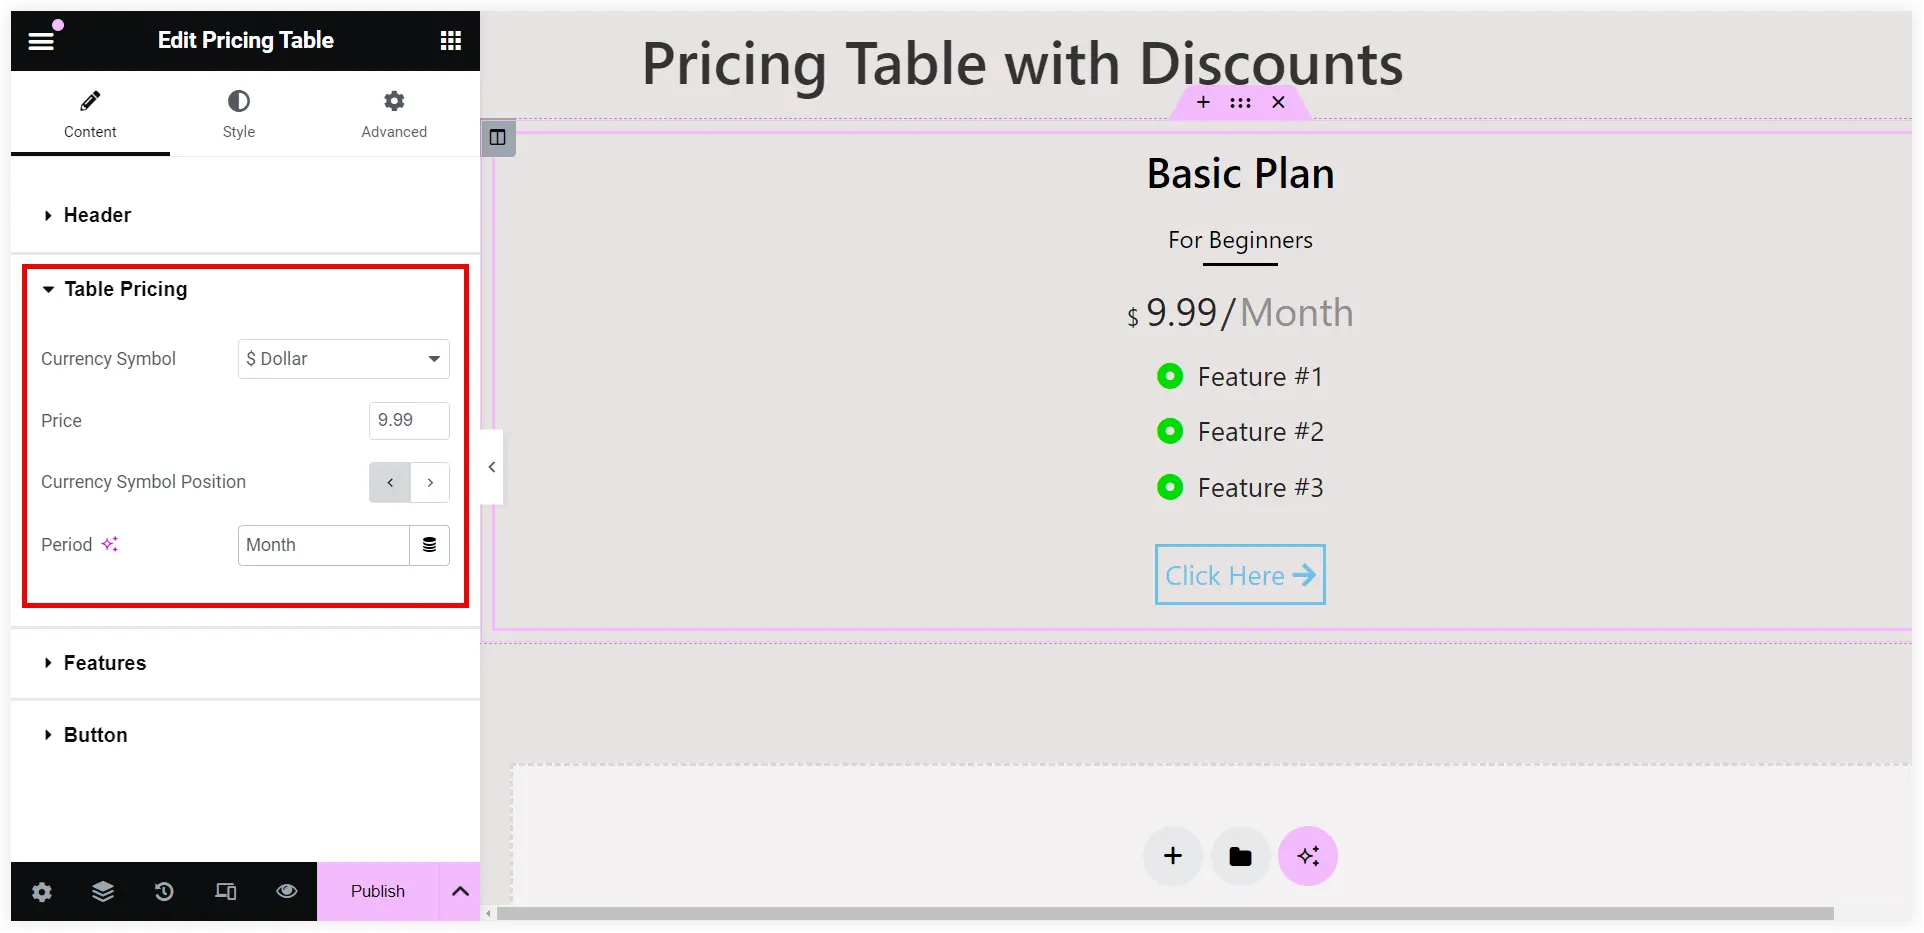
Add pricing for that specific tier and select a currency along with the period.
Features are the offerings that each of these plans delivers to the users. You can add as many features as required.
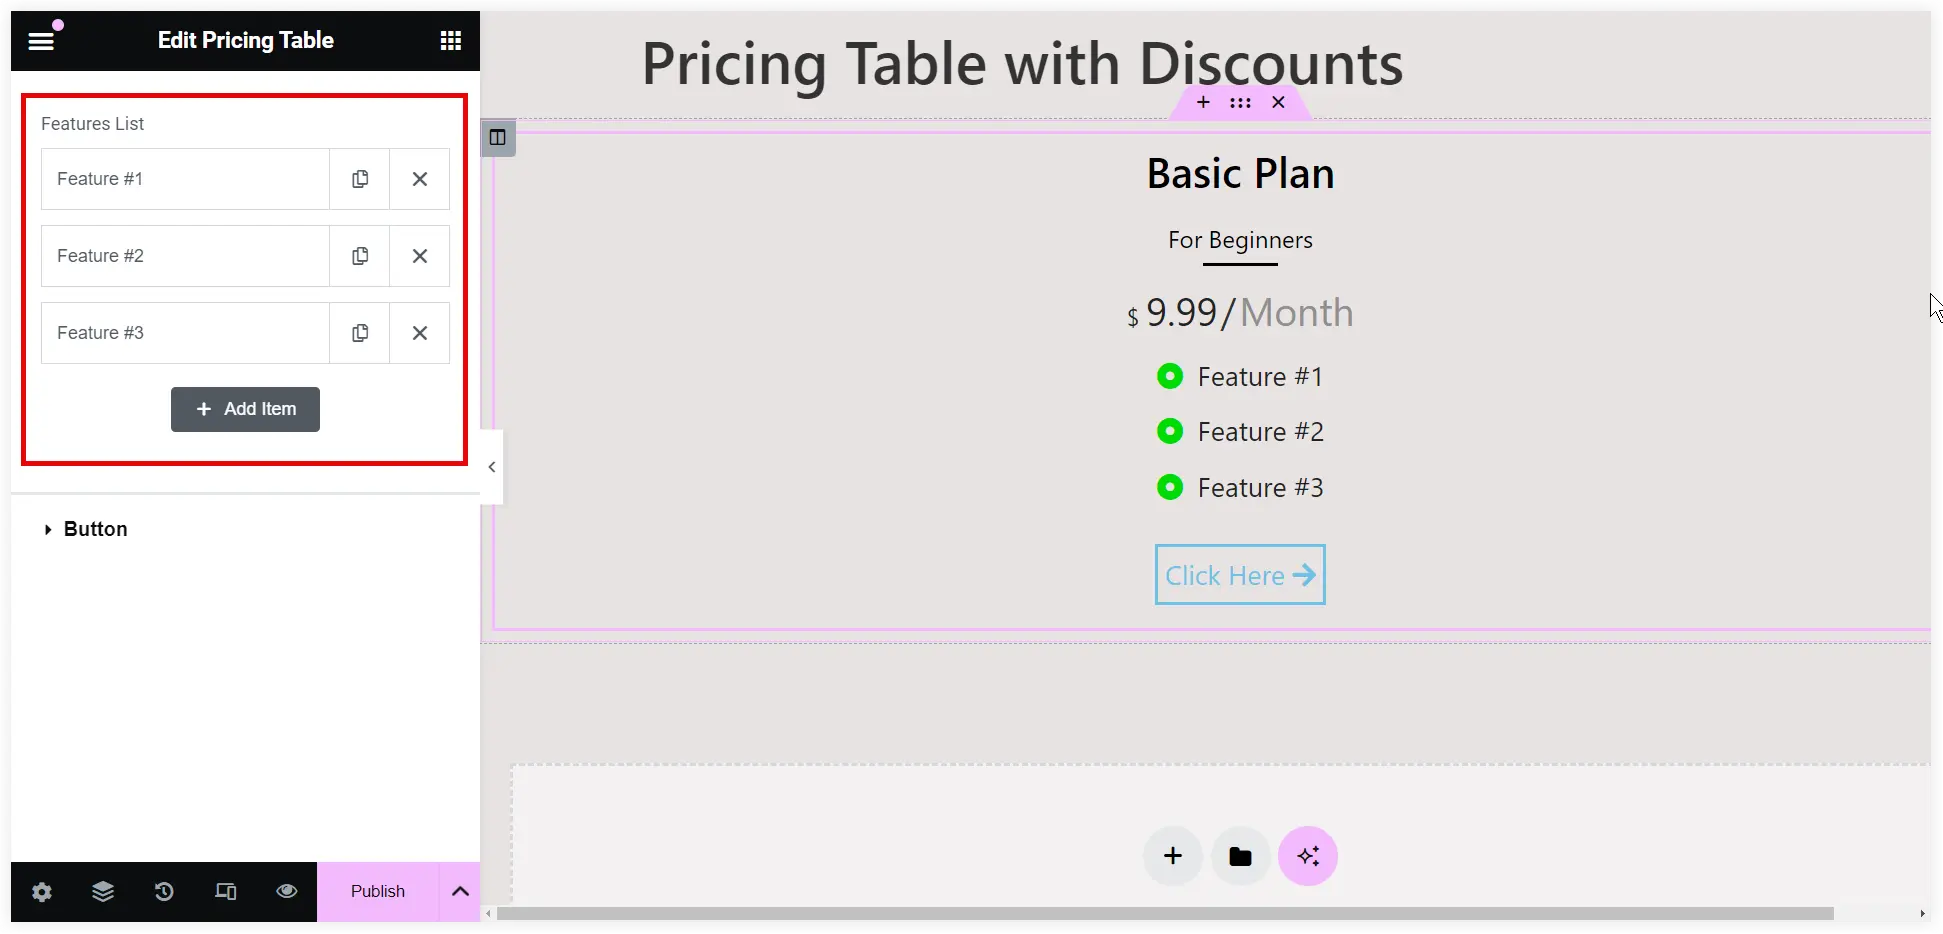
Edit a Feature and mention the offerings in the Feature list. Also, select a suitable icon, adjust the font size, and tune up the typography to make it more appealing.

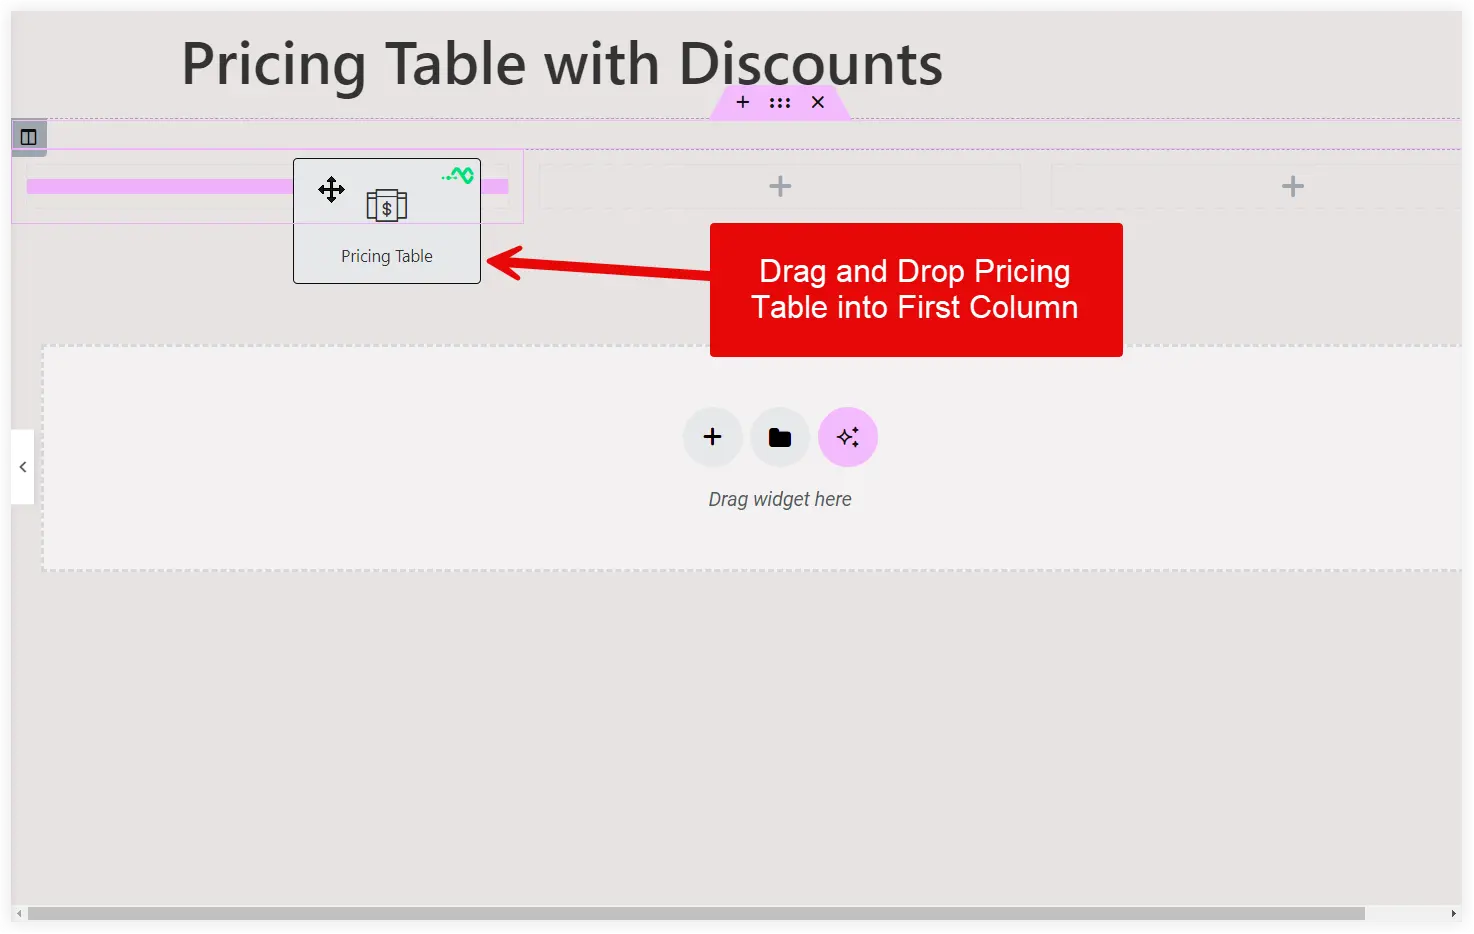
Select a Three Column Layout
In the Elementor page builder, select a three-column container to display the three pricing tiers using the Elementor pricing table widget. Now drag the pricing table section into the first column of this container.
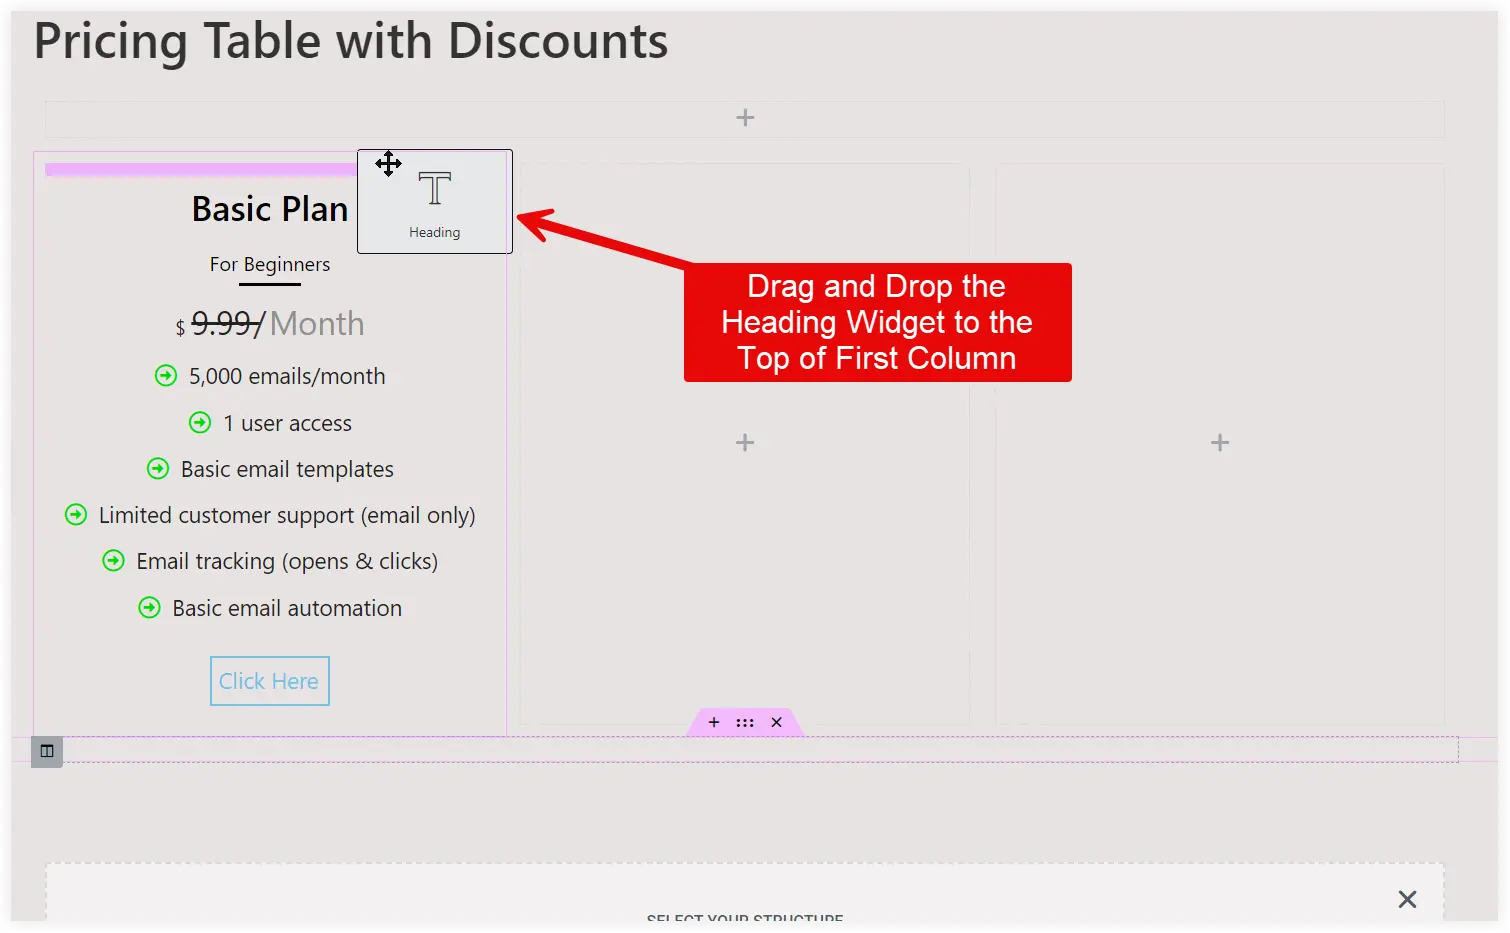
Highlight The Discounts
Add the basic heading widget of Elementor in the first column and reposition it to the top of the pricing section using Elementor’s drag-and-drop feature.
Let’s implement the discount strategies to draw visitors’ attention toward the pricing table.
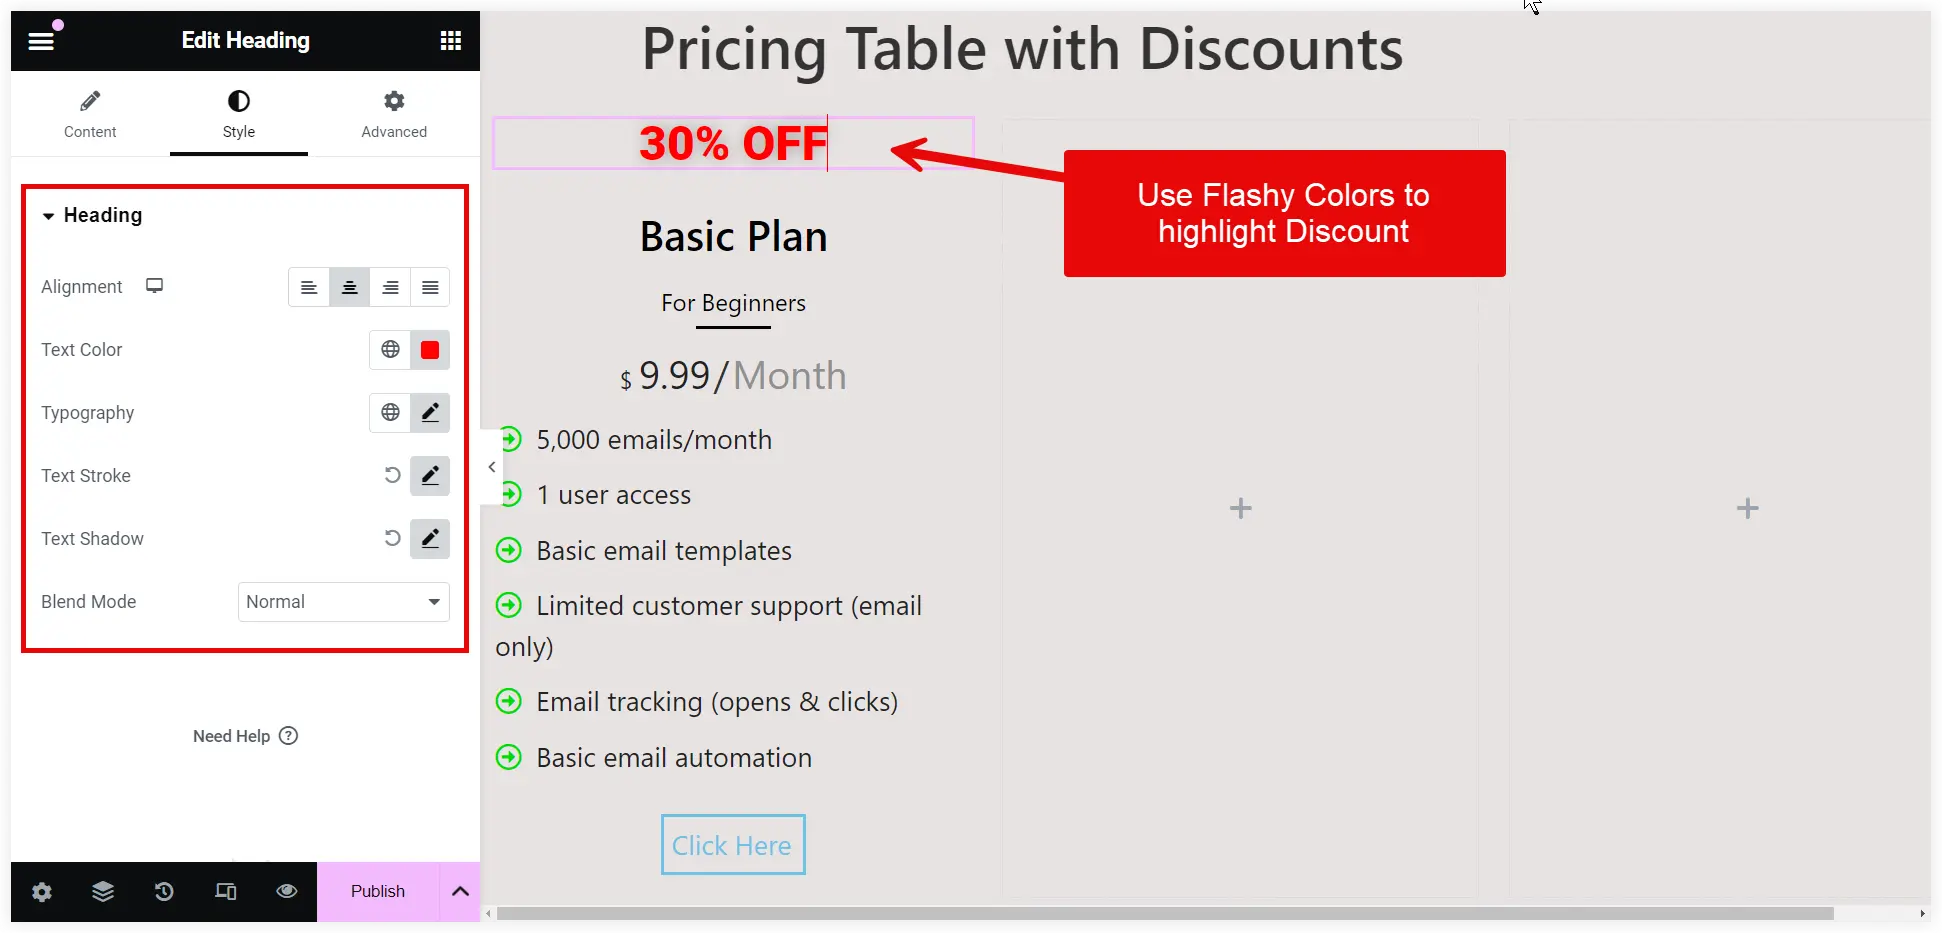
1. Use Flashy Colors
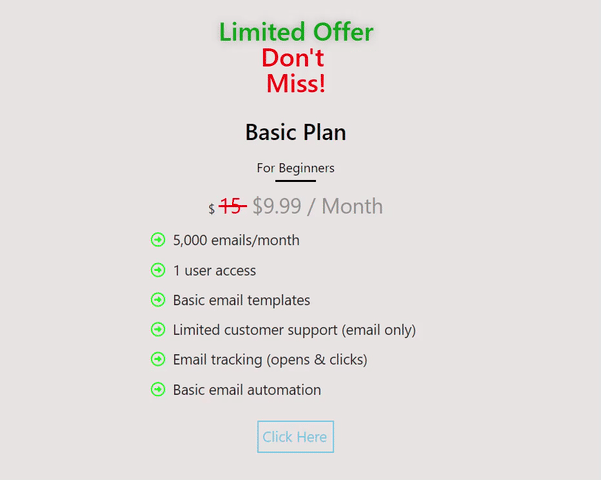
The flashy colors help in making the discounts visually stand out. Mention the discount or deal such as 30% OFF, SPECIAL OFFER, etc in the heading widget. Give them a flashy red color to capture visitor’s attention. Keep it Bold and apply a Text Shadow.
2. Strikethrough Pricing
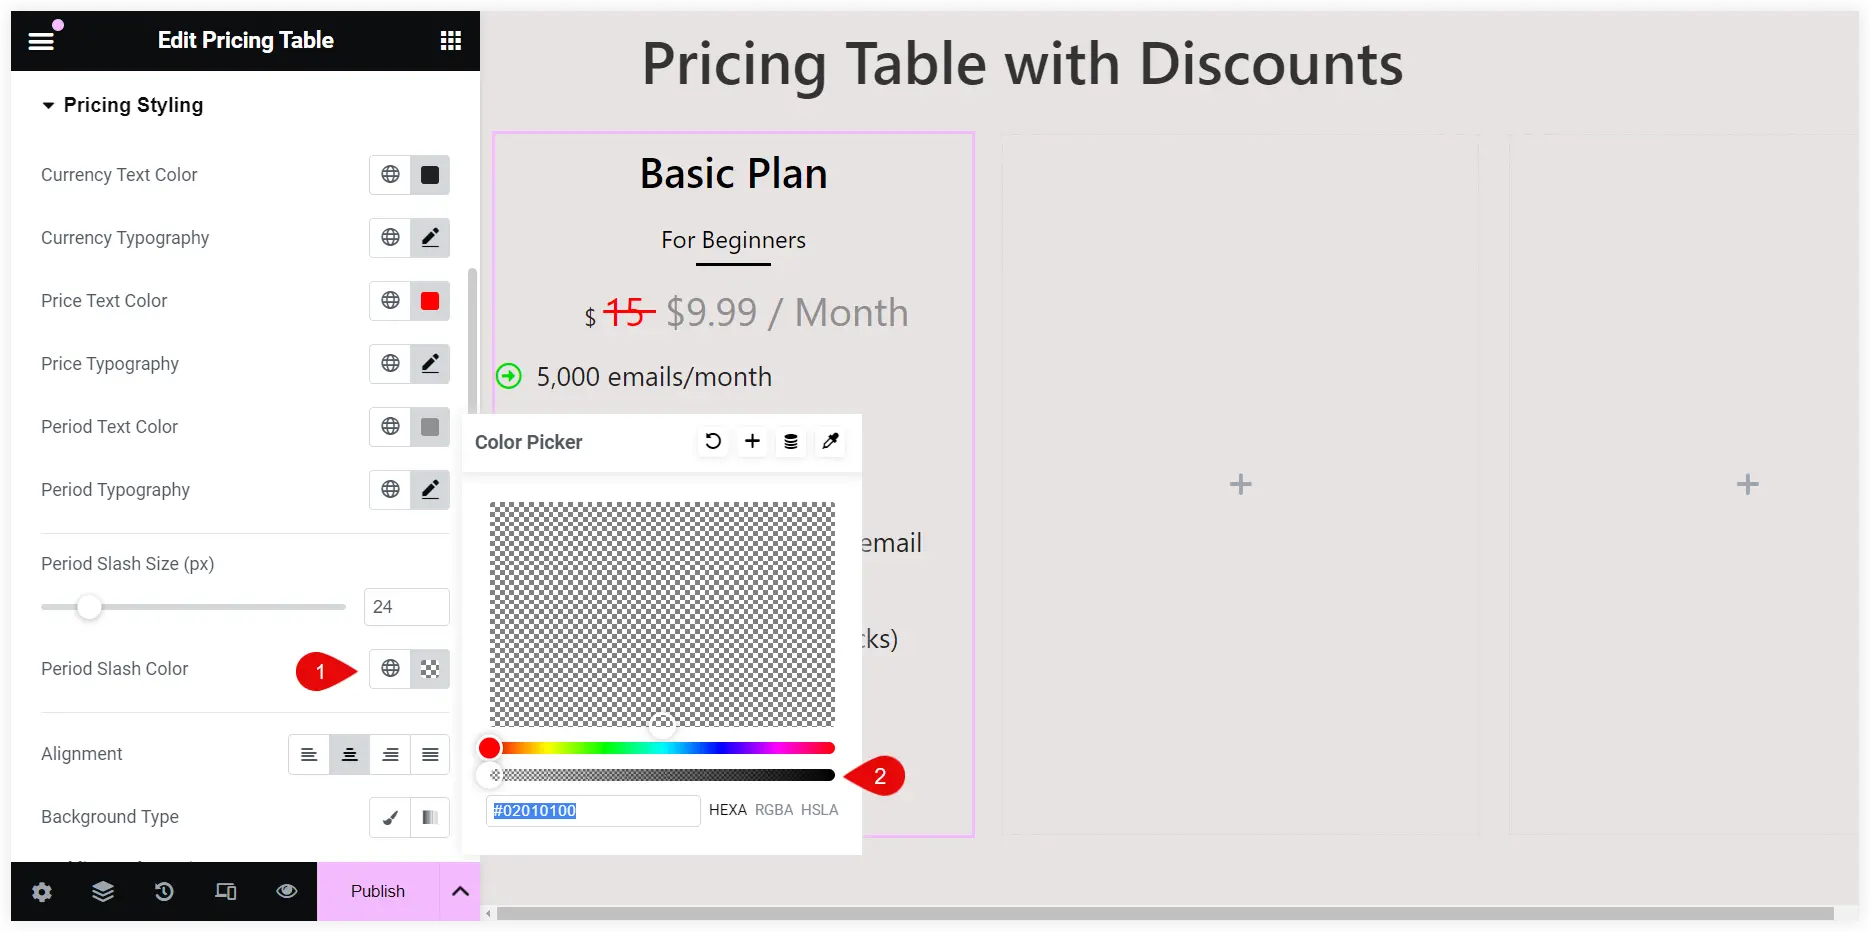
This is a unique way to grab the user’s attention by displaying the original price with a strikethrough along with the discounted price. Enter the original price in the Price field and the discounted price in the Period field with the time.
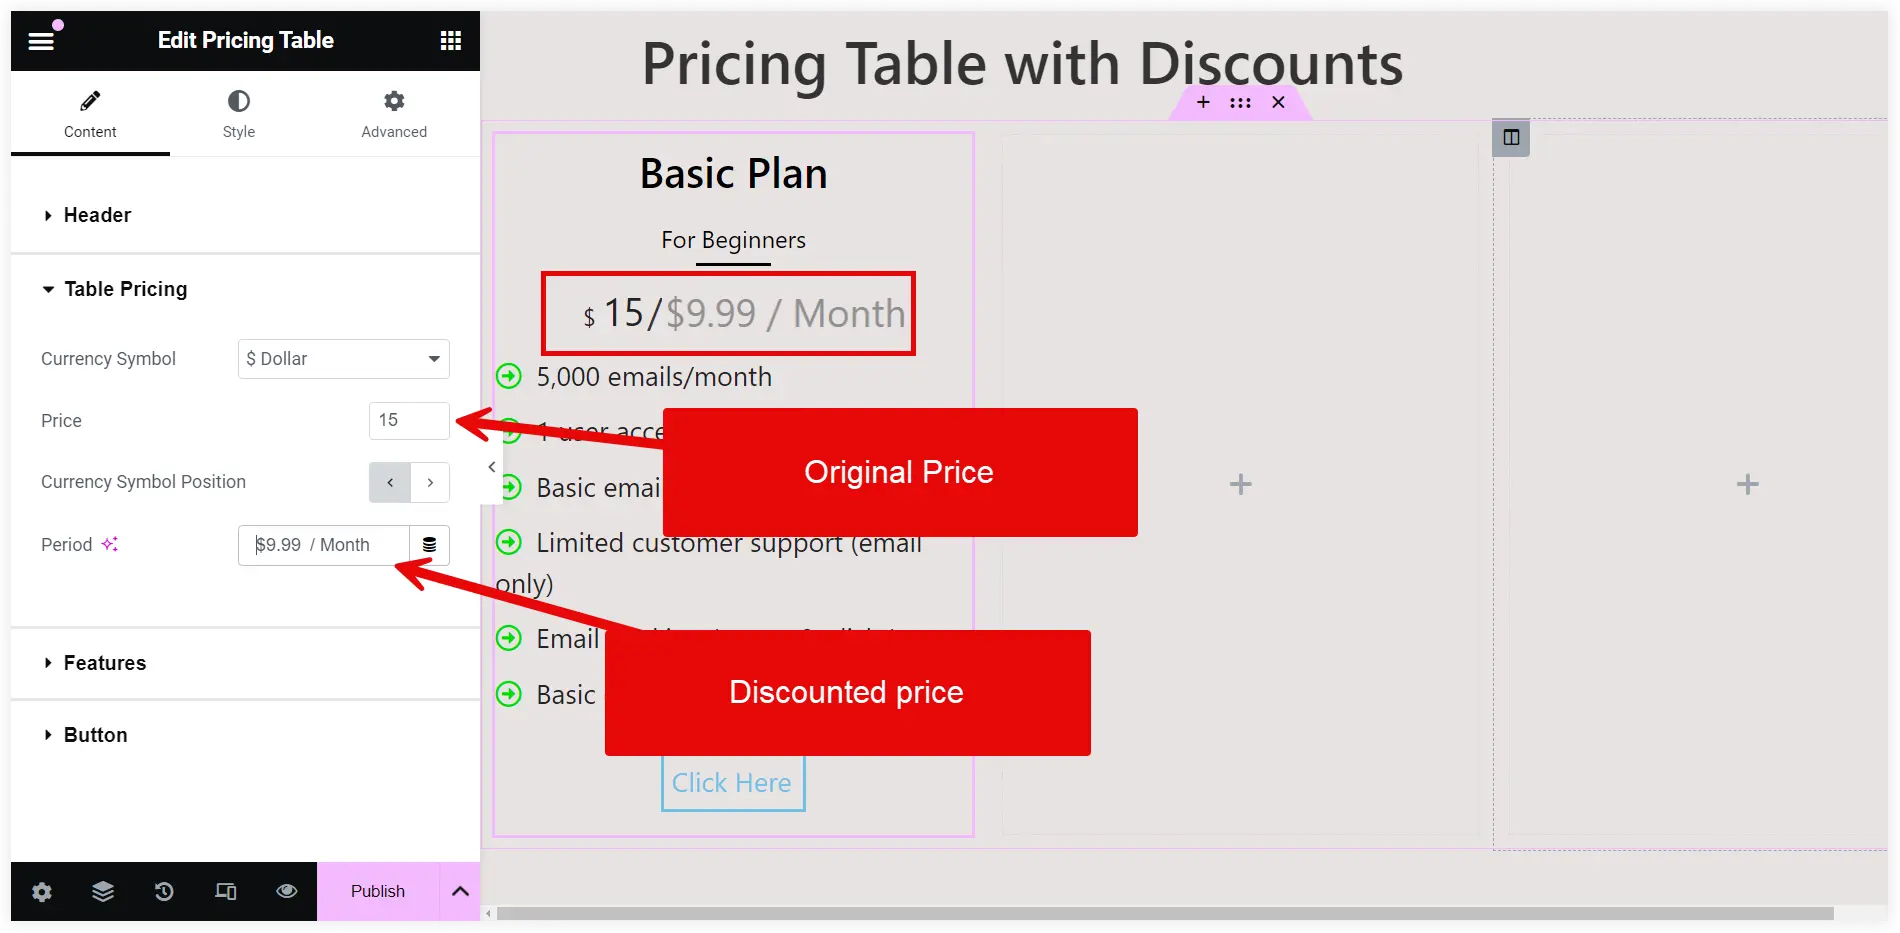
Style the Price and give it a red color with strikethrough decoration.
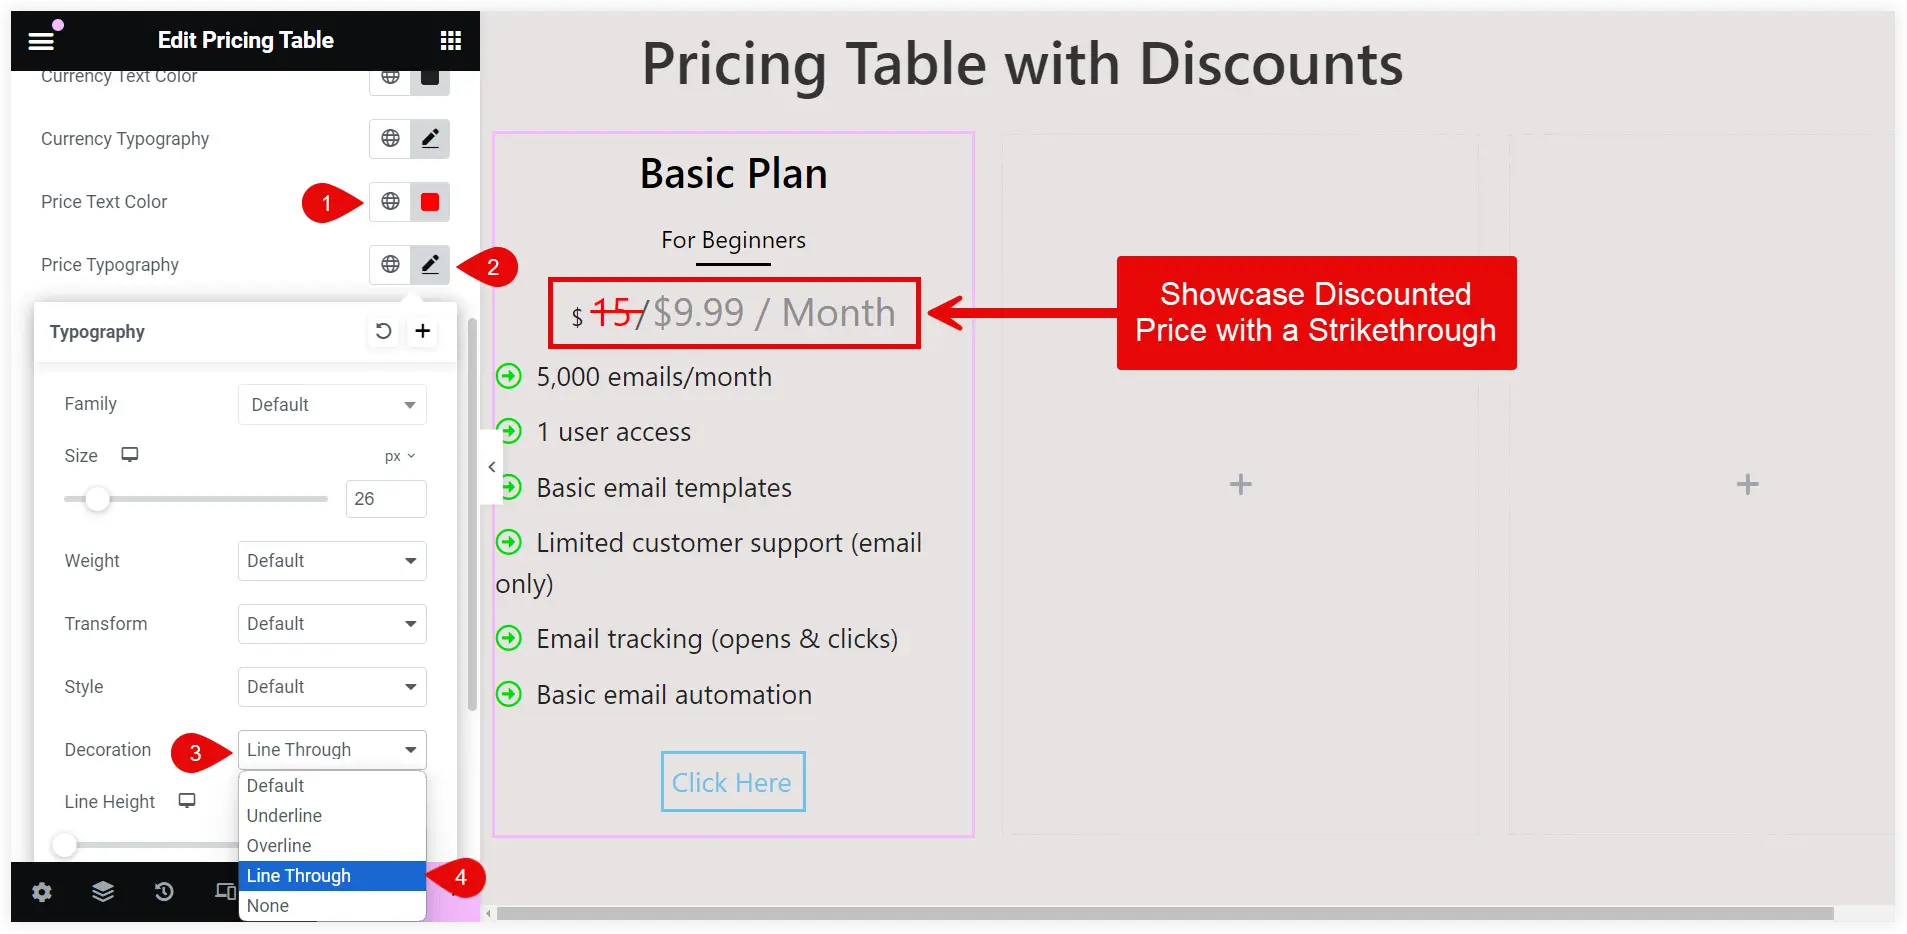
You can remove the slash by making it transparent in the style setting using the Period Slash color option.
It looks great. The discounted price is next to the original price providing a clear status about the offered discount.
3. Use Labels and Badges
The attention-grabbing labels or badges such as Limited Offer, On Sale, etc. can be a game-changer to create a sense of urgency and interest in visitor’s minds to make quick purchase decisions. It helps them spot deals with the first look at the pricing section.
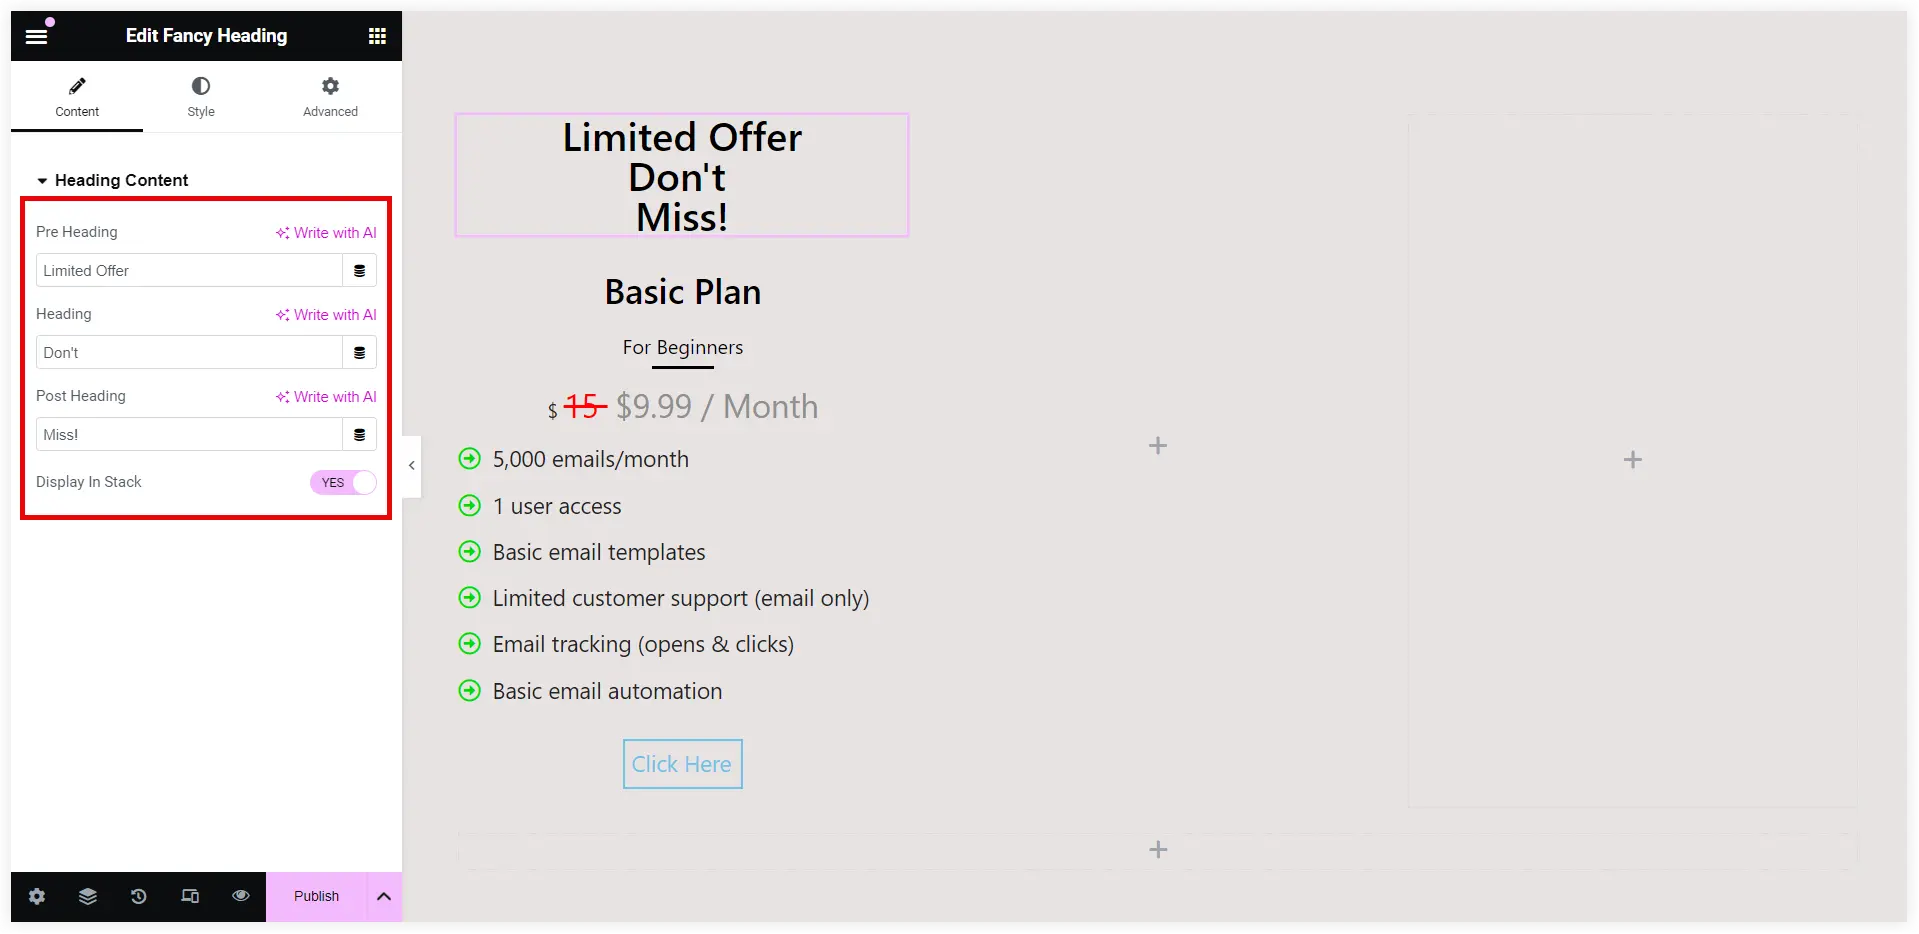
We already installed WPMozo addons for the Elementor plugin at the beginning which offers more than 20 useful Elementor widgets. This gives us the advantage of using the Elementor Fancy heading widget and we will use that to display a label or badge.
Enter ‘Limited Offer’ in the Pre Heading, ‘Don’t’ in the Heading, and ‘Miss!’ in the Post Heading. Enable the Display in Stack option.
Style the label to make it appealing enough to draw visitor’s attention.
Keep the Global Text Settings for Heading Level as H2.
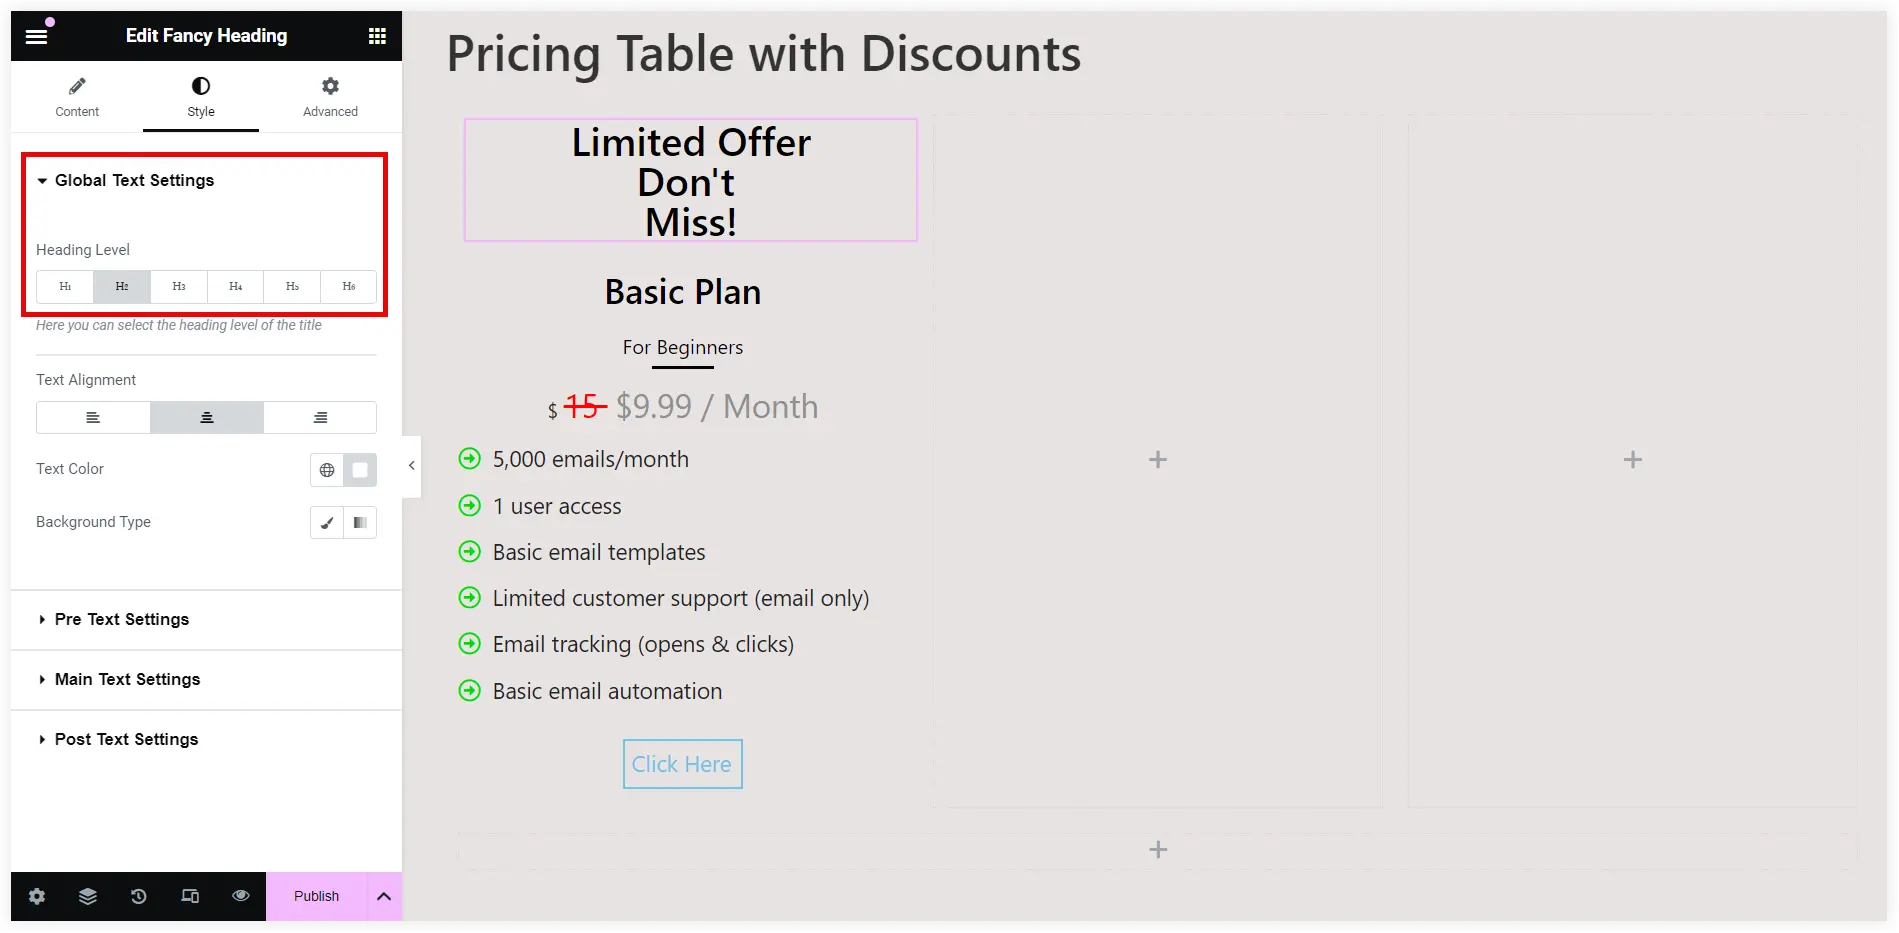
Style the Pre Text, Main Text, and Post Text. Change the Text Color and enable Text Shadow.

Repeat the same styling steps for Main Text and Post Text. Keep the Text color different for both to grab instant user attention.
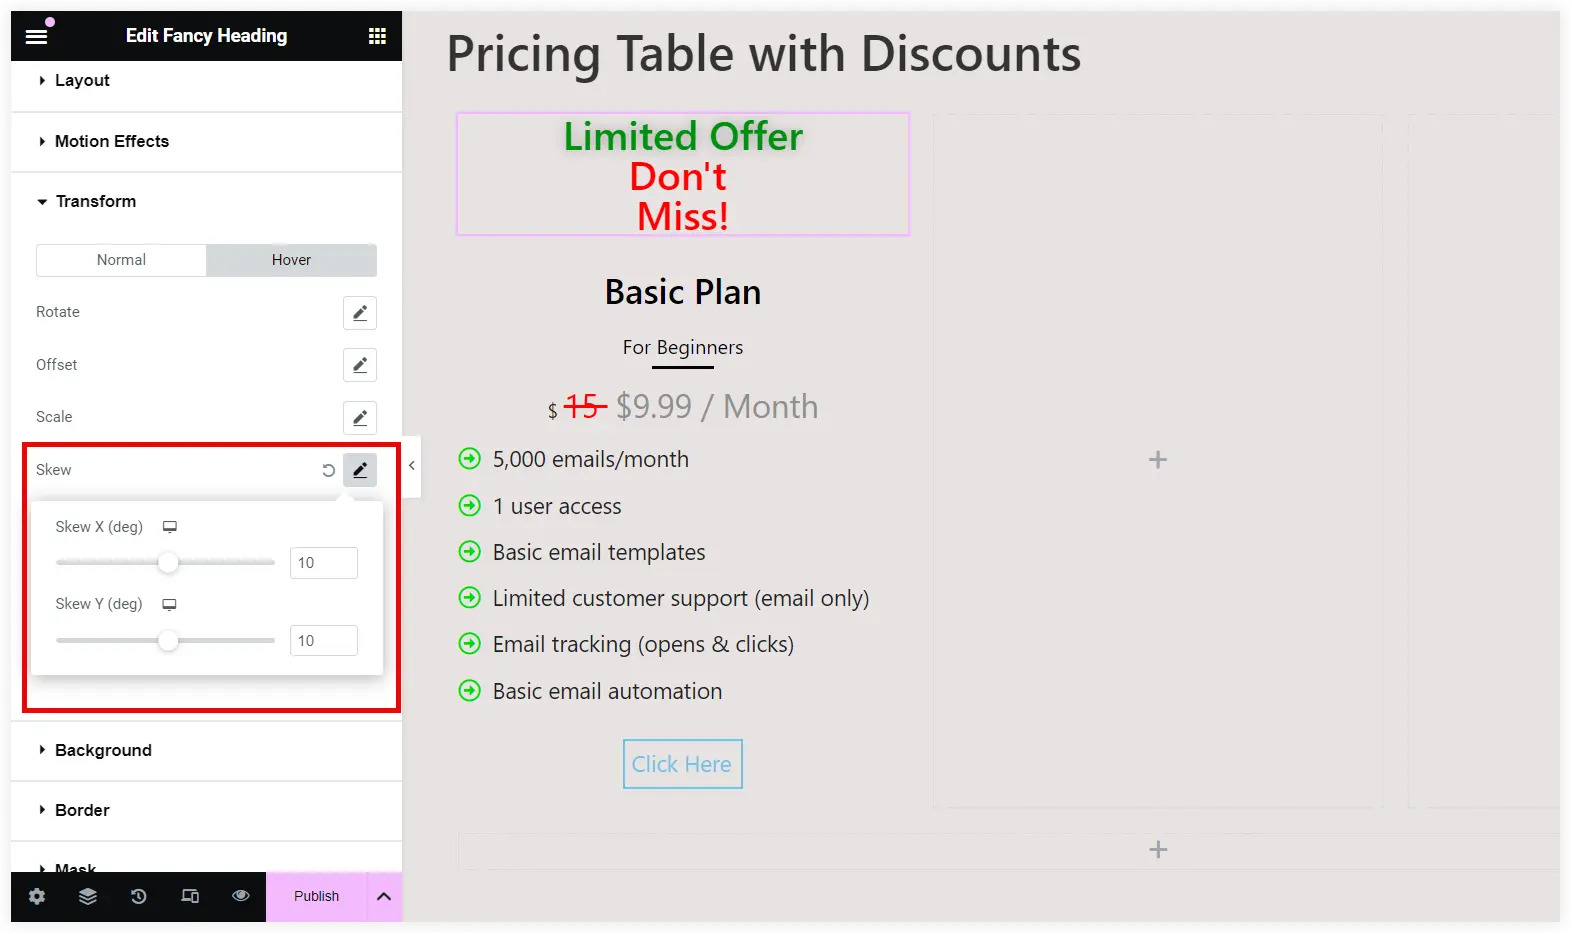
4. Display Discounts with Hover Effects
You can implement hover effects using the various transform settings offered by the Elementor Heading widget. These add different types of effects to the discount labels or badges which come into play when a user hovers over them. These effects provide an eye-catching appearance to the discount labels or badges in the Elementor pricing table.
Open the Transform Settings of the Fancy Heading widget and select the Hover tab. Navigate to the Rotate option. Enter the value for Rotate: 20, enable 3D Rotate, Rotate X: 1, and Rotate Y: 1. Leave the Perspective field blank.
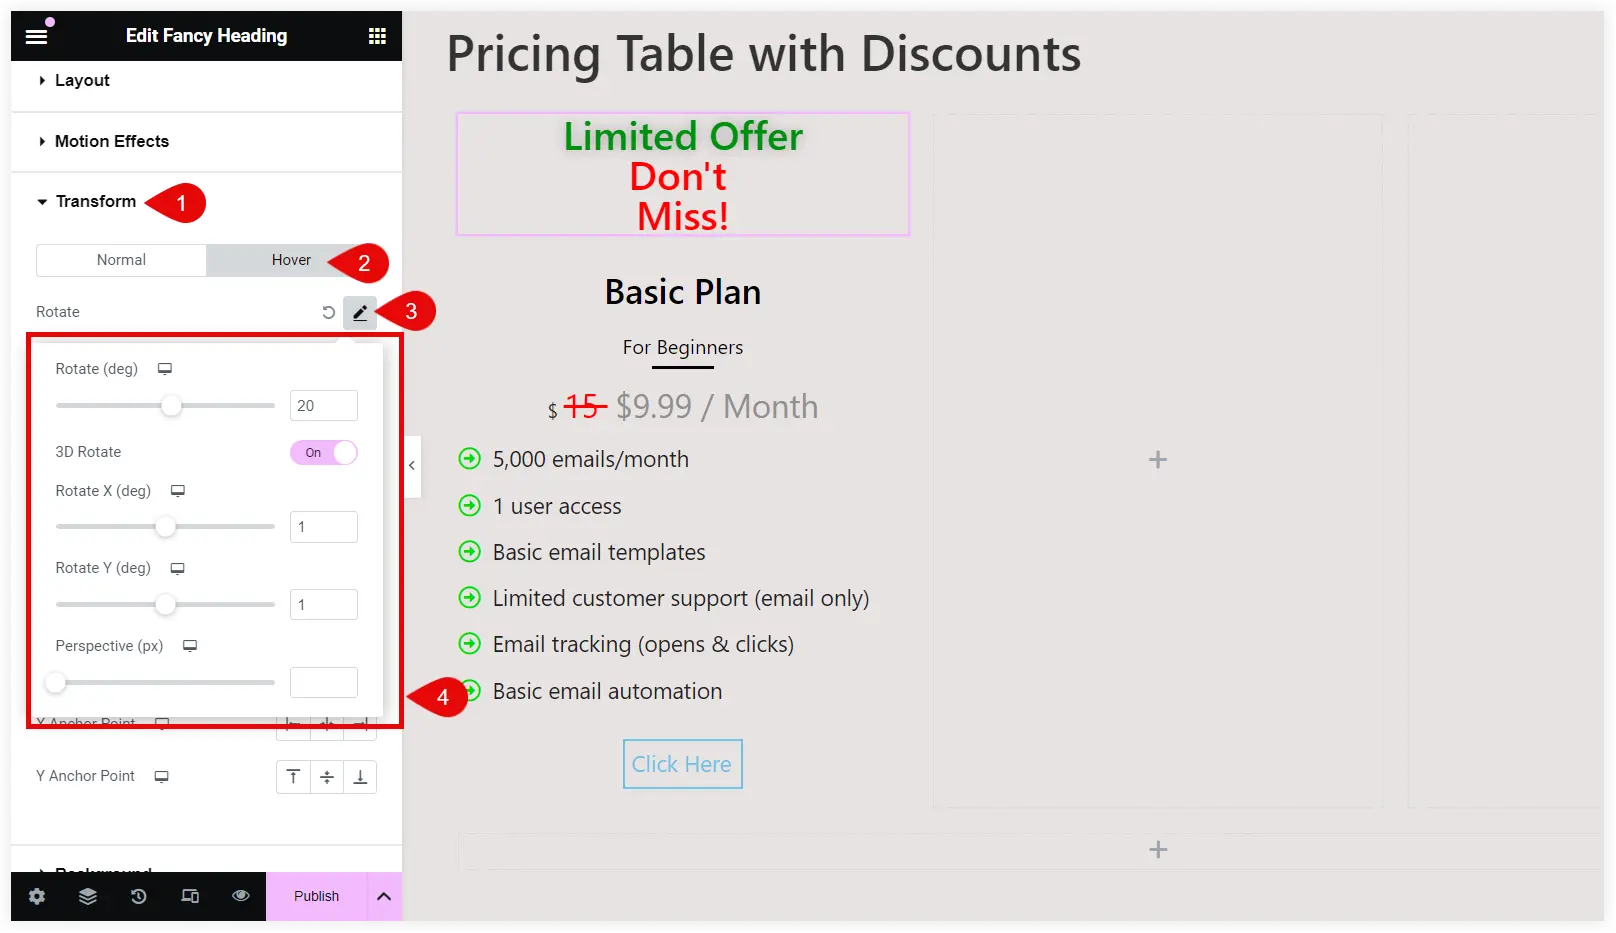
Save it and see what happens at the front end.
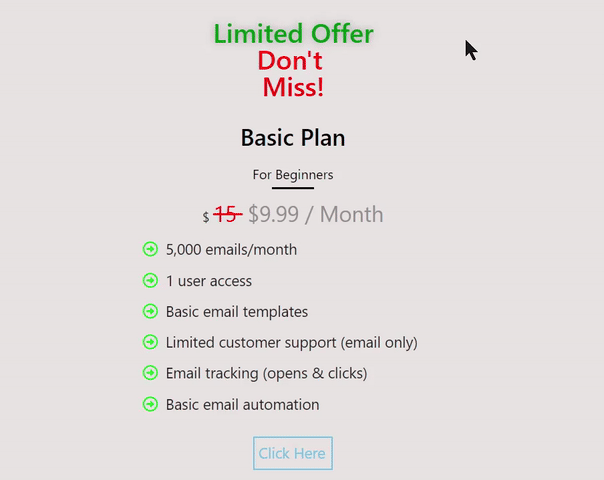
You can also give it a simple transform effect by moving it sideways horizontally or vertically. Use the Offset setting to do that. Enter the value Offset X: 30 and leave Offset Y blank.
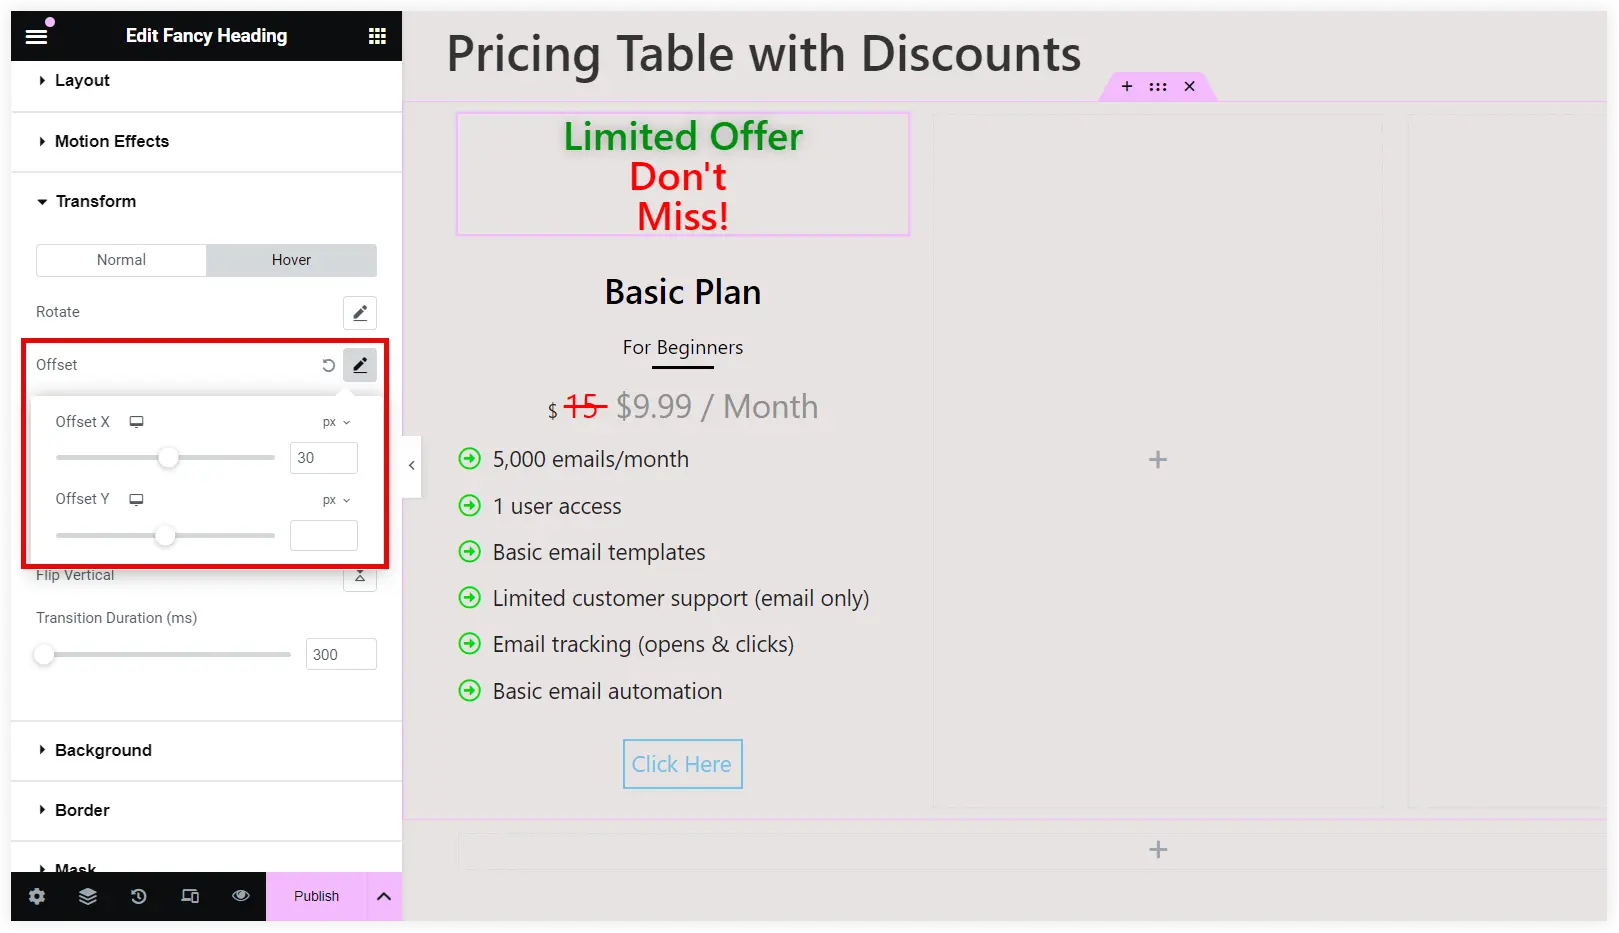
That badge responds with a simple movement effect which appears nice when visitors hover over the discount label.

Next is the Scale option which provides an enlarged view of the discount label to users on a hover. Enable the Keep Proportions option and give a value between 1 – 1.5 in the Scale field.
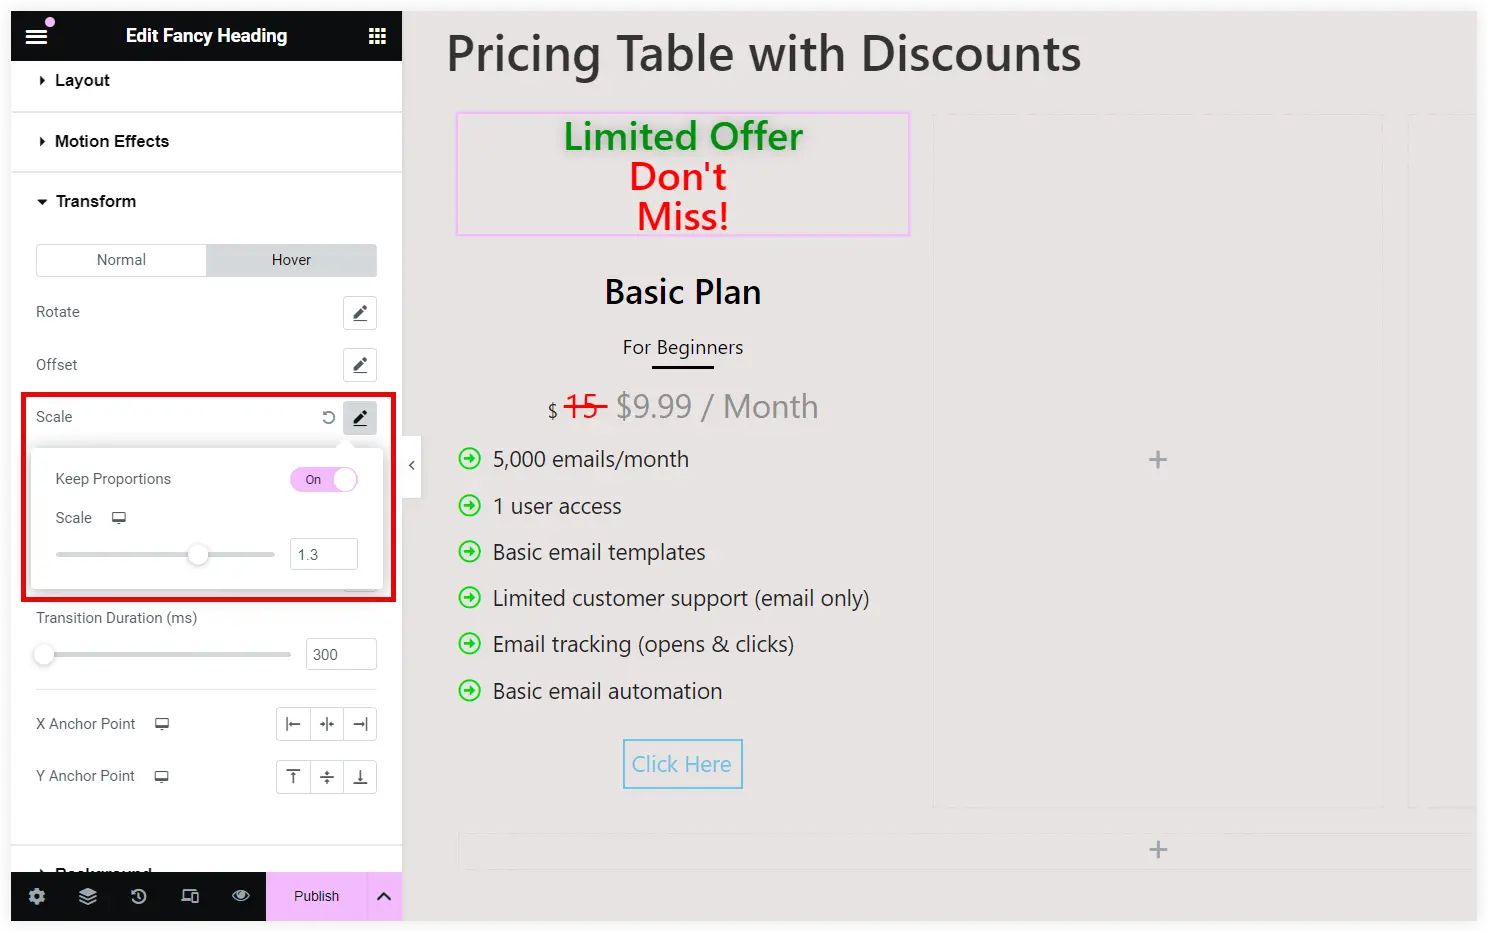
Take a look at how it gives a zooming effect by enlarging the discount label.
The other transform effect can be a twist effect which instantly captures the user’s attention. We will use the Skew option to implement it on our pricing table. Enter ‘10’ as the Skew X and Skew Y values.
See how the twisting effect appears on the front end.

5. Show Discount Timer
This is the perfect approach to display discounts and attract potential users by creating a sense of FOMO situation. The user thinks that the discounts are valid for a limited time and the countdown timer drives them to make a quick purchase decision.
You can use the Countdown Timer for Elementor plugin to incorporate a good-looking timer into your pricing table. Install and activate this countdown timer plugin.
Add the Countdown Timer widget to the pricing table above the discount label.

Set the Due Date and configure what time elements you want to display. If the sale or discount is for a single day, enable Hours, Minutes, and Seconds.
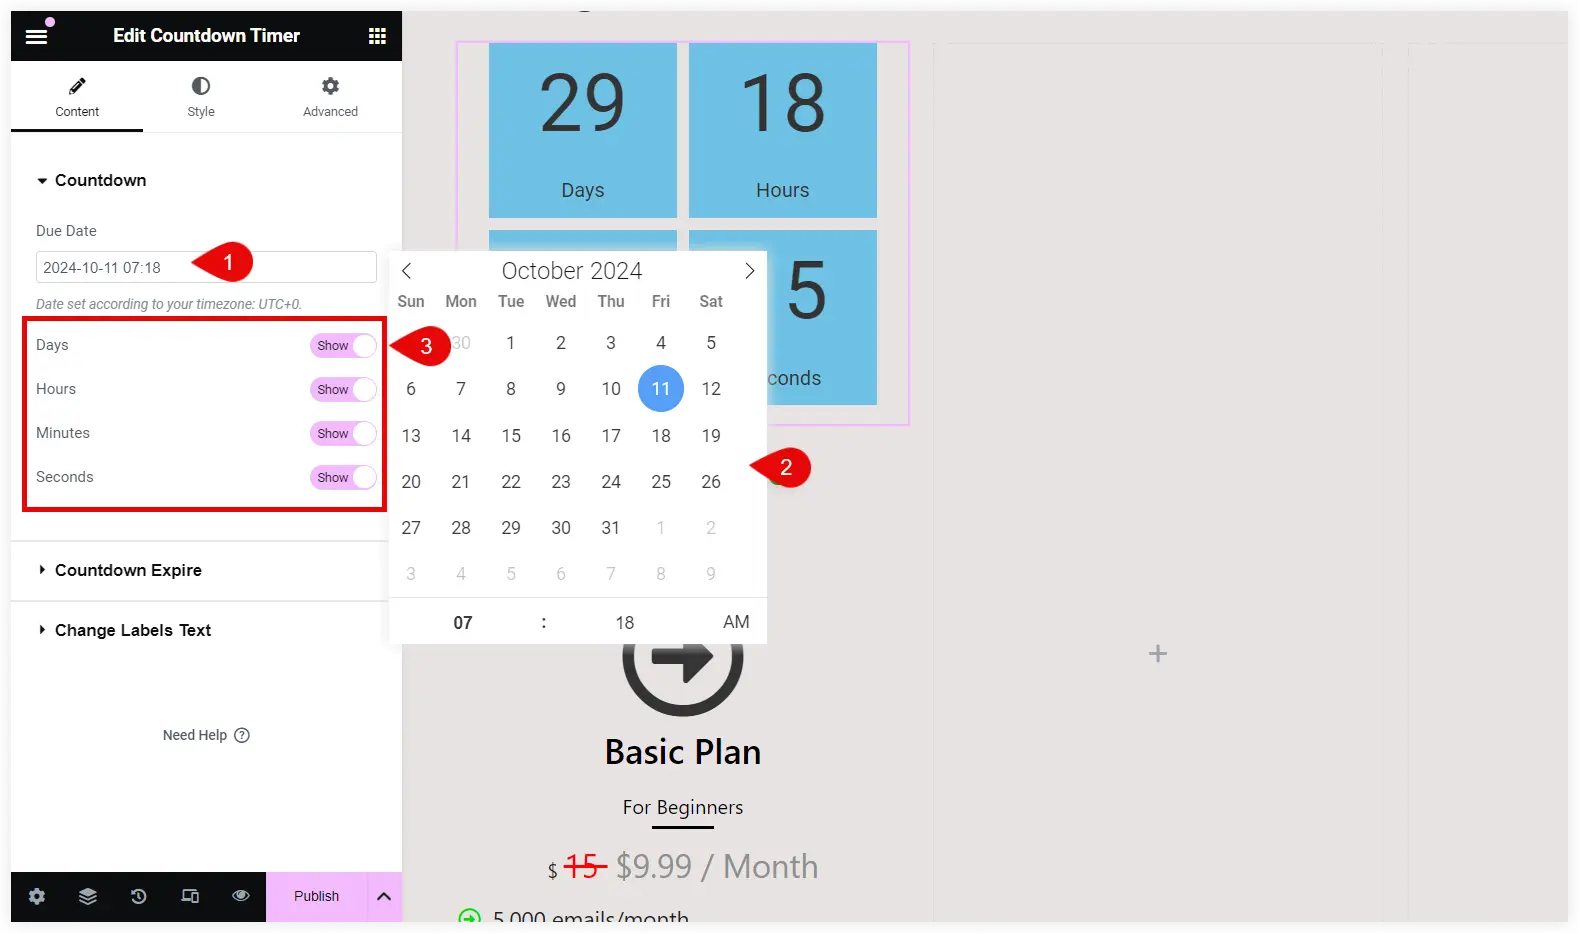
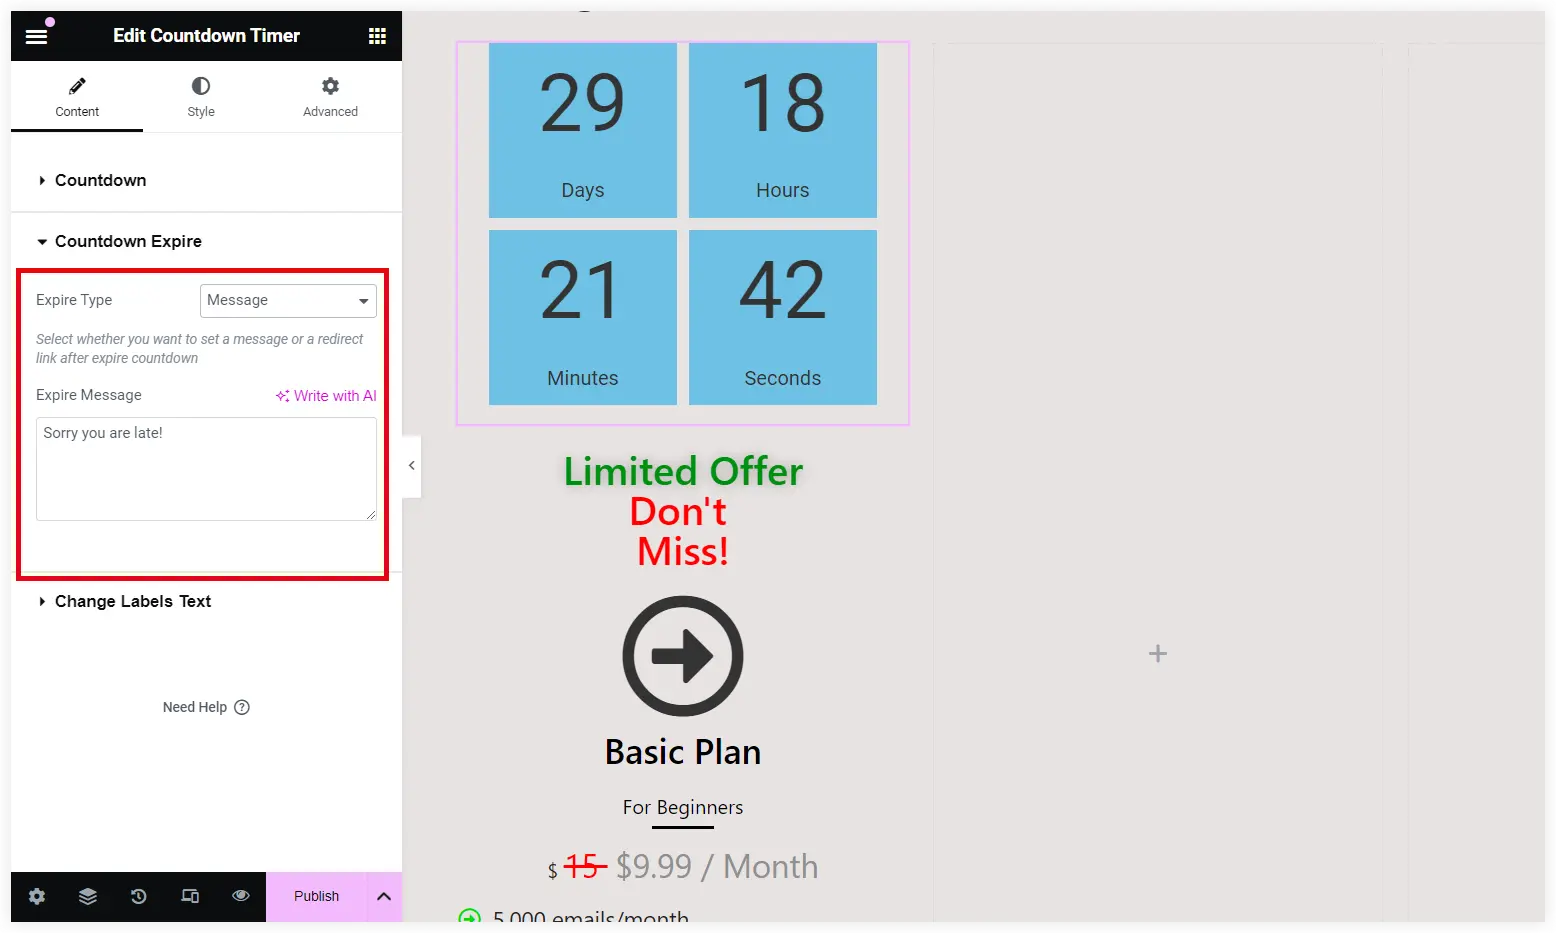
Select Message in the Expire Type dropdown. This message will be displayed at the sale or discount timeout.
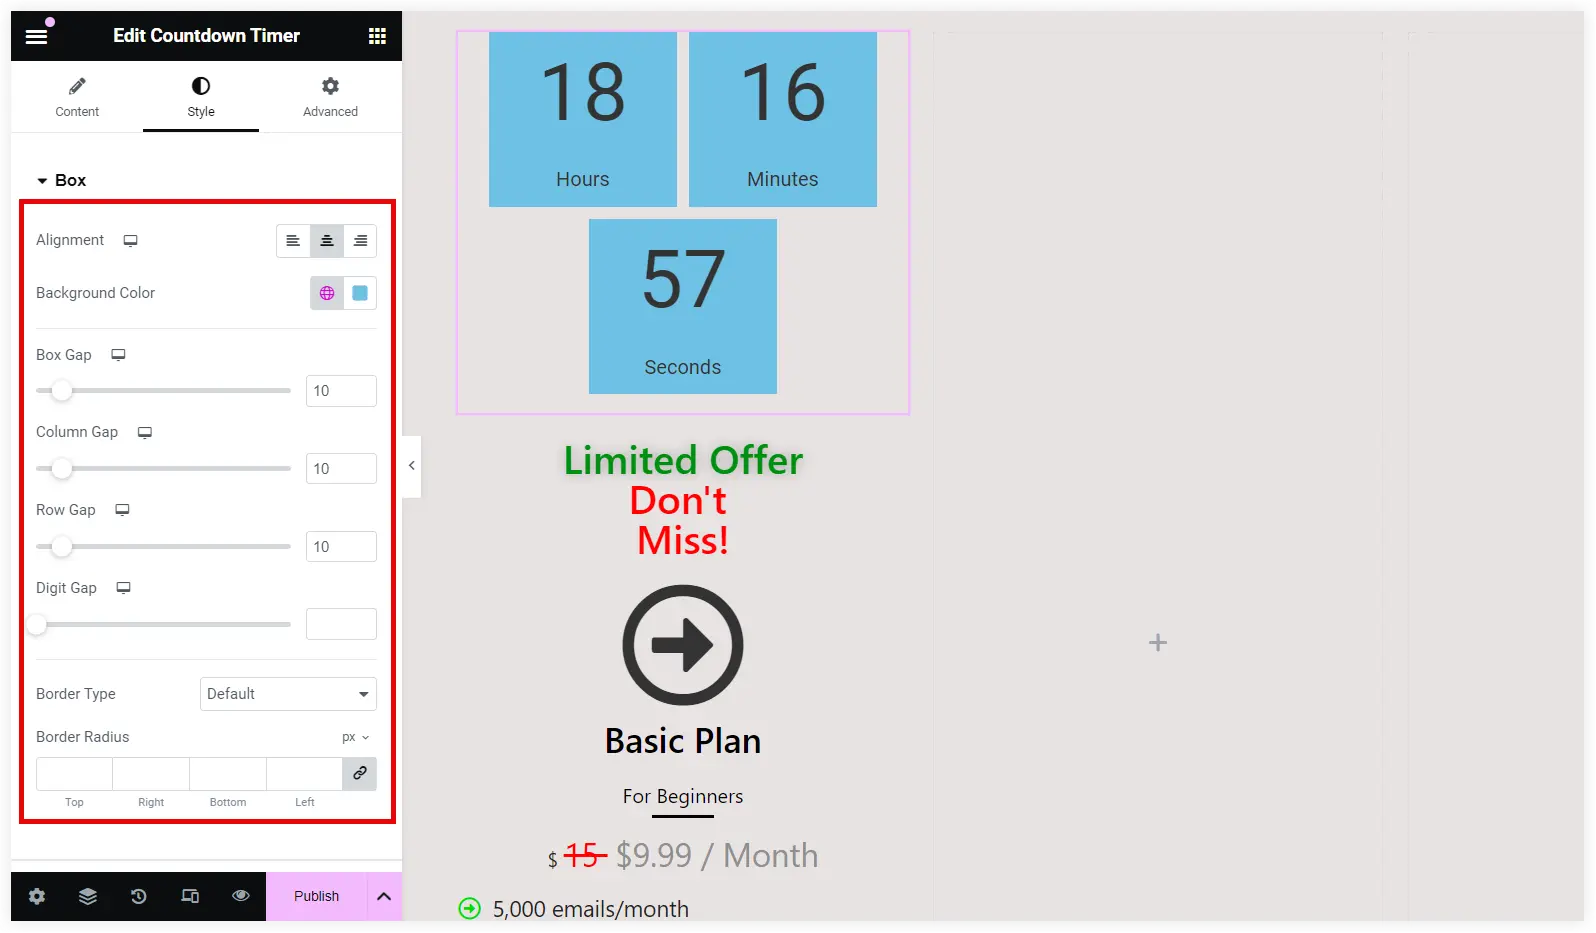
Style the Countdown timer for a personalized touch. Change the background color of the box for an eye-catching look. Adjust the box, row, column, and digit spacing.
Now Copy the Elementor Pricing widget in the rest of the two columns to display the other pricing tiers. Edit the content and take a final look at the Elementor pricing table created by us.
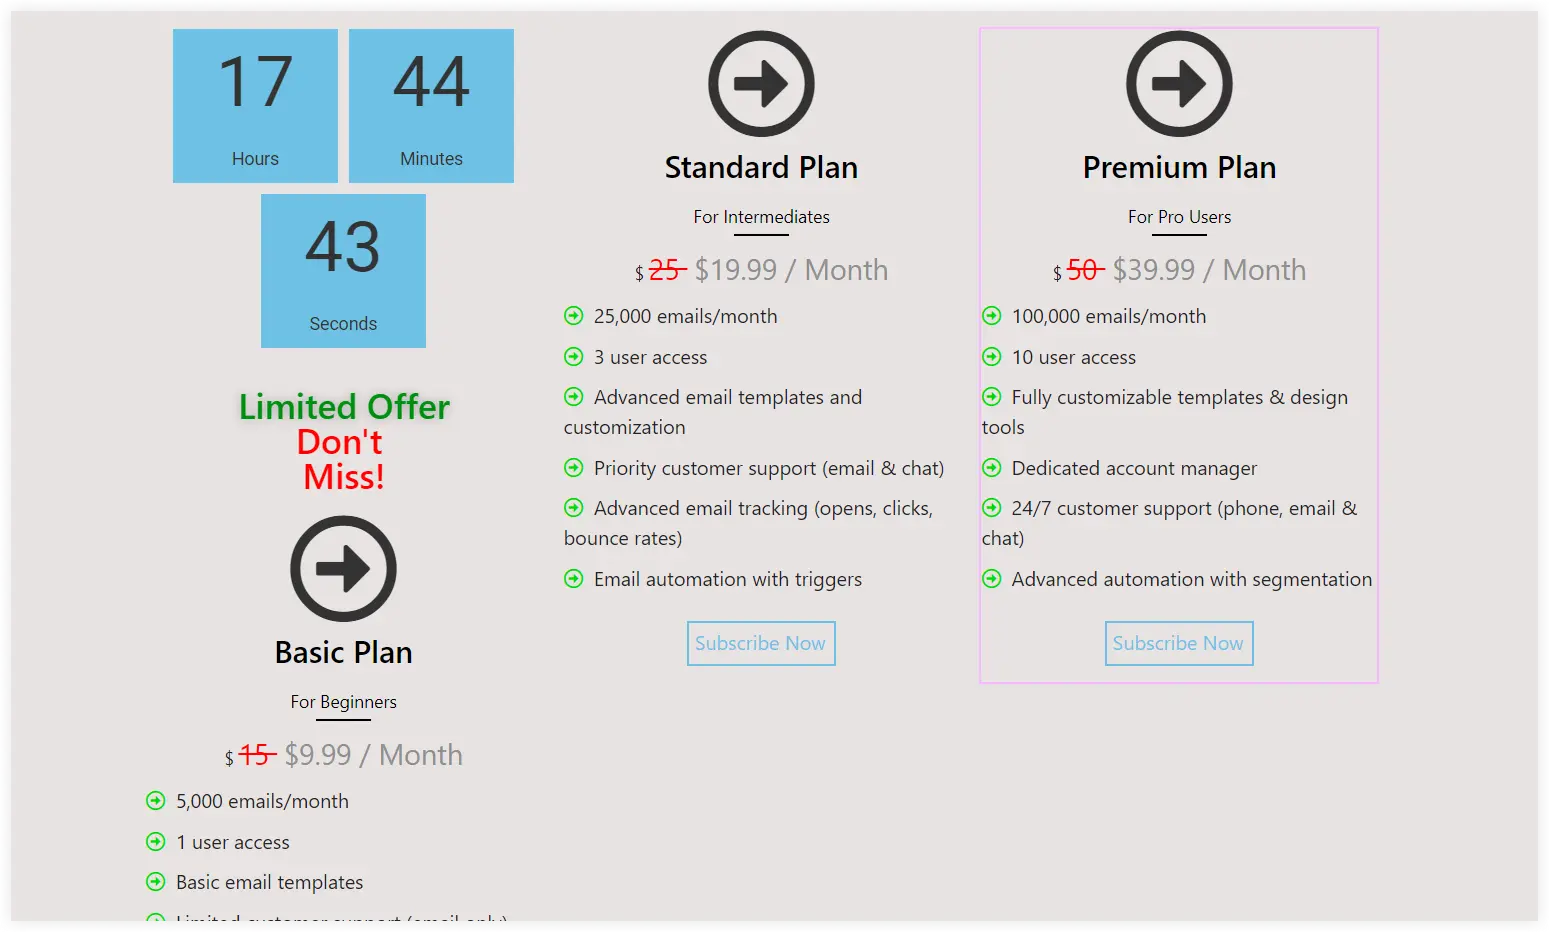
You will observe that the pricing tiers do not look uniform. We will use the Elementor Spacer widget in the other two pricing tiers where the discount is not displayed to maintain a uniform look of the pricing table.
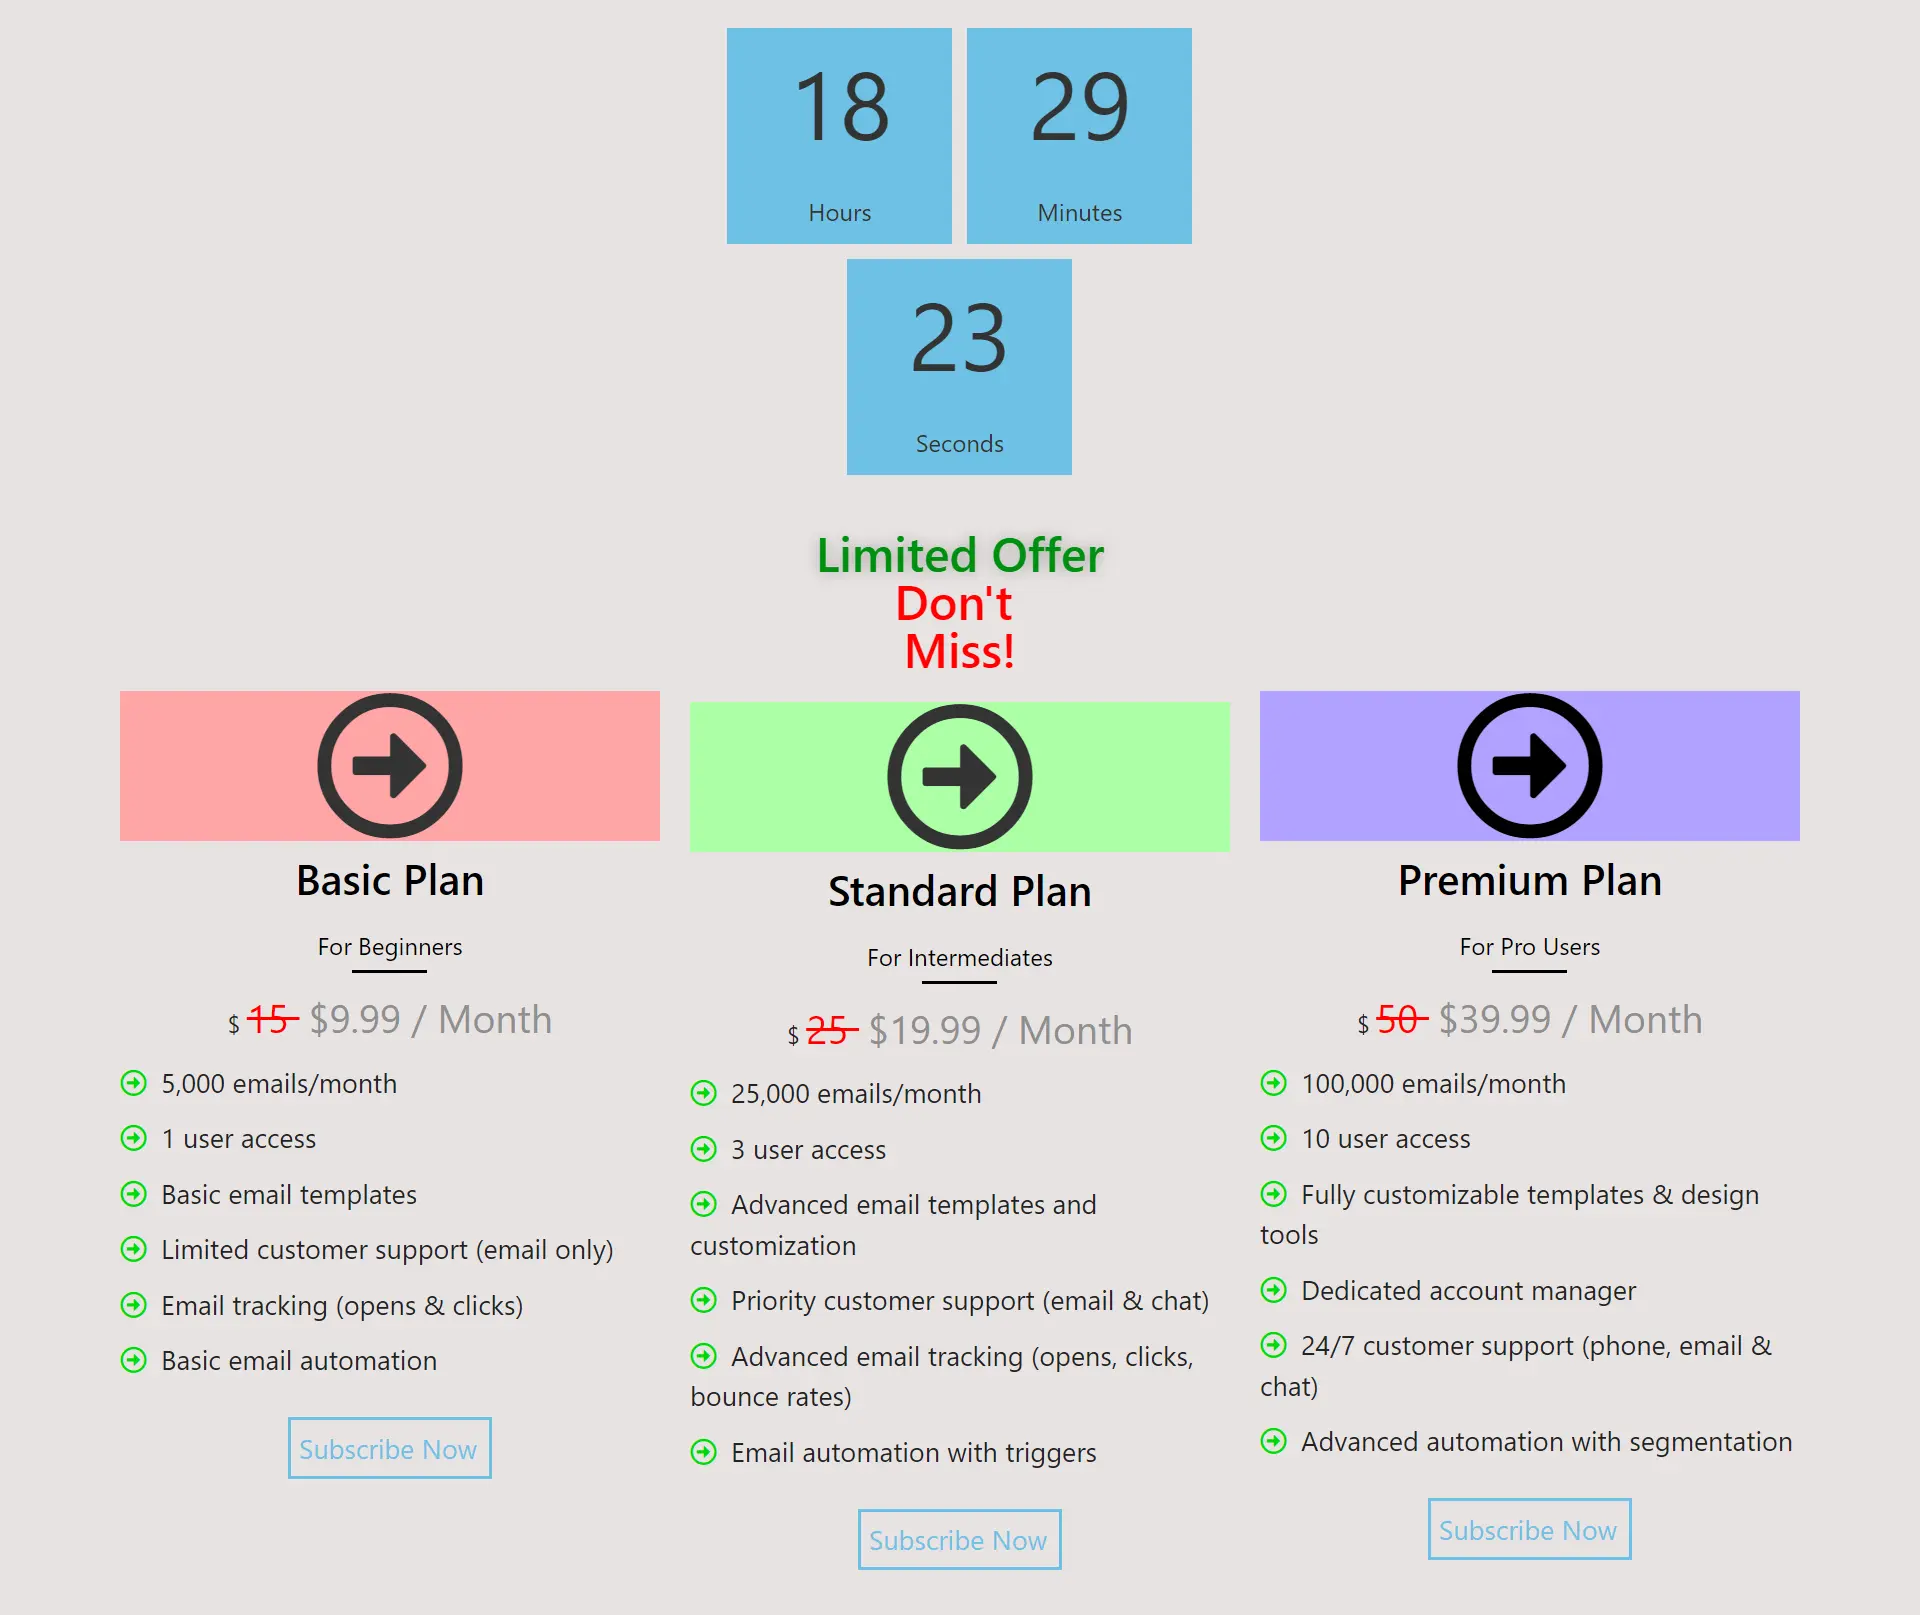
Also, remember that discounts are generally offered for the premium or standard pricing tiers. Move the discount label and countdown timer using drag and drop to the standard plan.
Change the Icon background color for a more appealing look.
That’s done.
Let’s have a final look at the pricing table with discounts.
After finishing that you can explore more design and customization possibilities of Elementor pricing table widget to style it for a more sensational look and feel.
Final Takeaway
Finally, it is clear that showcasing discounts can help in increasing conversion rates and website engagement. You can implement our step-by-step guide to design a dynamic pricing table that not only displays the offering but also highlights discounts to capture the user’s attention. From adding labels to hover effects and countdown timers each elements play a major role in attracting potential clients. Take advantage of the discounts with Elementor pricing table widget to make your website a winner in sales.


0 Comments