In online shopping, checkout is the most important stage where customers review the order and fill in their billing, and shipping details before a payment. Sometimes we need to customize the WooCommerce checkout page and personalize the WooCommerce billing fields according to our requirements.
WPMozo Checkout Manager for WooCommerce is a plugin that can be used to customize the checkout page in Woo.
- Add new WooCommerce checkout fields.
- Edit WooCommerce checkout fields along with their default value.
- Enable or Disable WooCommerce checkout fields.
- Remove the unwanted checkout fields.
- Arrange the WooCommerce Checkout fields the way you want.
- Modify WooCommerce checkout page with labels of text fields.
- Make the checkout fields optional or mandatory.
In this article, we will explain all the functions of the WPMozo Checkout Manager for WooCommerce in detail.
Requirements
You must have WooCommerce on your WordPress website to implement this checkout plugin.
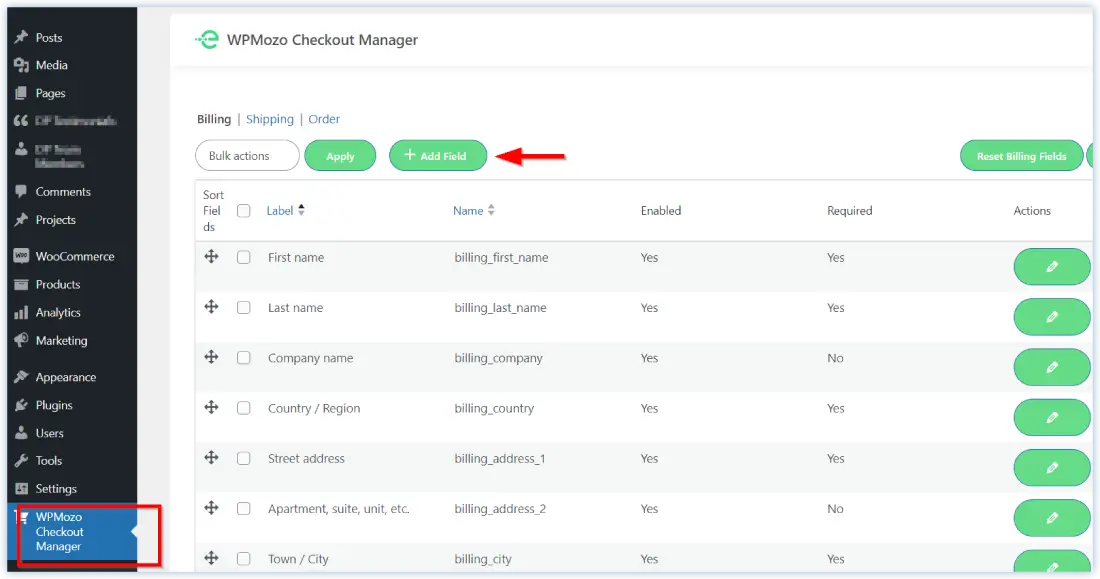
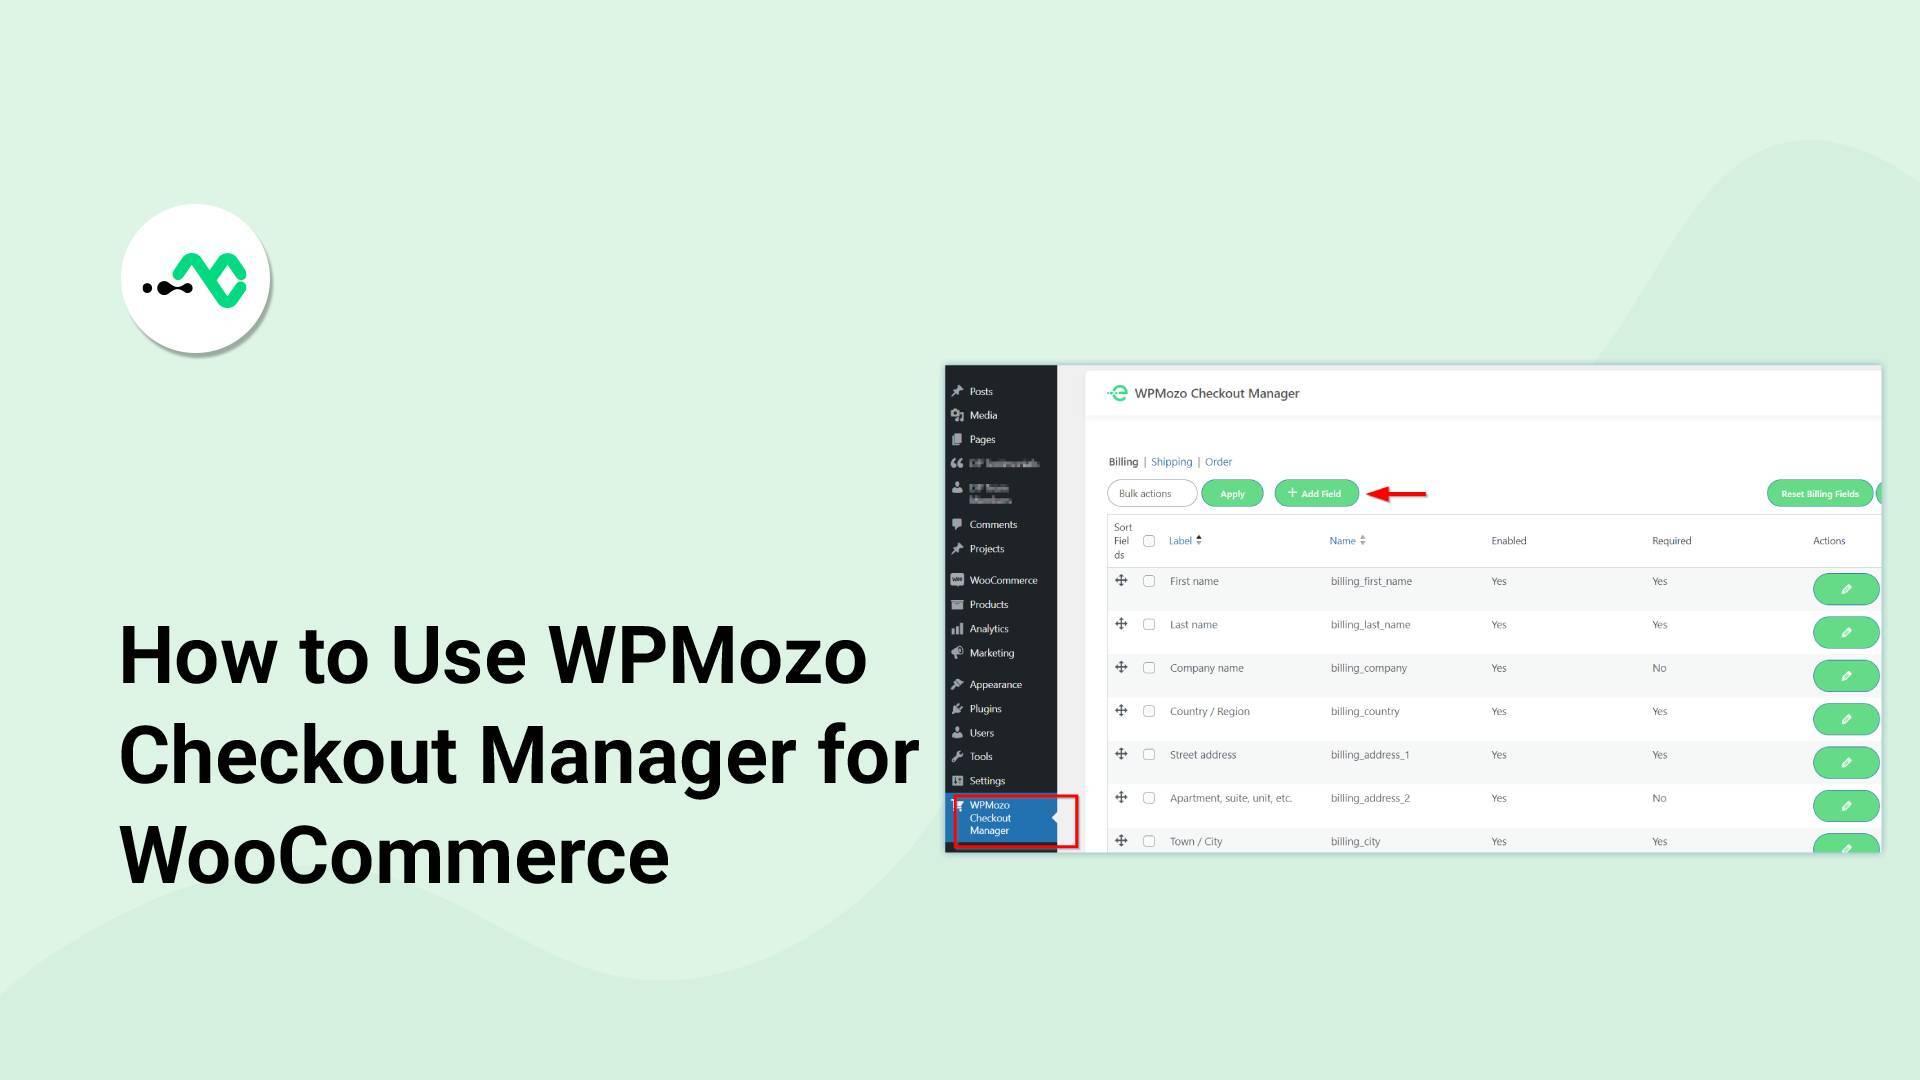
Locate the WPMozo Checkout Manager for WooCommerce plugin on the WordPress Dashboard to access all its functionalities. Let’s start exploring the outstanding capabilities of this checkout plugin.
1. Add new WooCommerce checkout fields
Click on the Add Field button. The general options for the checkout fields will open in a dialogue box.
Select a suitable field type. You can choose text, radio button, checkbox, and many other different options.
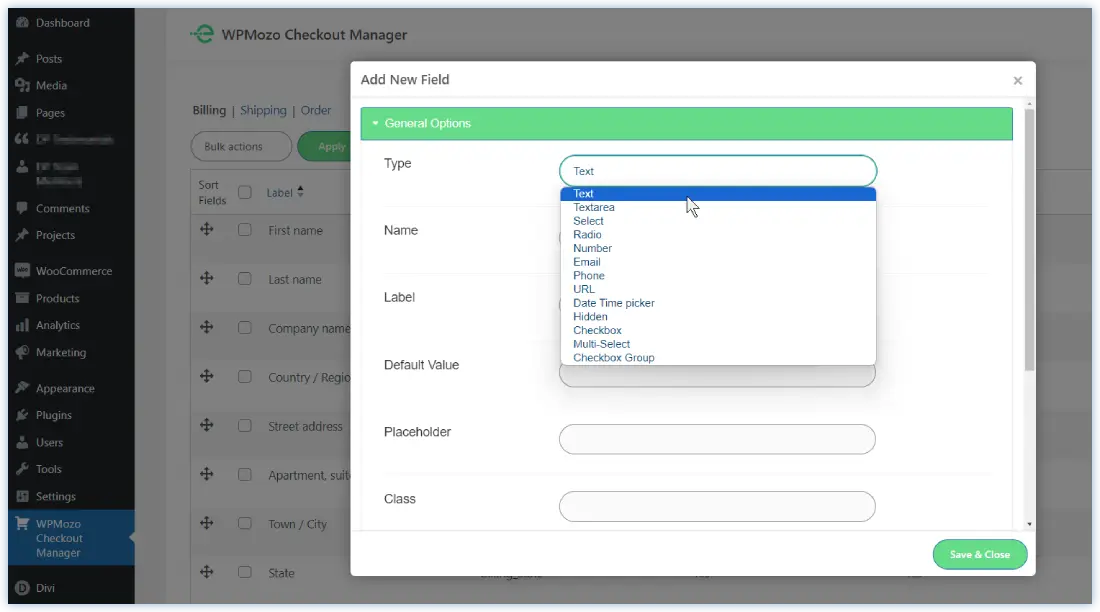
Enter the Name of the field. It would have the section name as its prefix. Like,
billing_Cellphone
shipping_Cellphone
Place the label that would appear with the checkout field.
You can also select the default value for the text field.
Skip the Placeholder and Class option.
Keep the Fullwidth switch enabled to maintain the uniformity in length of all the fields.
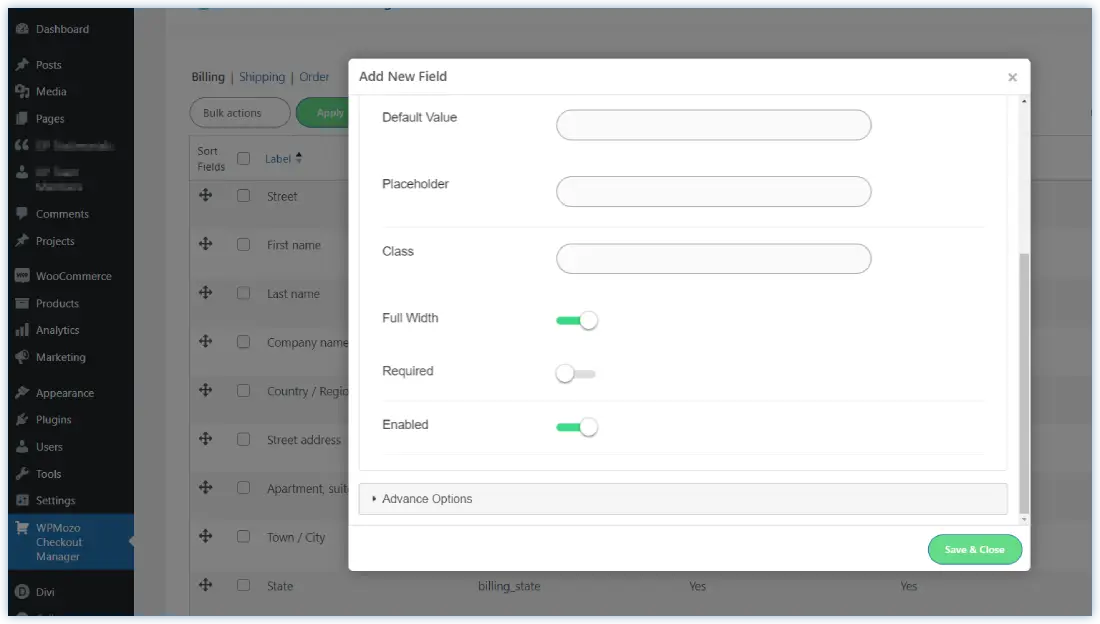
Switch the Required option to make that field mandatory or keep it off to turn a checkout field optional.
You can also enable or disable a field easily.
Click on Advanced Options which gives you the facility to display the fields as it is on the Order mail and Order detail page.
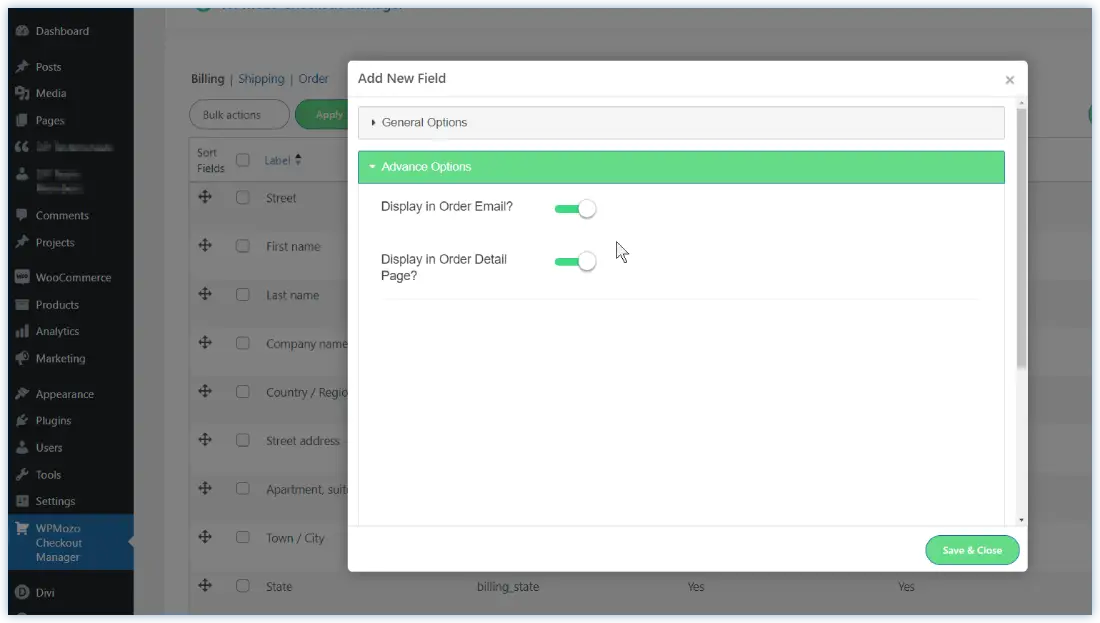
After doing all the above things Click on the Save & Close button.
Now go to your shopping website, add some items to the cart, and proceed to checkout. You will observe that a new field has been added on the checkout page of your website.
2. Edit WooCommerce checkout fields
This WooCommerce checkout manager plugin makes the editing of the checkout fields easy.
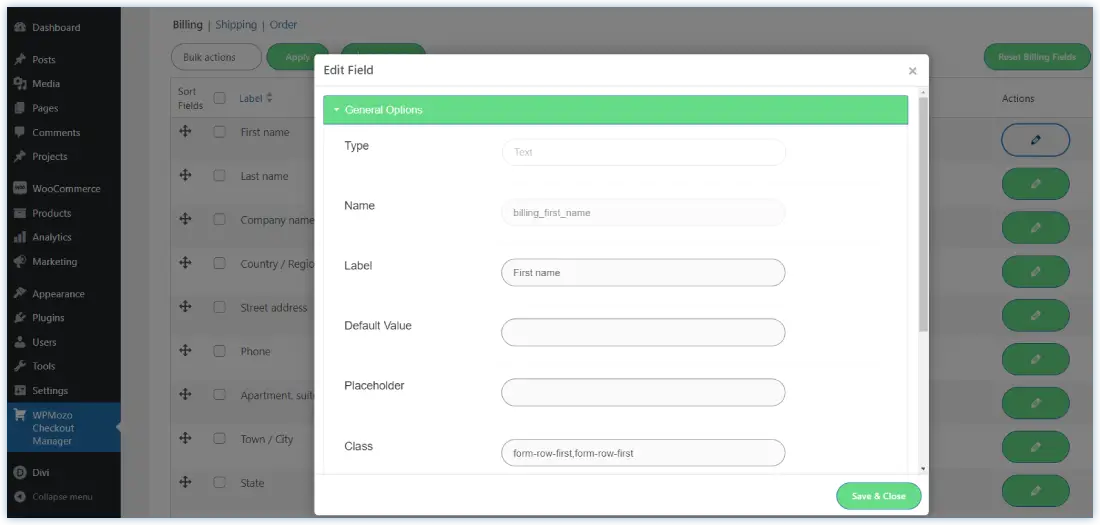
Click on the edit button located beside any checkout field and a dialogue box similar to the add new field option would be opened.
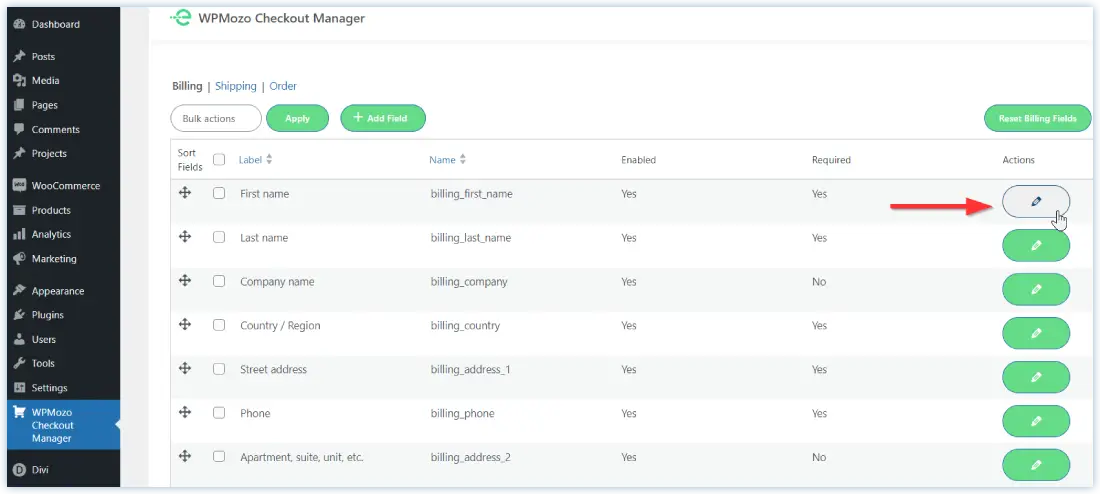
Now edit the information as per your needs. Click on the Save and Close button. All your previously saved details are now been updated with the new ones.
3. Position checkout fields the way you want
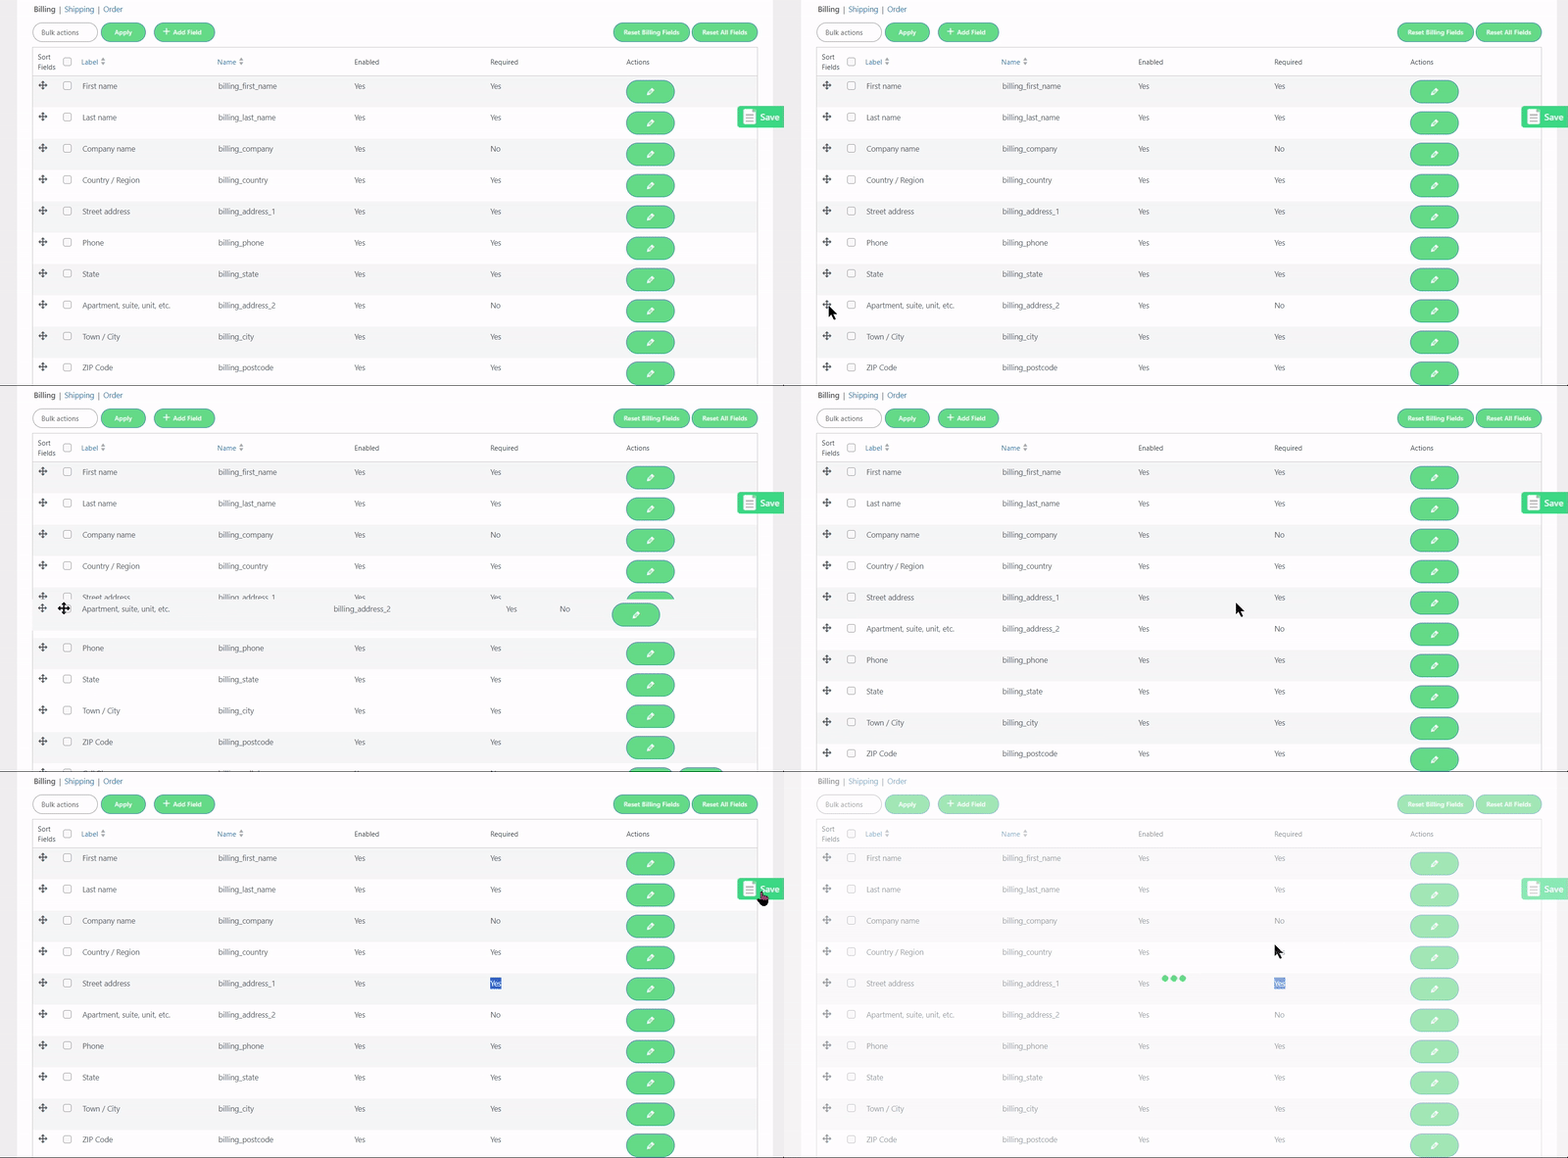
This checkout plugin gives you a convenient way to arrange the checkout fields in your desired way. You only need to drag the field from its position and drop it where you want. This is very easy and can be done without expertise.
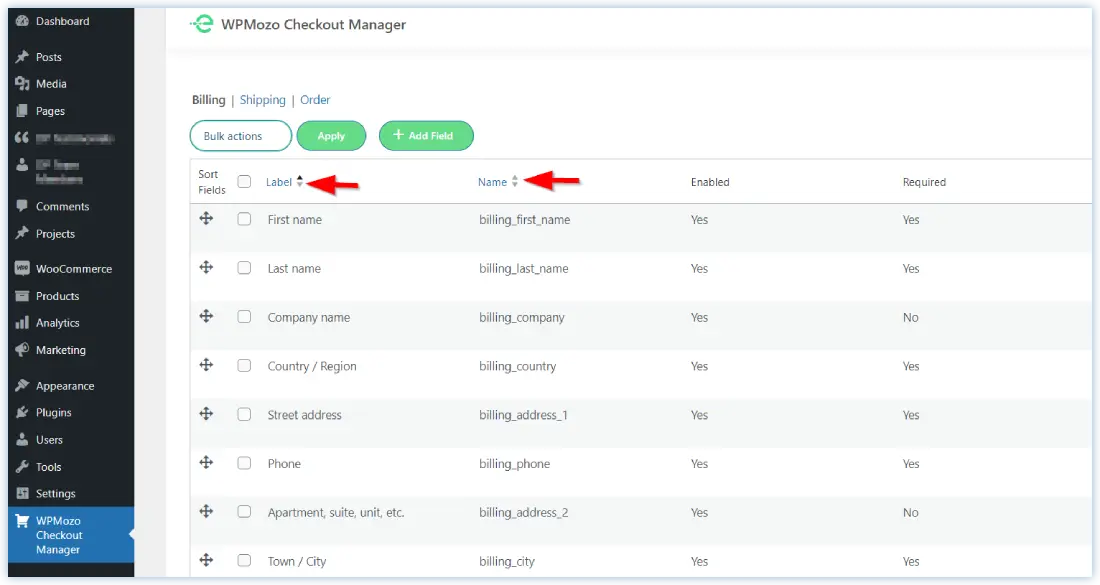
You can also sort the fields on the basis of Label and Name in ascending or descending order.
4. Remove an unwanted checkout field
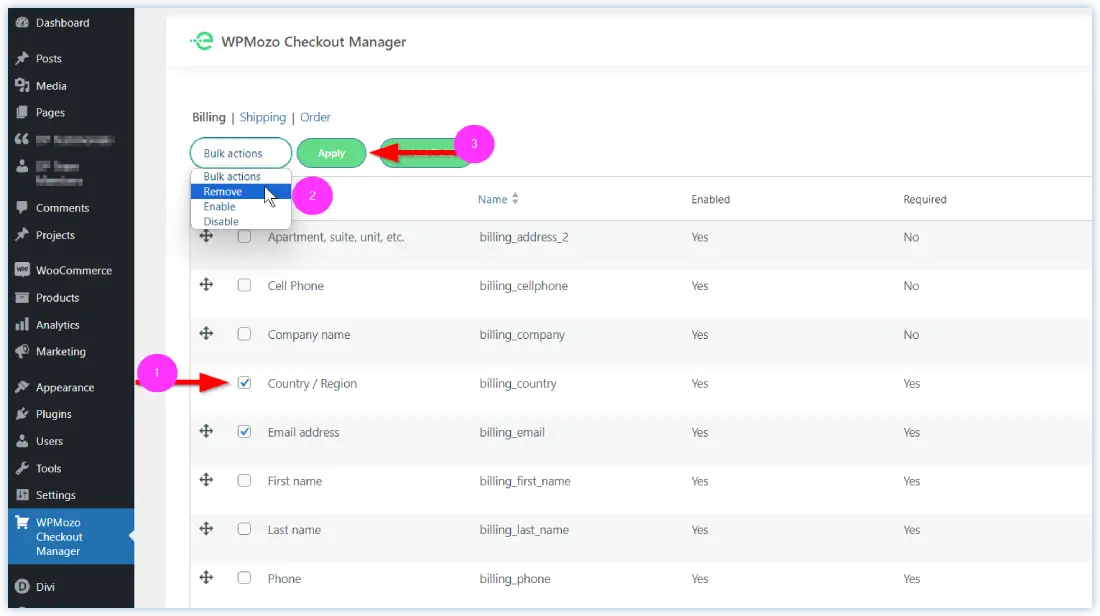
Removing an unnecessary checkout field is quite simple. Select one or multiple checkout fields that you want to remove.
Click on the Bulk actions drop-down, choose Remove, and click on the Apply button. The selected fields would get removed.
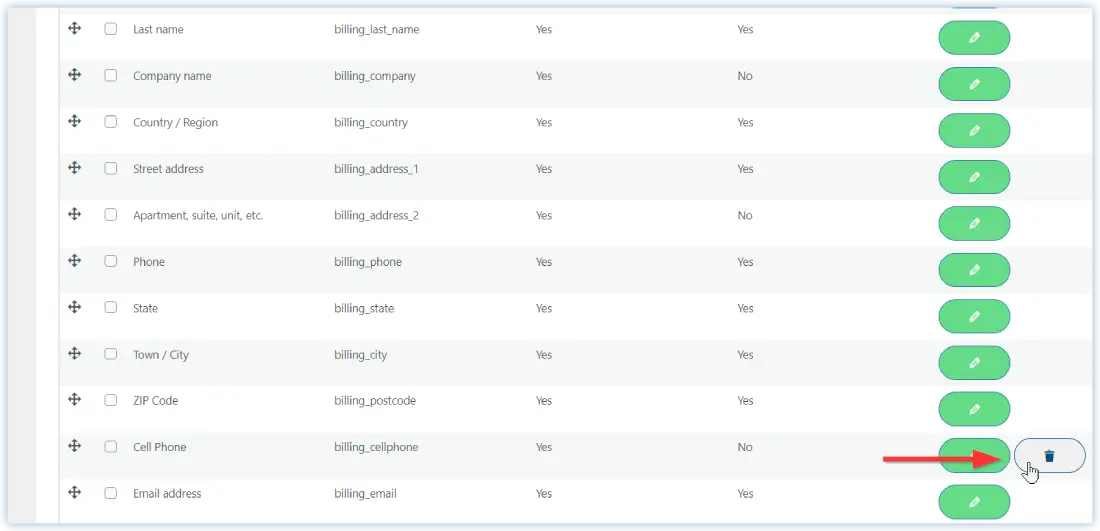
Apart from that the custom fields created by you can be easily removed with a single click on the delete button.
5. Enable or disable checkout fields temporarily
Sometimes there are situations when we don’t need a field on the checkout page of our store. But there are possibilities that it might be used in the future for any other range of products.
In that case, this WooCommerce checkout manager plugin gives you the flexibility to disable the field temporarily. Later on, you can enable it when you need it on your checkout page.
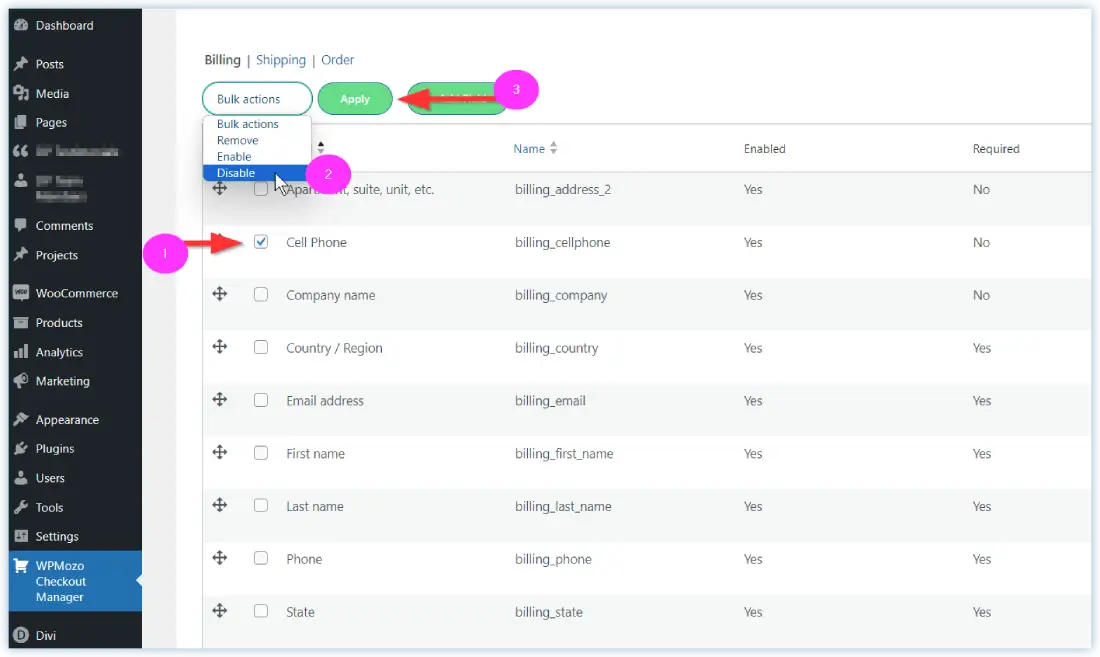
Click on the Bulk actions drop-down, choose Disable, and click on the Apply button. All the selected checkout fields would get disabled.
6. Reset the billing fields
In case you want to revert the changes, no problem. It can be easily done using the reset fields button placed on the top. You can revert the changes to the whole checkout page by Reset All fields option or you can use the Reset Billing Fields button to reset selected individual fields.
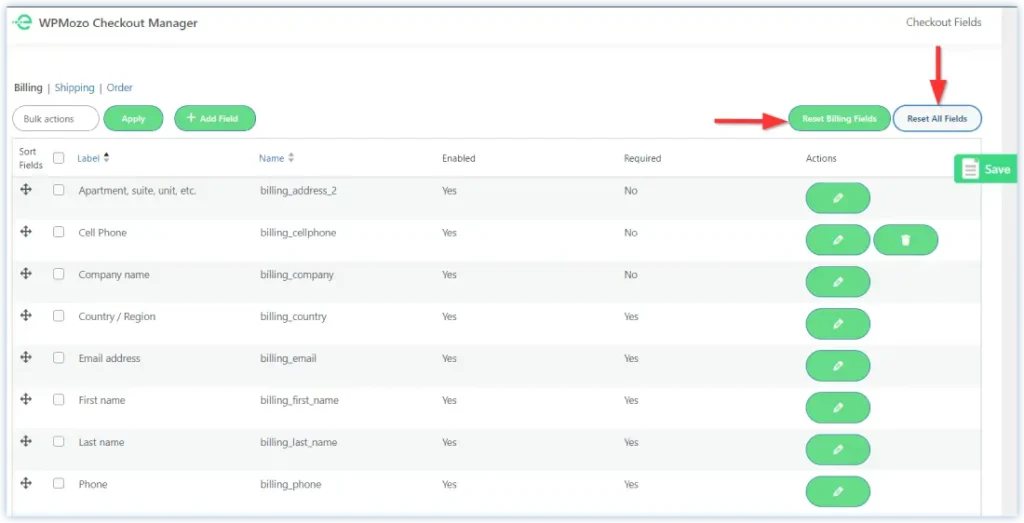
If you want to reset the changes separately for billing, shipping, and order, you can go to that individual section and click on that billing, shipping, or order reset button.
Finally, we can say that WPMozo checkout Manager provides you with a simple, convenient, and quick method to customize the checkout fields based on your requirements. It keeps you happy while customizing the checkout page avoiding several types of hassles involved in the entire process.



0 Comments