Searching for a solution to add a convenience factor for the customers while shopping in your online store? A mini cart plugin for your WooCommerce store is the ideal solution. You can add a mini cart to your WooCommerce store to make the customer experience quick, seamless, and simplified. These mini cart plugins smoothen the flow of the checkout process and enable customers to add products to the cart from any page of your store.
In this post, we will explain to you the setup of a mini cart using the WPMozo Mini Cart for WooCommerce plugin. Meanwhile, we will also guide you through some optimization suggestions that you can implement on the mini cart of your WooCommerce store to make it more seamless.
Let’s understand this with an example.
WooCommerce store without mini cart plugin
Imagine a Woo store that does not have a mini cart. Customers would not like to go to the checkout page after adding some products to see the total amount and other order cart details.
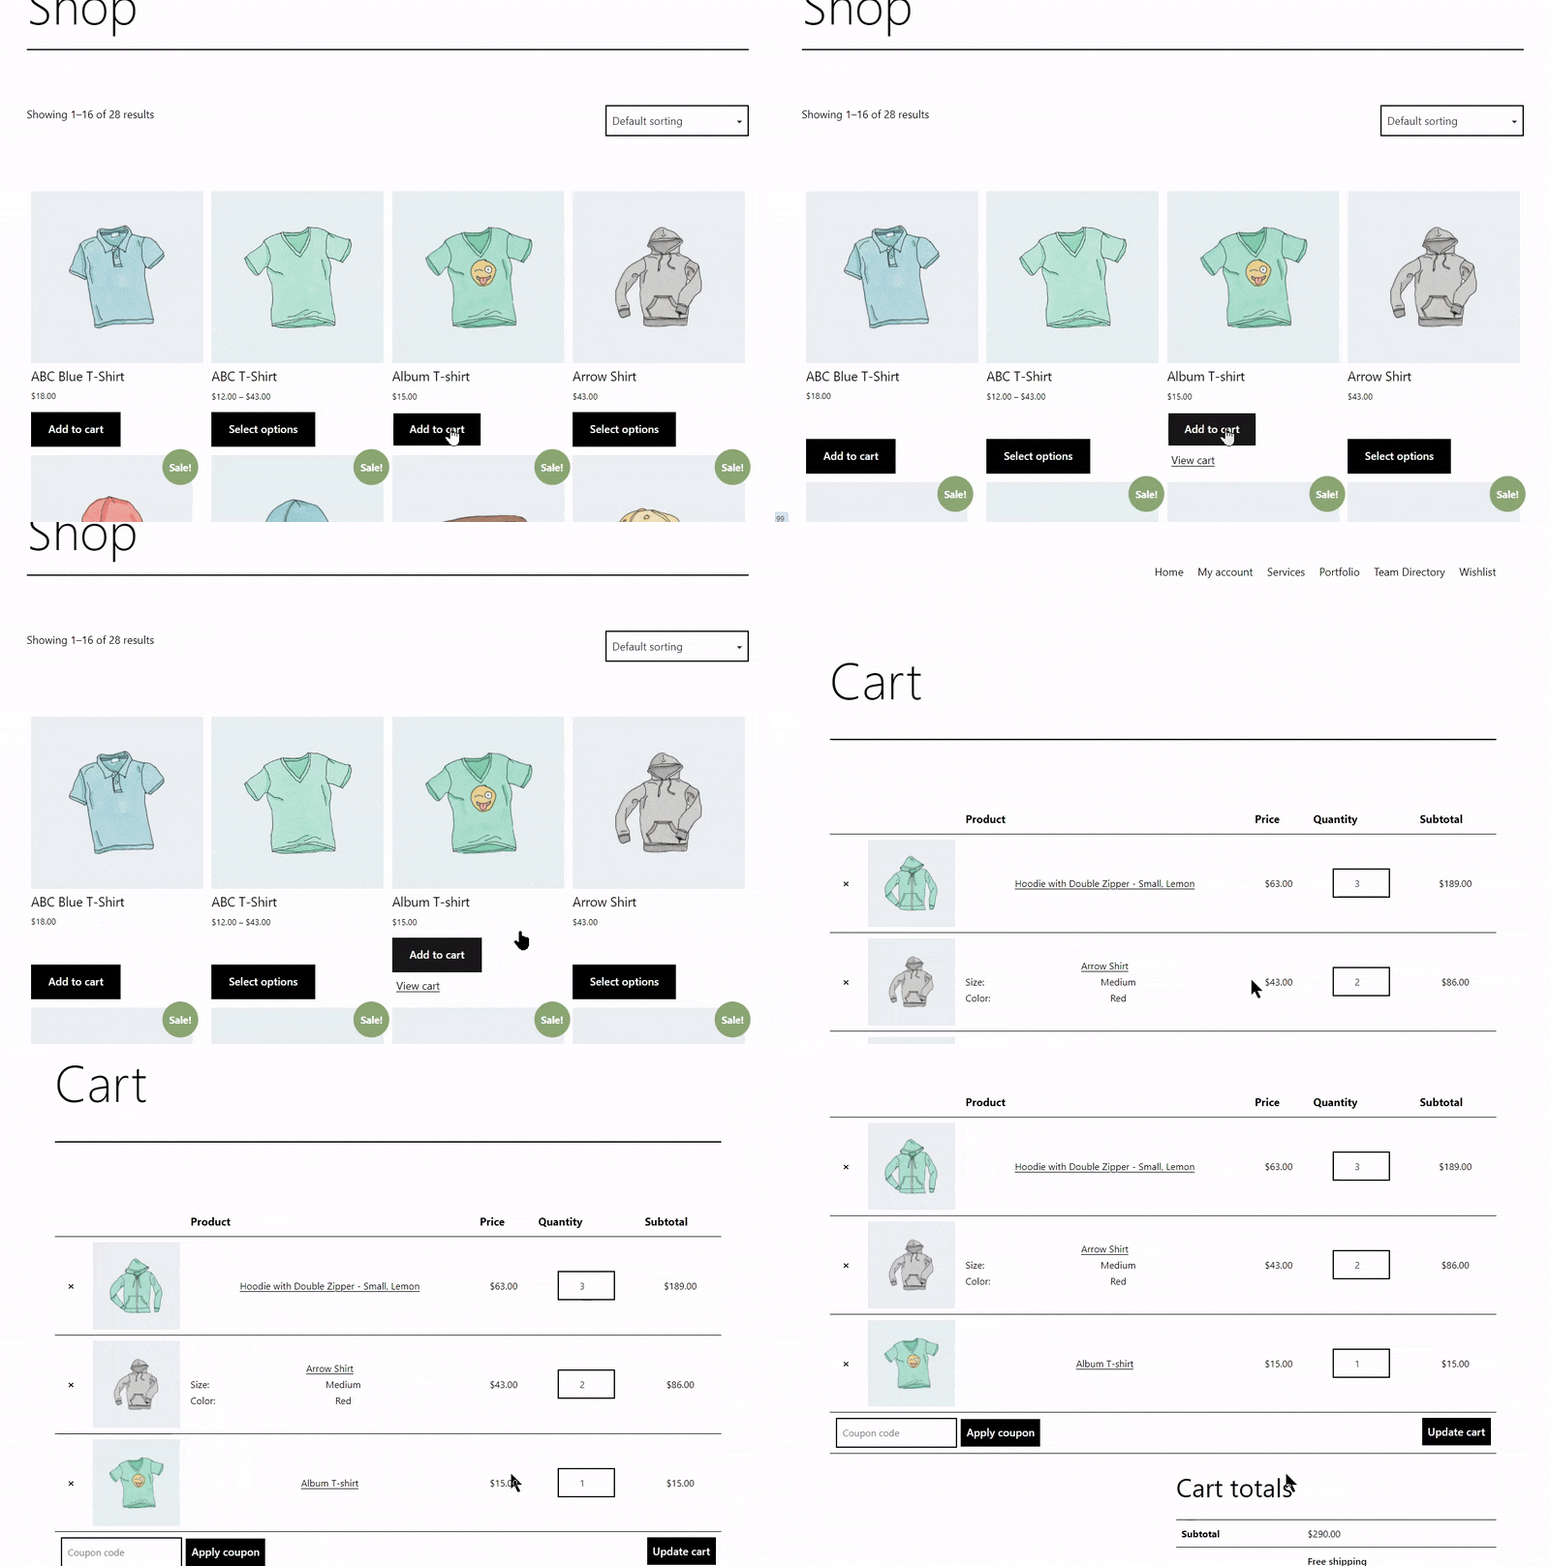
WooCommerce store with mini cart plugin
On the other hand, they will enjoy shopping when information about the existing products in the cart such as price, quantity, subtotal, etc. is displayed to them until they are browsing the store. Moreover, they can view the cart anytime in parallel with their shopping and browsing process.
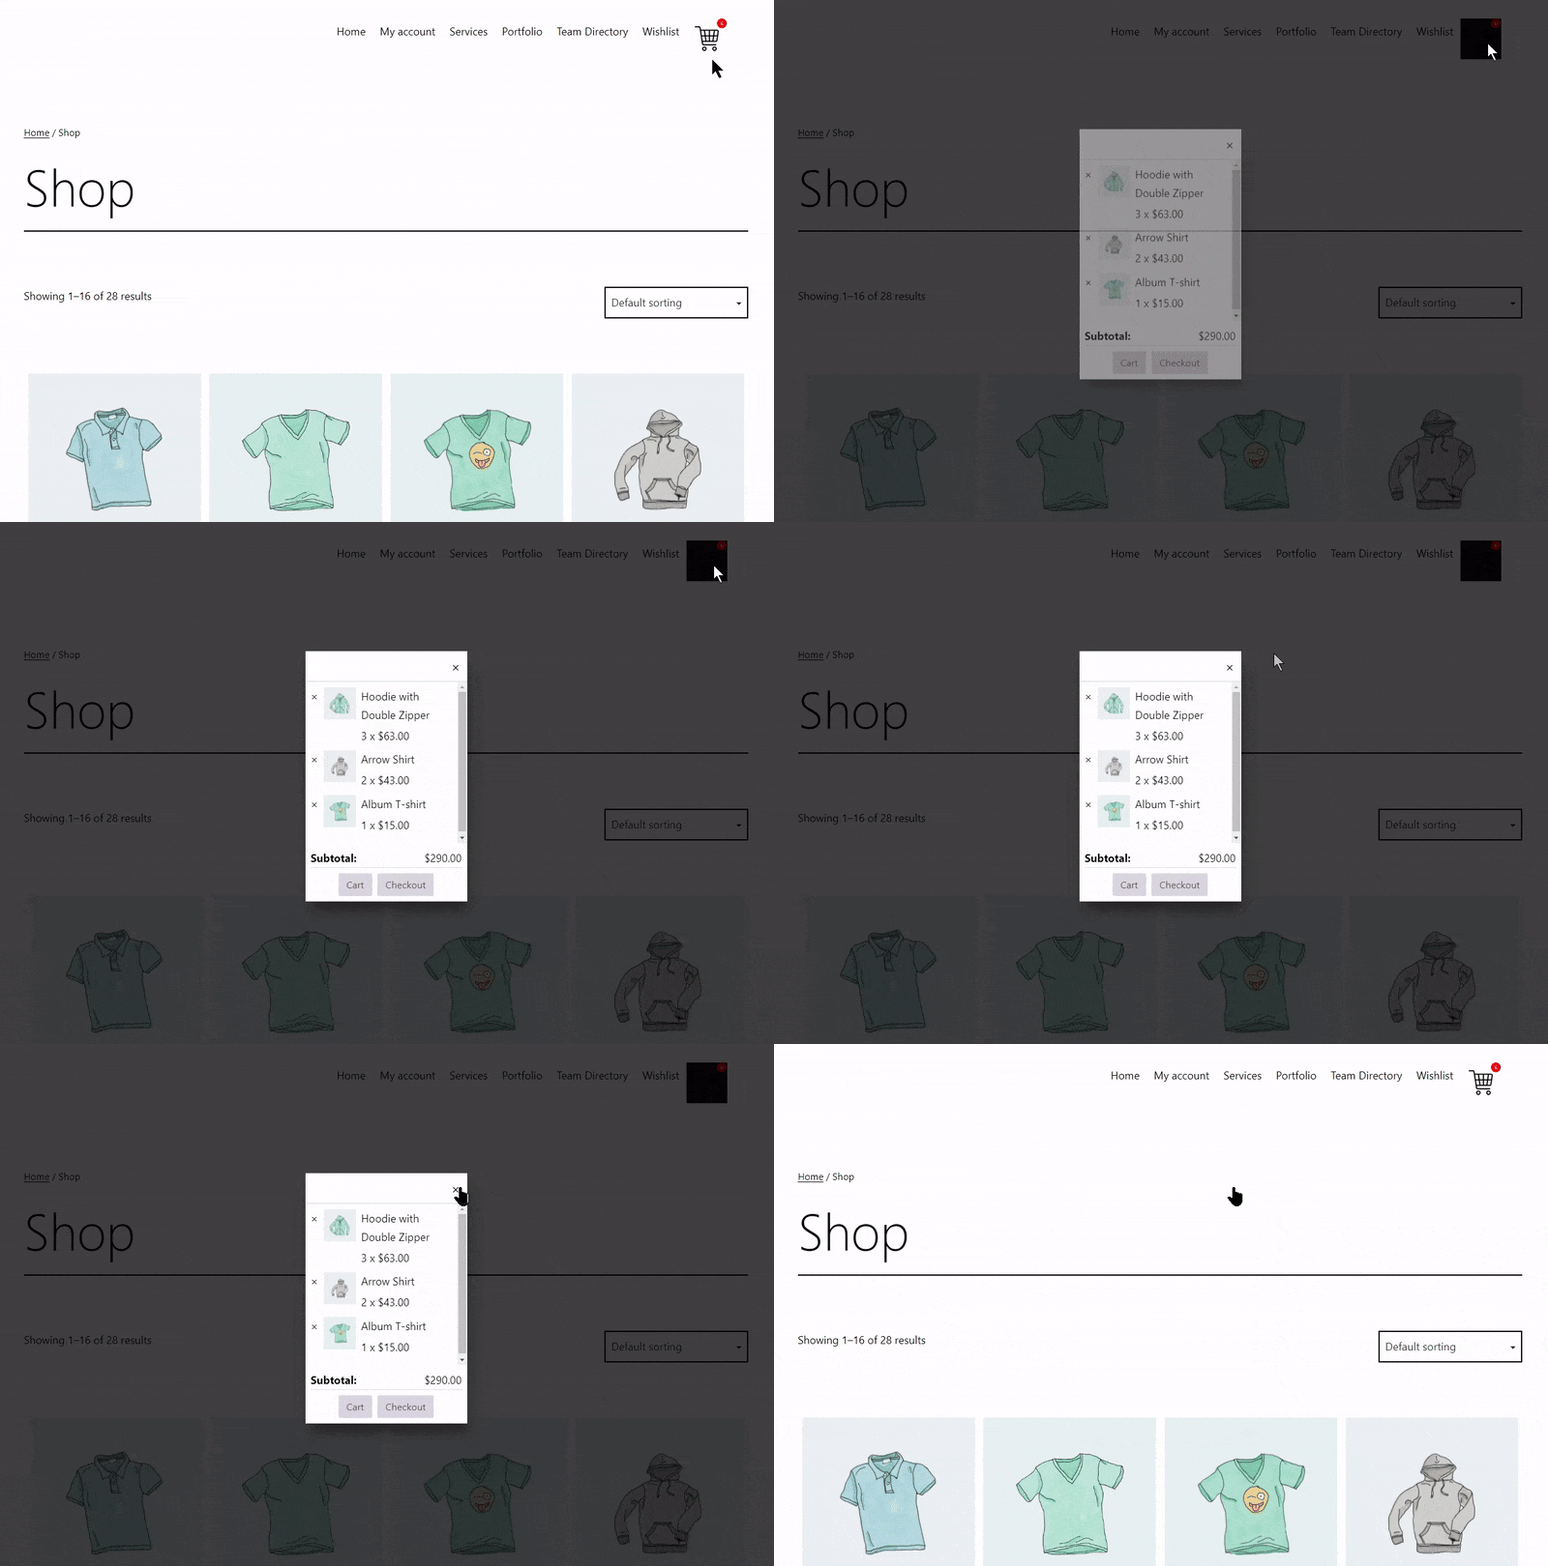
A WooCommerce mini cart can display multiple information easily without reloading the pages of your store. The information can be
- List of all cart products
- Product names
- Thumbnails of the products
- Quantity of products
- Subtotal
How to Set up a Mini Cart on a WooCommerce Store (Step-by-Step)
If you want a mini cart on your Woo store, you can use a mini cart plugin. We are using the WPMozo Mini Cart for Woo which provides many easy options to set up and customize a mini cart.
Before going through this setup download the mini cart plugin and install it on your WordPress store.
Let’s start.
After installing it there are two ways by which you can display a mini cart on the WooCommerce store.
1. Display Mini Cart on the Header
This is the most widely used strategy to provide a mini cart facility to the customers. The header of a website or store is intact throughout the shopping and is the best place to deploy a mini cart.
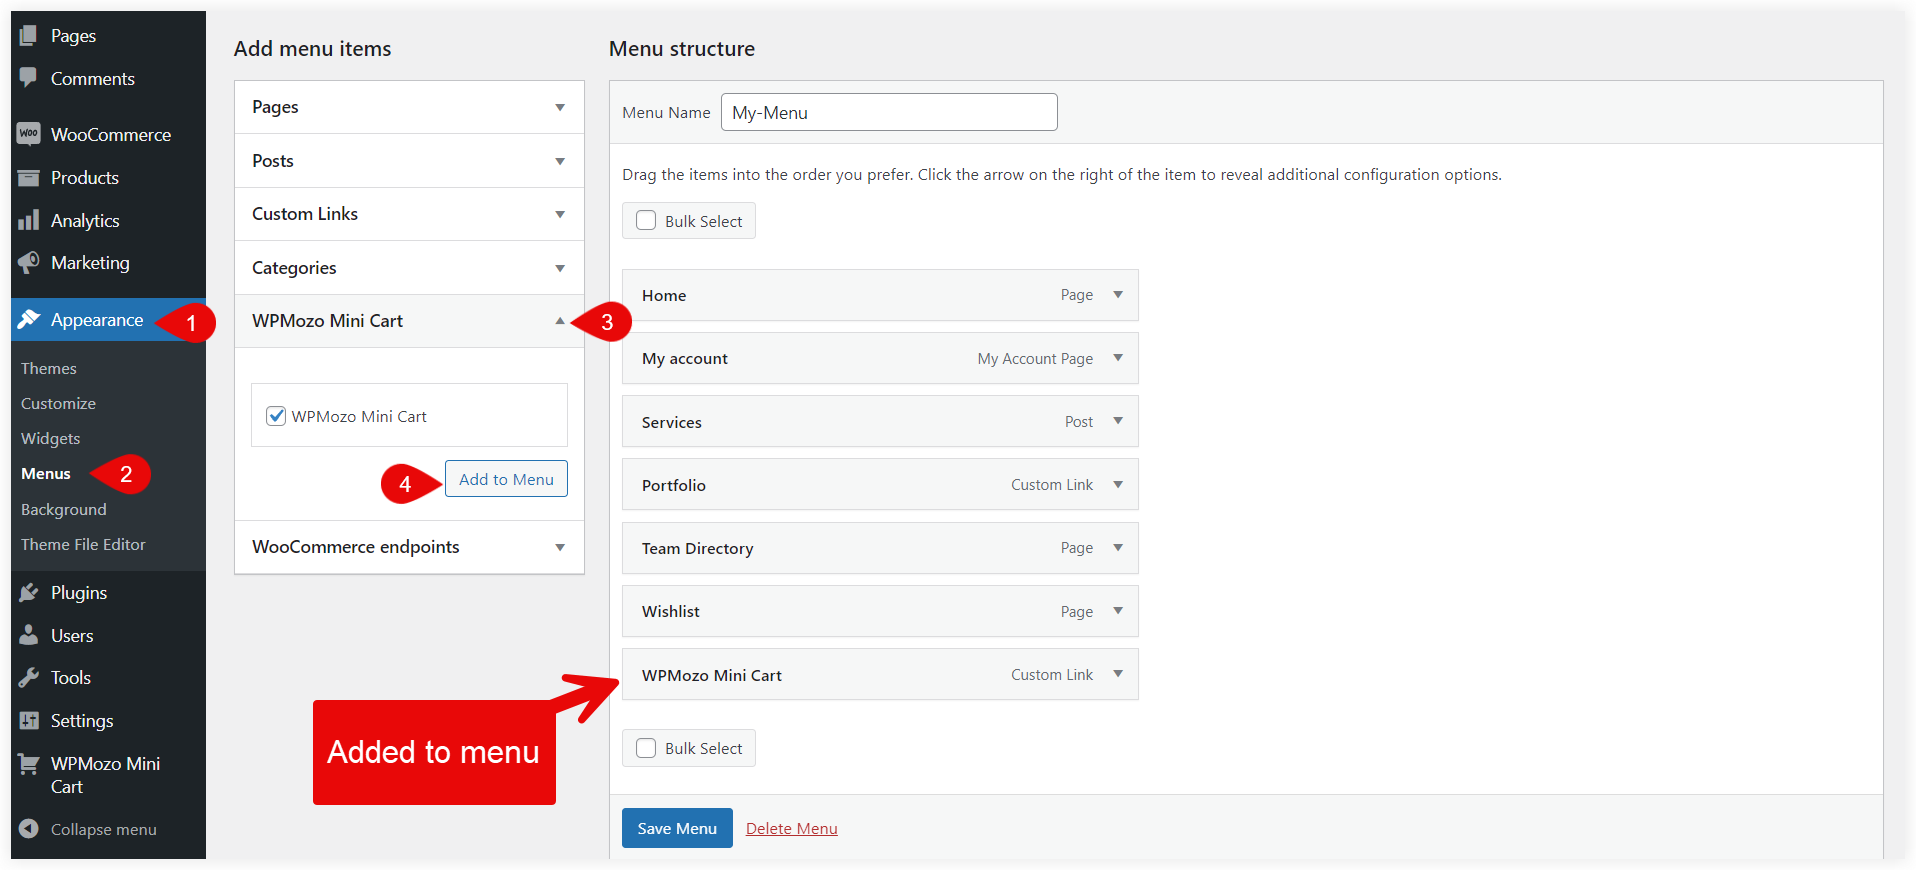
You just need to add it to the menu of your store.
2. Enable Mini Cart
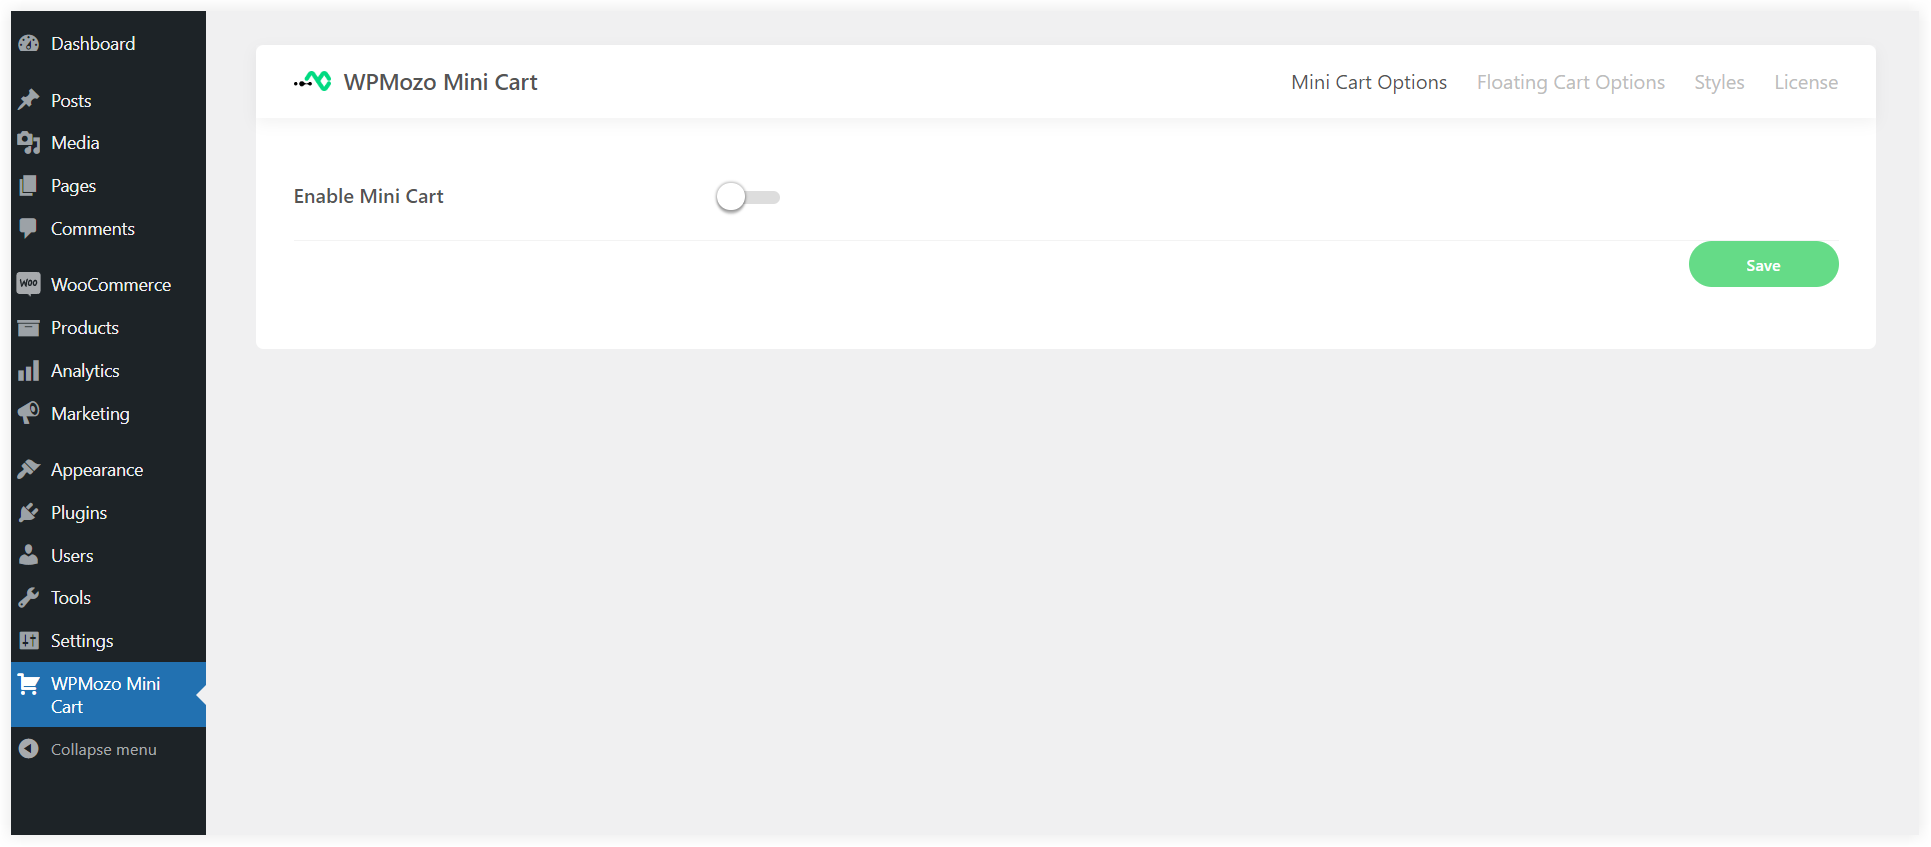
Now after adding it navigate to the WPMozo Mini Cart option in the WordPress dashboard and enable it.
3. Configure Mini Cart to Suit Your Needs
Now the mini cart is activated on your WooCommerce store and it will use the initial default settings. We can configure it to fit our needs easily.
Let’s explore what options it provides.
#1. Display it in Unique Style
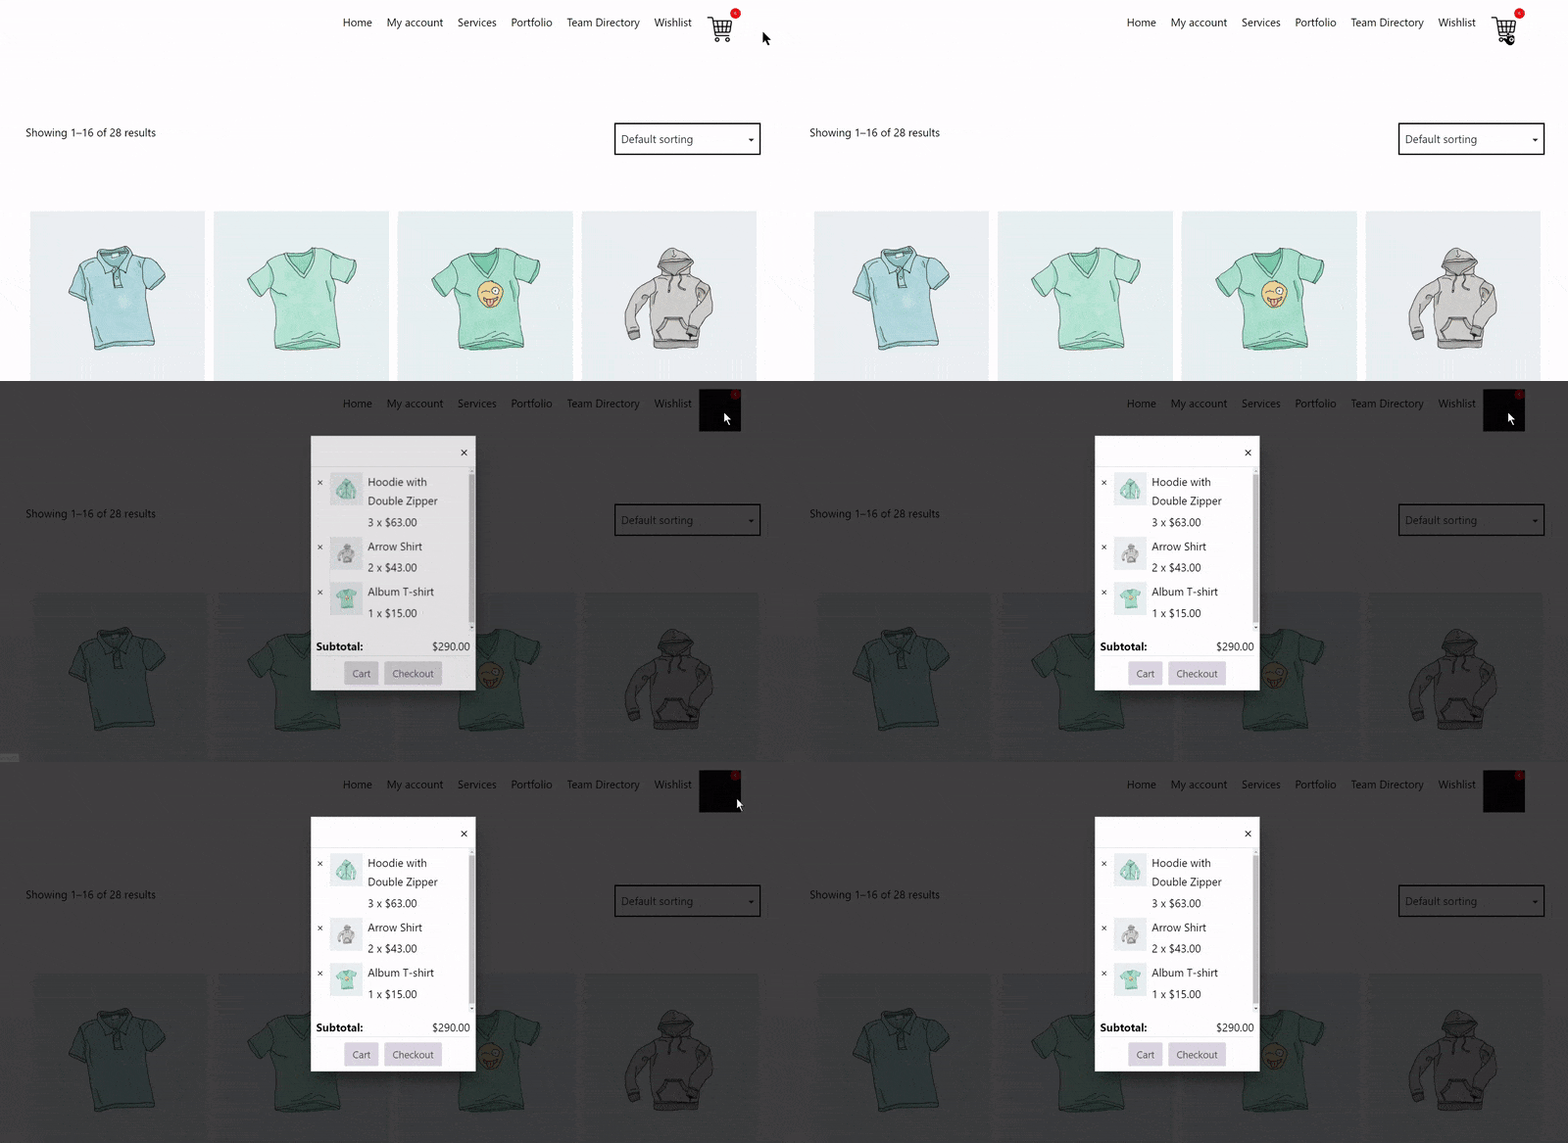
For customers to be interested in utilizing a mini cart, it must function in a distinctive and captivating manner. You can introduce mini cart in an eye-catching way using a Dropdown, Overlay, Off Canvas, and Modal.
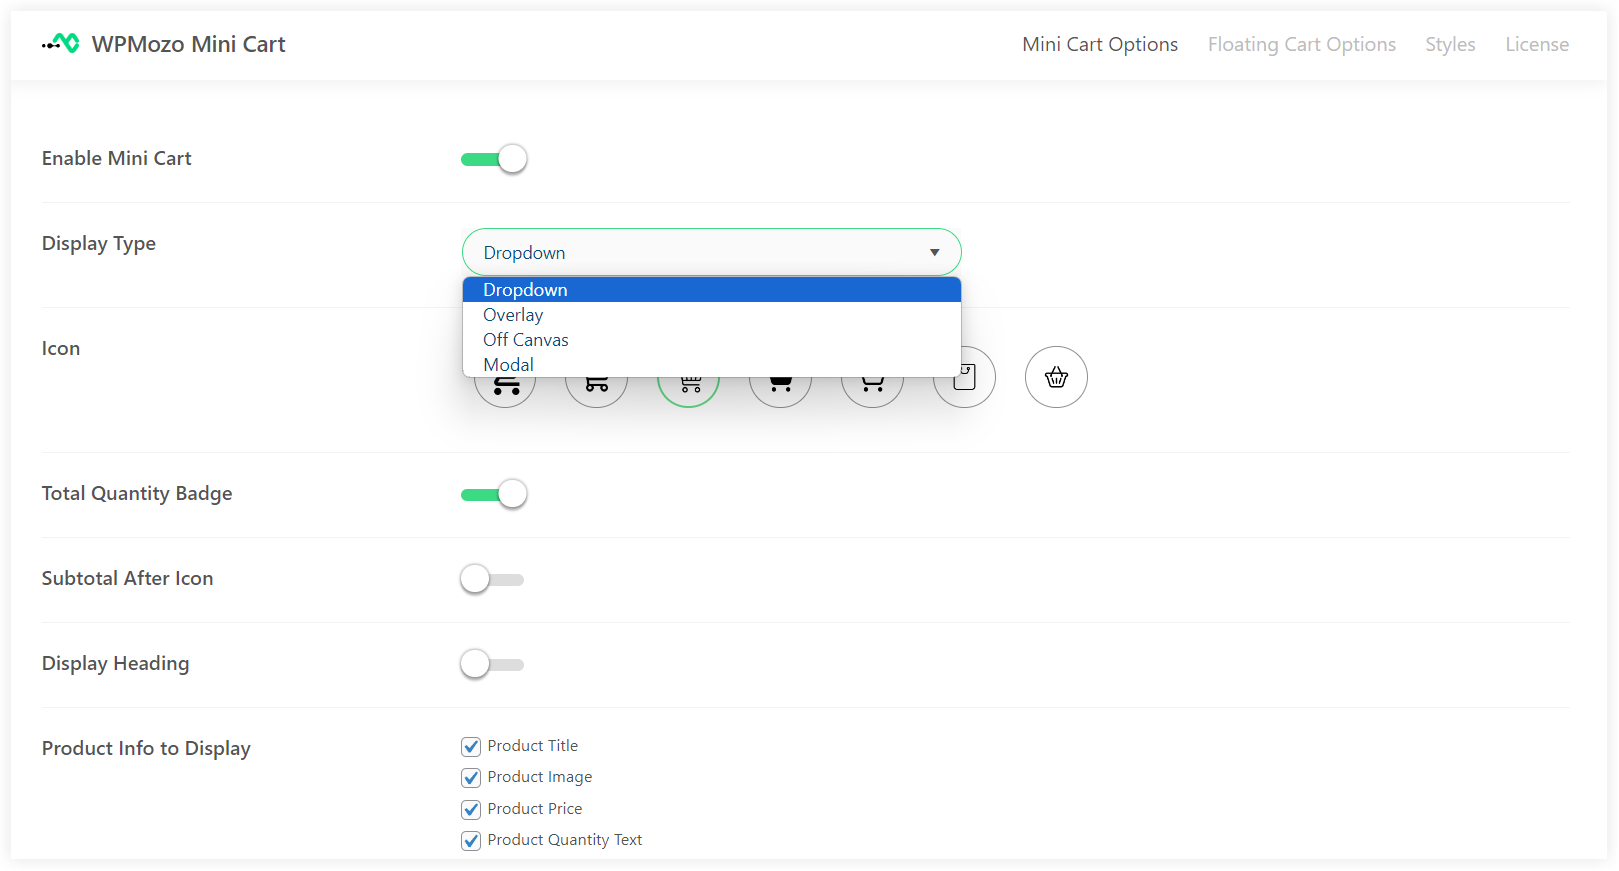
See how it appears in these different patterns.
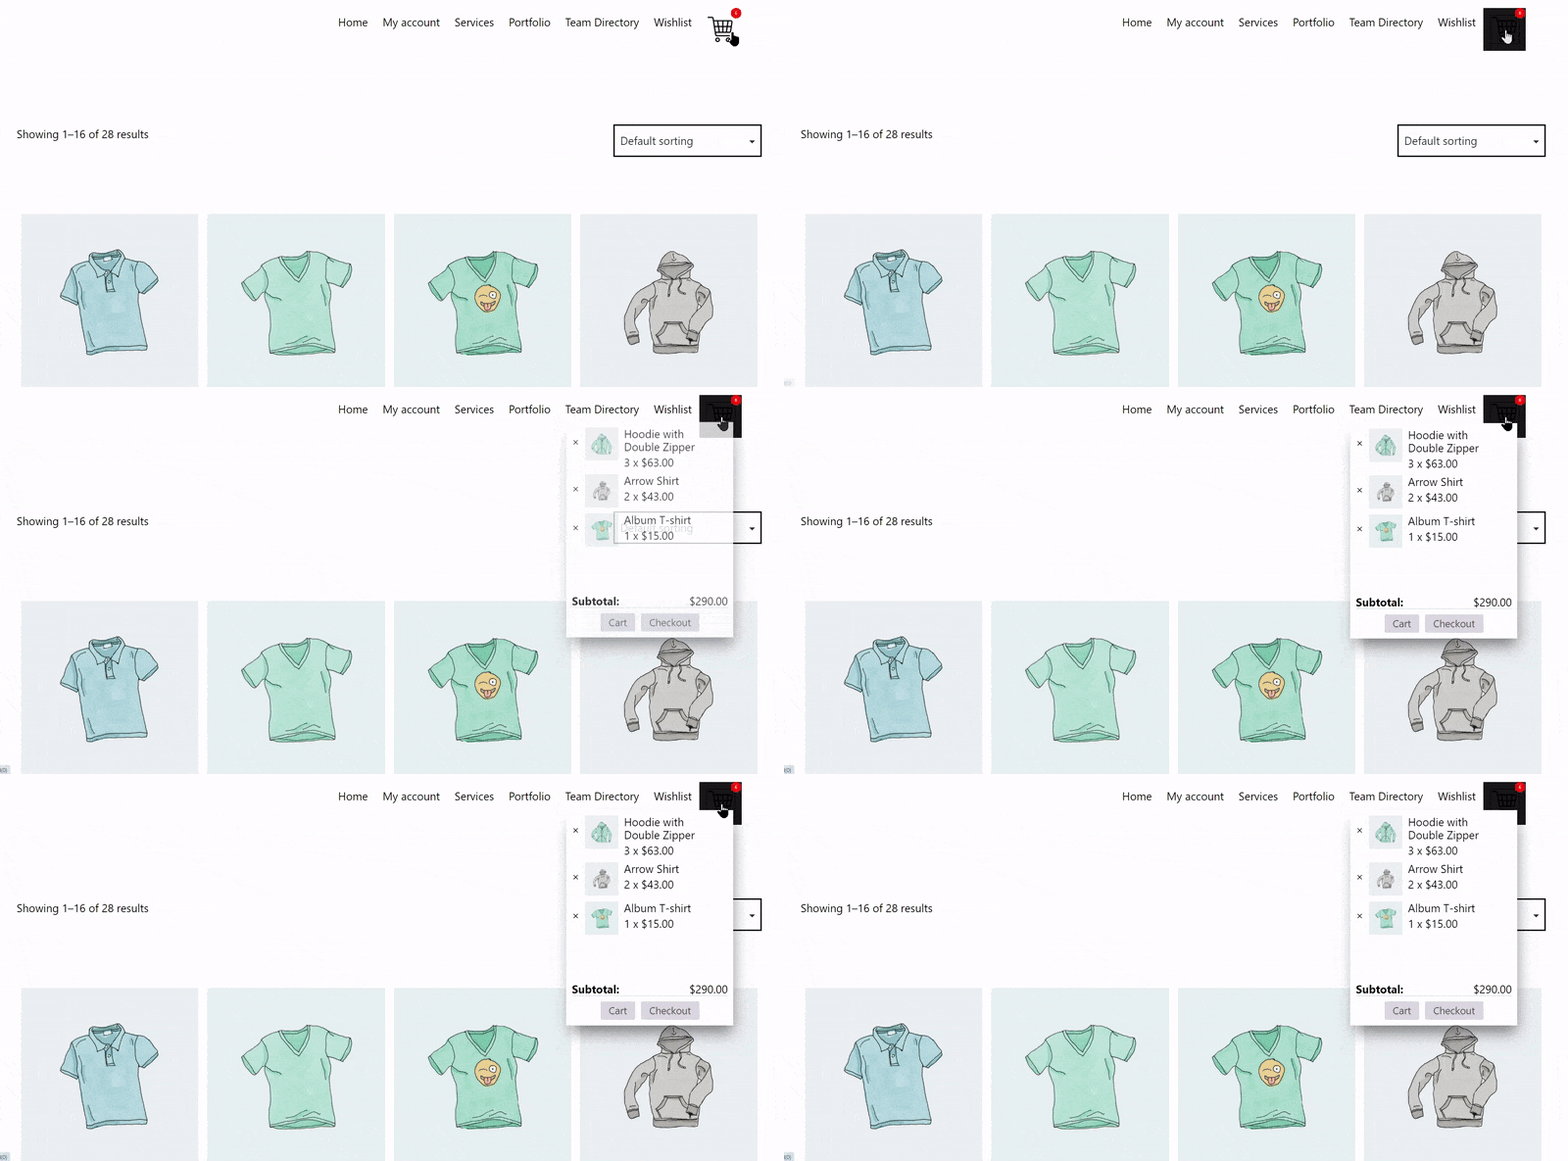
Dropdown – It simply opens the mini cart with a dropdown effect.
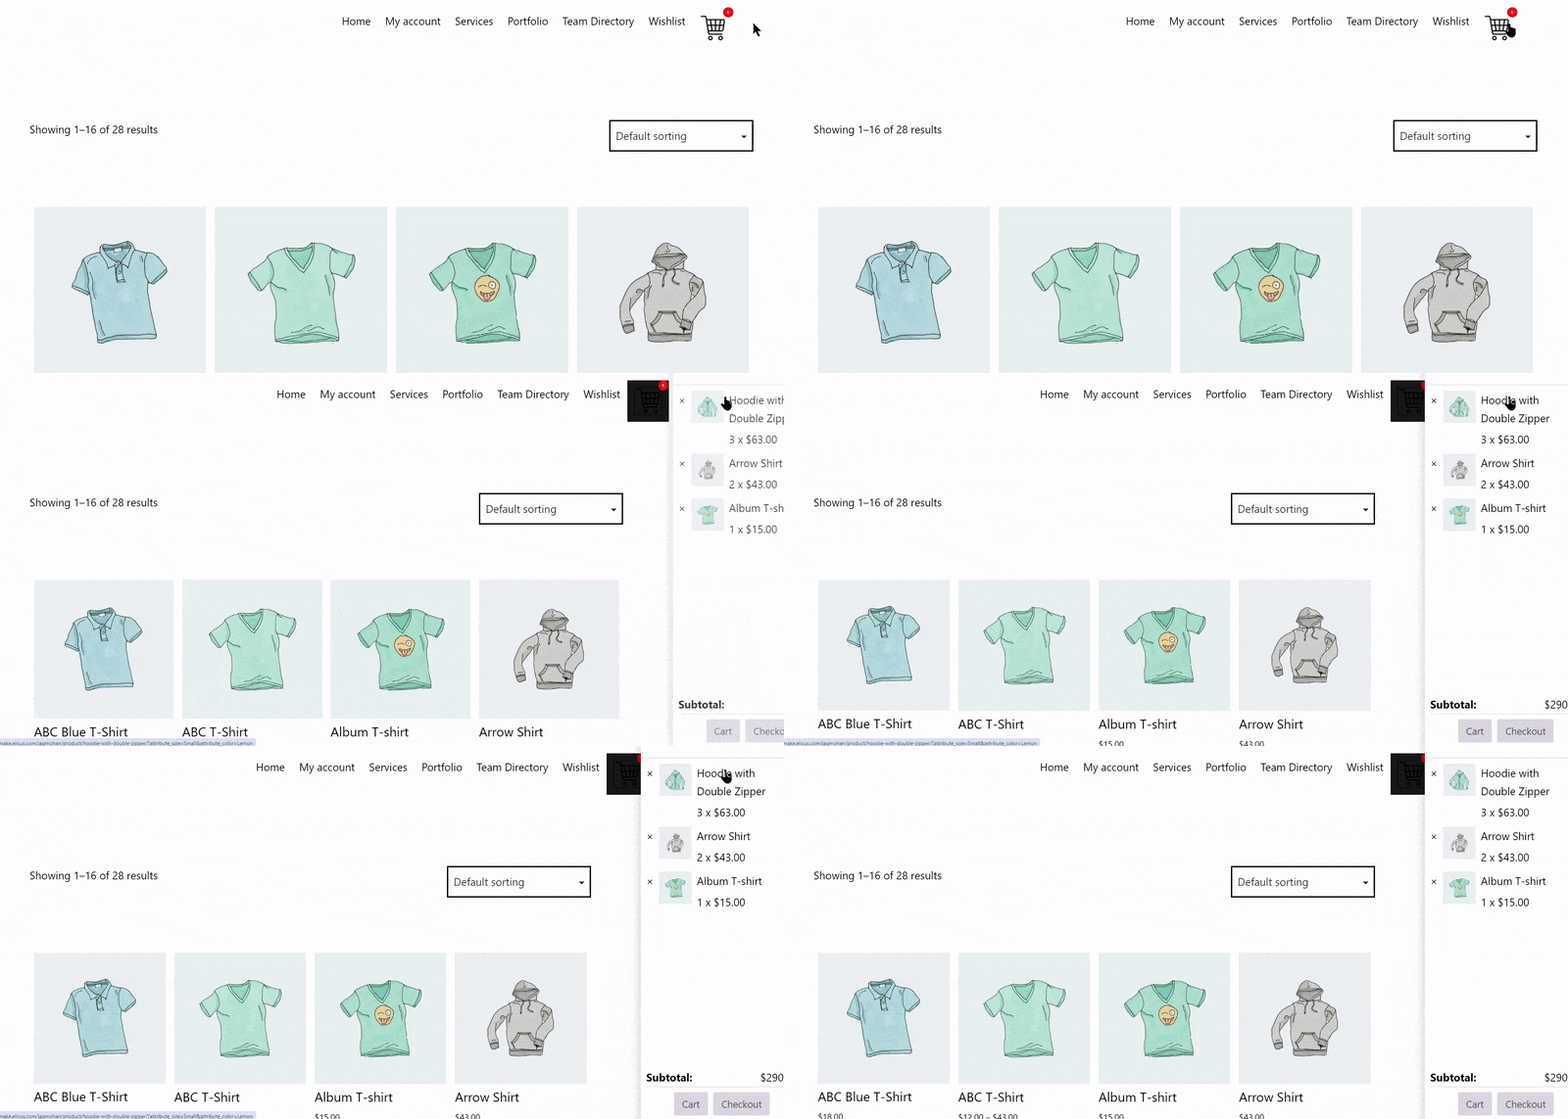
Off Canvas – This pattern opens mini cart with a sliding effect in the left or right side.
Overlay – This is almost similar to Off Canvas but the mini cart opens above the pages with an overlay effect.
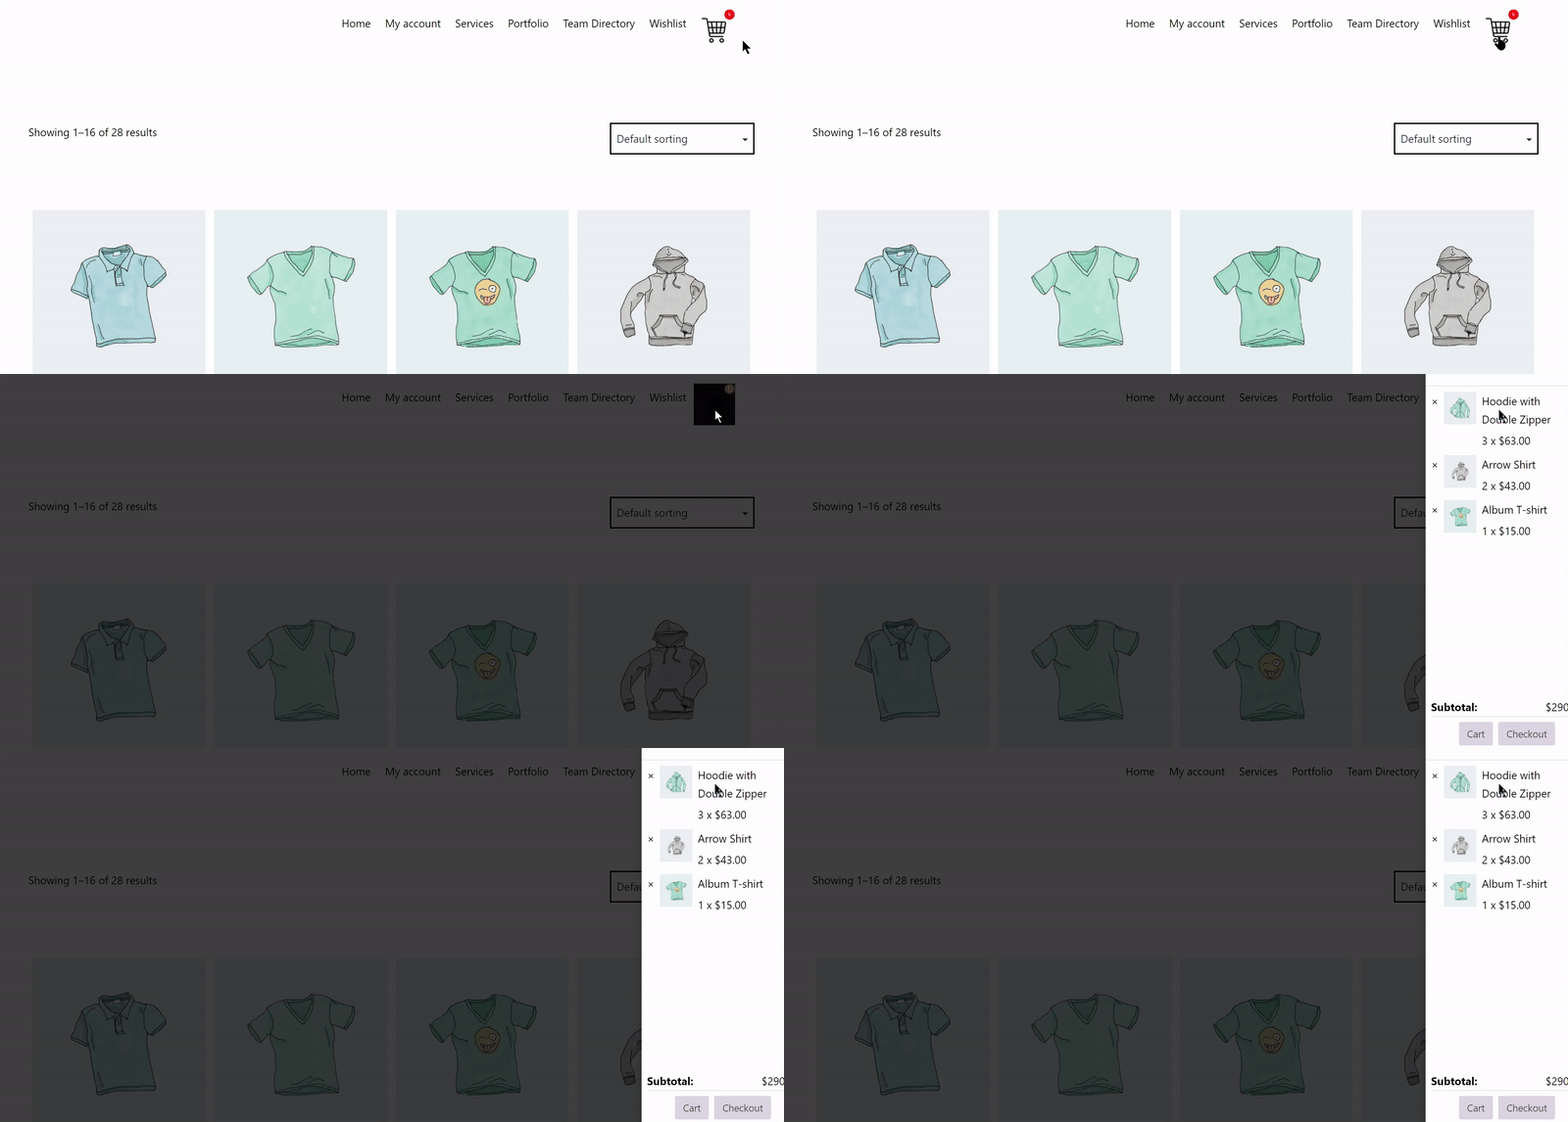
Modal – This pattern has also an overlay effect but it opens in a modal popup.
#2. Select the Icon That You Like
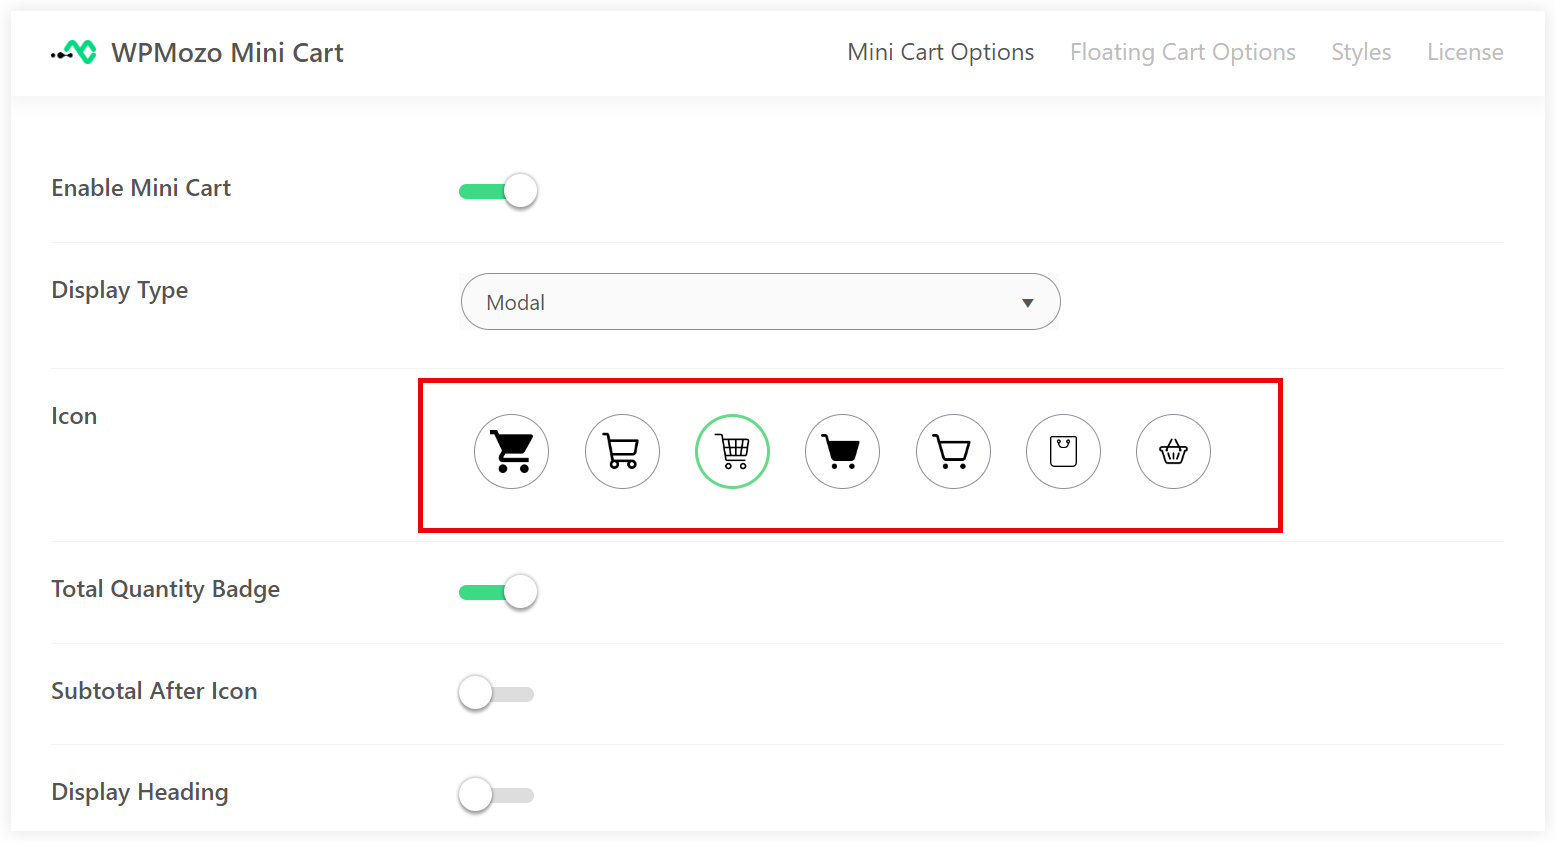
Icons will be used on the header area to notify customers about mini cart. There are many pre-defined icons that you can choose depending on your style needs.
#3. Notify Customers about Product Quantity and Cart Total
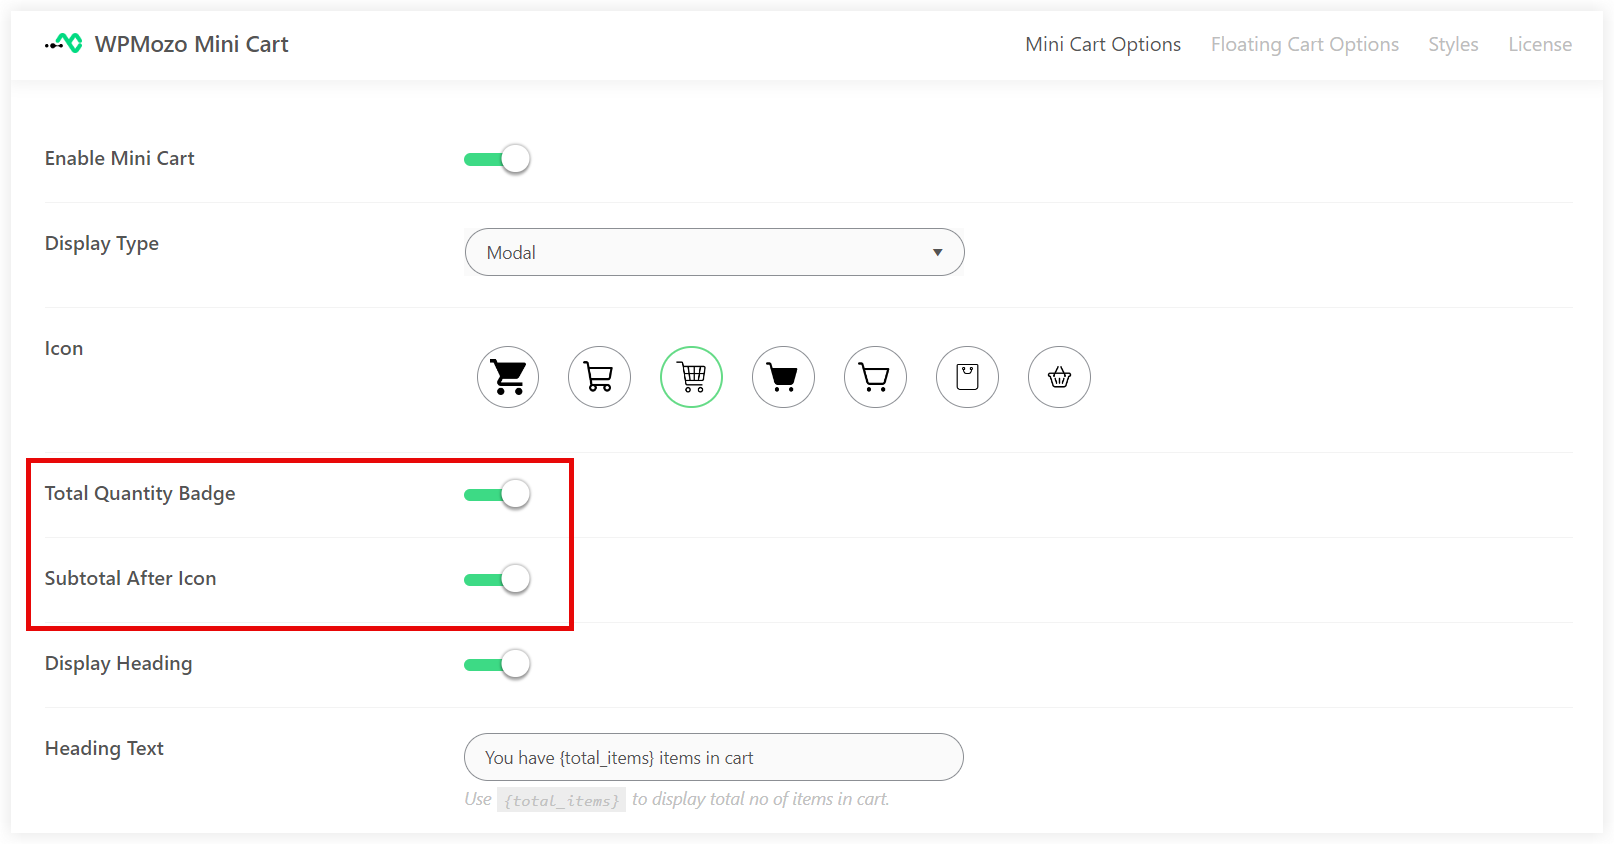
You can continuously notify the customers about the current cart quantity with a badge and display the subtotal amount beside the icon. This will be helpful for the customers to identify the number of products already in the cart and the subtotal amount without doing any action.

To configure this in the mini cart, enable it.
#4. Configure the Cart Information
It is completely up to you what you would like to display in the mini cart. Product image, title, and price are some of the common things. Product Quantity Input and Remove From Cart Link options make it easy for the customers to change the product quantity from the mini cart and remove any product from the cart which they don’t like to purchase.
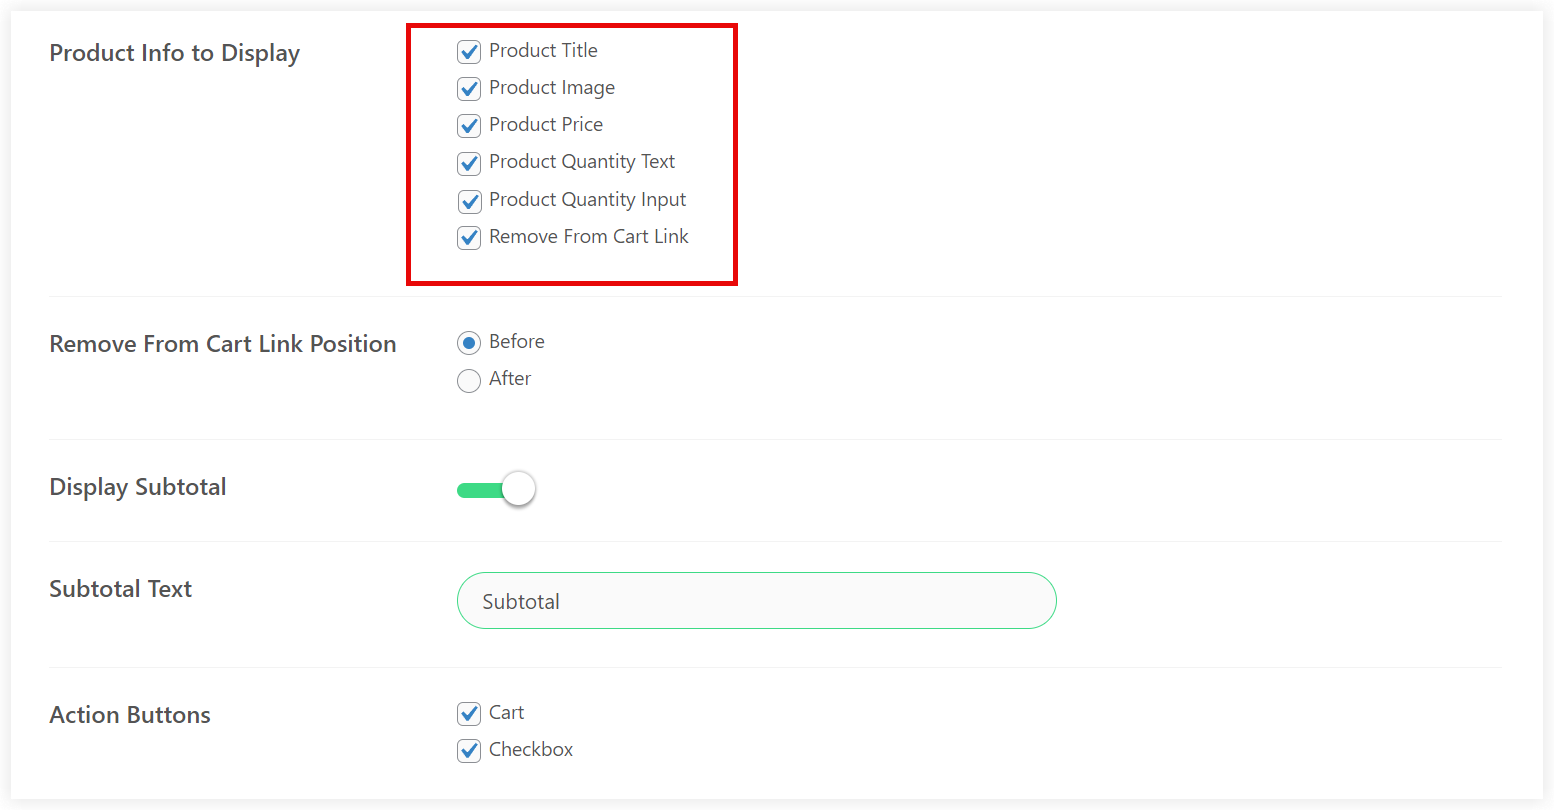
You can enable or disable the subtotal display and can also customize the Subtotal Text to your own words in the mini cart.
#5. Configure Mini Cart CTA Buttons
Action buttons on the mini cart can redirect customers to the cart and the checkout page easily. This is convenient when a customer has completed the shopping, views his cart status in the mini cart and want to make a checkout directly.
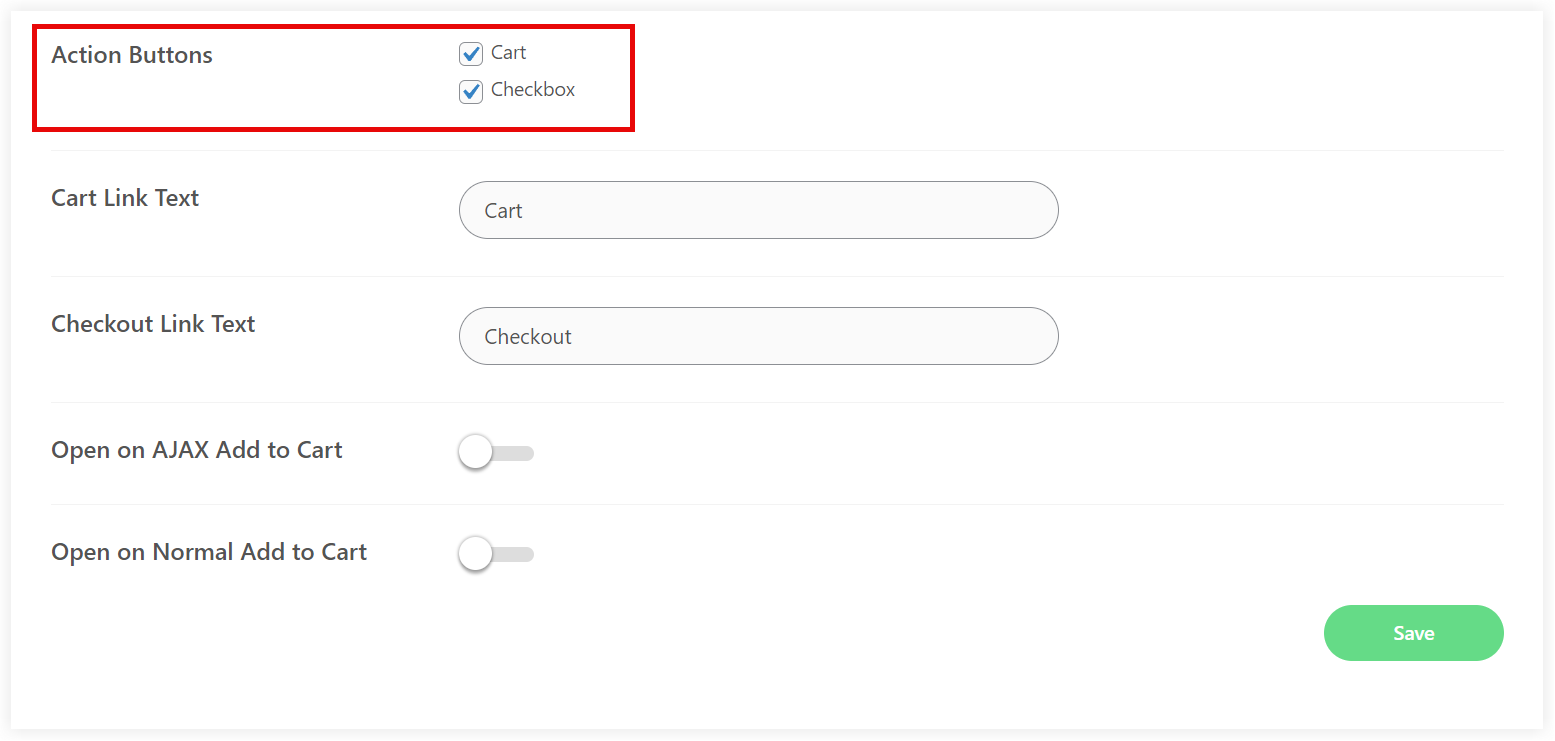
If you want to use unique text on CTA, it can be done with the Cart Link Text and Checkout Link Text options. This encourages the user to finish the checkout process and complete the purchase.
#6. Open Mini Cart with ‘Add to Cart’ Buttons
You can also activate the mini cart when a customer clicks on the Add to Cart buttons. There are two options provided in this mini cart that you can configure. First one is Open on AJAX Add to Cart and second is Open on Normal Add to Cart.
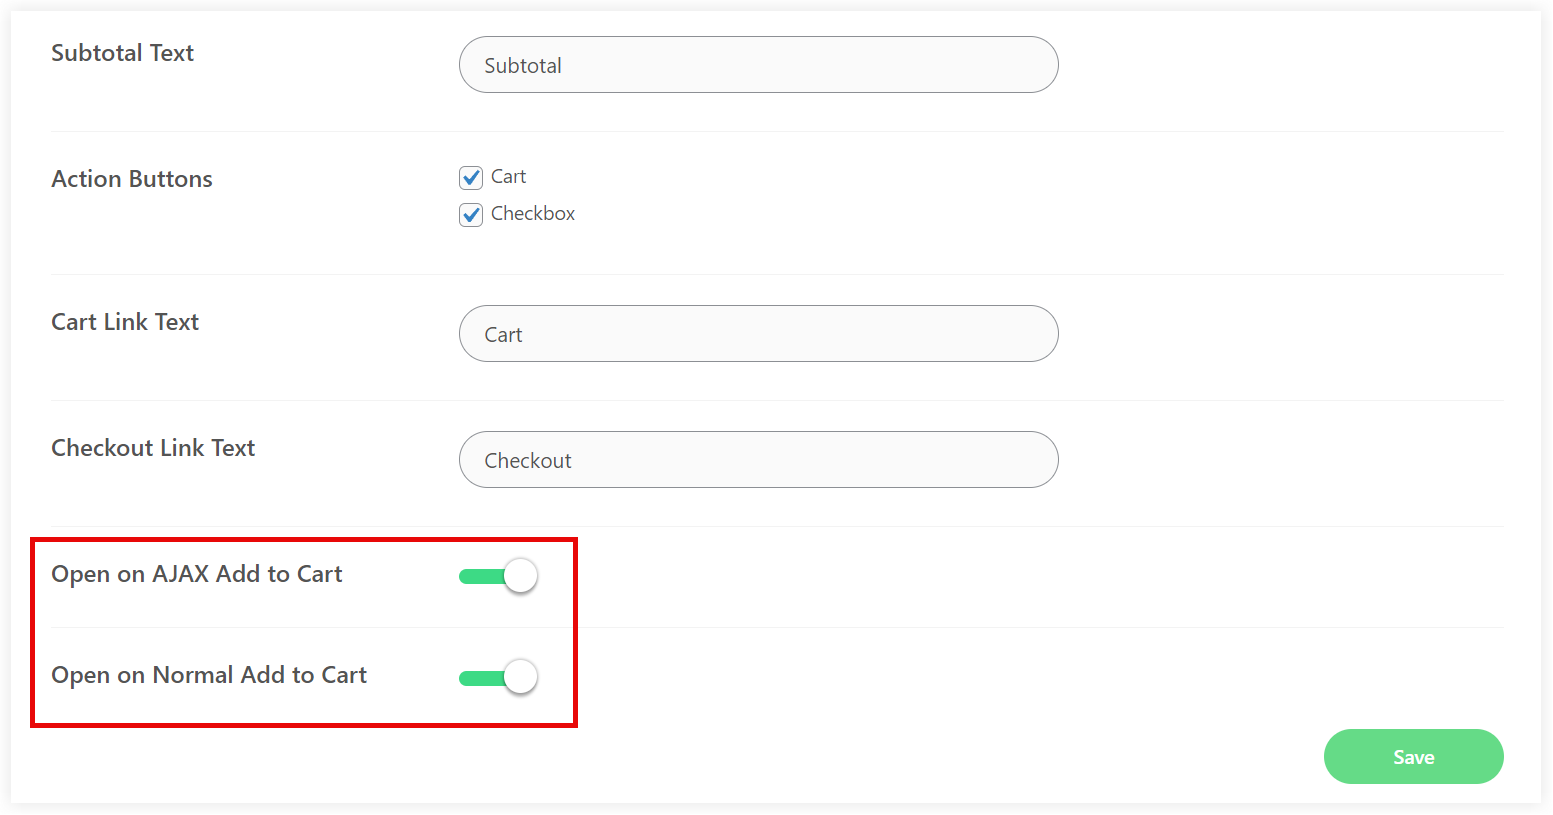
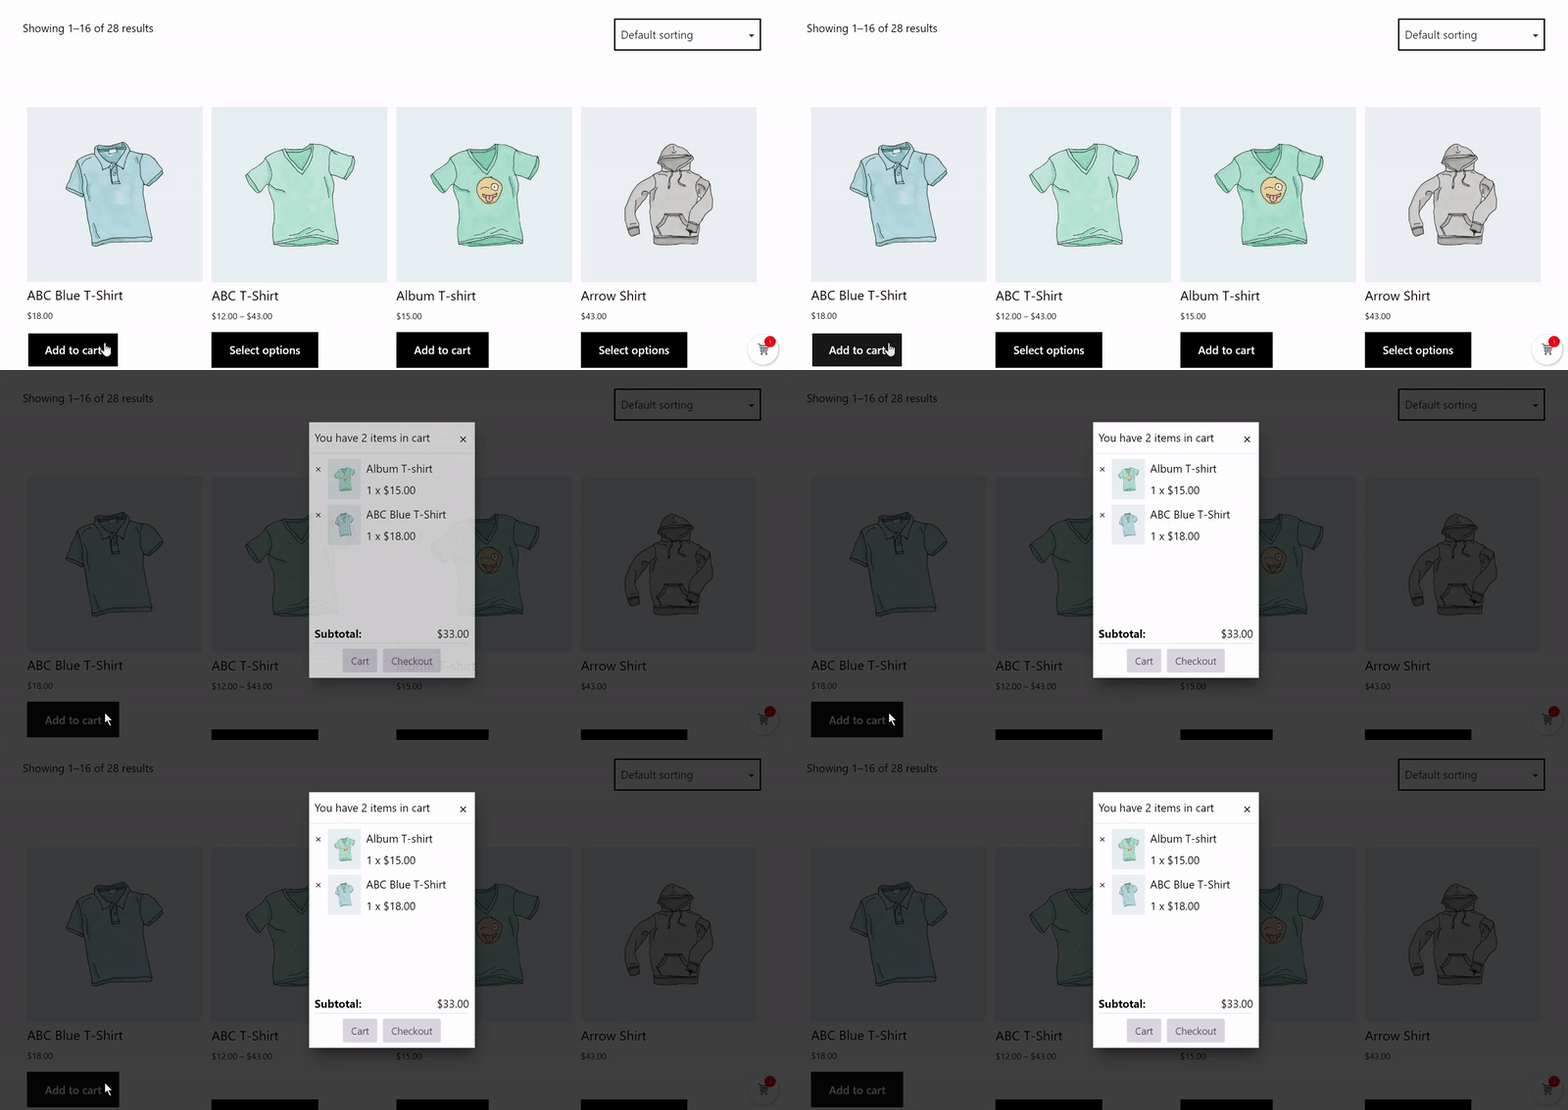
WooCommerce gives you the advantage to use AJAX add to cart buttons on archives and you can also configure them to work with mini cart.
See how mini cart simplifies things with AJAX add to cart buttons.
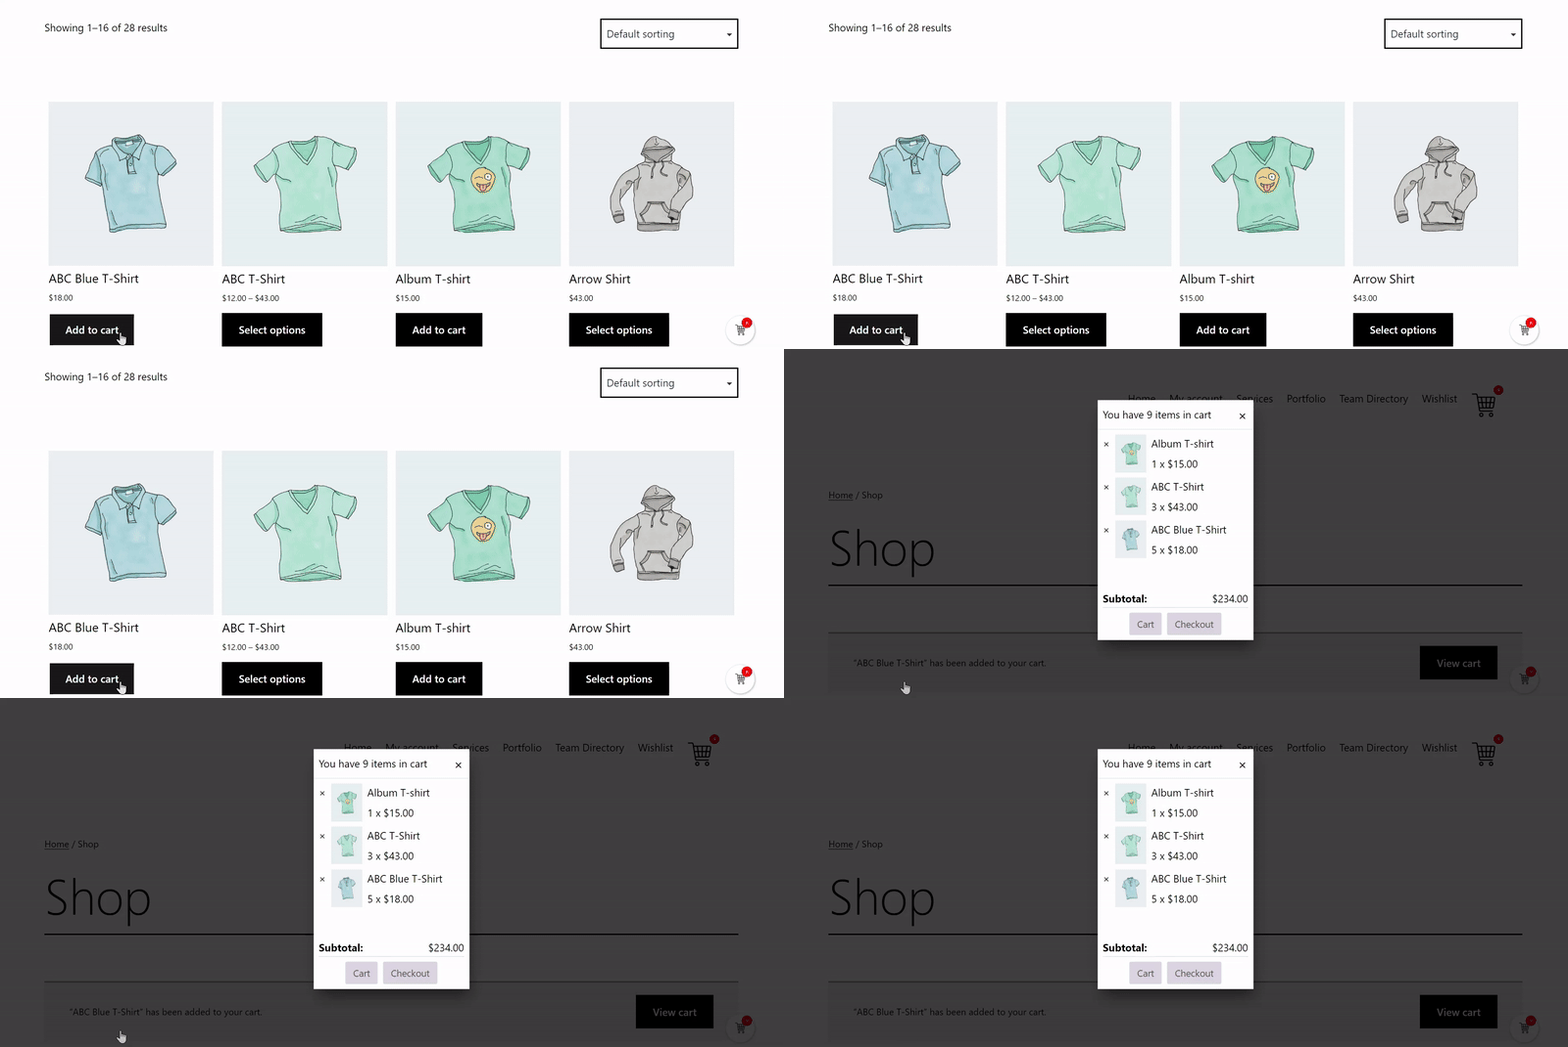
The second one is the Open on Normal Add to Cart option. This works in a similar way but the mini cart is displayed with a page reload.
#7. Show Mini Cart in a Floating Box
WPMozo Mini Cart for Woo not only provides you the option to display a mini cart on the header but it also has an additional floating cart option that displays the mini cart on a floating box. The floating icon is displayed in the right bottom by default.
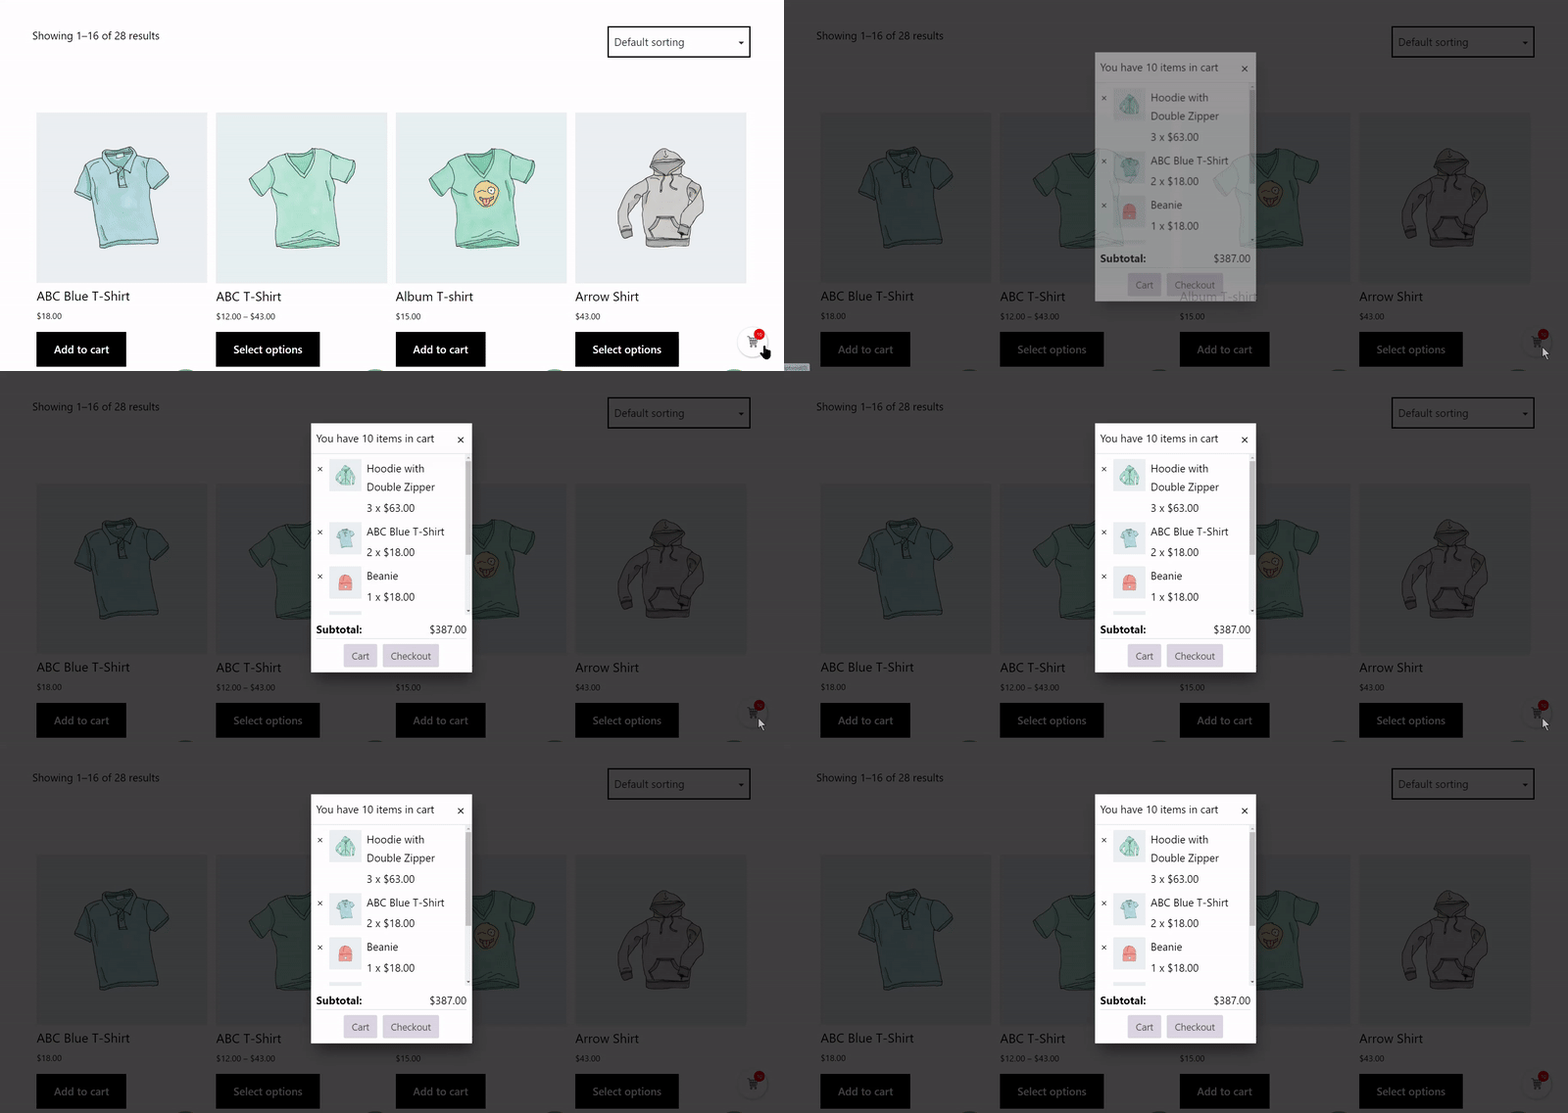
It has similar kinds of options like the mini cart on the header and you can configure it separately depending upon the needs of your store. You can also change the position of the floating box.
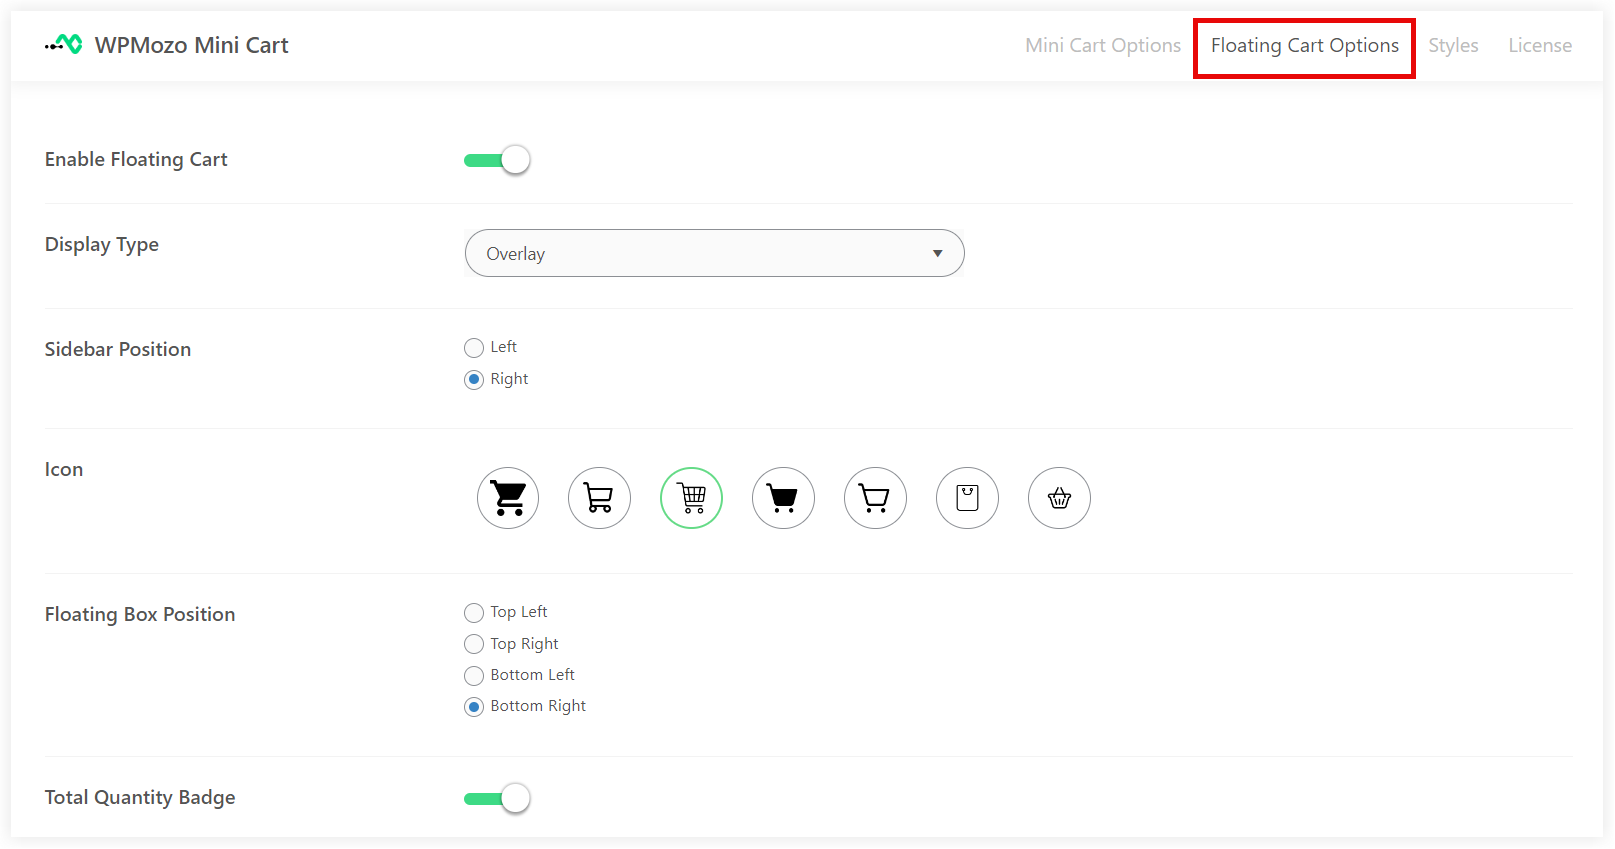
The floating cart is helpful for the customers as it keeps on floating in your store and continuously updates them about the current cart status without the need to scroll and go to the header area to open the mini cart every time.
Apart from that if you own a WooCommerce store running on Divi, Mini Cart module of Divi WooCommerce Extended is an excellent solution in that case. You can get the mini cart and 7 other useful features with the annual membership of Divi WooCommerce Extended in just $99 only. Just take a quick look on the other features that you get along with the mini cart.
- Quick View
- Categories Module
- Product Carousel
- Ajax Search
- Checkout Manager
- Tab Manager
- Wishlist
All these features can enhance the customer experience on your store that is built using Divi.
Finally we can conclude that a mini cart can make things easy for customers and improve the accessibility factor of your store. You can configure the mini cart options and streamline the customers’ shopping process. Moreover, it also tackles problems like cart abandonment and drives more sales to your business. You cannot overlook this feature on your WooCommerce store as it is a crucial component for the success of your store.

0 Comments