If you want to level up your website’s experience built with Elementor, adding the Ajax search feature is a perfect solution. Compared to conventional search techniques, creating an Ajax search bar in Elementor that dynamically retrieves and displays results improves the search experience. When users start typing in the search area, the Ajax search activates and initiates the search process. That is an engaging and quick approach to providing users with the content they need.
In this post, we’ll guide you through the step-by-step process of adding an Ajax Search in your Elementor website using the WPMozo Ajax Search widget.
Benefits of Adding Ajax Search in Elementor Website
Adding an Ajax search in an Elementor-built website provides numerous benefits. We are highlighting some of the major ones.
- Improved user experience
- Reduced load on the server
- Improved interactivity
- Higher conversions
- Better insights into user search behavior
After getting a quick idea about its benefits, let’s start the step-by-step guide to add Ajax search on the Elementor website.
Note: Before proceeding to this step-by-step guide make sure you have already installed WPMozo Addons for Elementor plugin.
Step-By-Step Guide to Add Ajax Search in Elementor
When we are using Elementor to create our website, it provides the ease to customize things in your way. The same goes for the Ajax search. You just need to follow some simple steps to load your website with this amazing search widget.
1. Configuration of Search Widget
Go to the Elementor dashboard of your website and search for the WPMozo Ajax Search widget.
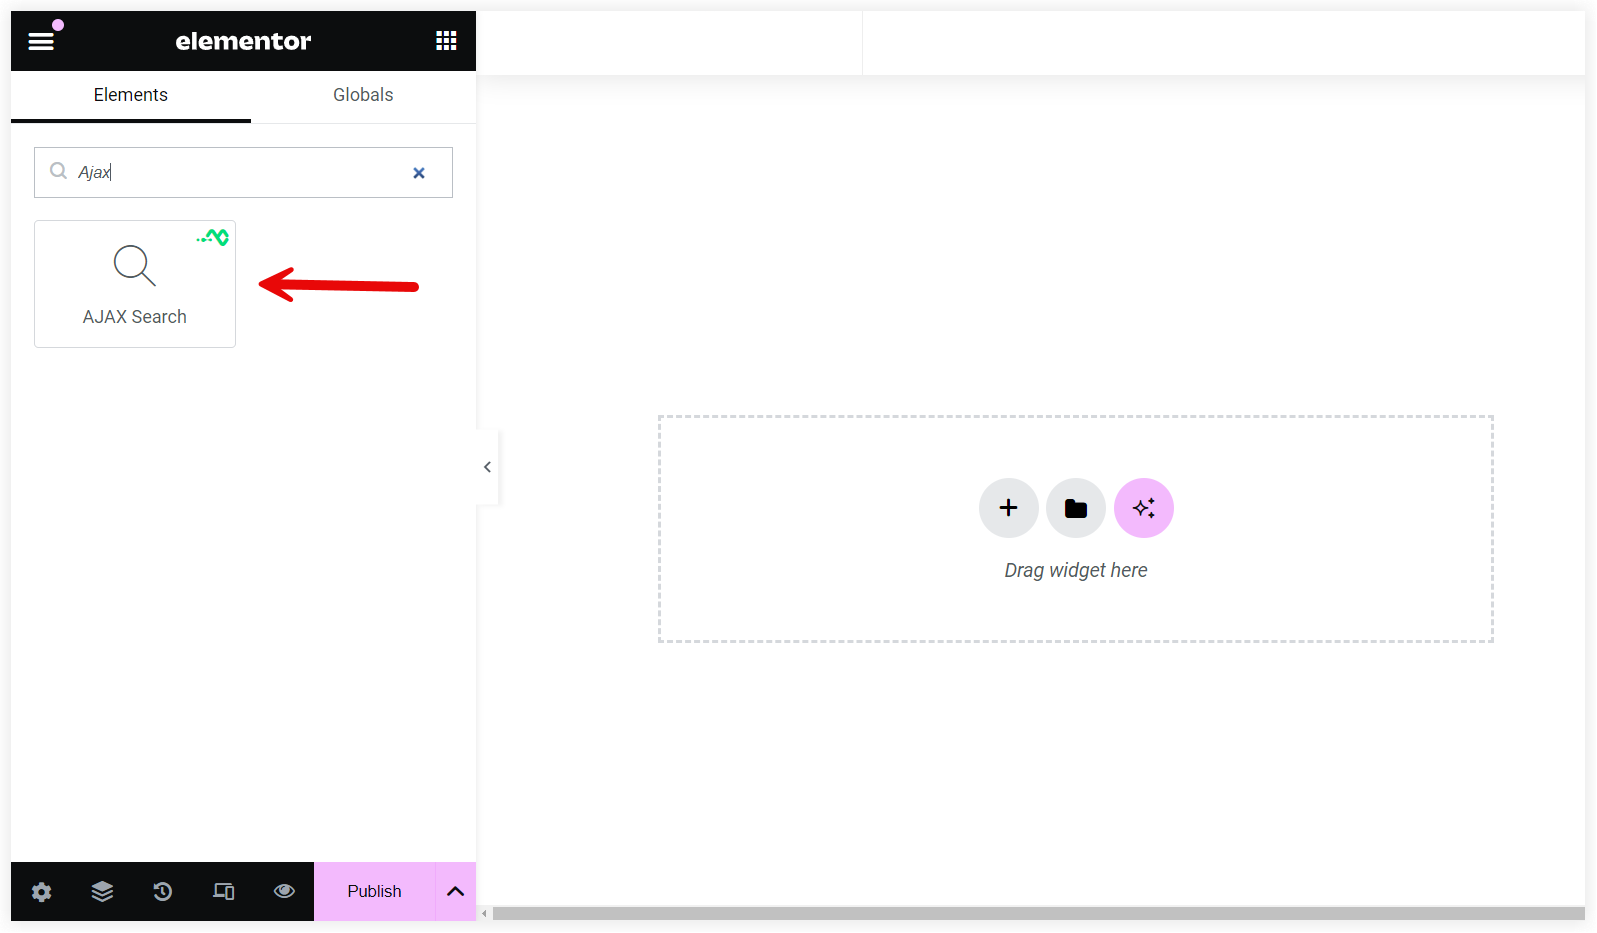
Now in this section of post, we will configure the basic structure and elements of Ajax search.
Search Field Placeholder
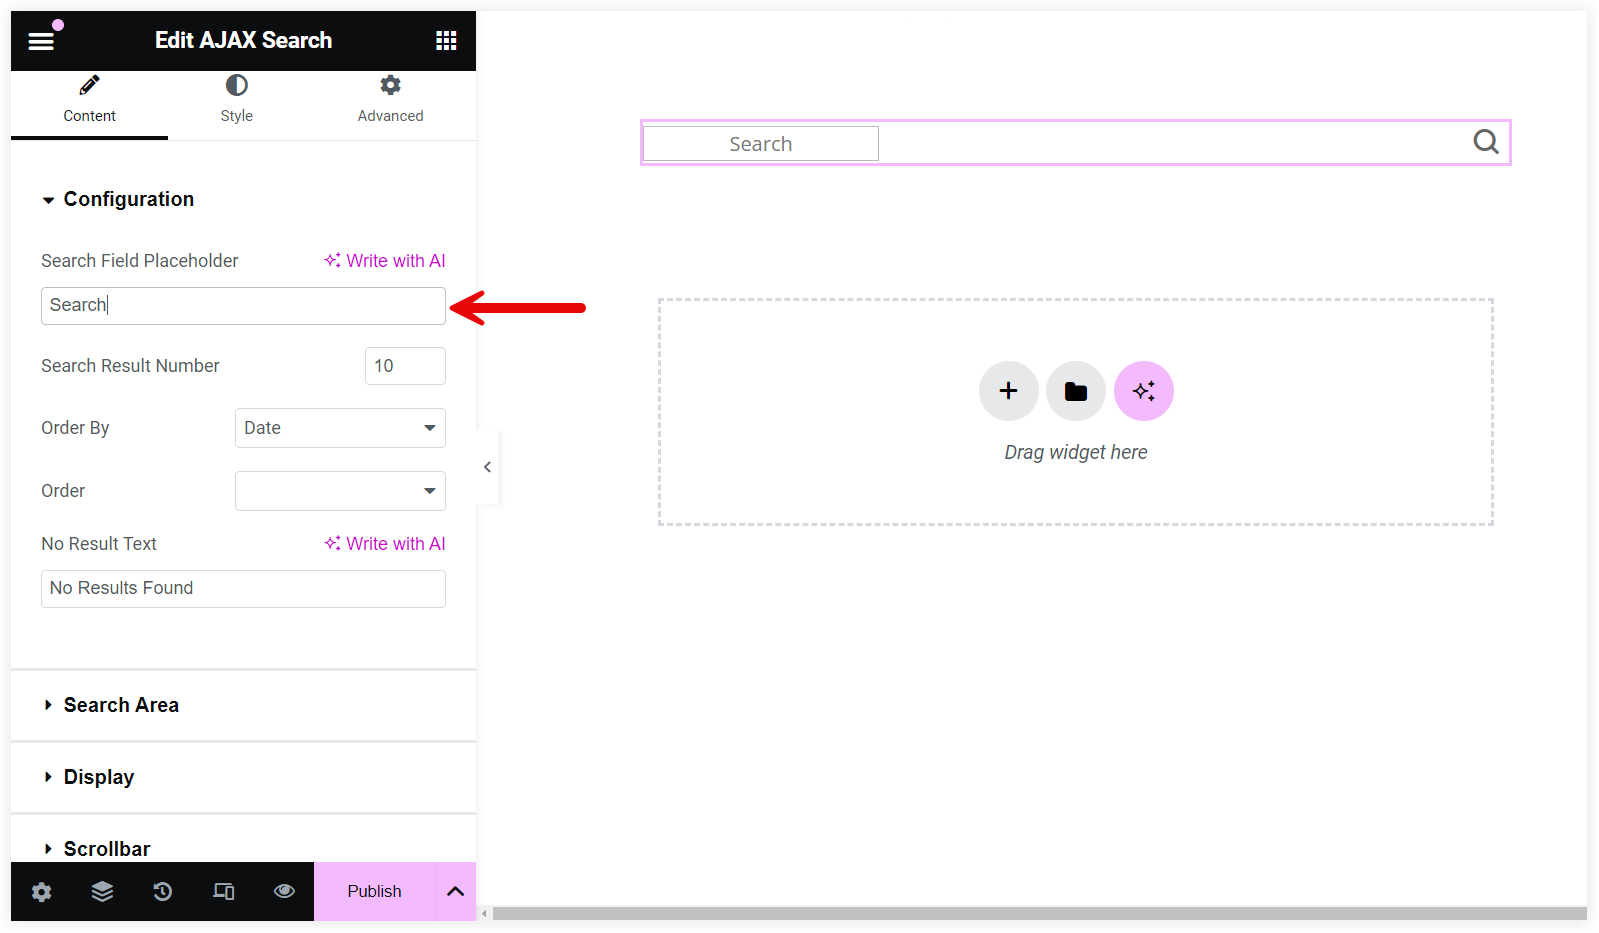
Starting from the Search Field Placeholder, you can use engaging custom text to encourage users to start typing and finding things. You can use key terms like Search, Find, etc. as placeholders.
Number of Search Results to Be Displayed
Next, you can mention the Search Result Number to display a fixed number of search results in the drop-down list. When we selected 3, only three search results were displayed in the dropdown list. Showing 5 to 10 results is manageable, maintains clarity, and does not overwhelm users.

Order Search Results
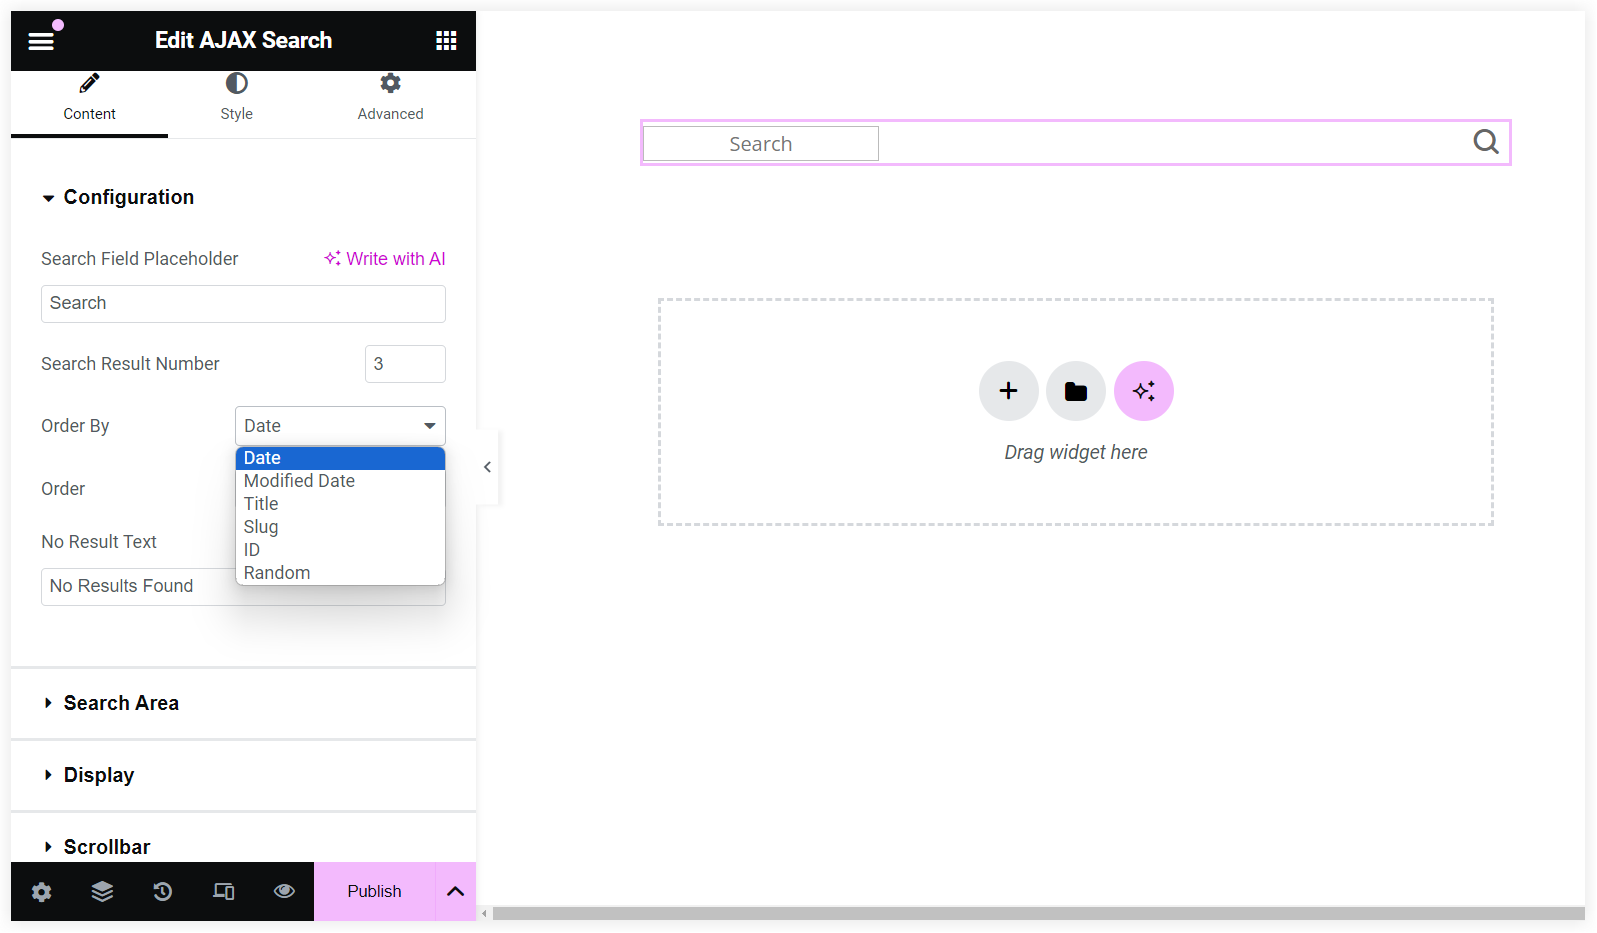
You can order the search results in ascending or descending order based on attributes such as Date, Modified Date, Title, Slug, etc. Always try to provide the latest and updated search results to improve user satisfaction.
2. Search Area of Ajax Search Widget
This section gives you the power to customize the search area and lets you modify the things scanned in a search. In simple words, we can say that you have the power to restrict or expand the search boundaries of the users.
Let’s explore it in detail.
Where Do You Want to Search
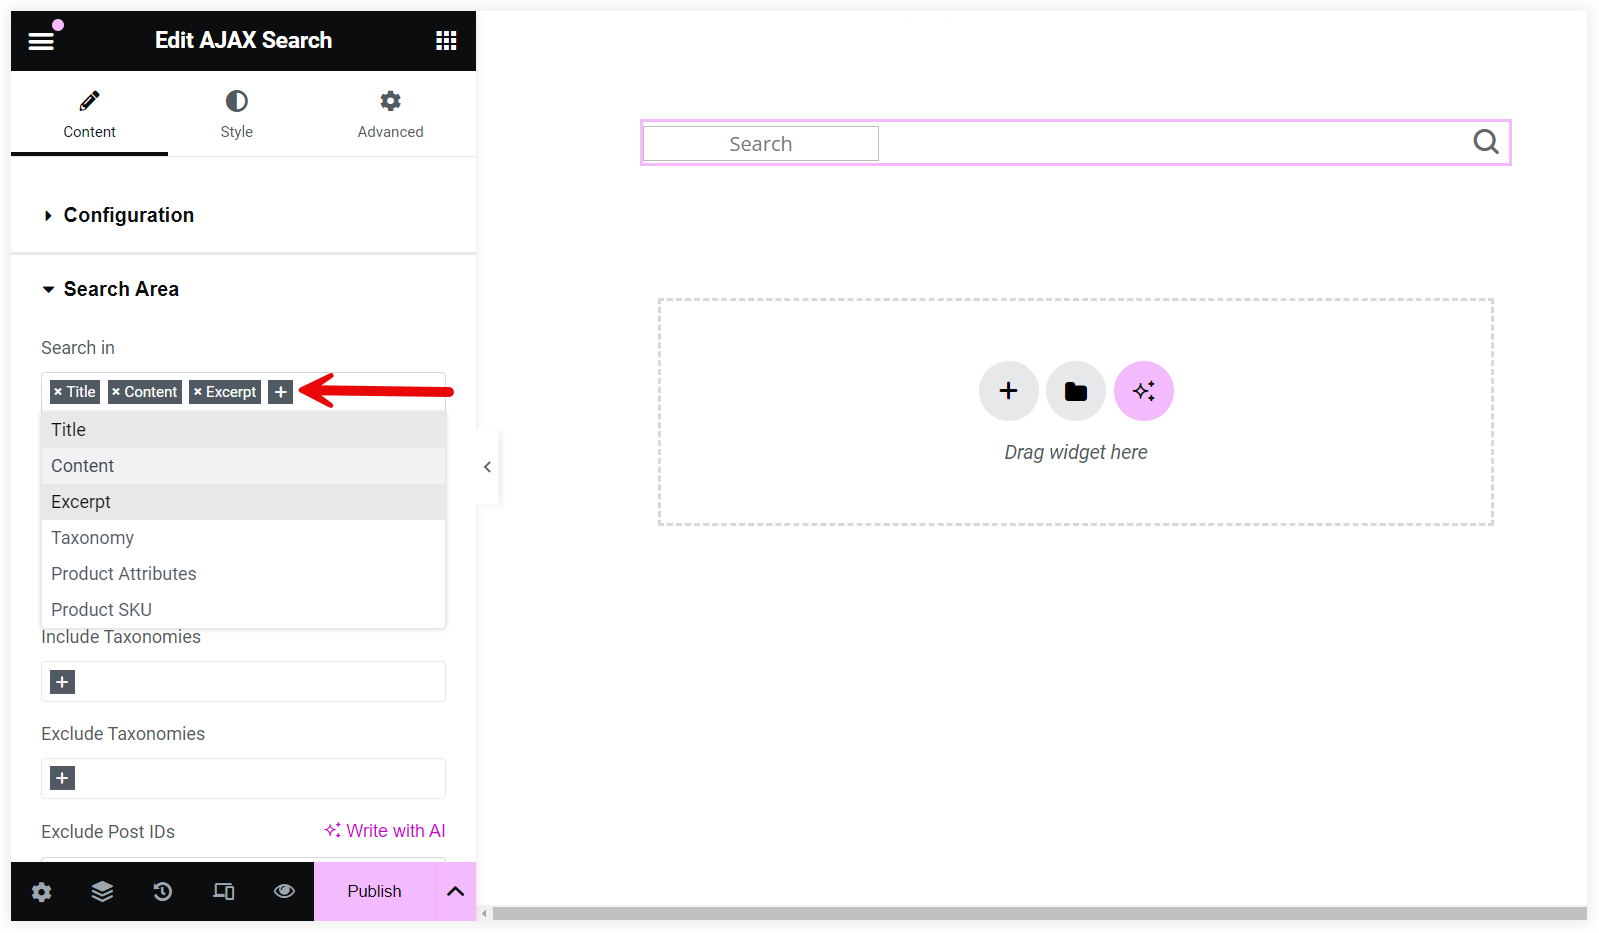
The Search in is the main option which lets you select the attributes where the Ajax search will find things. Ajax search will find a term in the Title, Content, Excerpt, etc. based on your selection.
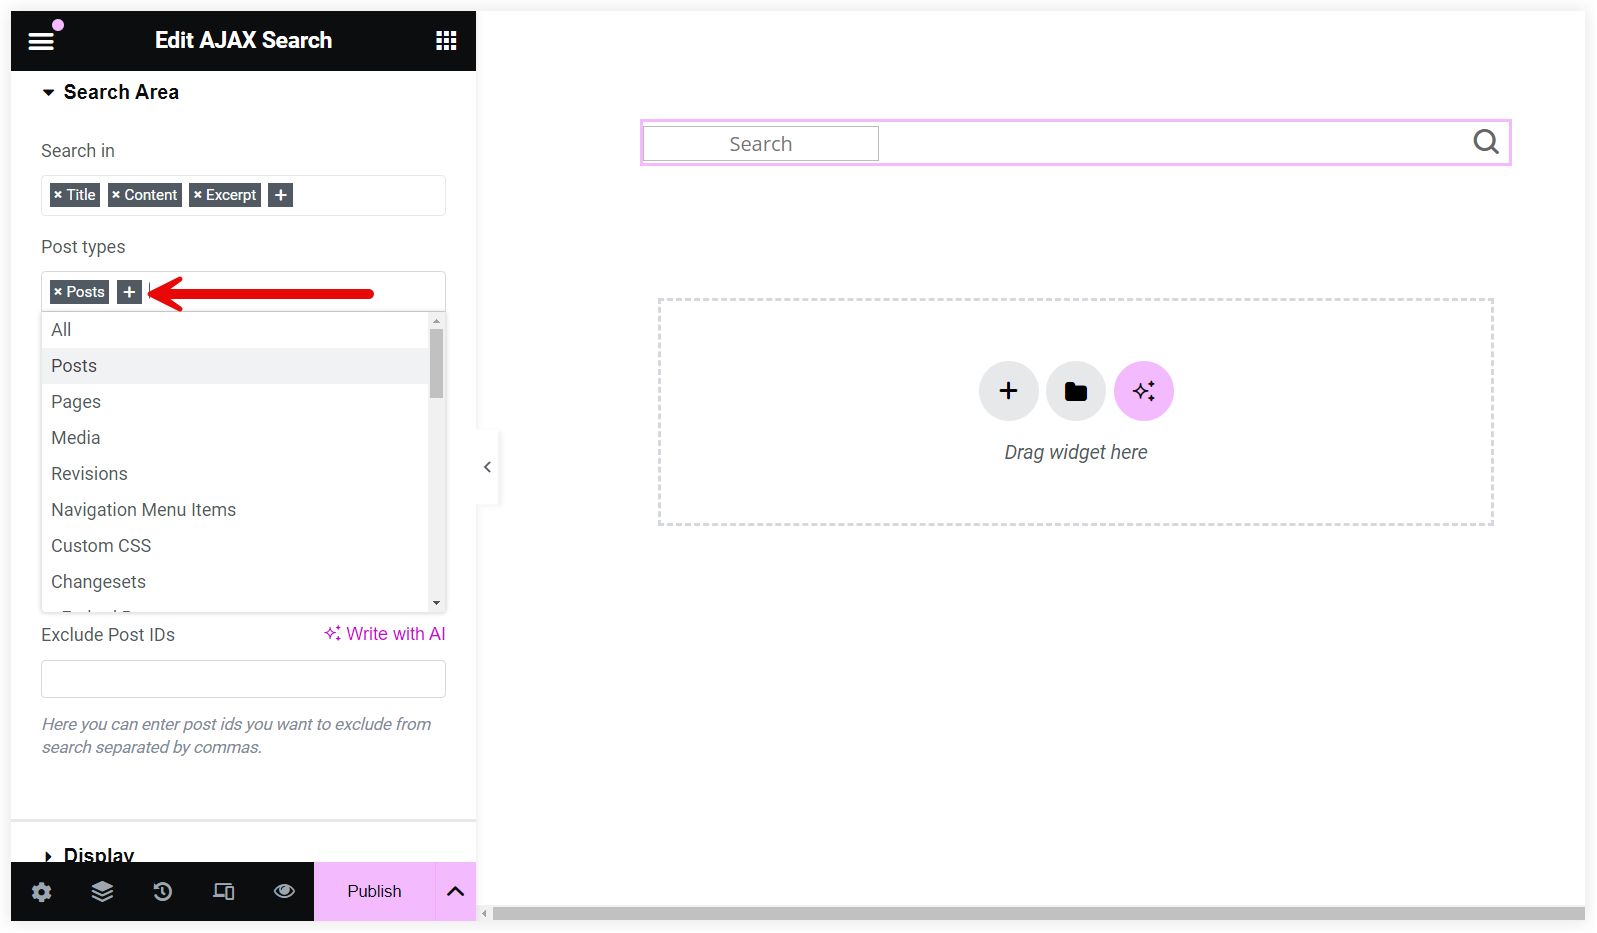
What Post Type You Want to Search
This is another useful feature of this search widget that lets you select the Post Types for search. You can select all the posts or specific posts as per your requirements.
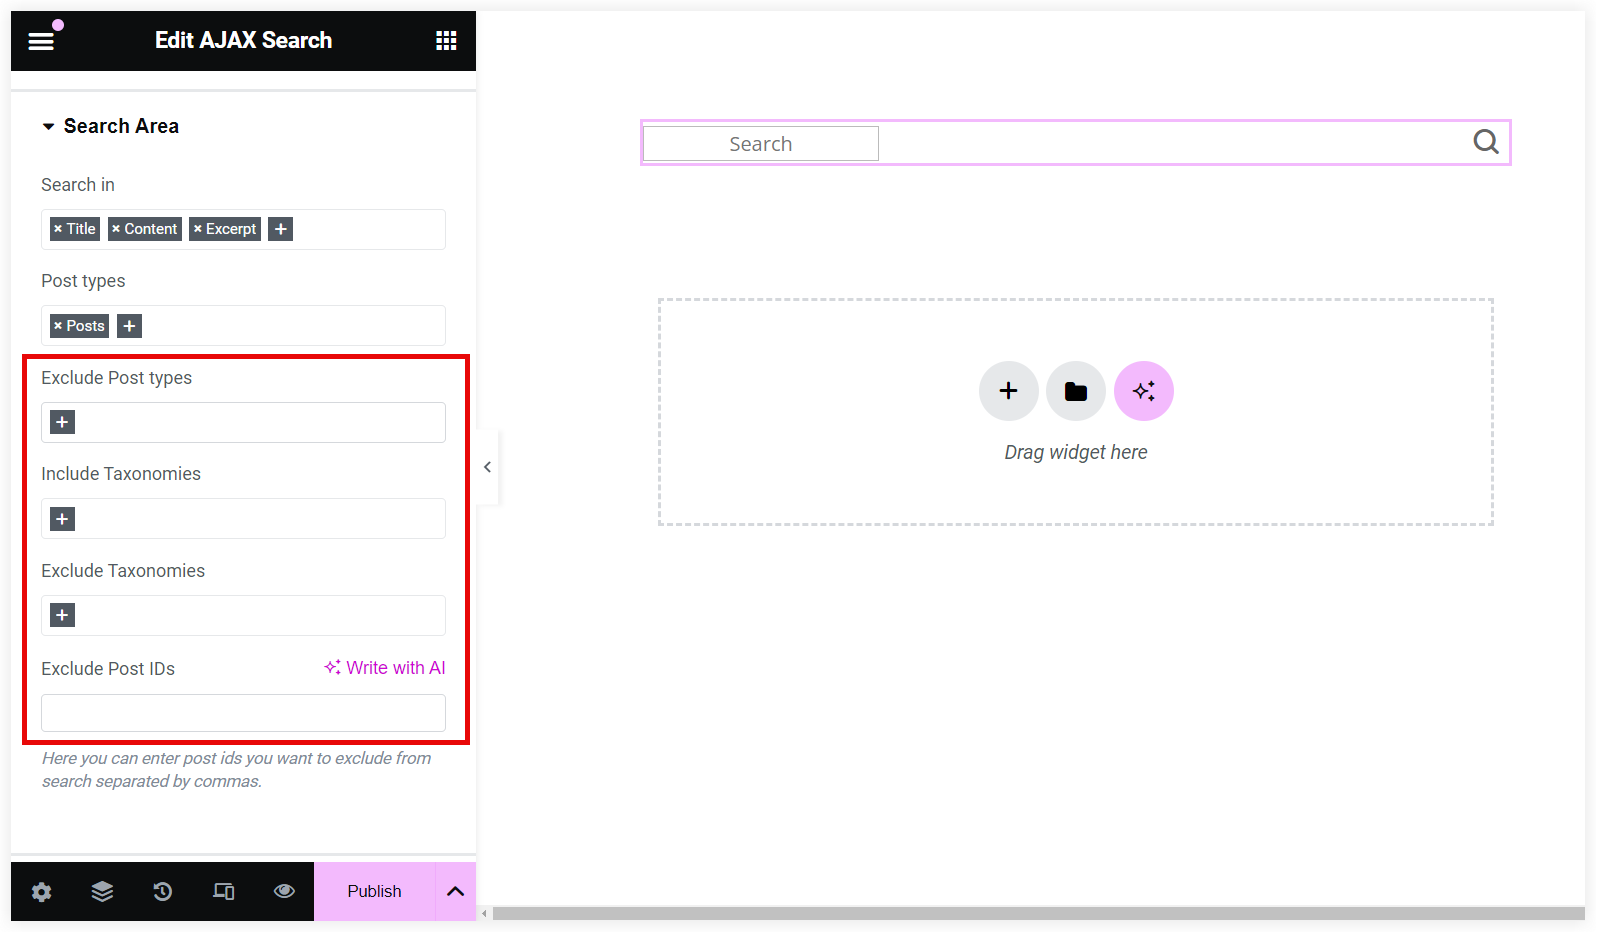
Useful Exclude and Include Options
This is another useful option of this Ajax search widget which helps you exclude specific Post types and include or Exclude Taxonomies in your search. Moreover, you also have the option to exclude particular posts using Post IDs.
These options are helpful to keep a set of posts hidden from the user while searching. We can ensure delivery of the latest, quality, and relevant content in search results by configuring these options.
4. Configure Display of Search
These settings handle the configuration of what elements you want to see in search results.
Set Up the Search Icon and Display Fields
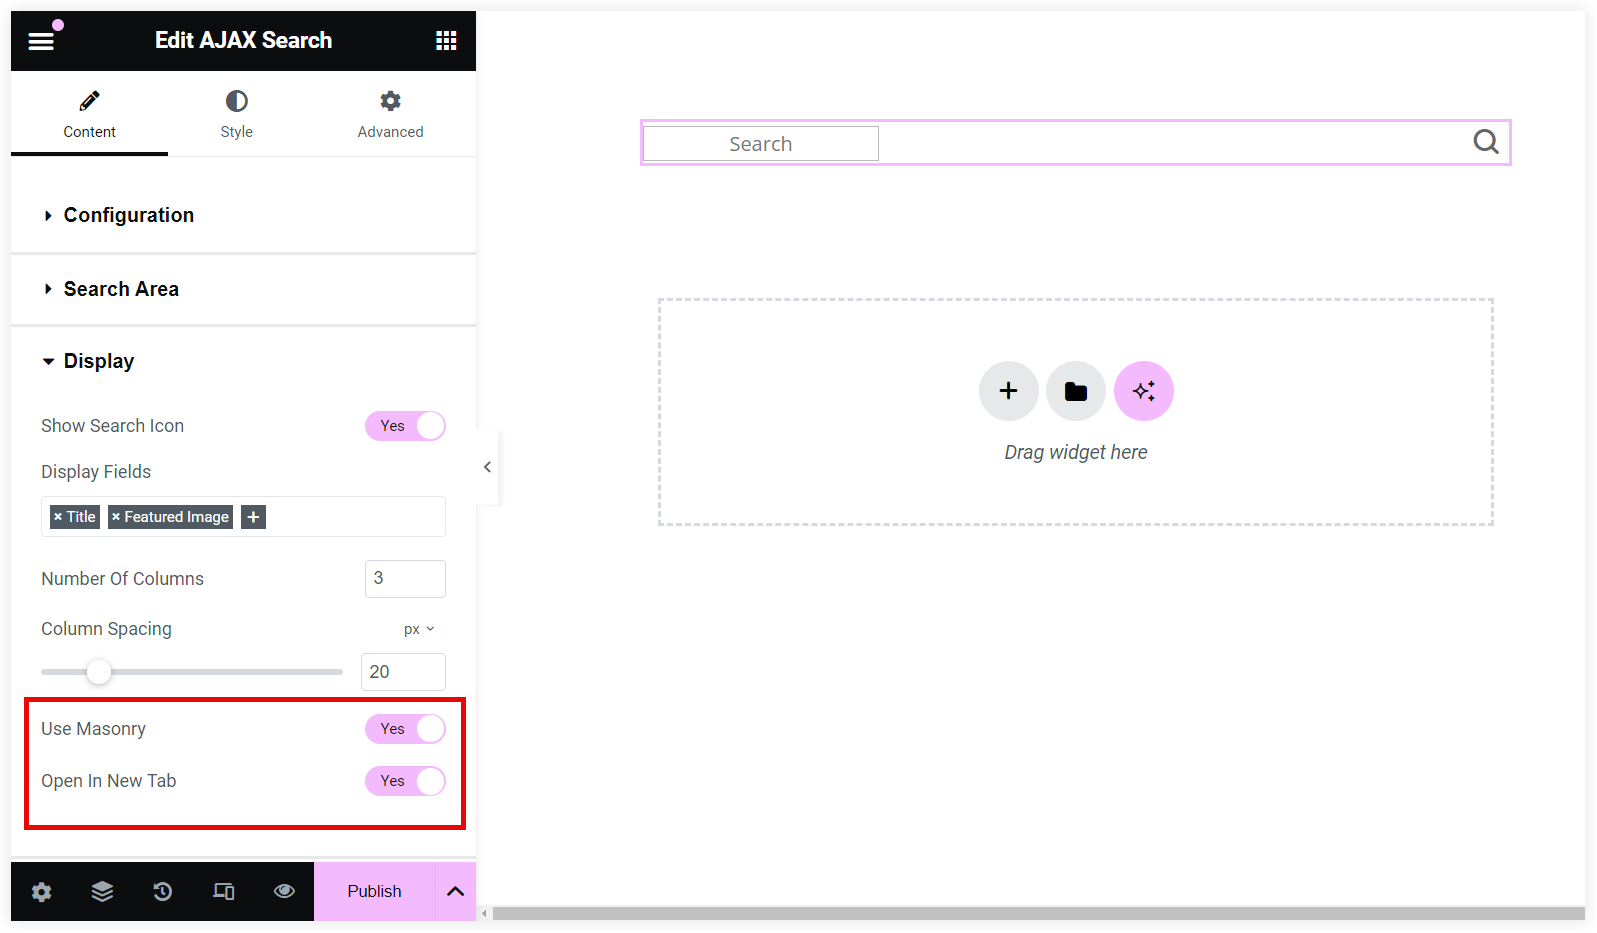
You can hide or display the magnifying glass search icon using the Show Search Icon toggle switch. We recommend you keep it enabled so that the user has a visual clue about the search field.
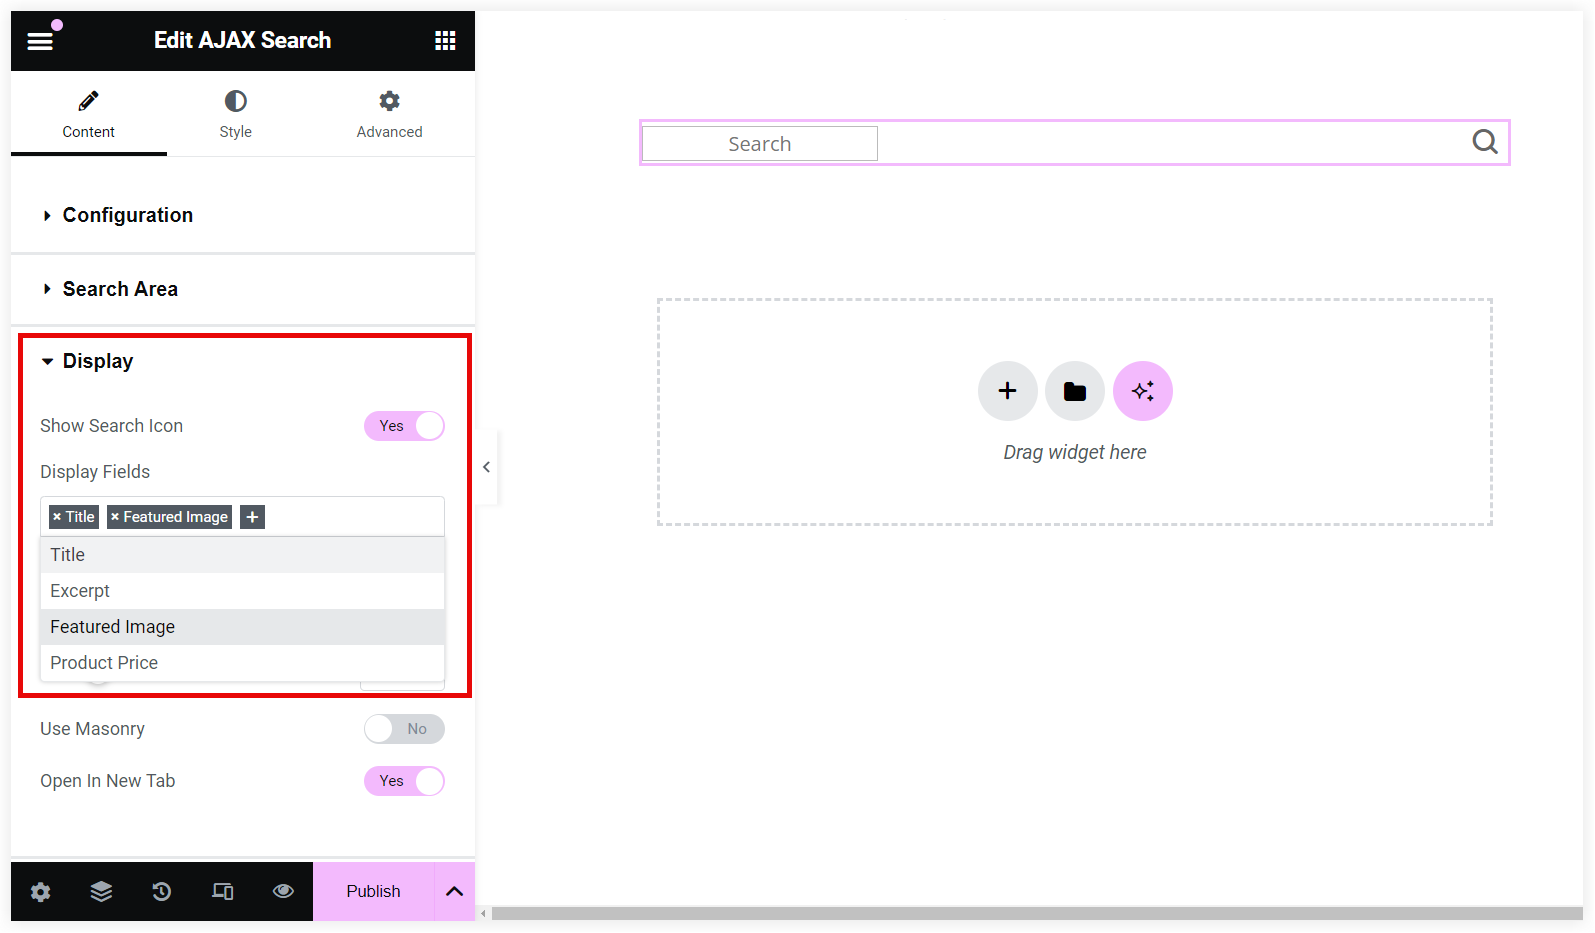
For every post, you can Display its Title, Excerpt, and Featured Image. The title acts as a key indicator of what the content is about. The excerpt gives additional context about the results with a summary or snippet. In the same way, featured images help users quickly grasp the context of a specific search result.
We recommend you select all three to provide a better search experience to users.
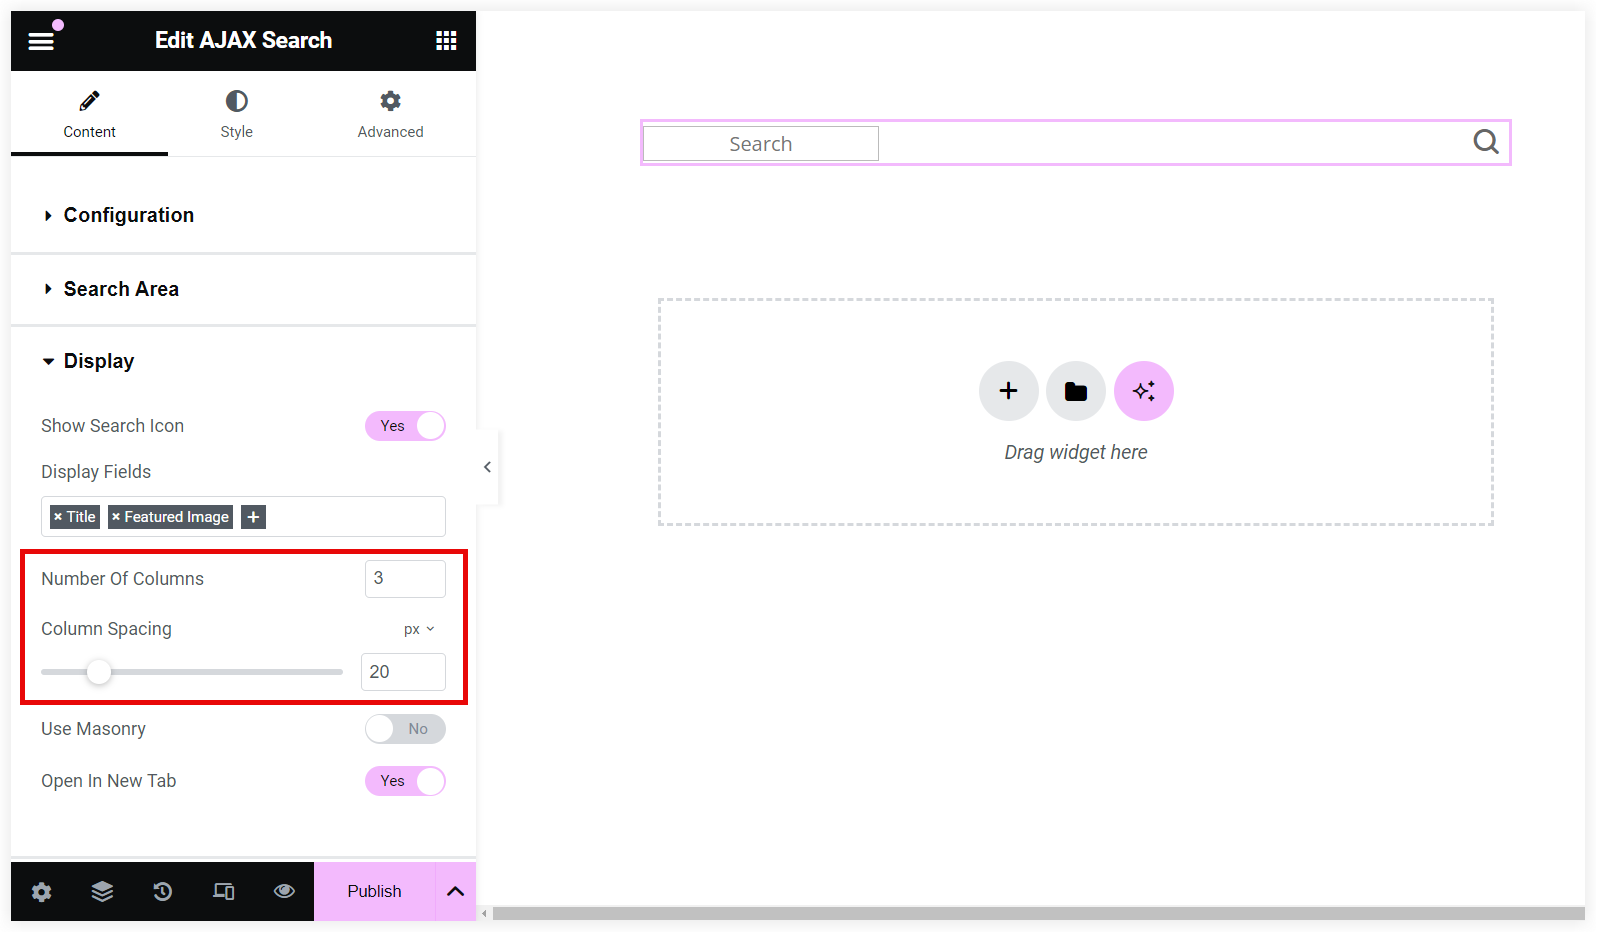
Modify Number of Columns and Spacing
This Elementor Ajax Search widget also offers options to modify the number of columns and spacing between them. For a readable view always use less than 5 columns and keep proper spacing for clarity between the search results.
Showcase Ajax Search Results in Masonry Format
Displaying Ajax search results in a masonry format is a unique idea to make the results eye-capturing. The Search results should open in a new tab to explore multiple search results simultaneously without losing the current page. Enable both these options to help users navigate back and forth between search results and clicked links easily.
Activate Scrollbar
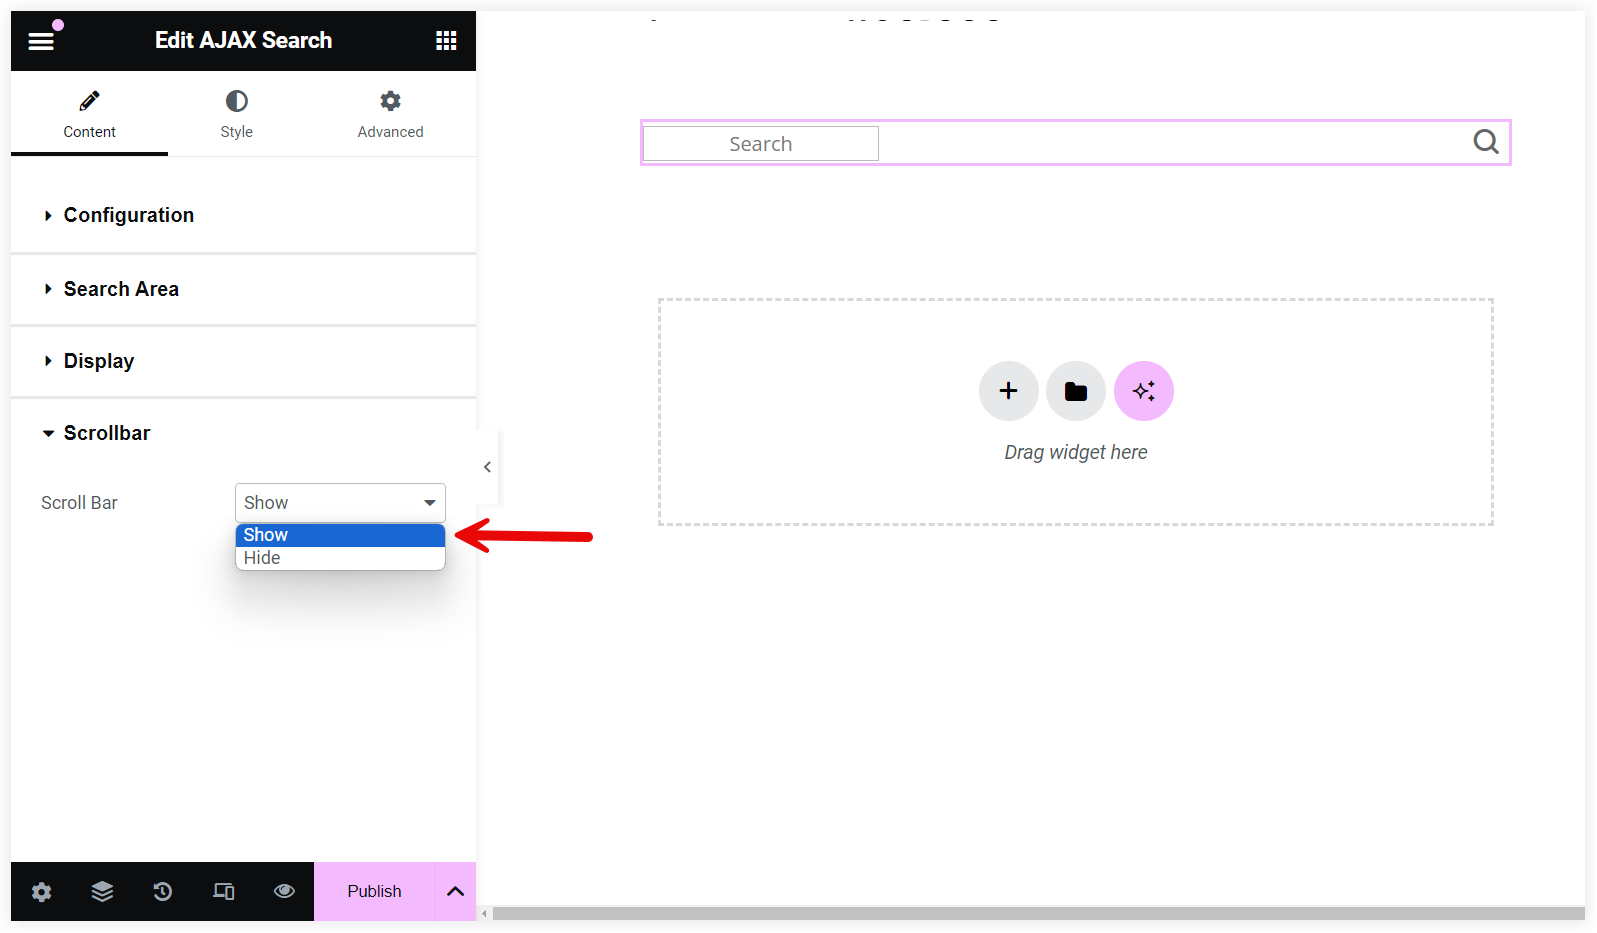
The next useful option is the Scrollbar which helps users browse all the search results conveniently when there is a long list of search results to display.
5. Style Ajax Search Elements
After configuring the Ajax search, it is time to play with its styling options and make it attractive to grab visitor’s attention instantly.
Let’s start with the search field.
Search Field
These settings allow you to customize the –
- Field Background Color
- Field Text Color
- Field Focus Background Color
- Field Focus Text Color
All these options help you highlight the Ajax search field on your website and make it look aligned with the styling of your website.
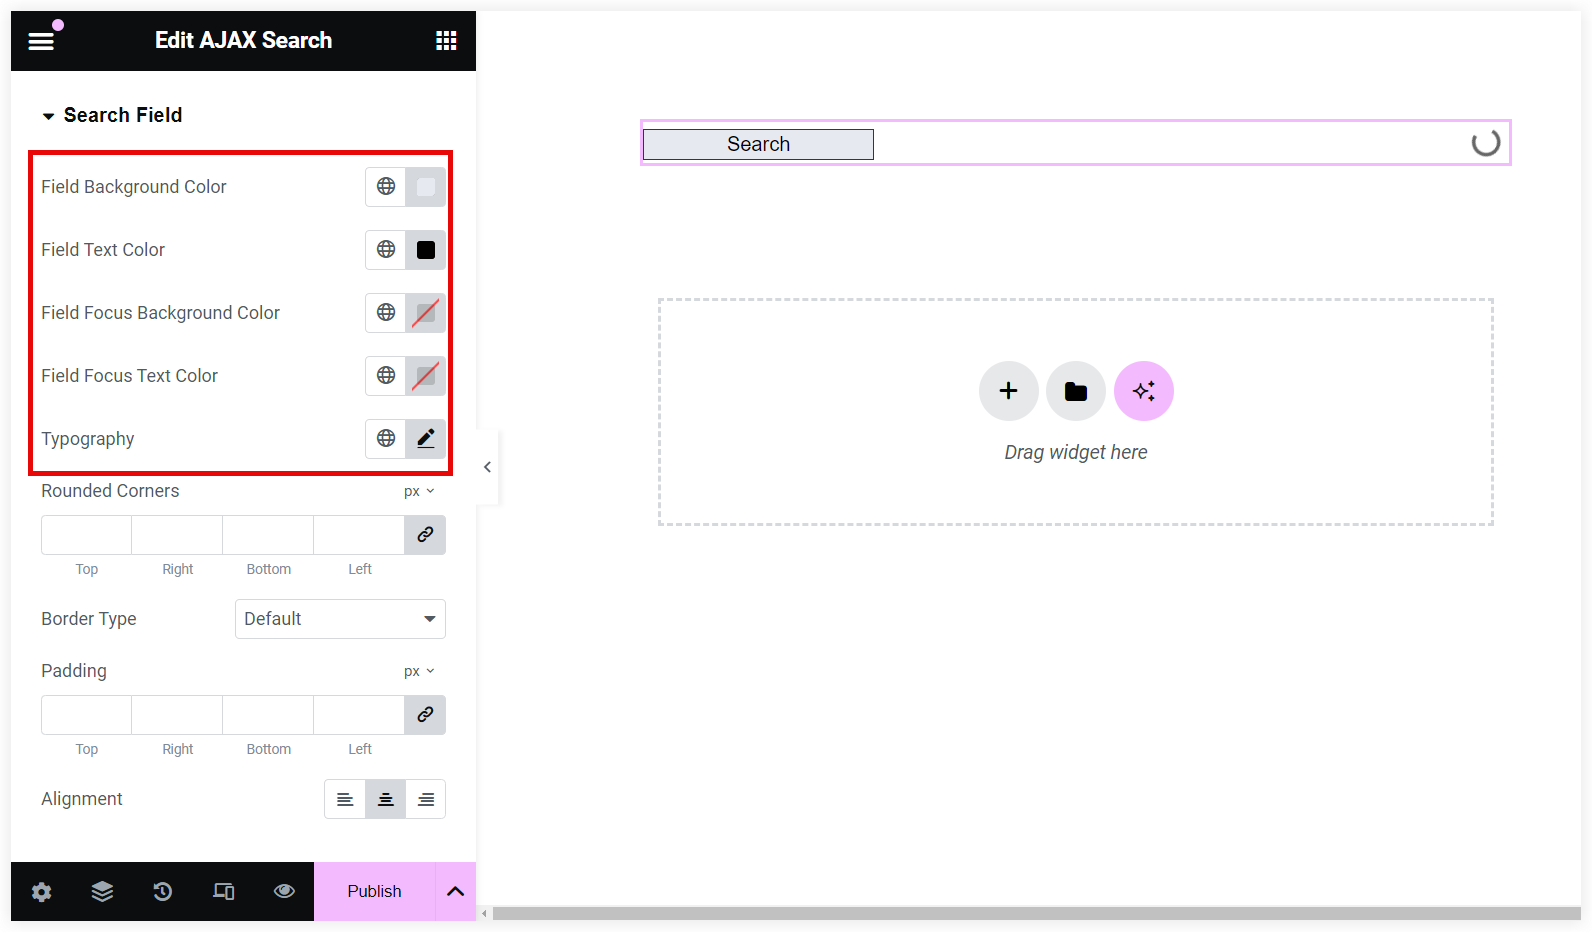
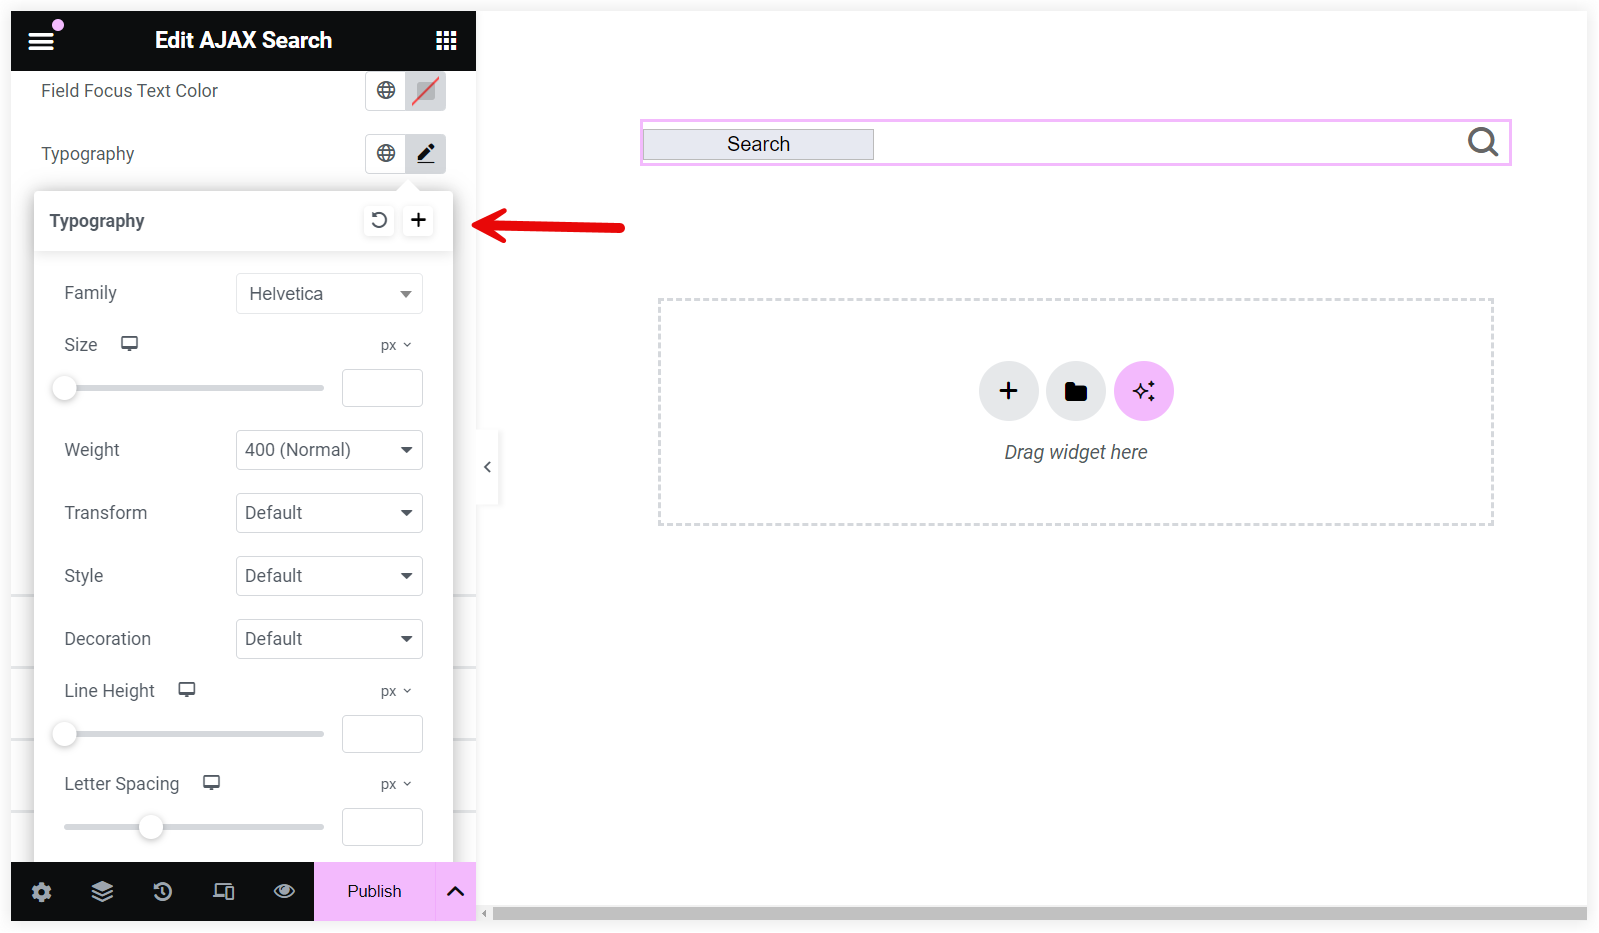
You can also personalize all the font elements of the search field using the Typography settings. It covers everything from font family to line height and letter spacing.
Style Ajax Search Icon
These options help you highlight the search icon on the page by modifying its color and size. You can design an attractive search bar on your Elementor website using these styling options.
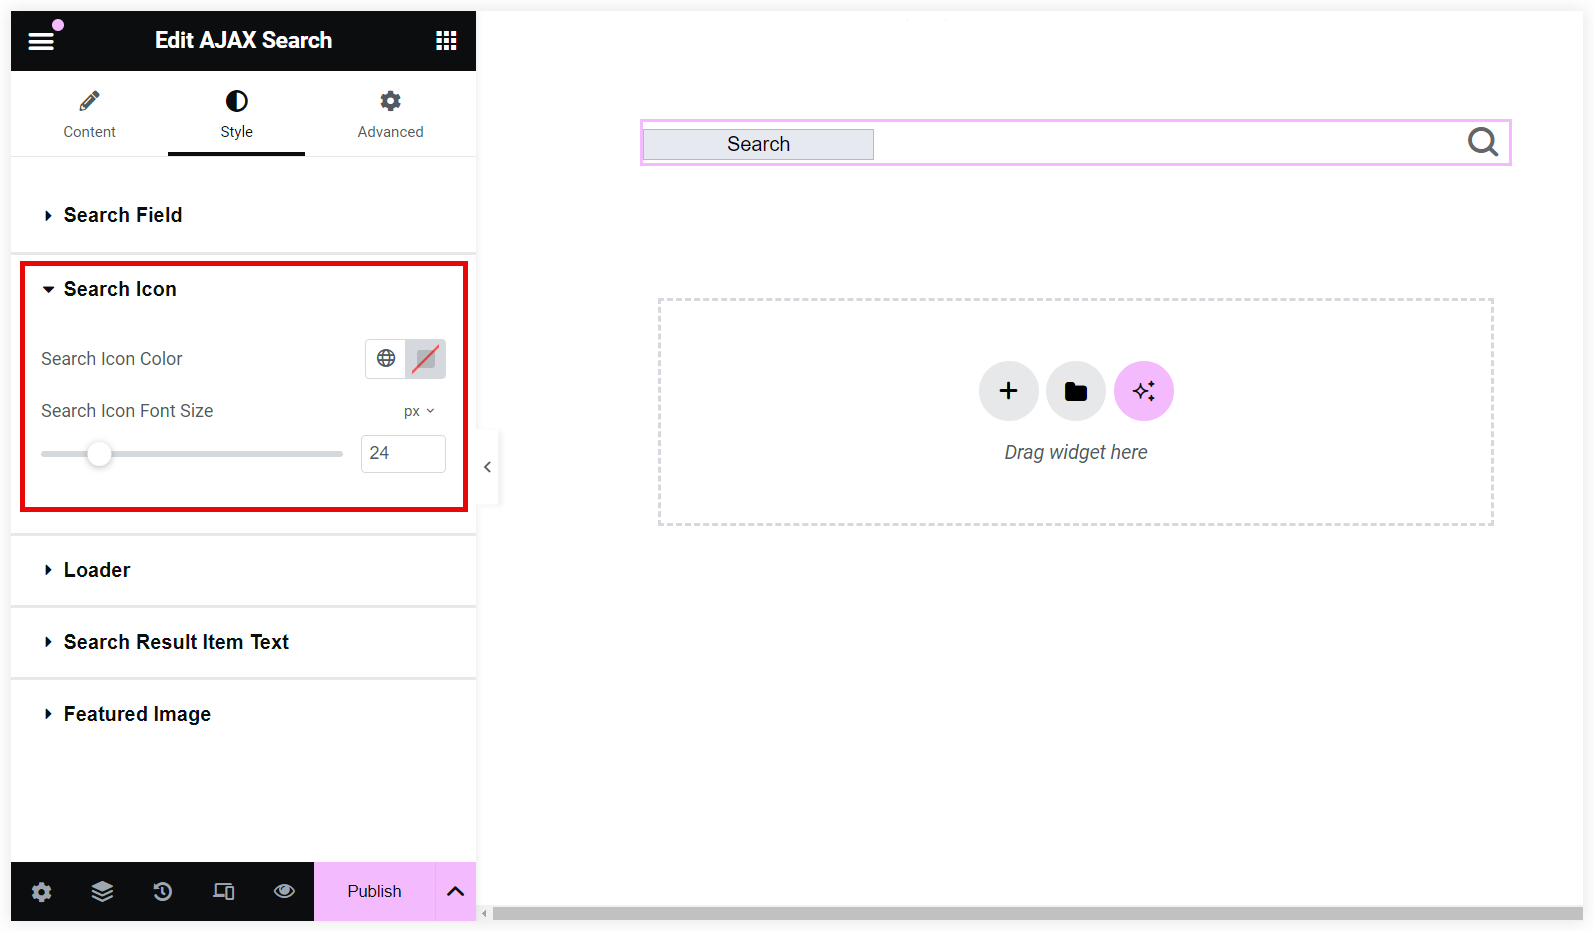
Style Interactive Loader
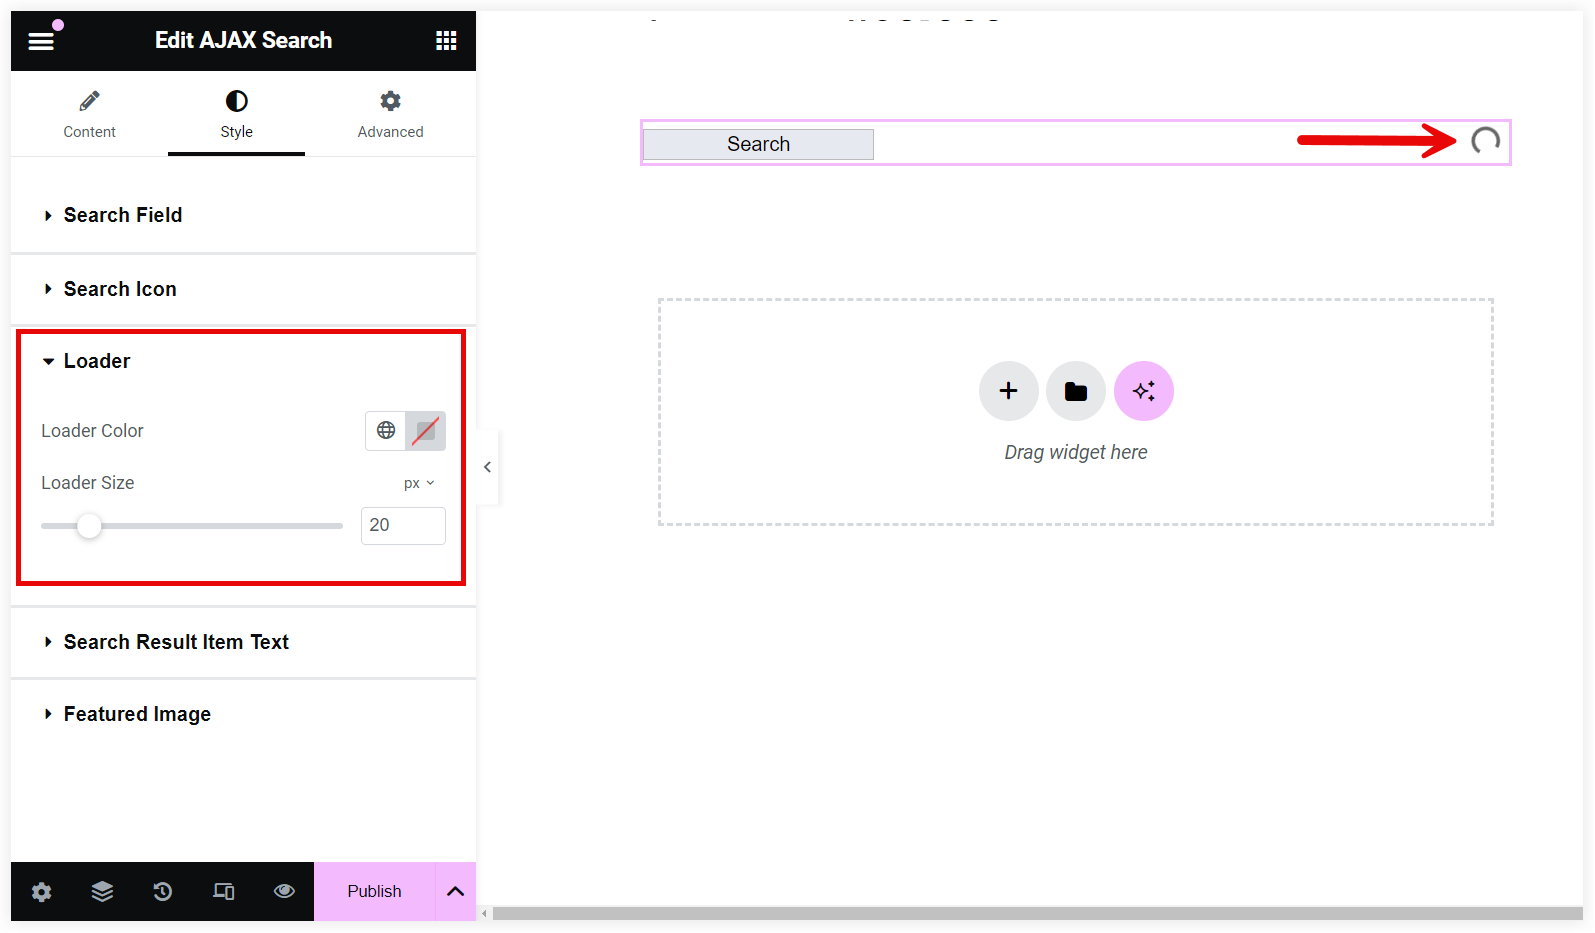
When a user starts typing in the search field a loader icon is displayed to indicate the working of Ajax search. These options help to make this process more interactive by changing the size and color of the loader icon.
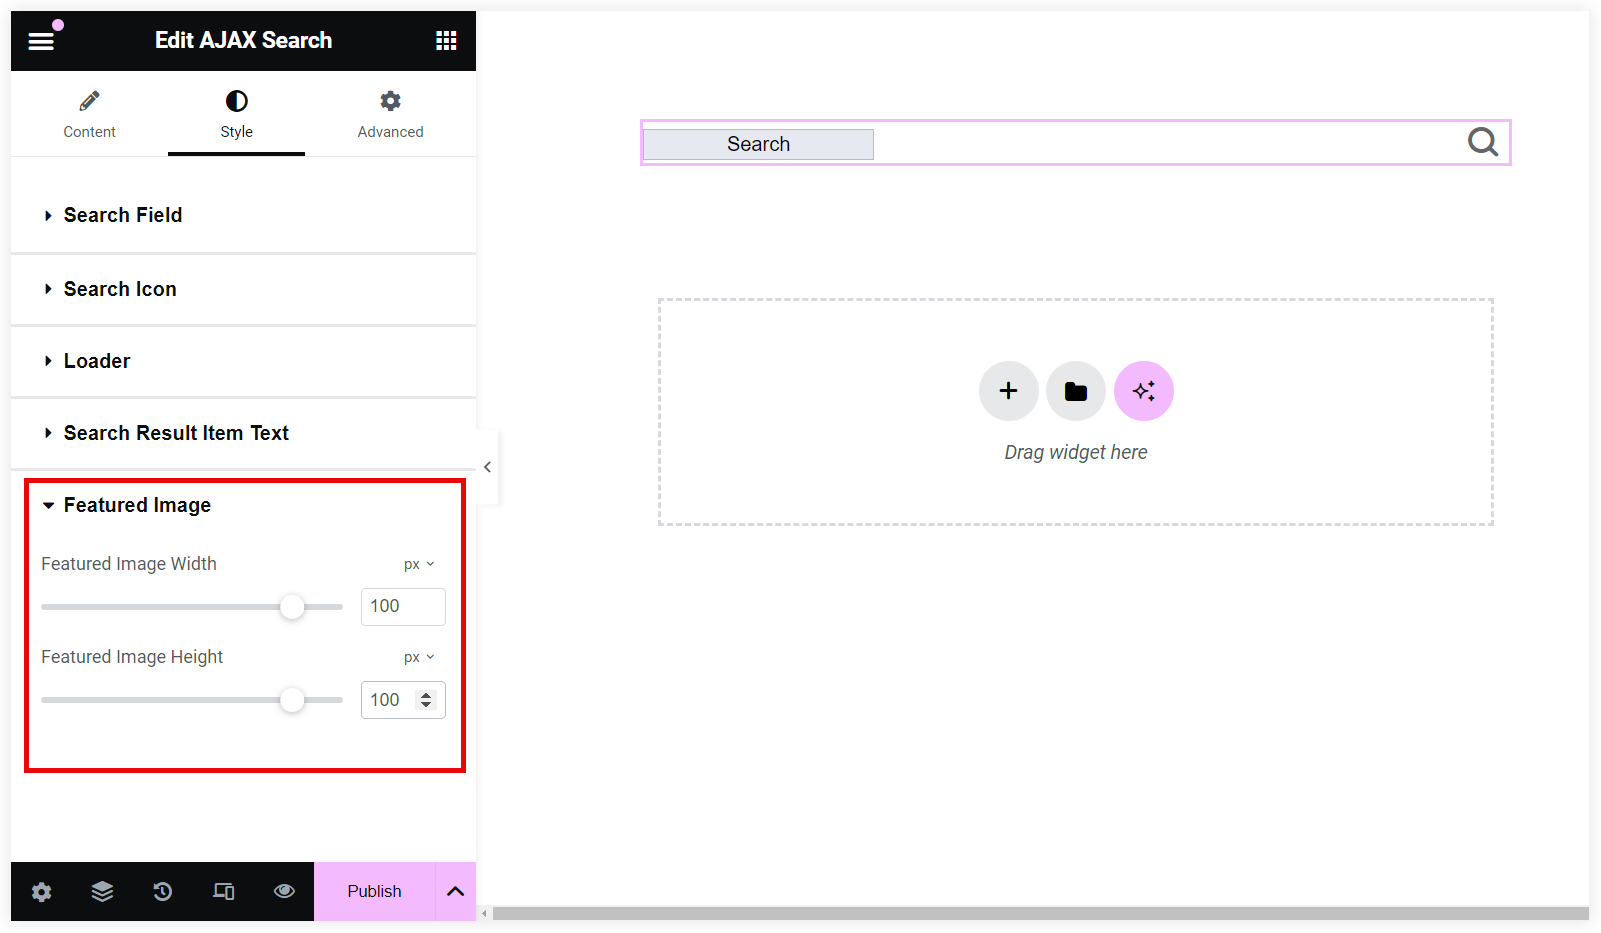
Modify Featured Image Size
The featured image of the displayed search results should properly fit in that area for a readable view to users. This option lets you customize the image dimensions to fit it properly in the search area with a clear view of titles and excerpts.
After all this configuration Ajax search is ready to find things on your Elementor website and users can quickly find required data within the website.

In case you are using Divi theme to create and manage your website Divi Ajax Search is another good option with same kind of features to integrate Ajax search on your website.
This tutorial took you through the detailed process of integrating Ajax search in Elementor, which included setting up search parameters, installing required plugins, and personalizing the Ajax search bar. By adding Ajax search to your website using this tutorial, you can ensure a more efficient and seamless search experience for visitors.




0 Comments