
A floating mini cart WooCommerce can increase your sales and convert website visitors into customers. Additionally, where you position your shopping cart and ease of locating it is important. A customer can easily abandon their cart if they find it hard to checkout. The simpler it is, the better.
If you have a powerful WooCommerce site, you can consider adding a floating mini cart to increase the conversion rates. WooCommerce is a great WordPress e-commerce plugin that has gained popularity with over 4 million websites being run with it. Therefore, you can trust the kind of functionalities it can provide and the success of your business.
In this article, we will elaborate more on the WooCommerce floating mini cart benefits, the best sites to use a floating cart, and how to set up the WPMozo Floating Mini Cart in WordPress.
Why Do You Need a User-Friendly Floating Mini Cart?
There are various reasons why you need a user-friendly floating mini cart in your ecommerce website if you want to increase your conversion rates.
1. Ease in Adding Products
A floating mini cart for WooCommerce makes it easy for customers to add products and cumulatively add the total during checkout. Therefore, a buyer can easily see what they have bought, remove some unwanted products, and purchase the ones that they need.
2. Make Payments
The floating mini cart makes it easy for a customer to make payments based on their chosen products in your WooCommerce store. When you checkout after verifying everything in your cart, you can pay using your credit card, PayPal, debit card, ApplePay, and much more. Therefore, the shopping cart should be user-friendly to ease the process of making payments.
3. Ease in Tracking Products
The WooCommerce floating mini cart should be easy to access from any page on the site for easy tracking of their intended purchases. It also helps reduce shopping frustration to ensure a seamless checkout.
4. Easy Accessibility
The floating mini cart icon makes sure that it is accessible at all times as a user scrolls or browses through the website. Also, you get to choose where it will be positioned and choose a style that will rhyme with your website.
This also removes the guesswork of a customer worrying whether they added an item to the cart. It is also easy to see the latest product additions without leaving the specific product page.
5. Monitor Your Total
A floating mini cart will keep the customer updated so that they can check the limit of spending they would want to reach, thereby, reducing the chances of cart abandonment. If a person can’t keep track of their spending, they will find themselves getting a total of the products, shipping costs, taxes, and fees they hadn’t anticipated and abandon their cart.
However, with regular and upfront pricing, you can know whether you have reached your limit. Therefore, makes it easy to adjust earlier.
Which Sites Should Use a Floating Mini Cart?
A Floating mini cart WooCommerce is highly recommended for stores where customers are likely to make multiple purchases.
The floating cart provides a beautiful shopping flow in which the customers can easily keep up with their purchases, modify their carts, easily add items to their carts, apply order coupons, calculate their total, or see their order subtotal before checkout, and make their payments. It also helps the customers to feel encouraged to make more purchases.
The floating mini cart for WooCommerce ought to display a basic summary of selected cart information to help them stay updated. Some stores that offer big equipment, may not necessarily need a floating mini cart, unlike those in which multiple items can be bought at the same time.
Therefore, the trend of customer purchases can determine whether having a floating mini cart in your online store is important.
How to Use the WPMozo Mini Cart Plugin for WooCommerce to Add a Floating Mini Cart to Product Pages Automatically
The WPMozo Floating Cart WooCommerce plugin is reliable, efficient and affordable. Many WooCommerce sites use it because of how it stands out and provides effective features needed to ensure a seamless shopping experience to buyers.
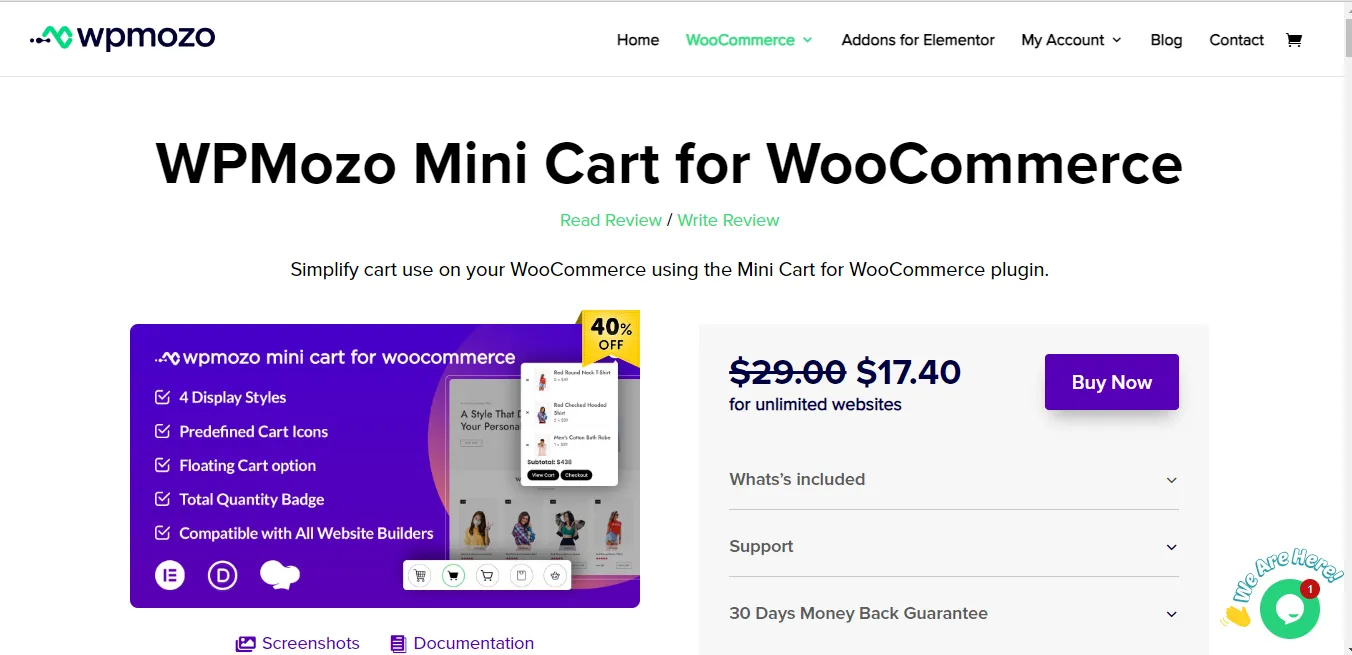
Step 1: Get the Plugin
First, you will need to purchase this reliable WordPress WooCommerce plugin from the the official page of the product.
Once you purchase it, you can use the product on unlimited number of websites and get updates for a whole year and support. Also, you get to enjoy a 30-day money-back guarantee if the plugin doesn’t work as intended.
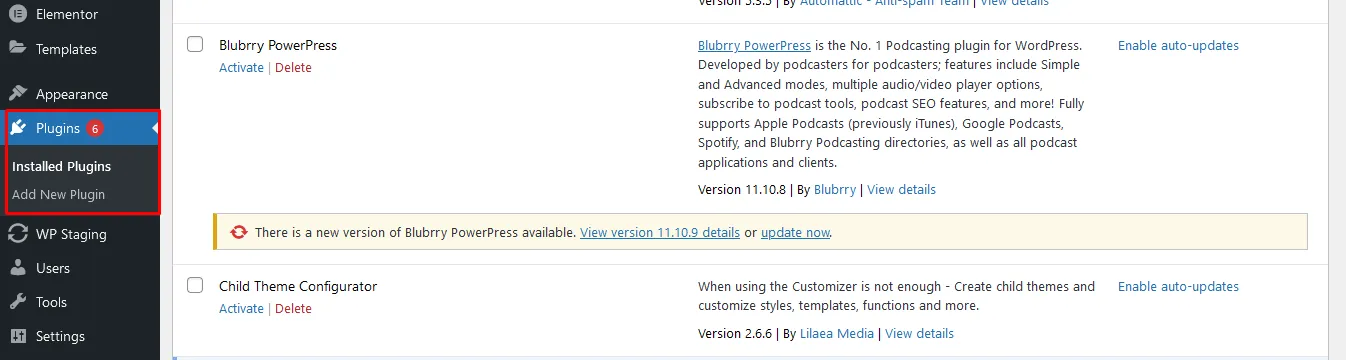
Step 2: Install the Plugin
Access your WooCommerce WordPress dashboard. On the left menu bar, click on plugins, and on its menu, select Add new plugin. This will allow you to install the WPMozo Mini Cart on your WooCommerce site.
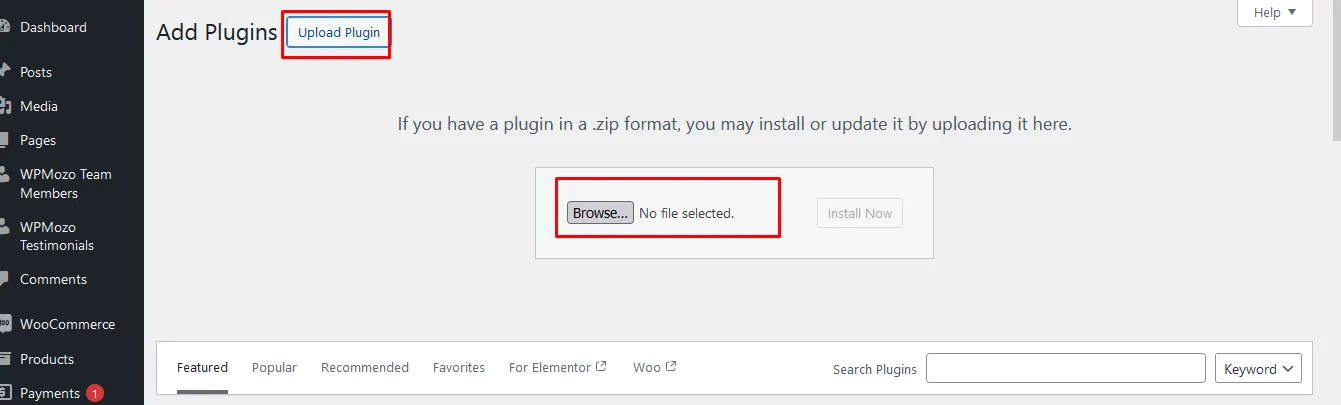
Click on the Upload Plugin button and click the browse button to look for the plugin’s zipped file in your local storage or cloud storage to install on WordPress. Once uploaded, activate the plugin to start using it.
Step 3: Access the WPMozo Mini Cart WooCommerce Plugin’s Settings
The WPMozo Mini Cart plugin icon will appear on the dashboard’s left menu bar. When you just click on it, the settings will appear on the main page to make it easy for you to change the style, settings, positions, and set actions.
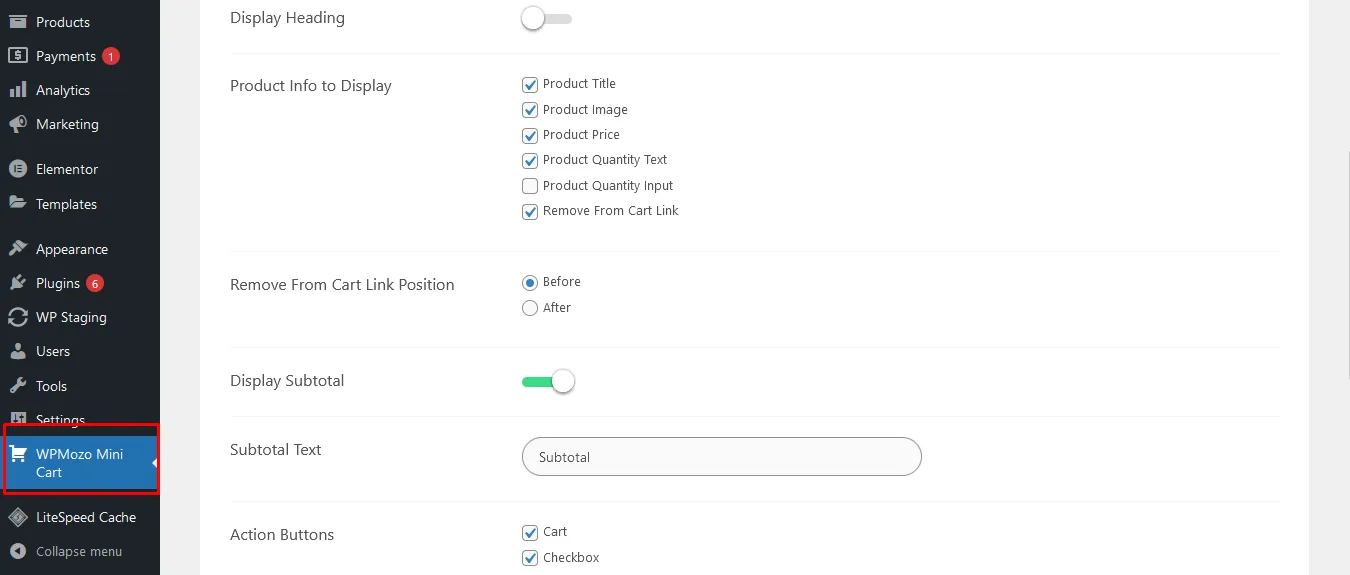
Step 4: Modify the Settings
On the top menu bar, you will find various modification options. On the Mini Cart Options tab, you will be able to:
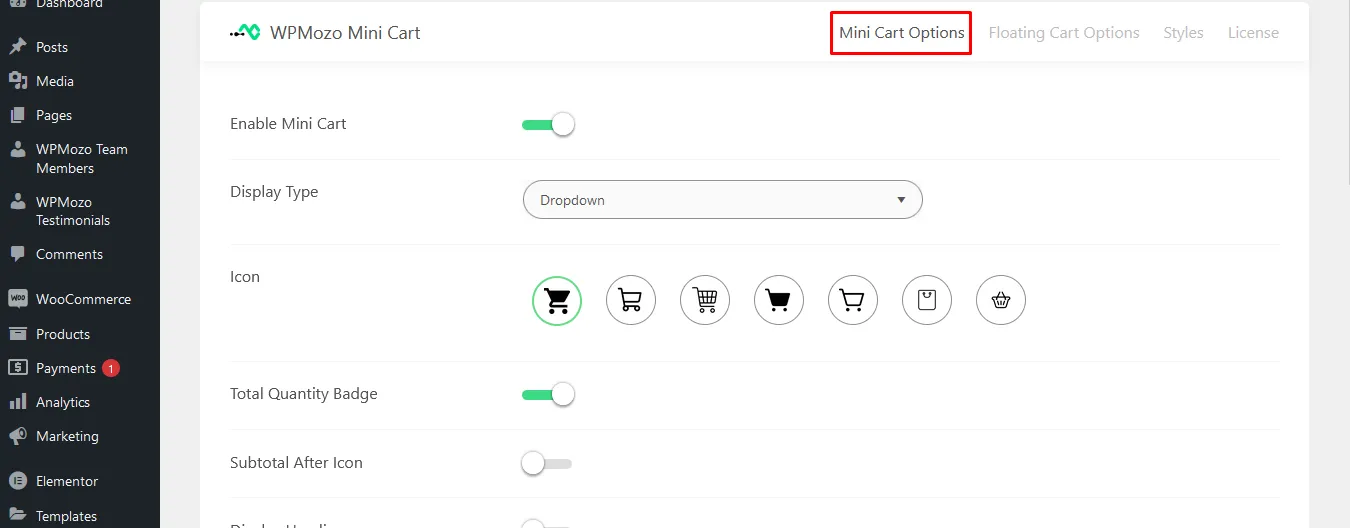
- Enable/disable the mini cart for WooCommerce
- Modify the display type
- Choose an icon type
- Enable/disable the total quantity badge
- Allow subtotal after icon
- Enable/disable the display heading
- Allow product information to be displayed
- Change the “remove from cart” link position
- Allow to display subtotal
- Change the subtotal text
- Provide action buttons
- Change the cart link text
- Change the checkout link text
- Open on AJAX add to cart
- Open on Normal Add to Cart.
Step 5: Set the Floating Mini Cart on Your WooCommerce Site
On the next menu option, WooCommerce Floating Cart Options tab, you will be able to enable or disable the floating mini cart on your site. Toggle the button to allow and toggle off to disable.

Once you allow, some more settings will appear that will allow you to make relevant changes.
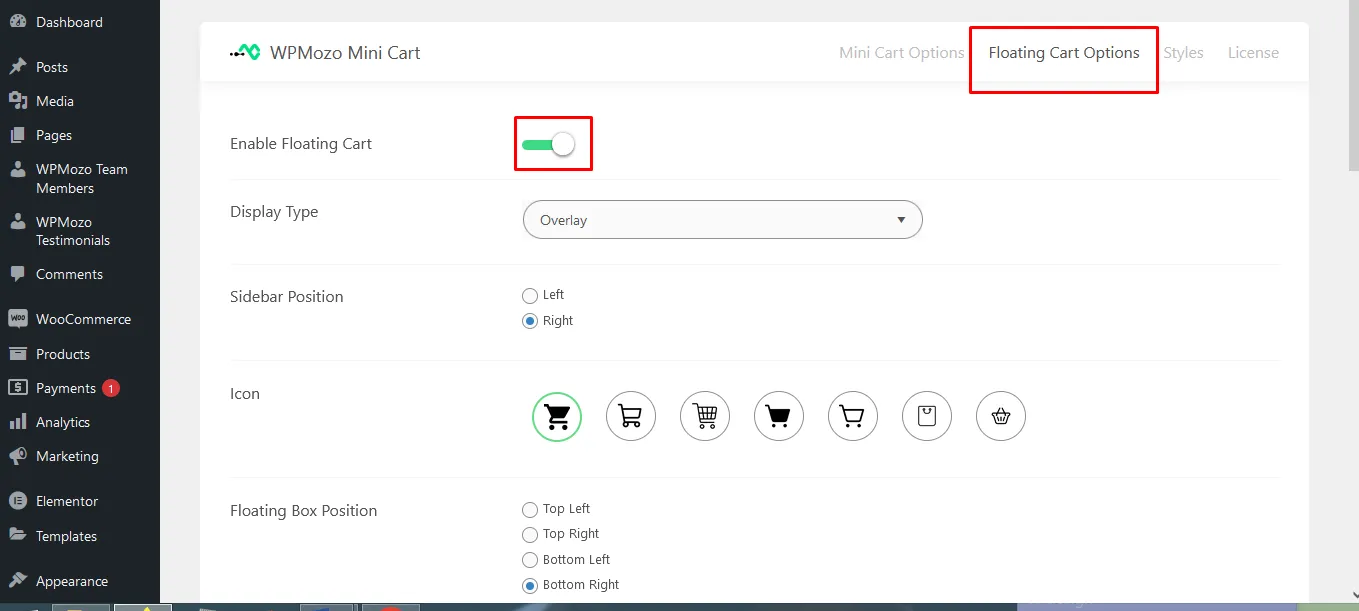
You will be able to:
- Change the display name
- Set the sidebar position
- Change the icon
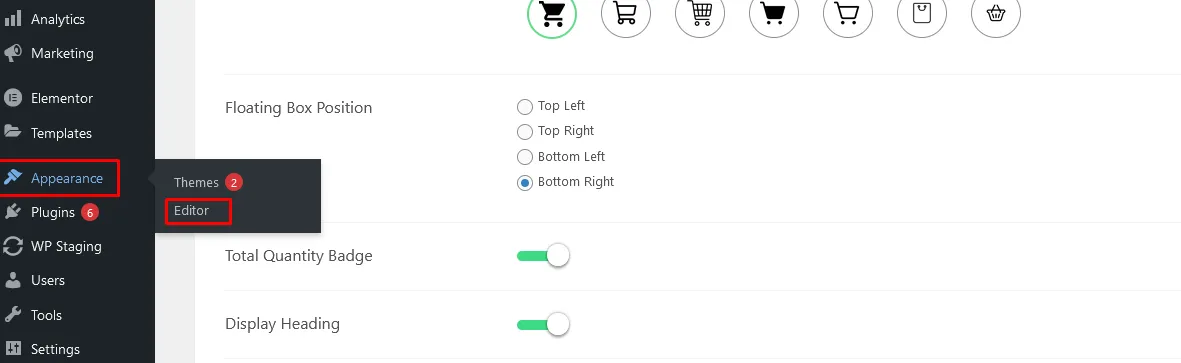
- Choose the floating box position
- Enable/disable the total quantity badge
- Change the heading text
- Choose product information to display
- Choose the “remove from cart” link position
- Allow to display subtotal
- Change the subtotal text
- Provide action buttons
- Change the cart link text
- Change the checkout link text
- Open on AJAX add to cart
- Open on Normal Add to Cart.
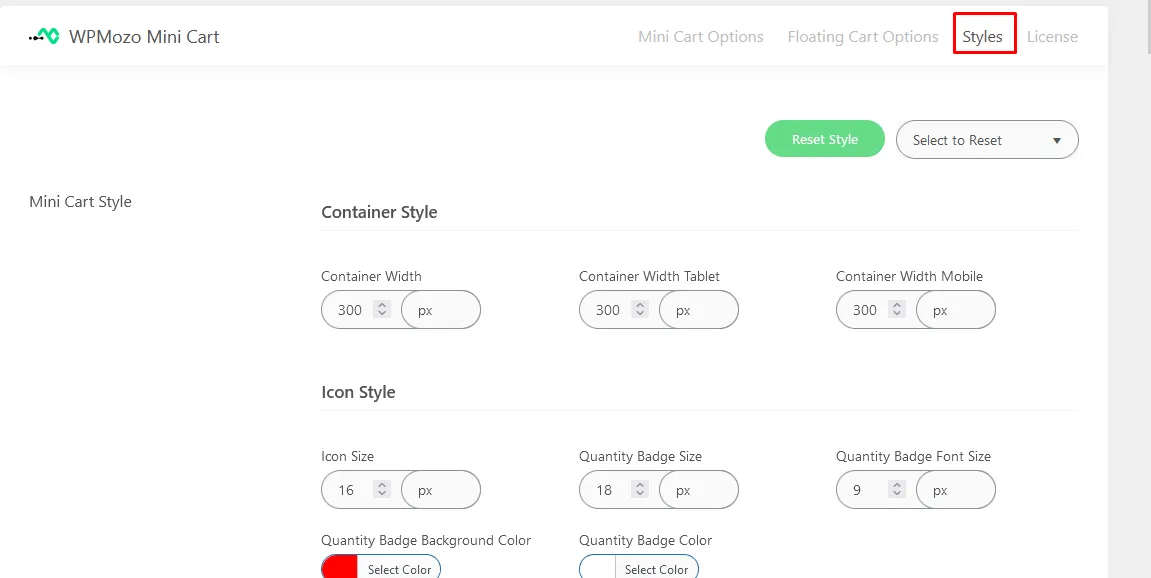
Step 6: Change the Style
Proceed to click the Styles tab, which will allow you to modify the settings of the floating mini cart and mini cart. Scroll down to find the floating mini cart style options and modify as you wish.
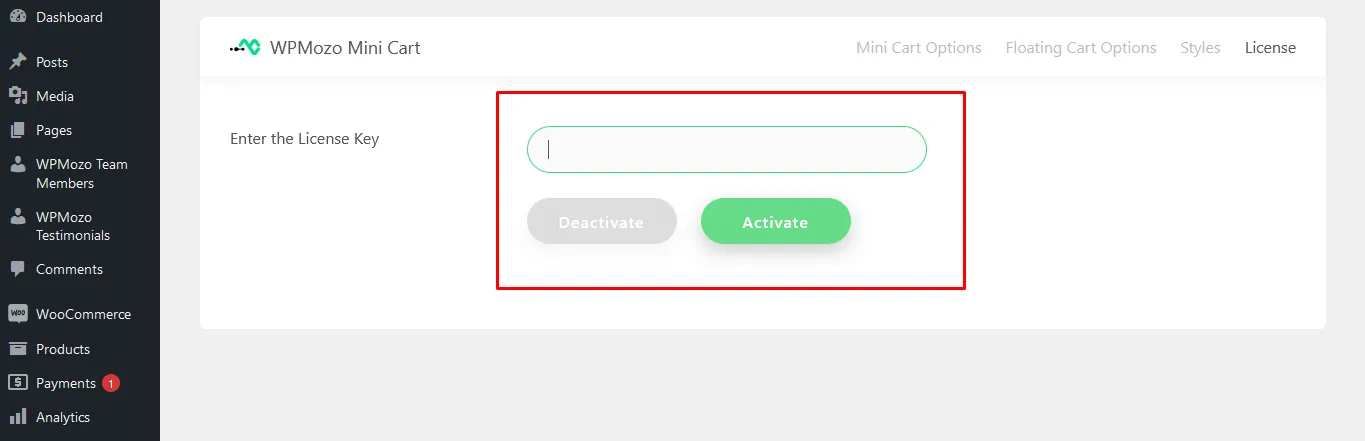
Step 7: Enter the License/Product Key
Finally, you can enter the license/product key to activate the plugin and start using it. That’s it.
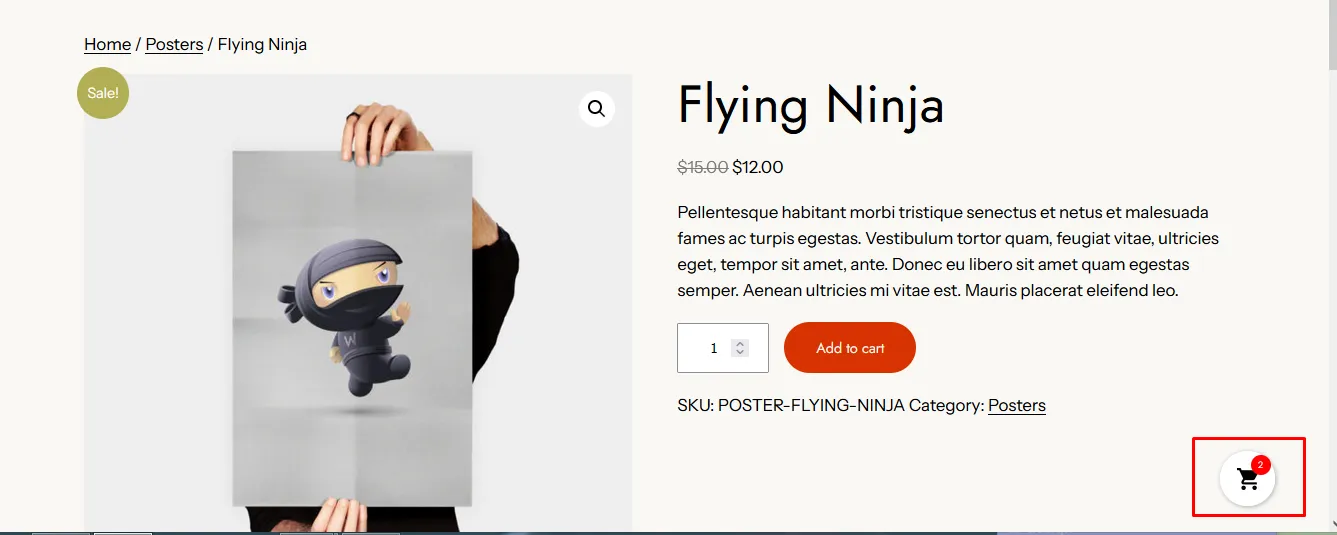
Step 8: Preview the Product Pages
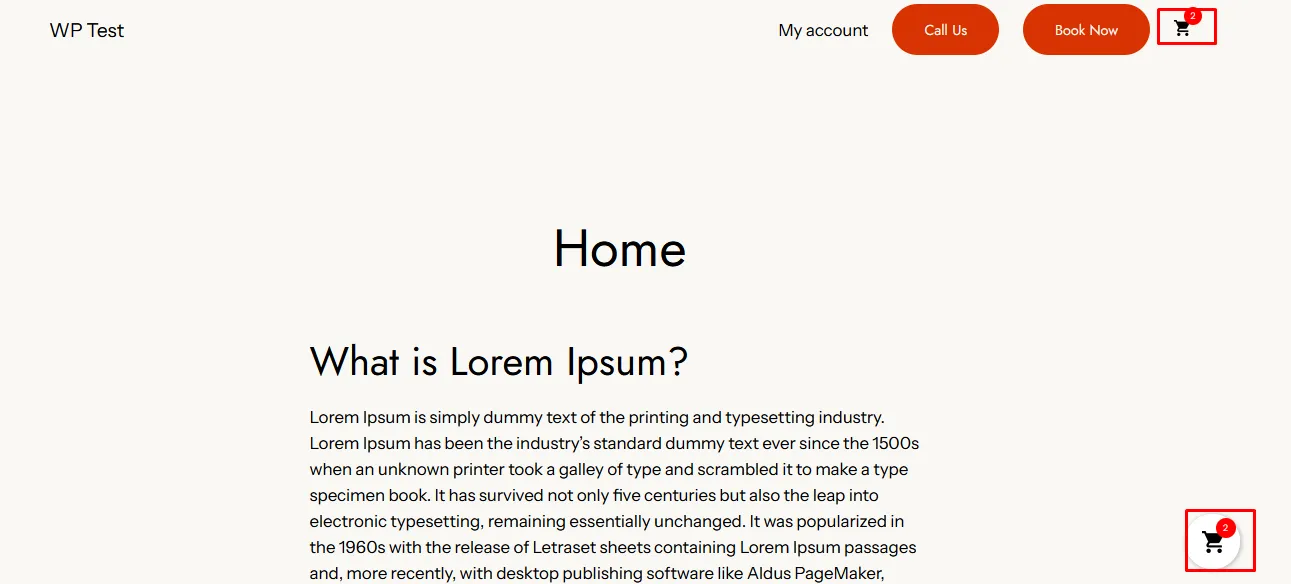
Once you enable the floating mini cart, it will appear in the position you chose on your product pages. It can be displayed on the bottom right, bottom left, top left, or top right.
That’s it.
How to Add the Mini Cart on Other Pages and Posts Manually
You can also manually add the mini cart to pages or posts on your WooCommerce store easily. If your WooCommerce pages and posts are running on the block customization theme, adding the WPMozo mini cart is easy.
Here is how you can add the WooCommerce Mini Cart to your posts and page.
Step 1: Click on Add a New Post or Add New Page
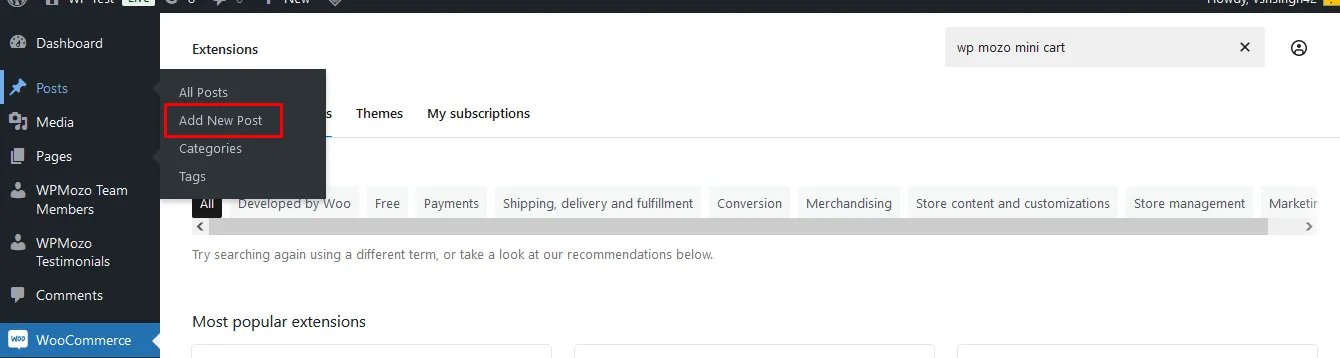
Login to the WooCommerce WordPress dashboard. Click on a post or page and add a new page/post. Click on the block element (+ icon) on the top left corner of your page or posts. The search element will appear that will allow you to find the Floating mini cart.
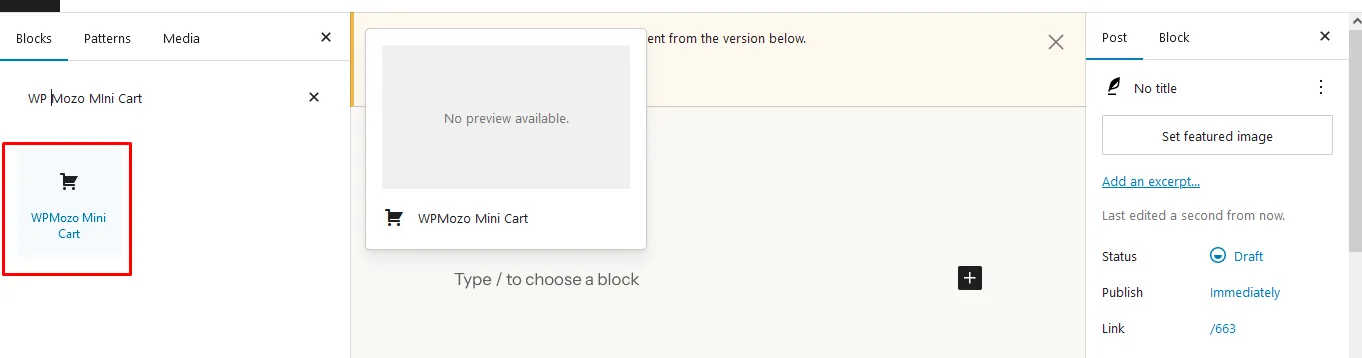
Step 2: Search and Add the Floating Mini Cart to Your Page or Post
Search for the WPMozo mini cart block and add it to the page by clicking on it. The cart will be added to your page or post.
Step 3: Repeat the Process
Repeat the process for all the other posts and pages you want to add to the cart. The icon will always appear on the pages and posts you choose.

How to Add the WPMozo Mini Cart to the Menu Through the Site Editor (Block Theme)
It is also possible to add the WPMozo Mini Cart to the menu through the site editor option if you are using the block theme.
Step 1: Access the WordPress Dashboard
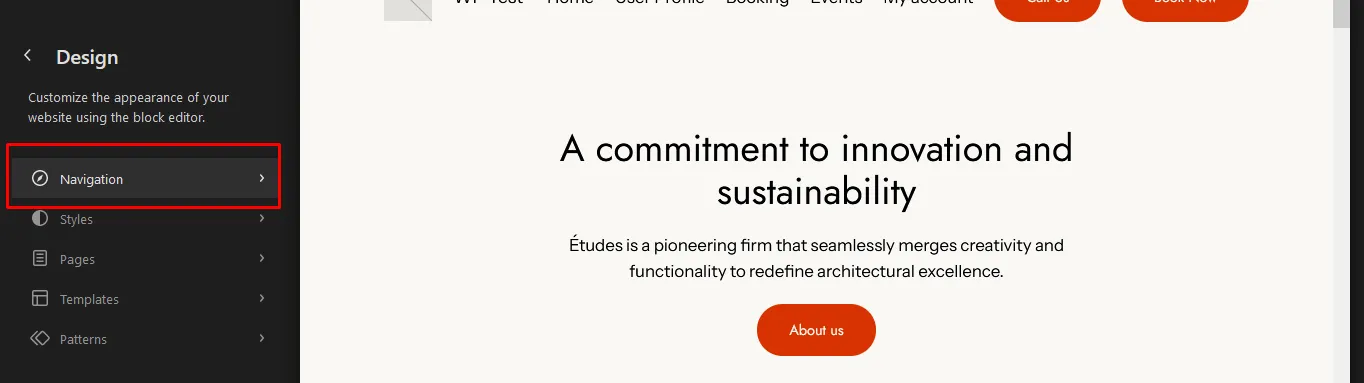
Access the WordPress dashboard and on the left menu bar, click on Appearance > Site editor.
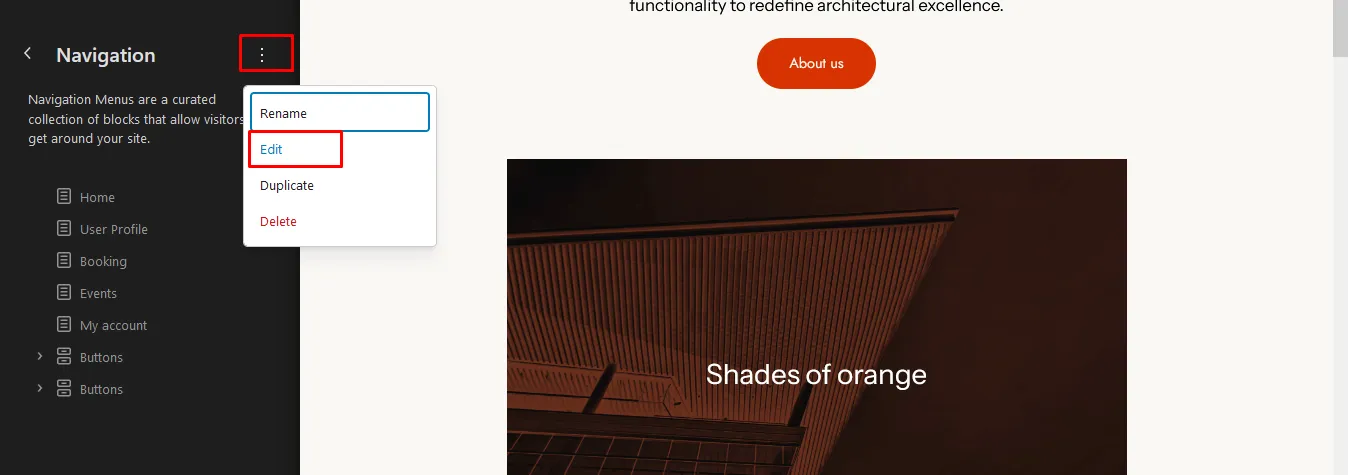
Step 2: Select the Navigation Option
Proceed to click on the three dots beside the navigation option to edit the menu. On the drop-down menu, click “edit”
Step 3: Choose Where to Place the Cart
On the menu, click on the block element icon and search for the WPMozo mini cart. Once you find it, click it, and it will be added to the chosen position on the menu section.
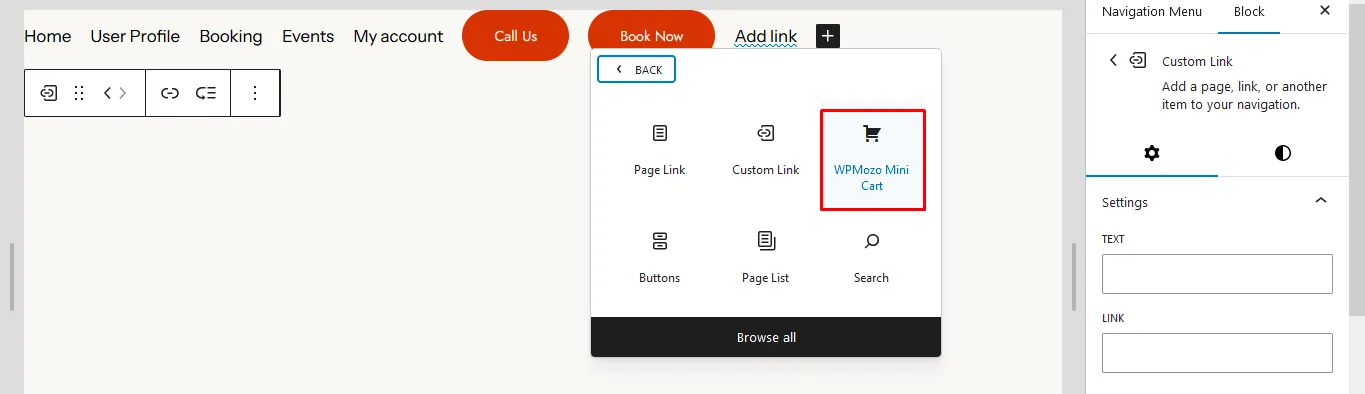
You will have the cart in the menu section and the floating cart at your chosen position.
As easy as that!
How to Add the WPMozo Mini Cart on the Menu (Classic Theme)
If you are using the classic theme, you can easily add the cart to your desired position.
Step 1: Access the WordPress WooCommerce Dashboard
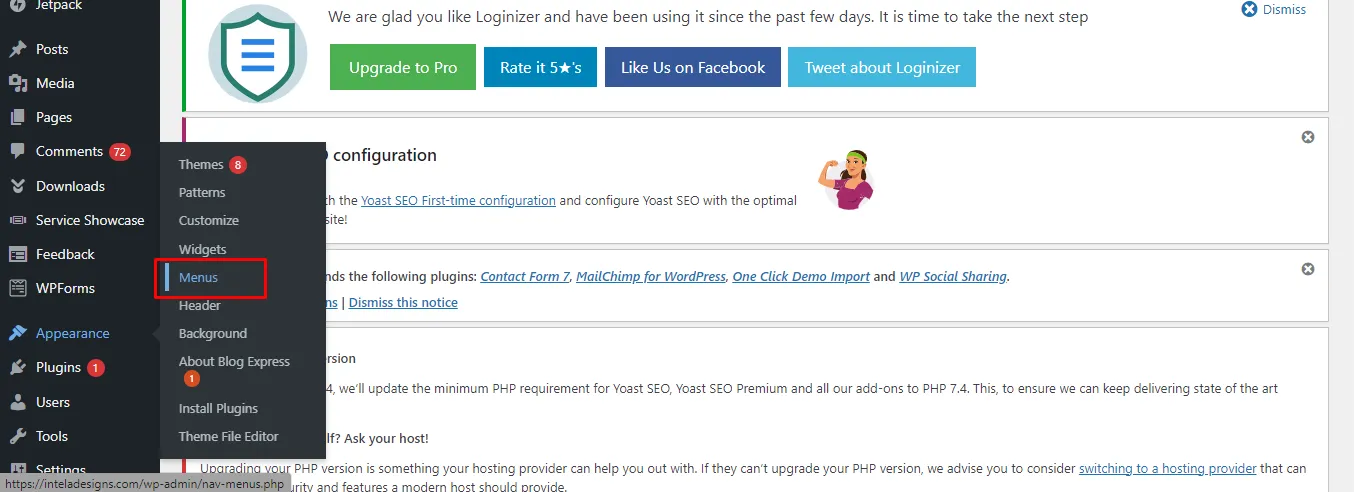
First, you need to access the WordPress WooCommerce dashboard. On the left side menu, click on Appearance → Menus
Step 2: Create or Edit the menu
You can either edit your existing menu or create a new menu. On the left side menu bar, you will see the option WPMozo Mini Cart, drag or click the “add to menu” button to add the WPMozo mini cart to the menu.
That’s it.
Features of the WPMozo Mini Cart WooCommerce Plugin
These are some of the features of the WPMozo Mini cart WooCommerce plugin that will amaze you:
1. Wide Variety of WooCommerce Mini Cart Customization Options
The WPMozo Mini Cart WooCommerce plugin has a wide variety of customization options that make it easy to check the cart items, remove products, access checkout, check subtotal, etc. The customer’s journey is well streamlined.
2. Floating Cart WooCommerce Option
In addition to the mini cart, it is also easy to display a floating cart icon in any part of the website to make it easy for customers to find the details they need. Thereby, you can modify the floating cart WooCommerce style as you wish.
3. Variety of Cart Icons
It offers a wide variety of 7 cart icons that you can use for mini carts. It is also possible to have different icons for the mini cart and the floating mini cart on your WooCommerce site, they don’t have to be the same.
4. Multiple Cart Content Display Types
You can configure the cart to show the content in different ways, such as a drop-down with the details, an overlay, a side cart that slides in with the details, or a cart modal popup. You also have the freedom to hide certain content or some product information.
5. Add Custom Text as Desired
In the WooCommerce mini cart customization options, it is possible to use custom text for the subtotal text, cart, and checkout links texts. Therefore, you can personalize the content to give the customers a unique experience.
6. Open Cart Details
It is also possible to modify the settings in a way that whenever a customer adds an item to the cart, it is automatically displayed for them to see the progress. You can either do it using Ajax or normal add-to-cart functionality.
FAQs – Frequently Asked Questions
1. What should you look for when choosing a WooCommerce floating cart plugin?
You should ensure it allows you to customize the cart according to your preference, allow the application of styles, allow icon modification, and other customization options.
2. What are the floating mini cart benefits?
It makes it easy to see added products, simplifies the checkout process, allows easy tracking of added products, allows easy checking of the subtotal, ease in making payments, and ease in accessibility.
3. How can you disable the WPMozo Mini Cart for WooCommerce feature?
It is easy to disable the Mini Cart WooCommerce by WPMozo. Access the WordPress dashboard, selecting the WPMozo Mini Cart option on the left side menu bar, and on the mini cart options tab, toggle off the option to disable it.
Conclusion
A WooCommerce floating mini cart ensures that a customer can easily see their subtotal, remove unwanted items, check added items, and other information in real time.
The WPMozo floating mini cart WooCommerce plugin stands out for its exemplary features, affordability, efficiency, wide customization options, ease of adding custom text, ability to open cart details and enable the floating cart option. If you have a WooCommerce store in which users buy multiple items, then using this floating cart WooCommerce plugin will work magic.


0 Comments