
E-learning is an effective medium to present educational content and you can leverage its power to provide educational content interactively. It is anticipated that by 2029, there will be 1.0 billion users in the online learning platforms market. If your website provides e-learning, these numbers might excite you and with the Elementor Flipbox, you can make studying enjoyable. The Elementor Flipbox allows e-learning developers to create visually appealing elements and present educational content engagingly. The Elementor Flipbox elements help students get a better understanding by presenting the information in an effective and fun style. It also becomes easier for students to retain the information when it is delivered using Elementor Flipbox.
This blog post will help you develop a clear understanding of Elementor Flipbox, its benefits, the step-by-step process to create it, and its practical applications.
Let’s see how Flipbox can improve e-learning experience on your website!
Why Use Elementor Flipbox in E-learning?
Elementor Flipbox is a versatile tool that helps users build interactive elements that ‘flip’ with a hover to reveal information on the other side. This interactive process creates engagement and interest in students for the educational content.
Elementor Flipbox is loaded with many useful features to enhance user experience. These features also make it a perfect tool for E-learning purposes.
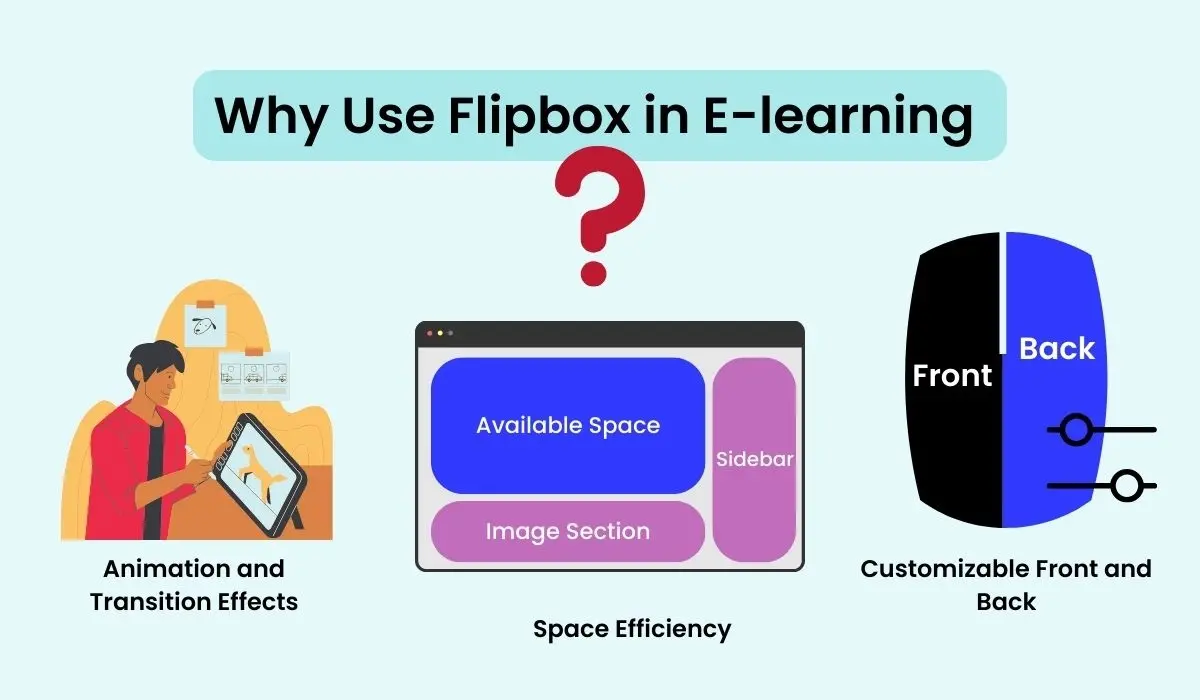
Customizable Front and Back: Understanding Elementor FlipboxBoth sides of the Flipbox are customizable to use separate content and Styling.
Animations Effects: These capture the visual interest of students and make the transition more smooth.
Space Efficiency: Flipbox can display much information in a compact space. This allows educators to present their content engagingly in a confined space.
Let’s explore how these key features make it ideal for online learning.
- All the static content turns interactive and the flipping action instantly captures student’s attention.
- The learning process becomes more enjoyable than before.
- Educators can organize and present summaries, key points, and detailed explanations interactively in a compact style.
- Flipbox helps you implement active learning strategies such as digital flashcards question-answers, concepts, and detailed lesson summaries.
- Elementor Flipoxes have responsive designs that make it excellent to perform seamlessly on devices of different screen sizes.
- Learners can focus on one piece of information at a time, preventing information overloading.
Practical Applications of Flipbox in E-Learning
Elementor Flipbox can be used in many ways in E-learning. It depends on your creativity, and how you implement it to fulfill a purpose in El-earning. We are discussing some practical applications of Flipbox that can be used on your E-learning website to make it interactive for learners.
Quizzes and Flashcards
Make learning more engaging on your educational website by displaying quizzes and flashcards. The front side of the Flipbox will display a term or question while the back side will unveil the definition or answer. The whole process is visually enjoyable and generates learning interest in users. You can cover a wide range of subjects with these flashcards, like English vocabulary, historical facts, and mathematical problems.
Lesson Summaries
When it comes to summarizing information or lessons in key points, Flipboxes are a smart option. Educators can display byte-size information to summarize a lesson or concept that is easy to understand for users. The lesson or topic can be showcased on the front side while the back side will reveal the summary or key information. This is the best approach to provide a quick overview of any lesson or topic to the learners.
Course Modules
Flipboxes can also be used to provide the course overview to the users on an e-learning website. Course details can be extensive or long enough to be displayed and visitors find it annoying to read. The course or module name is placed on the front side and its details are presented on the back side. This whole process is more interactive than a static text section making it interesting for the users to explore.
Interactive Timelines
Flipboxes can also display historical events, discoveries, and facts in chronological sequence. The front side will display a date with the event title and the other side will provide details, descriptions, or facts. This will help students to learn and memorize the events with their dates in chronological order.
Problem-Solving Exercises
When we talk about displaying problem-solving exercises, Flipbox emerges as a magical tool. Whether mathematics, programming, or reasoning, Flipbox presents it interestingly to the students. This encourages students to attempt the problem before checking the solution on the back side.

After getting a quick idea of all these practical applications of Elementor Flipbox in E-learning, let’s learn how to create them.
Step-by-Step Quick Guide to Creating Flipboxes for E-Learning
We have segmented the steps into four important phases. This provides a clear and simplified way of avoiding certain confusion while creating it. Let’s go through the step-by-step creative process to build a Flipbox that matches the needs of your E-learning website.
Preparation
It is essential to lay the groundwork for creating effective Flipboxes before starting the design process. This ensures a smooth and organized workflow while creation.
1. Define Your Objectives
Plan your Flipbox to suit your needs. First of all, you identify what educational content you want to display. It can be quizzes, lesson summaries, flashcards, interactive definitions, etc.
2. Plan a Layout
Create a rough sketch of the Flipbox layout and decide the number of Flipboxes and their arrangement. This completely depends on what content you want to showcase on the Flipbox.
3. Gather Content
Generate text content and images that will appear on the front and back sides of the Flipbox. Always try to create text content in a byte sized format to maintain clarified learning approach.
4. Install Flipbox Widget
You need to select a Flipbox Widget in Elementor to start things off. We are using the WPMozo Flipbox Module to demonstrate the creation of an E-learning Flipbox. You need to install WPMozo Addons for Elementor plugin to use this module on your E-learning website.
Structure Design and Animation
Structure refers to the container where the Flipbox will be placed on your website and animations are the soul of any Flipbox. Let’s see how to organize and present it on an E-learning website.
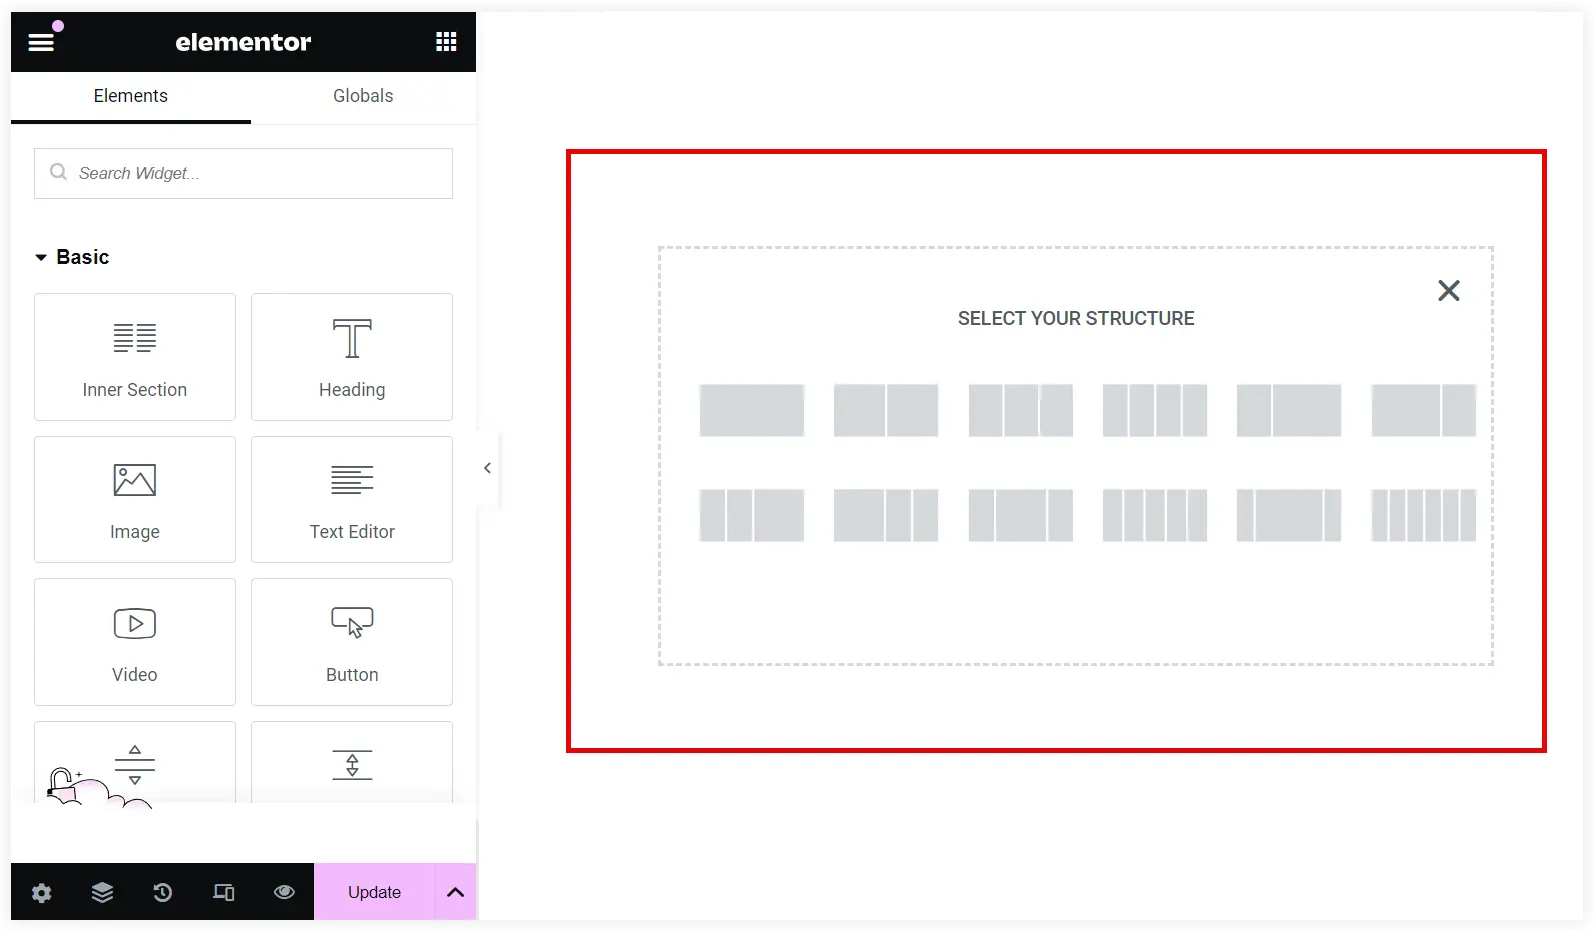
1. Go to the Elementor dashboard and add a suitable section that suits the planned structure of your Flipbox. Depending on the number of Flipboxes you wish to display and the aesthetic preferences for each Flipbox, you can select an appropriate layout.
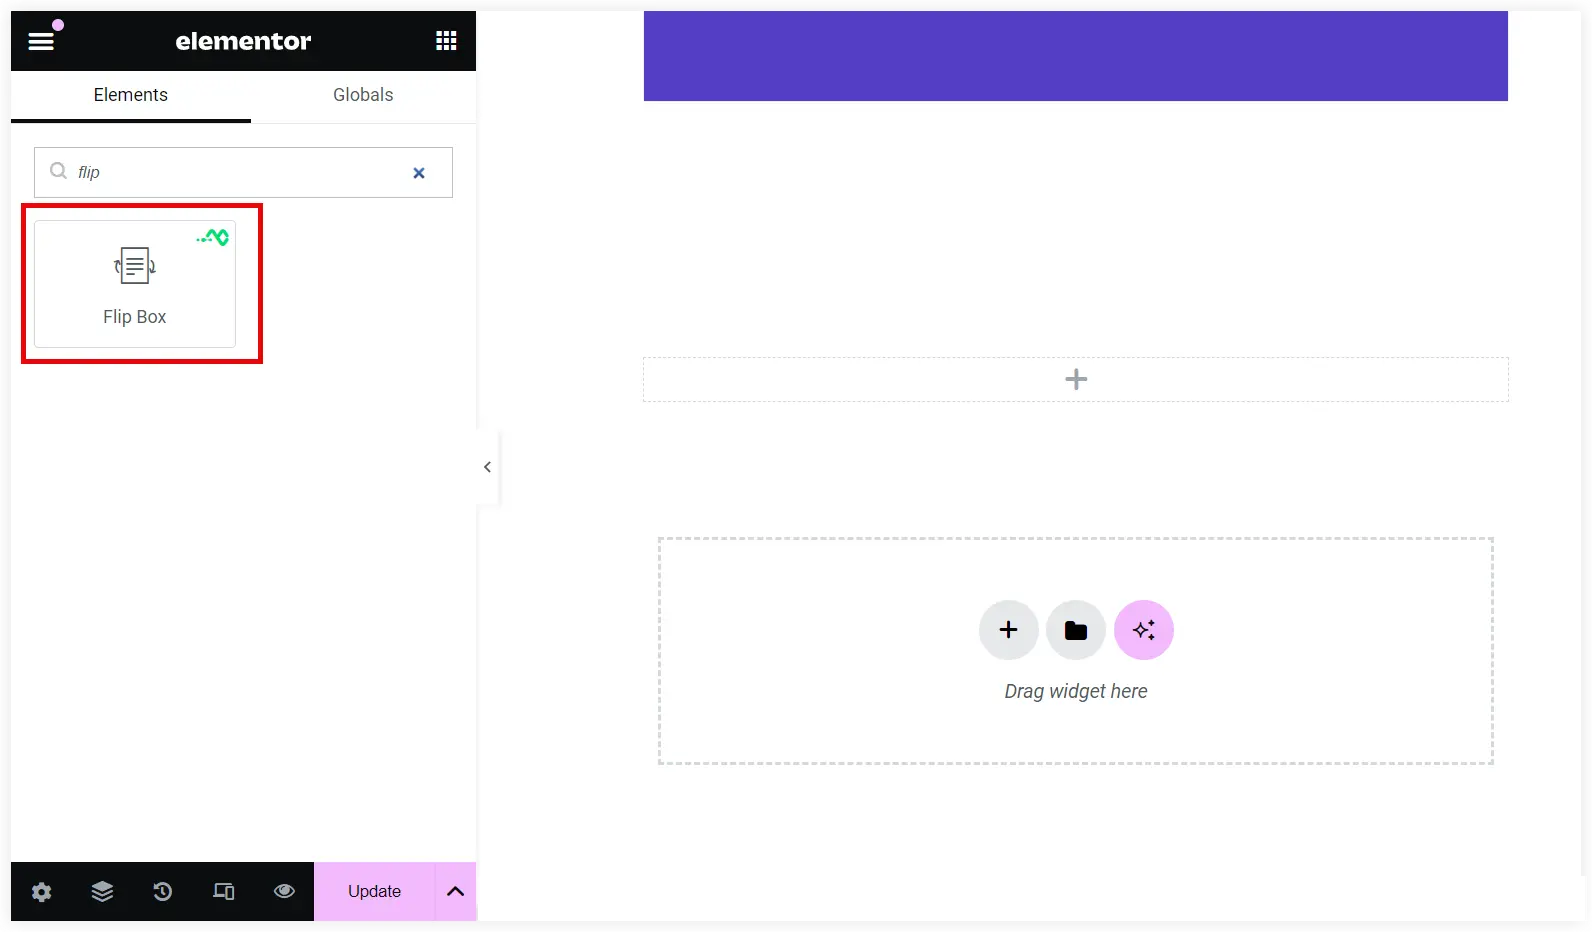
2. Search for the WPMozo Flipbox Widget and insert it in that section.
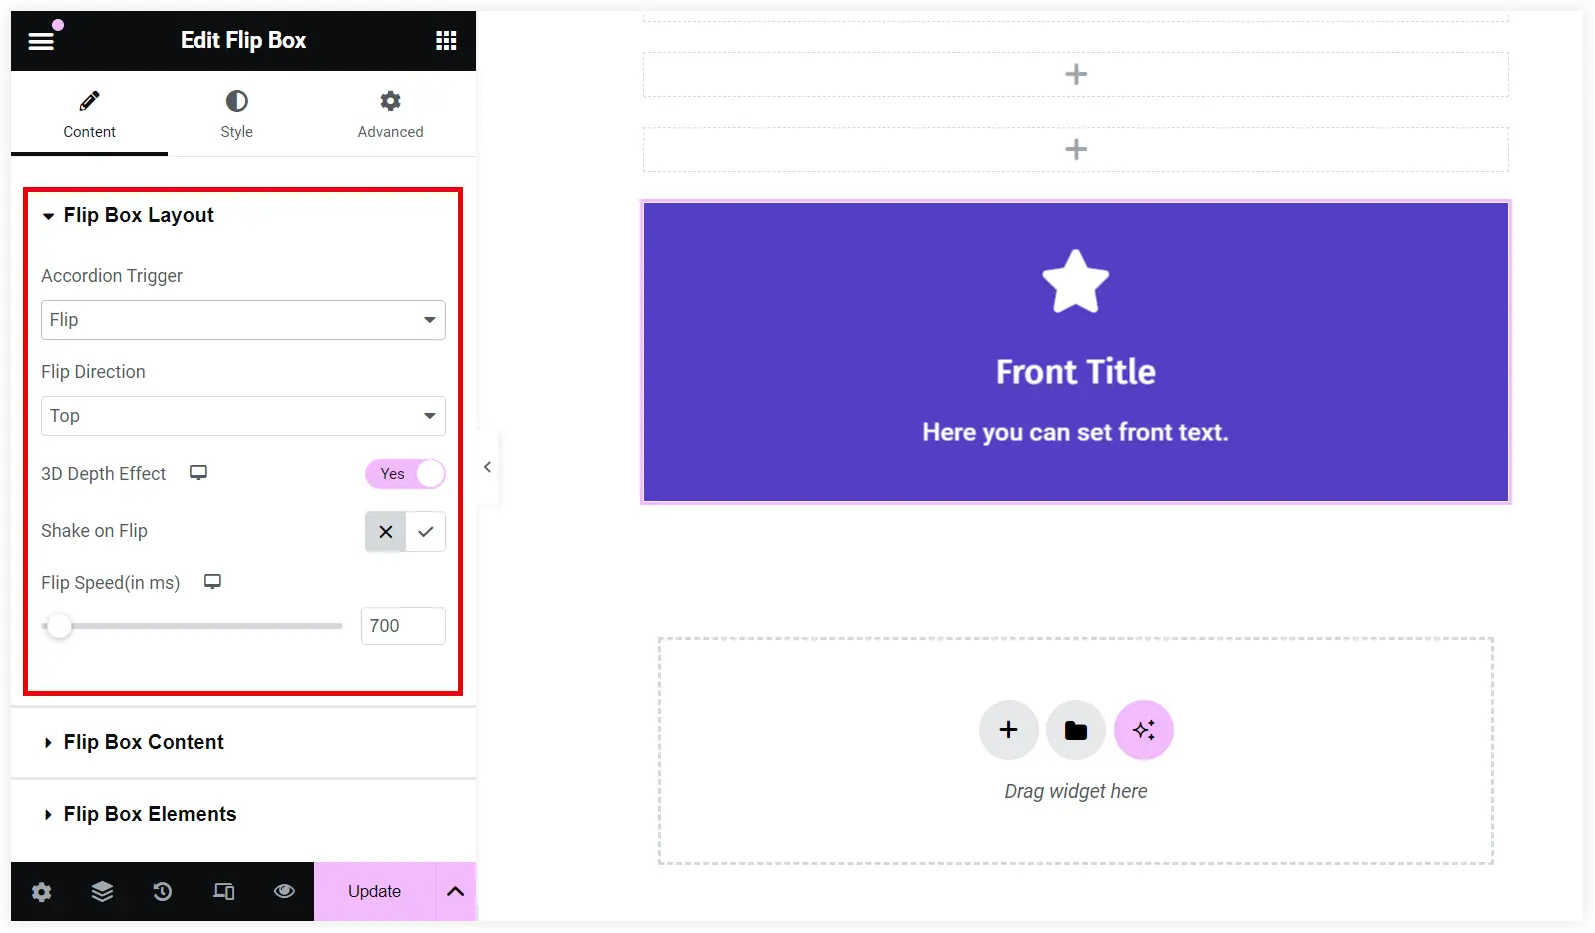
3. Choose the flip animation and direction. You can also use advanced animation effects such as 3D Depth, and Shake on Flip to enhance the presentation. The selected animations must be intuitive and should not distract learner’s focus from the content.
Adding Content
Let’s begin adding content to it after the structure and animation are finalized.
1. Select the Flipbox Content and add a suitable title for both the front and back sides. In the content field, you can insert content in the form of paragraphs, bulleted lists, and Headings.
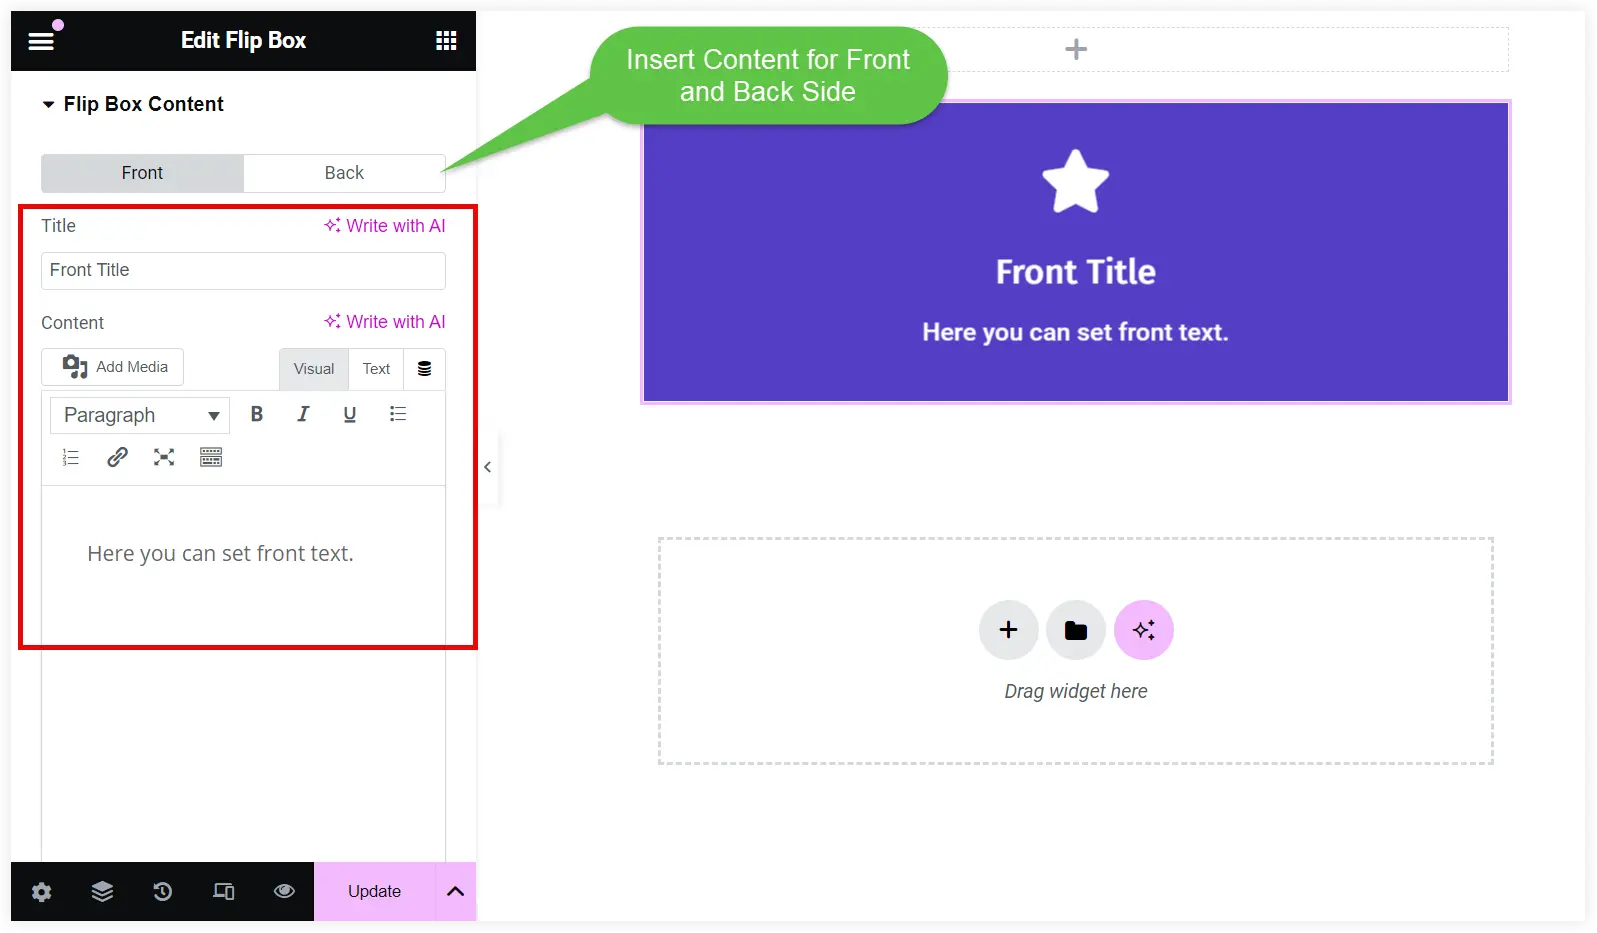
2. Next, you can find and replace icons from the Icon library to match the purpose and look relevant in context. There is also an option to use an SVG image if you don’t find any icon that resembles the context of your Flipbox.
Click Flip Box Elements. Select Icon or Image. You can use icons or images for both the front and back sides individually.
Customize Style
Let’s start customizing the Flipbox according to our creativity after adding content. Keep focus on making its look subtle and understandable rather than fancy.
1. Navigate to the Style section of the module. Global Styling lets you configure the typography and color of the title and content. These settings will be applied to the front and back sides of the Flipbox.
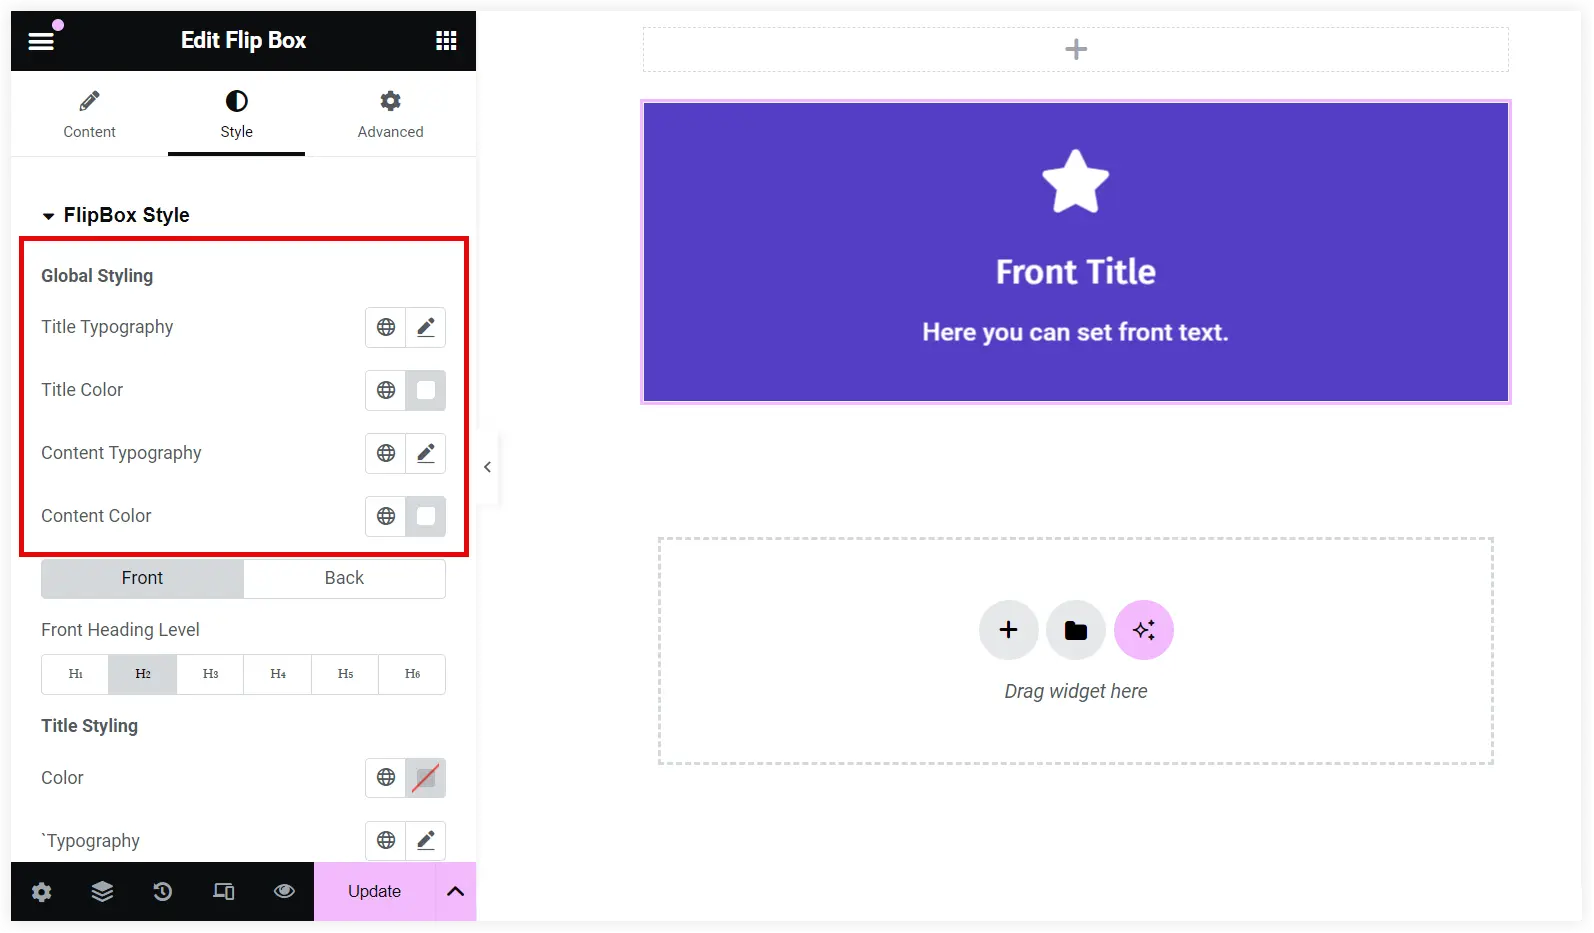
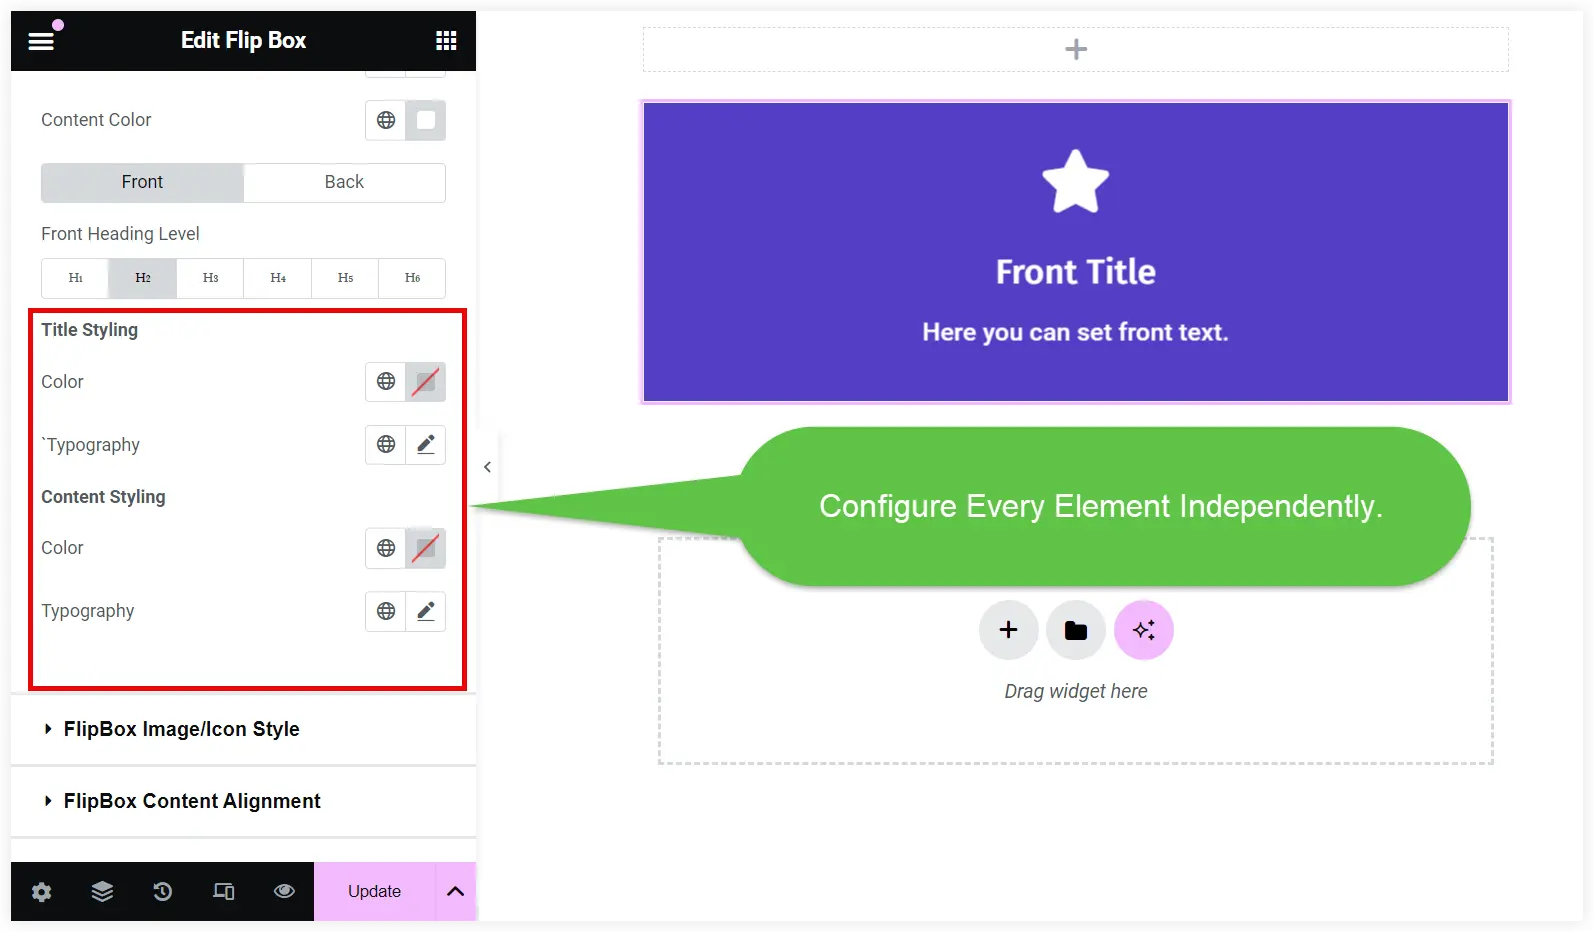
2. If you want to include more creativity in your Flipbox, we recommend avoiding Global Styling and configuring the Title and Content Styling of the front and back sides independently. This would encourage more creativity in the design of Flipbox.
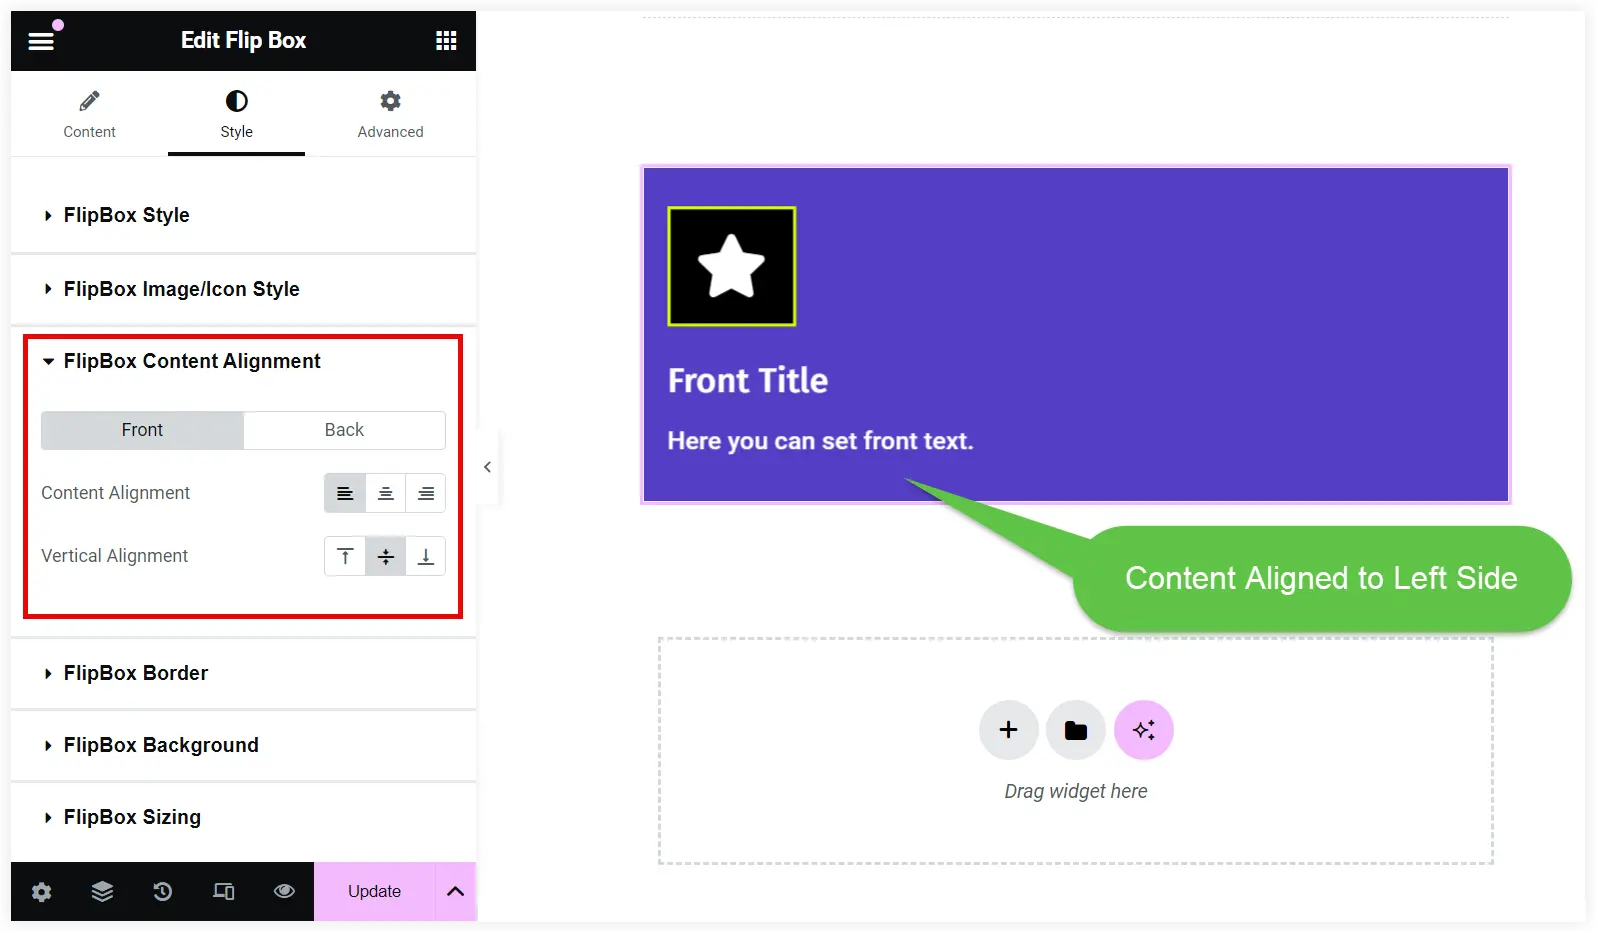
3. Next comes the Flipbox Icon/Image Style. These options enable you to customize the Icon design. It includes a wide range of options to change its color, placement, shape, background color, etc. Enable the Style switch to activate the Shape, Shape Background Color, and Display Shape Border options.
4. The Elementor Flipbox widget also provides a smart option to align your content horizontally and vertically according to your requirements.
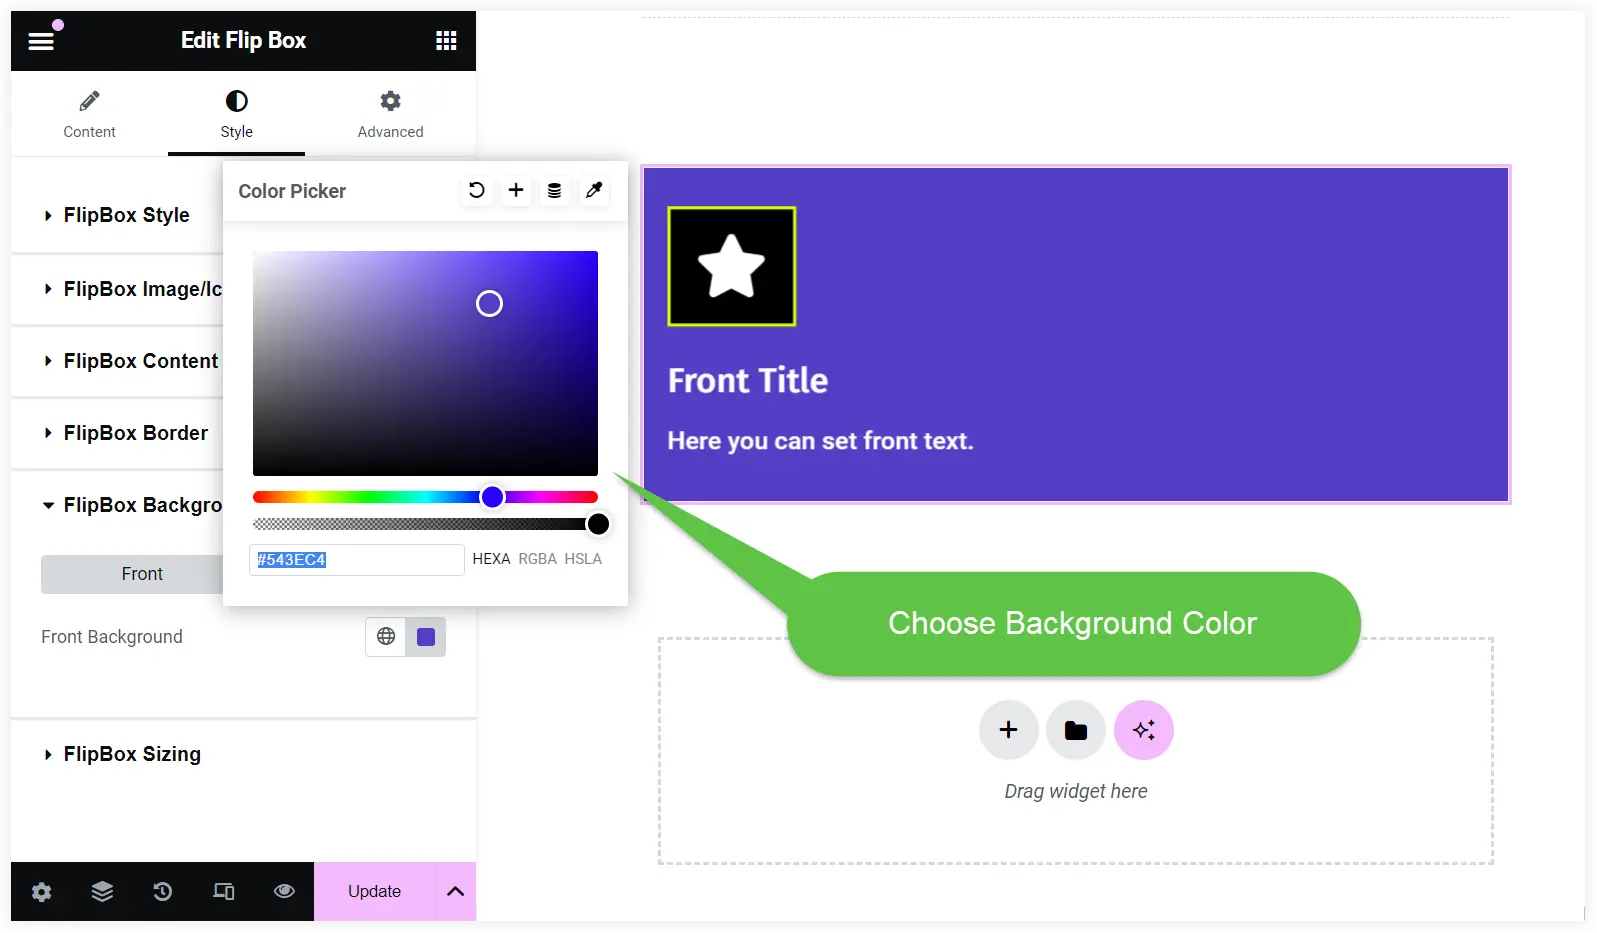
5. The background color is crucial to decide the overall appearance of Flipbox and engage visitors. You can choose a perfect color for the front and the back side that compliments Flipbox’s design and enhances its visual appeal.
That’s done. You can easily craft a personalized Elementor Flipbox section for your E-learning website by following this easy guide. All the steps assist you and open up possibilities to unlock your creativity.
Final Takeaway
Finally, we can conclude that the teaching and learning experience on an E-learning website can be enhanced using creative Flipboxes. The Flipboxes can depict, explain, elaborate, and display different types of educational content. You can plan its application based on your requirements and follow the above tutorial to create an eye-catching Flipbox and provide a fun learning experience.


0 Comments