WooCommerce is an incredible platform for running an e-commerce store. However, for your online store to grow, you need to create a good rapport with your customers. This can be achieved through sending promotional, successful, order tracking, payment, failed transactions, and product status emails to keep them updated and engaged.
The emails need to be elaborate to ensure your clients are happy and get as much information as possible through the emails.
Therefore, you can also opt to add social icons to WooCommerce emails to ensure they can also engage with your business/brand. Social media is growing greatly, and if you want to gain more customers or retain existing ones, then engaging with them on social media would work magic.
We will provide an overview of how to add social icons to WooCommerce emails easily, the importance of social icons on emails, and other information.
The Importance of Adding Social Icons to WooCommerce
There are certain advantages of adding social icons to WooCommerce:
1. Engage Your Customers
Adding social icons to WooCommerce is essential since it can help to engage with customers even beyond the sale. They will also get regular updates whenever you have new products or are planning to launch a new product.
Also, it will help build a strong relationship and loyal customer base. Customer engagement is key to the success of a business.
When your customers or email subscribers get links to your social media accounts, then it will increase brand visibility. They will also see how you engage in the social web and even gain more trust.
2. Increase Customer Acquisition
Through social media engagement, it will be easy to engage, retain, and gain new customers. Therefore, by putting the information in the email, people will easily want to follow the brand, and even lead to more customers.
3. Drive Sales to Your Website
When they engage through your socials, they will also get more information about your website and even blog. Therefore, they will always be updated about your brand and the products you offer timely. This will play a huge role in boosting sales through your WooCommerce site.
How Can You Add Social Icons to WooCommerce Emails?
You can use some plugins to add social icons to WooCommerce emails:
1. Use the Virface Email Customizer for WooCommerce
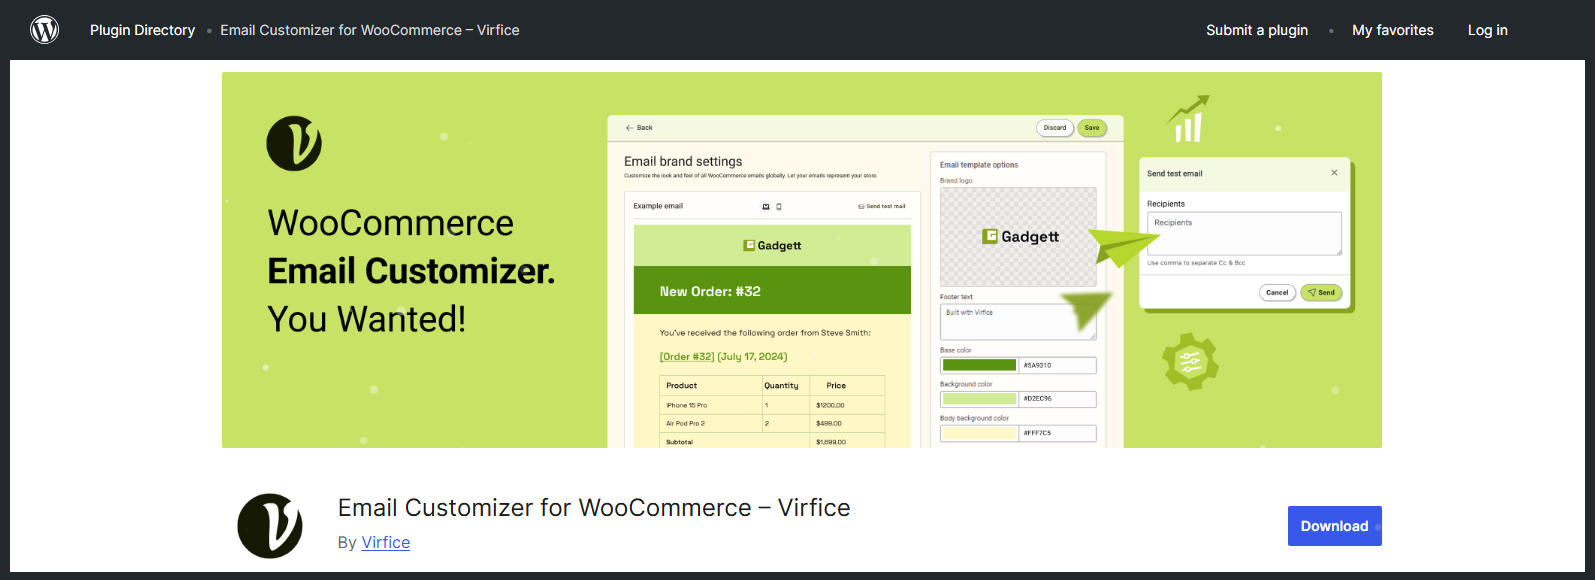
With this plugin, you can utilize the WooCommerce email customizer to modify the emails you send. It is an effective plugin you will enjoy using and can even help promote your brand perfectly. You don’t even need to edit from scratch, but you can use the available templates.
You can modify the template colour, edit the body text, add content, edit the footer, send test emails, and even see your store’s transactional emails. Through the plugin customization, you can add a logo to WooCommerce email templates, change the subject of the emails, add a sender email address, customize email templates, and much more.
You can also see new, canceled & failed order emails, orders on hold, orders processing, orders completed, orders refunded, customer note emails, passwords, and account emails through its dashboard.
How Can You Add Social Icons to WooCommerce Emails Using the Plugin?
It is not that complicated to use the plugin to add social icons to WooCommerce emails:
Step 1: Install The Plugin
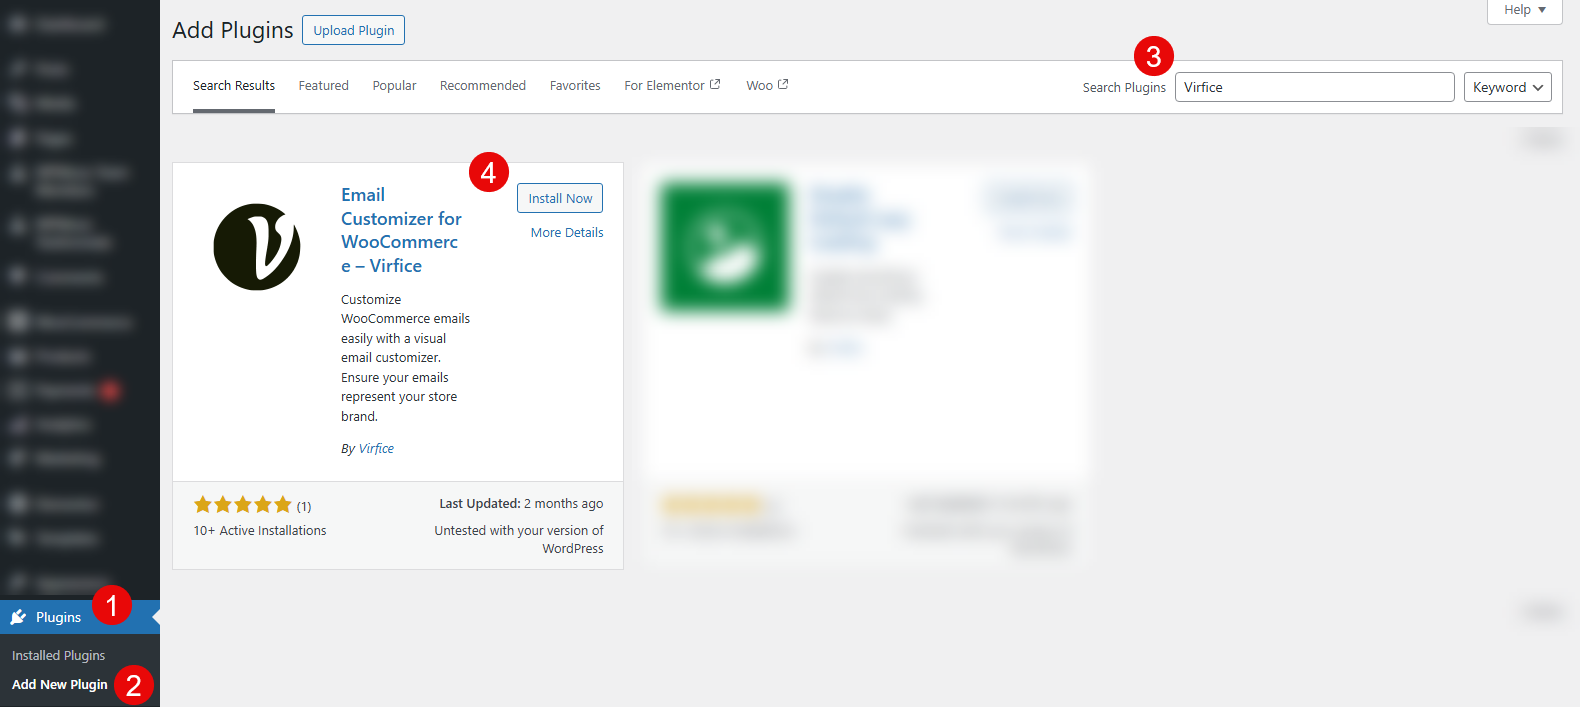
Login to your WordPress WooCommerce site, head to plugins, and search for the Virfice Email customizer for WooCommerce. Once you find it, click on install, then activate.
Step 2: Plugin Customization
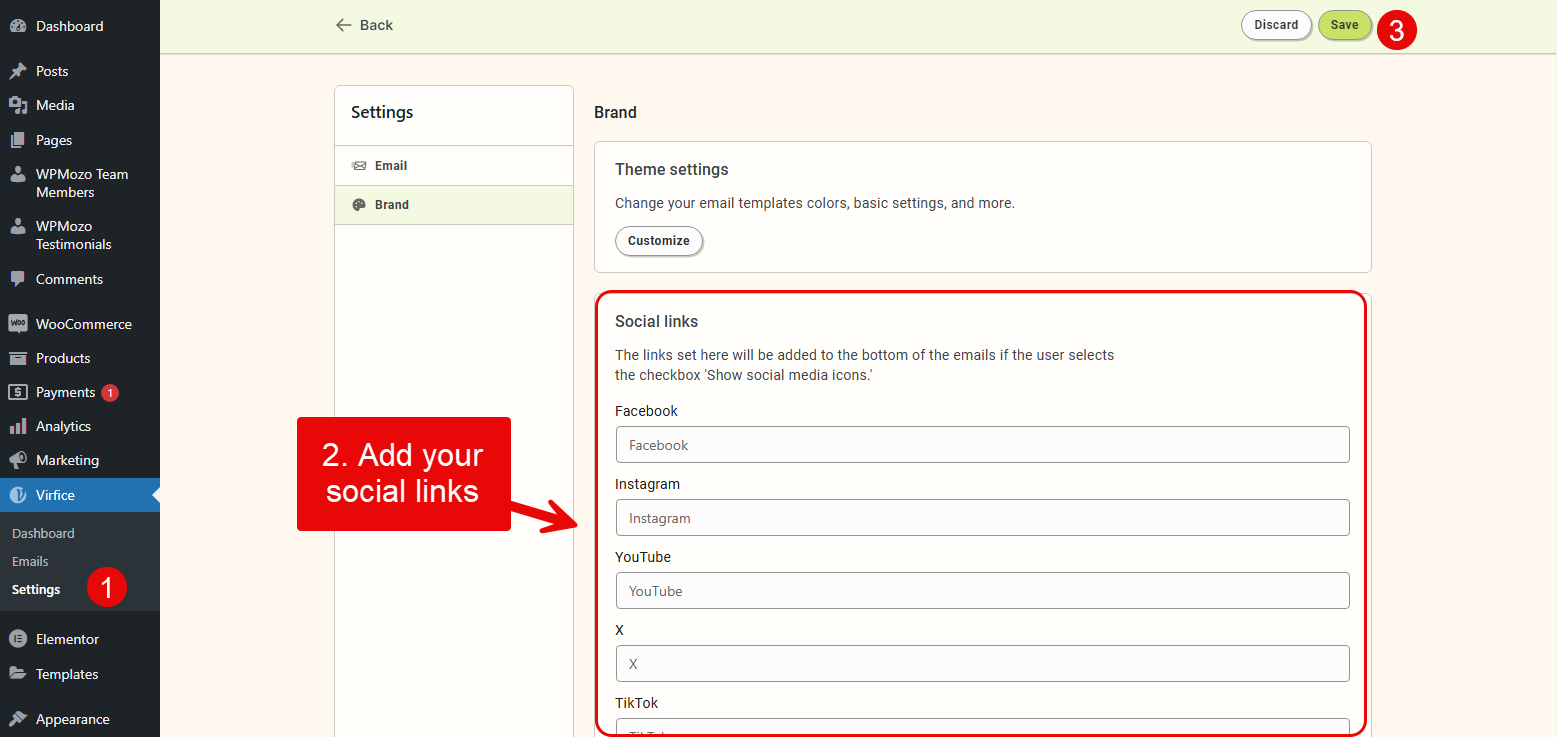
Once you have installed the plugin, it will appear on the left menu bar. Click on it and select “settings” on its menu. On that page, check the social icons and modify different social media links like Facebook, Instagram, YouTube, X, etc. Once done, remember to save the modifications.
Step 3: Enable Social Icons On Your WooCommerce Emails
Proceed to “enable social icons for your WooCommerce store emails”. Simply click Virfice on the left menu bar on your WordPress dashboard, click Settings, and on the brand option, click the “customize” option.
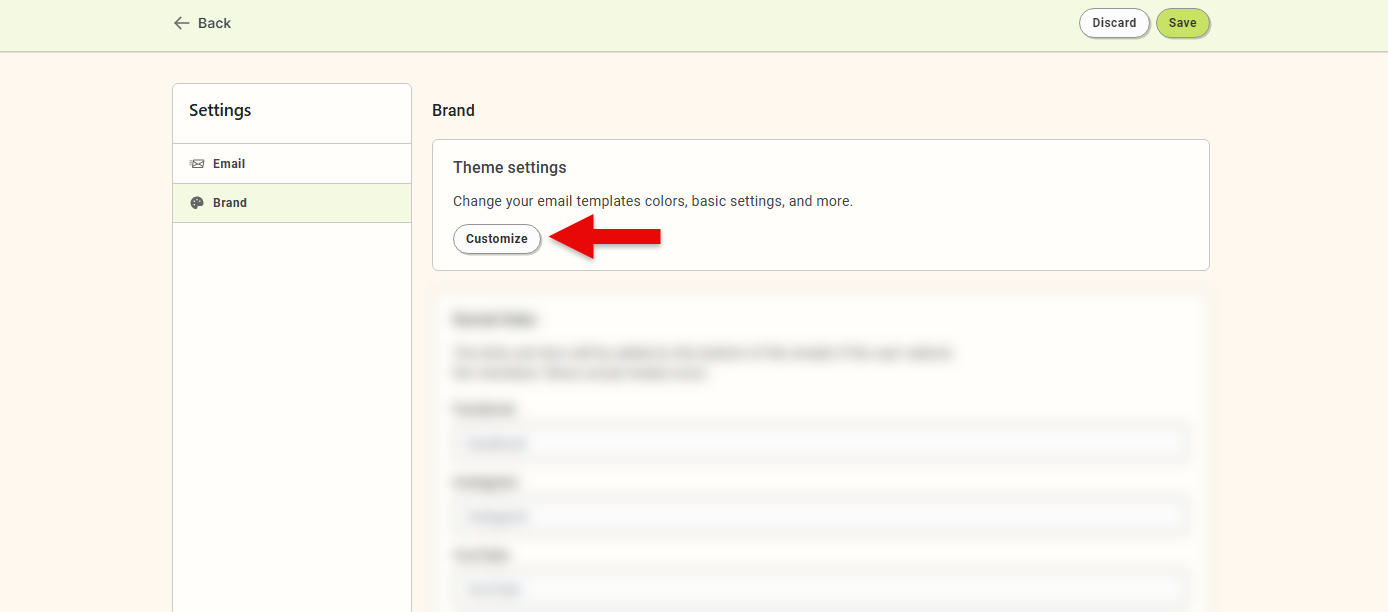
You will be taken to the next page, which will allow you to easily add social icons to WooCommerce emails. Remember to checkmark the option; “show social media icons” and choose the heading of the social media section. Save your changes.
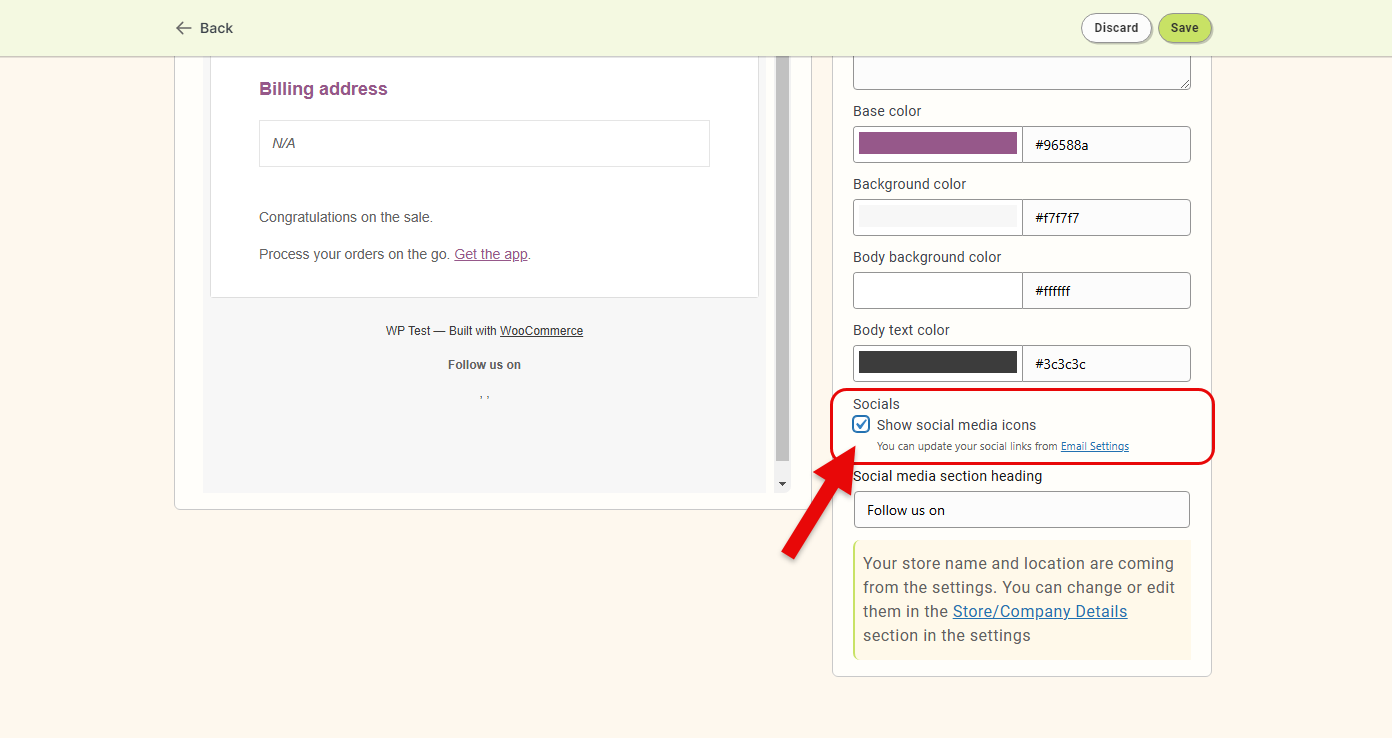
Step 4: Send A Testing Email
Once done, be sure to send a testing email to check whether your changes have been saved well. Also, check whether the links redirect to the right social media profiles.
2. Use the WP HTML Mail plugin
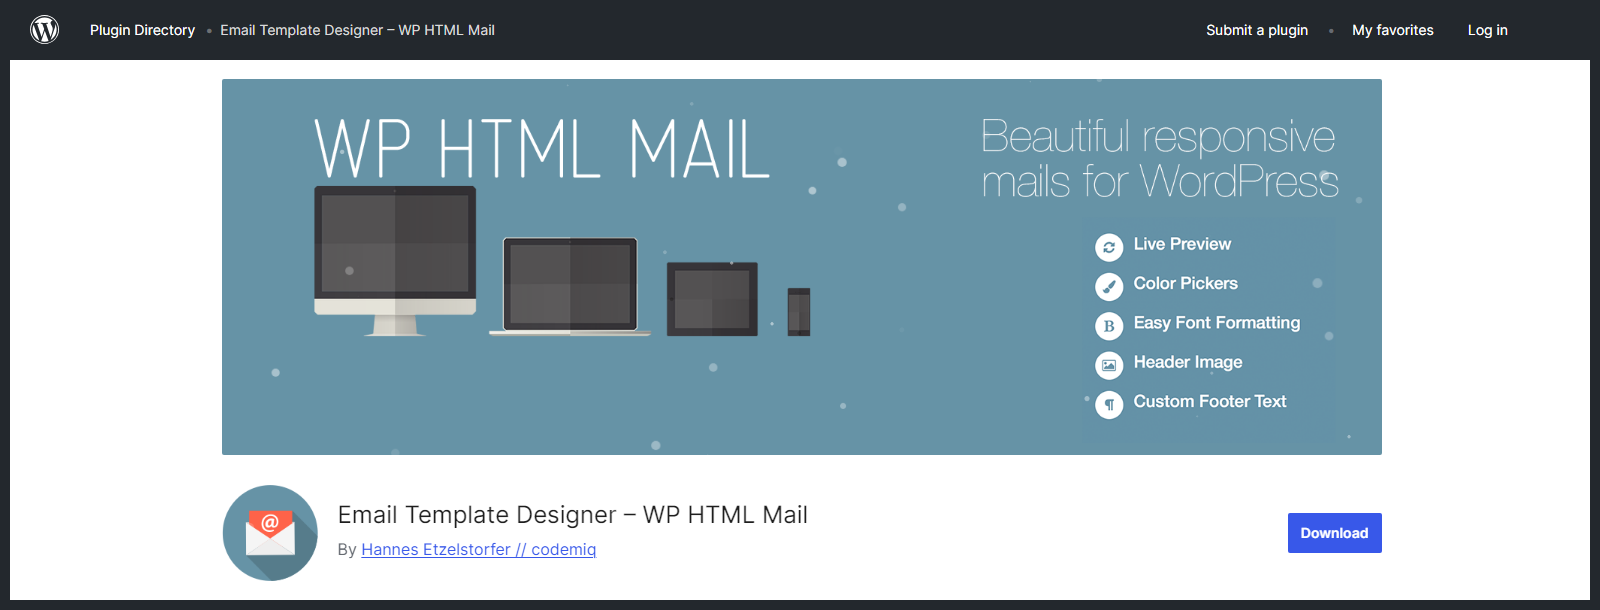
You can also use the WP HTML Mail plugin to add social icons to WooCommerce emails easily. Moreover, it makes it easy to design your professional email designs fast. The email templates are responsive and allow you to customize them based on how you want them. It comes with a free and pro version, with the pro version having more features than the free version.
How Can You Add Social Icons Using the WP HTML Mail Plugin?
It is not that complex to use the plugin:
Step 1: Install And Activate The Plugin
You can install and activate your WP HTML mail plugin straight from the WordPress dashboard. You can also download it independently and then upload the plugin through the dashboard.
Log in to your WordPress dashboard, click on the plugin option, add a new plugin, and search for the WP HTML Mail plugin.
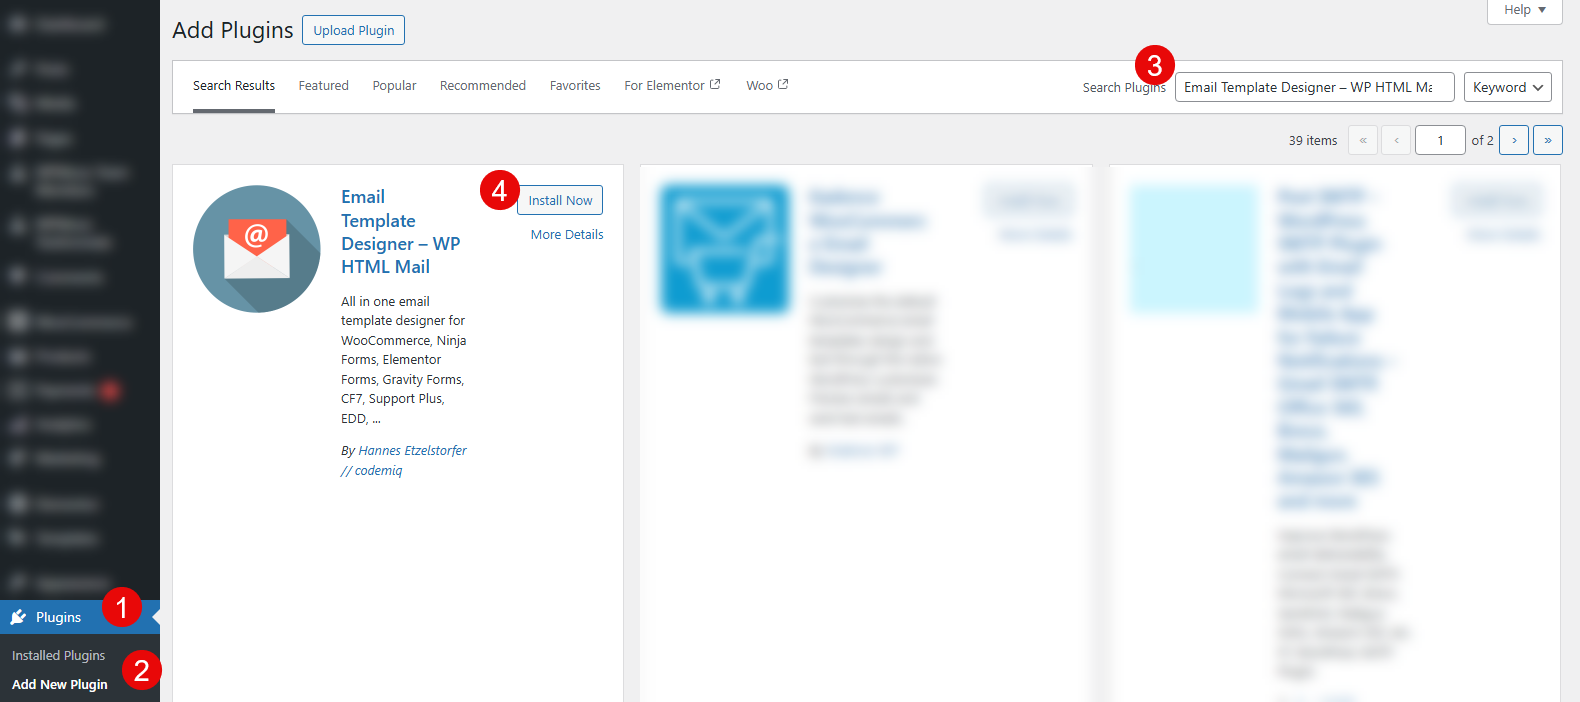
Click on the install option and then activate it for WooCommerce email customization.
Step 2: Modify the Settings.
Proceed to the plugins page, scroll till you find the plugin, and click “settings”. On that page, you can customize email templates that will work for your website.
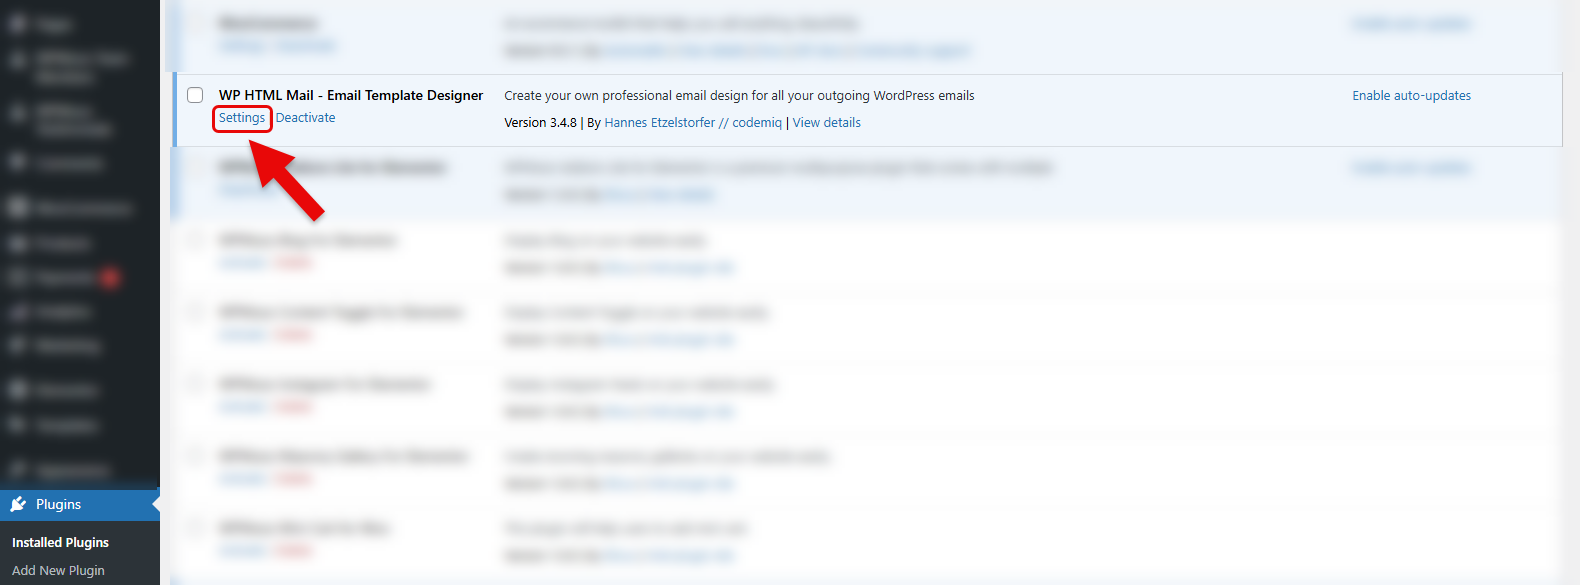
Step 3: Choose An Available Template
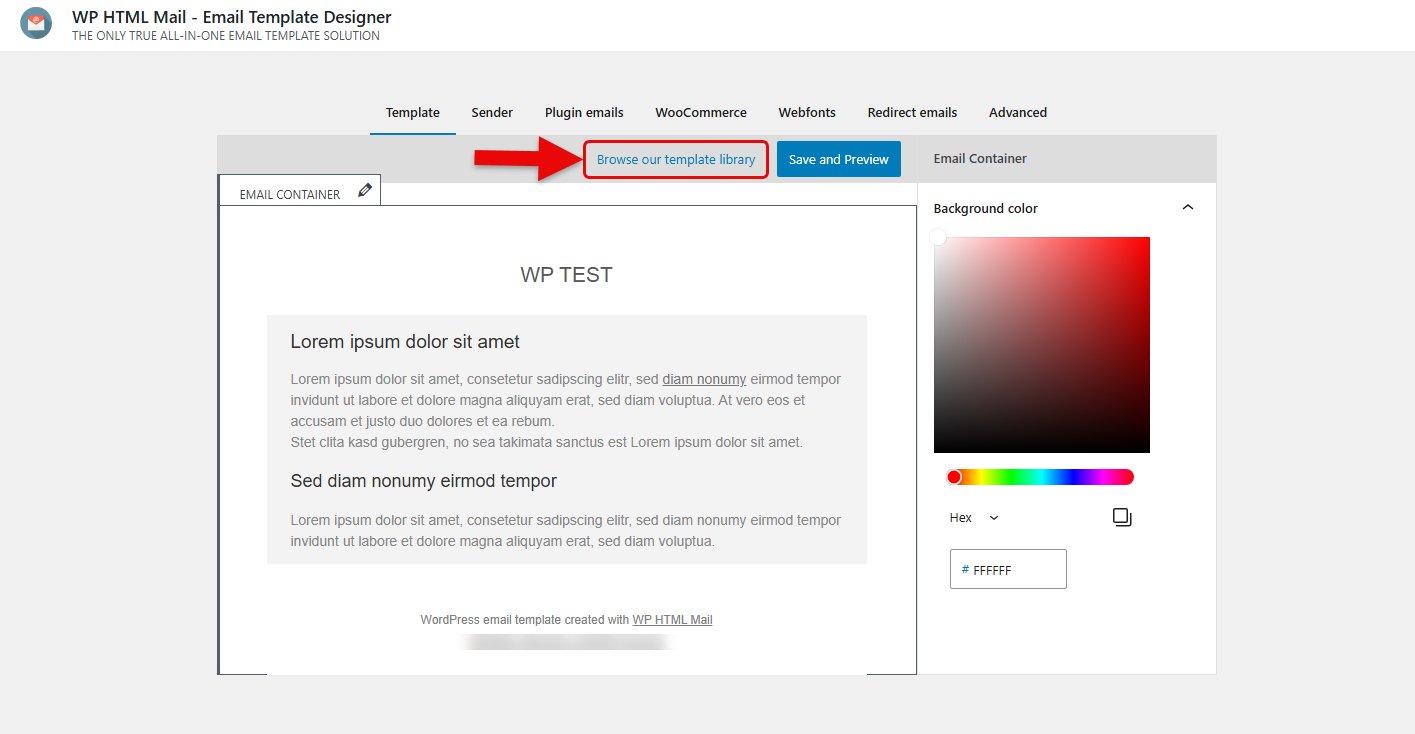
Click on browse our template library to see available templates that you can utilize for your emails. Check them out and choose the best.
Step 4: Modify WooCommerce Plugin Emails
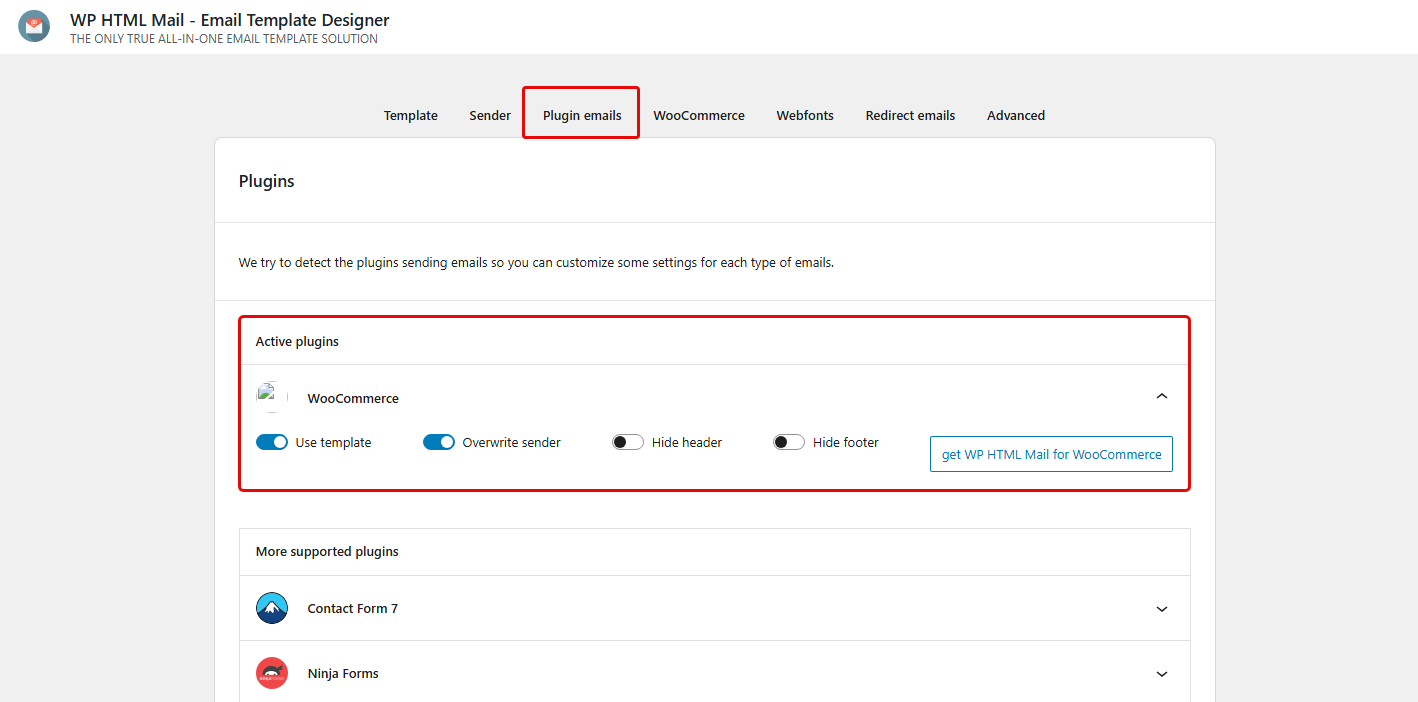
One great thing about this plugin is that it also allows you to easily modify WooCommerce plugin emails. Therefore, while on the settings page, click on the “plugins emails” option that allows you to scroll through the available plugins on your site and modify any emails you already have.
In our case, it is WooCommerce. Click on the specific email template, and an editor will open.
Step 5: WooCommerce Email Customization
On the left sidebar of the editor, you will see a list of blocks and elements to customize the email template. Search for the social icons block. Drag and drop the social icons at the place you want them to appear.
After adding the social icon block, modify the social media links like X, Instagram, Facebook, TikTok, etc. Remember to save your changes.
Step 6: Send a Test Email
Once done, send a test email to see how it looks. Therefore, click on the plugin’s “Sender’s” option on the main menu.
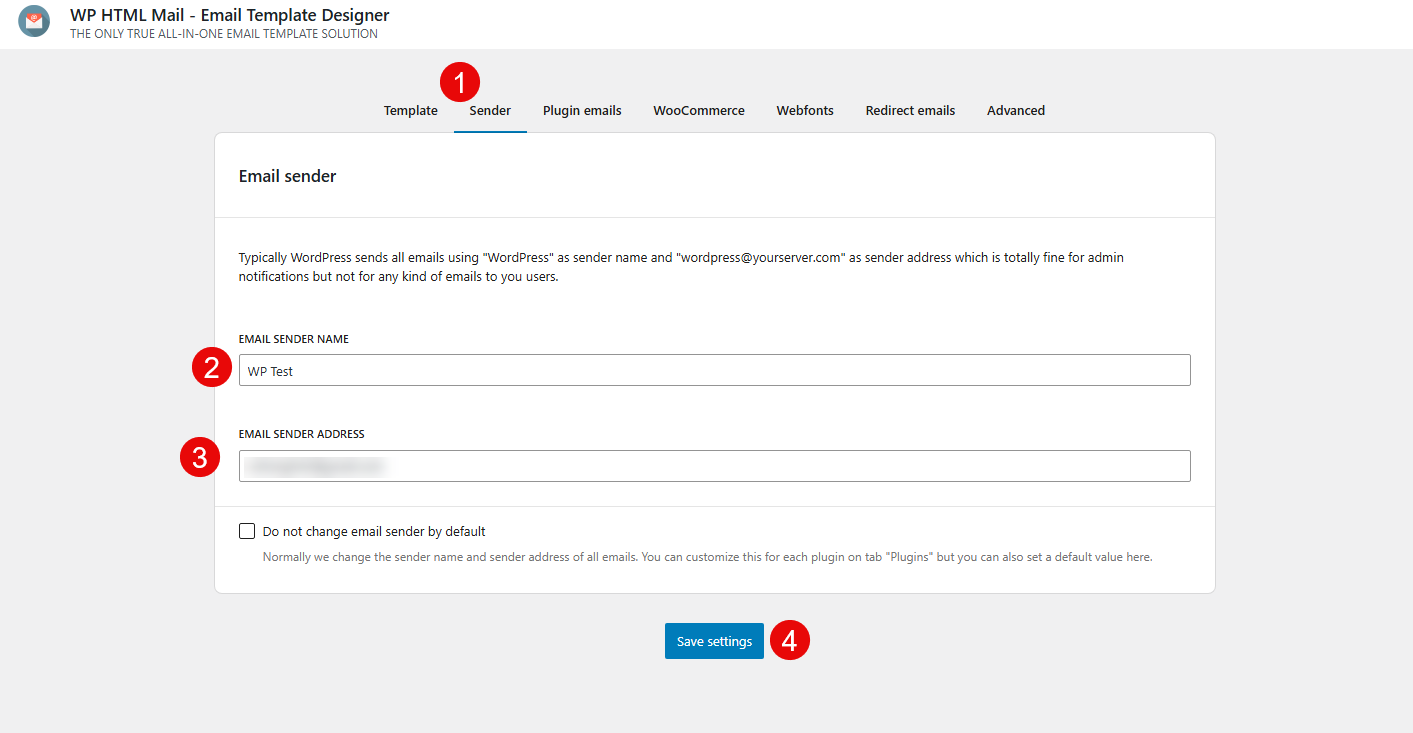
Scroll down, and you will see a preview of your email. Click on the test email option to see whether the email will come with the just-added social icons.
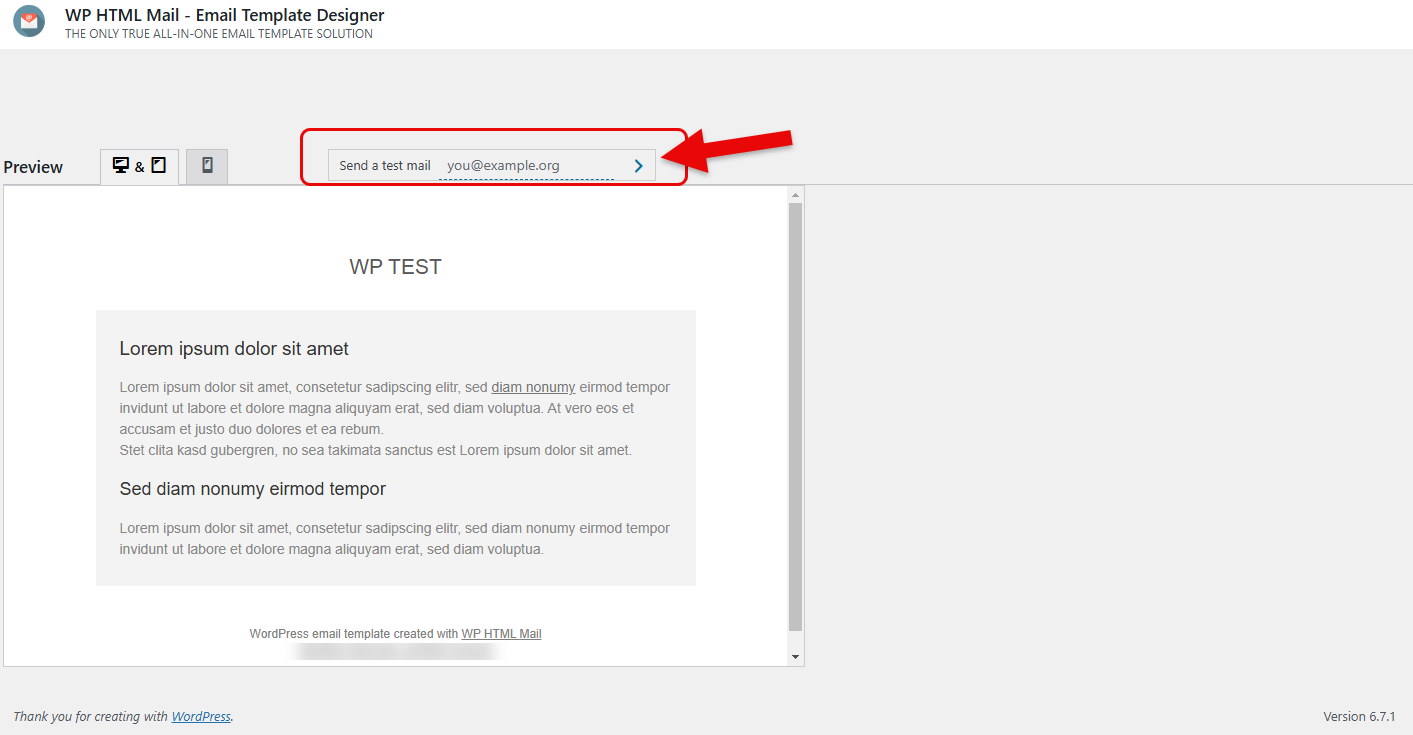
Remember to change the recipient’s email to ensure you receive it.
3. Use the Kadence WooCommerce Email Designer
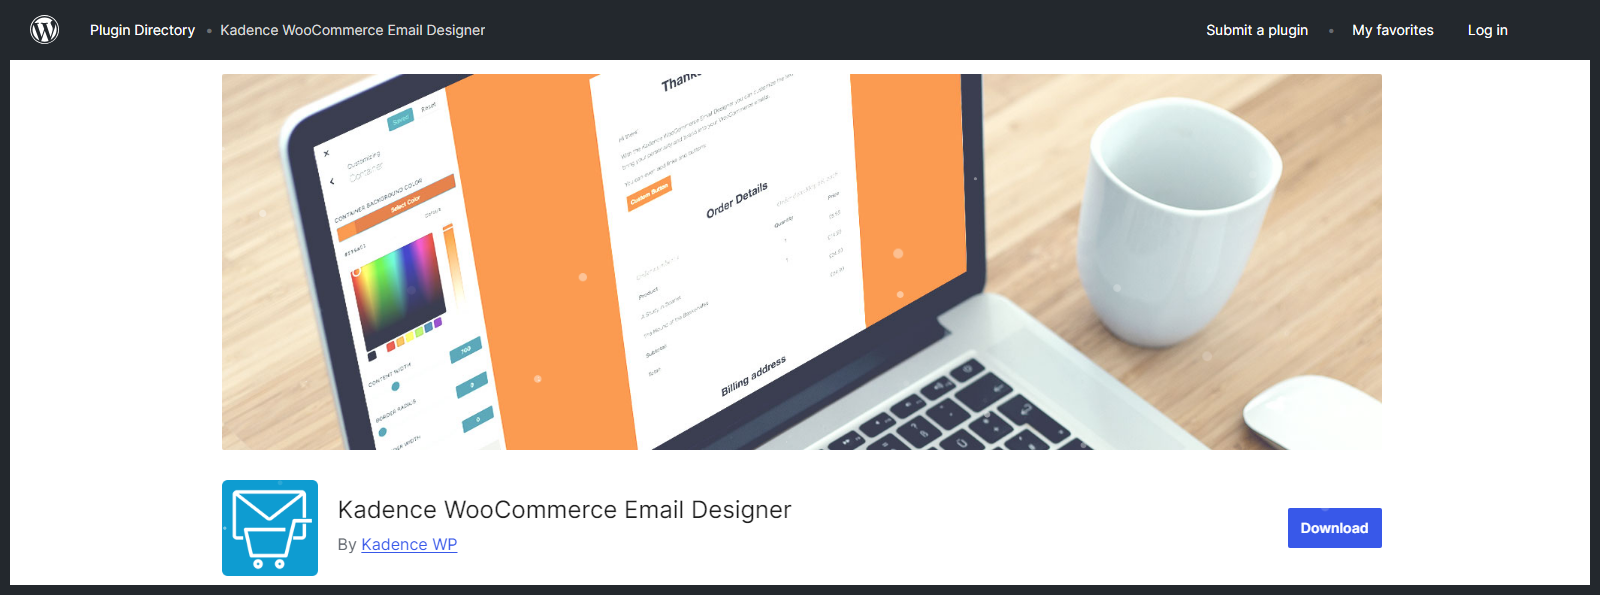
You can also use the Kadence WooCommerce Email Designer to add social icons to emails. It makes it easy to customize the default transactional email templates, edit the content, and style as you wish.
Additionally, it makes it easy to live preview your WooCommerce emails, import pre-built email designs, customize emails, customize the styling, send test emails, and import & export the settings.
How to Use the Kadence WooCommerce Email Designer Plugin?
It is easy to use the plugin for WooCommerce email customization:
Step 1: Install the Plugin
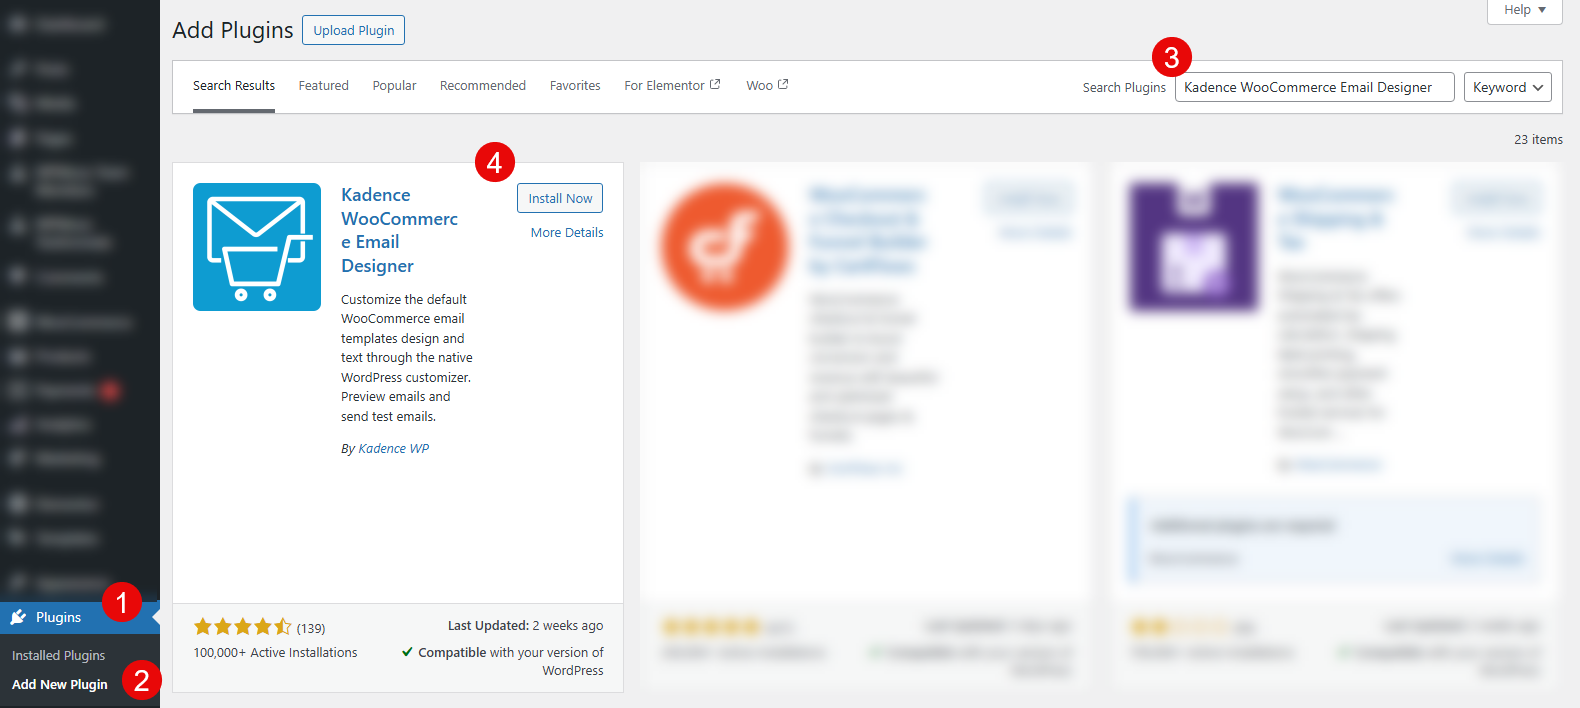
Search for the Kadence WooCommerce email designer on the WordPress dashboard, or first download it from the WordPress store.
Therefore, access the WordPress Dashboard, on the left menubar, click on plugins, select “add new plugin”, search for the Kadence WooCommerce Email Designer plugin, install, and activate the plugin.
Step 2: Customize Your WooCommerce Emails
Navigate to WooCommerce settings. While there, click on the “emails” tab. Click the “email customizer” button.
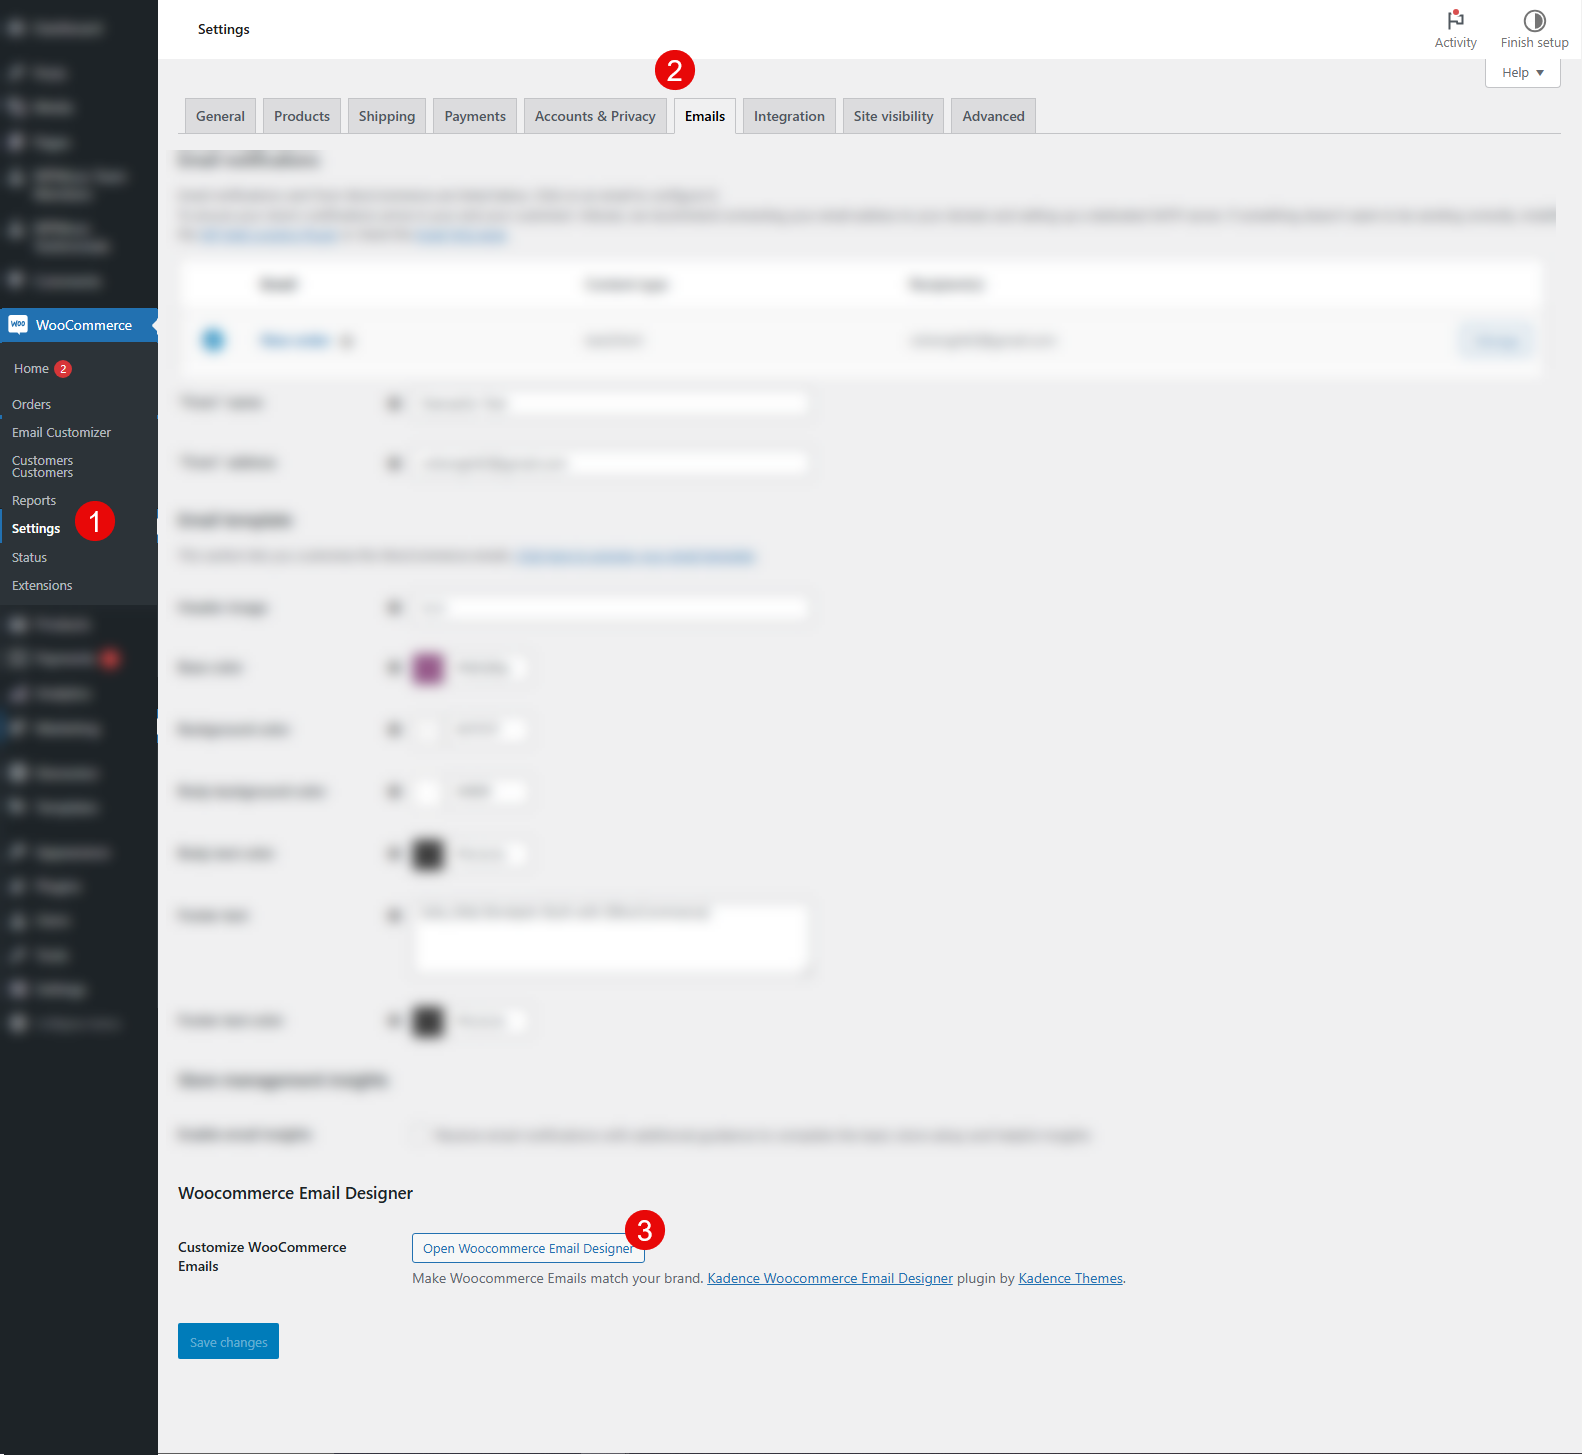
This action will open the Kadence email designer interface. While there, you can see all the WooCommerce email templates that you can customize. Choose the template you want to edit.
Step 3: Go to the Footer Option
This plugin allows you to modify the social icons on the footer area.
Therefore, on the customization menu, click on Footer → Footer socials and add all the social icons you want to display in your email.
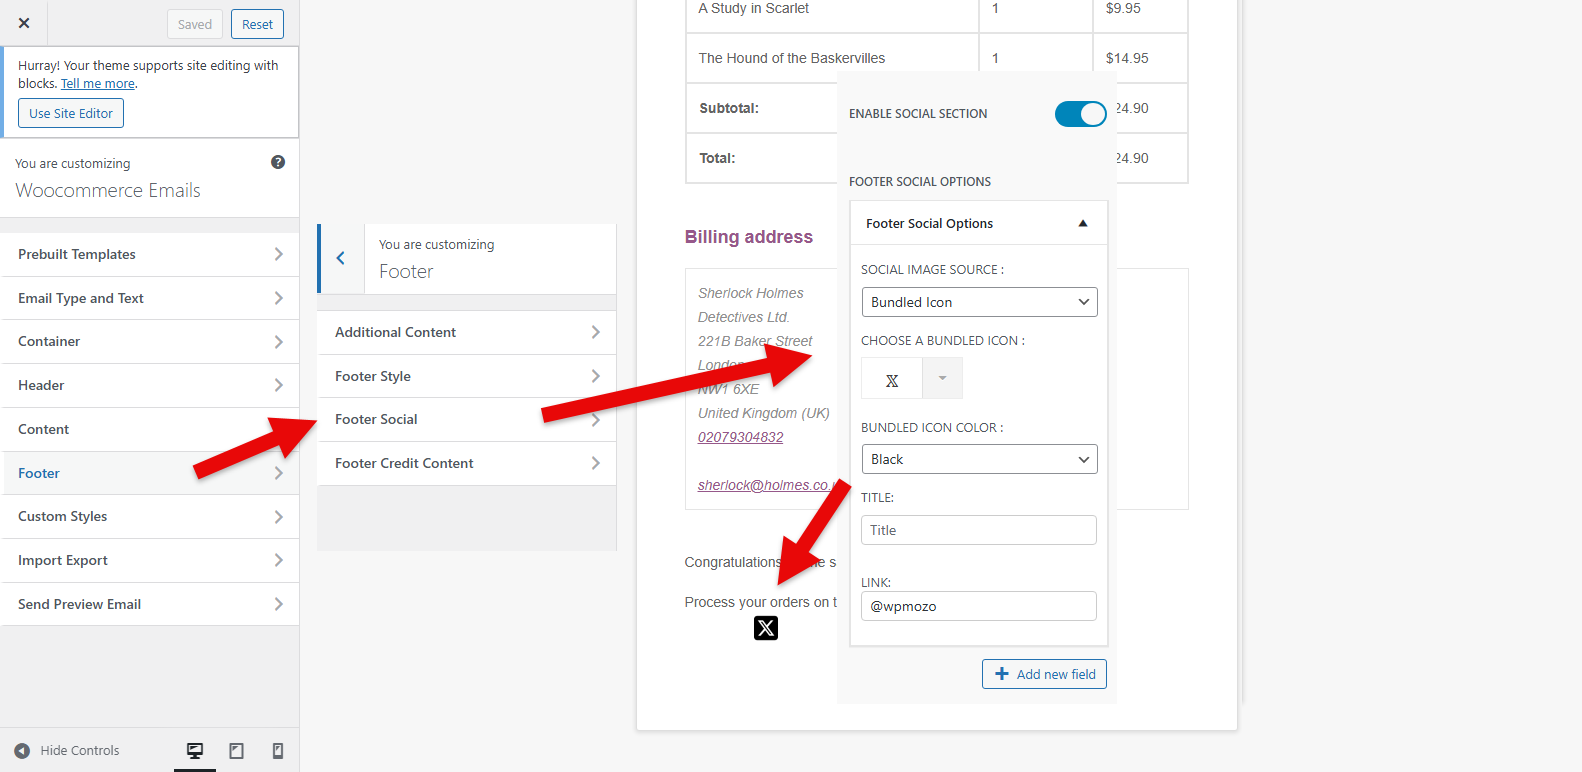
Save the changes for all the modified templates.
FAQs – Frequently Asked Questions
Q1. Is it possible to add social icons to your WooCommerce emails using code?
Yes, it is possible. DiviExtended and Webdogs articles provide a great overview of how to go about it without an issue by modifying the header and footer files in the source code.
Q2. What are the different email types of WooCommerce?
They include new orders, canceled orders, failed orders, order-on-hold, processing orders, completed orders, refunded orders, customer invoices, customer notes, reset passwords, and new accounts.
Q3. What is the best place to add social icons to your WooCommerce emails?
The most ideal place would be at the footer section. Since the emails tend to be brief, adding the footer area will still be visible and not steal the limelight of the sent email.
Engage Your Customers Through Your Social Media Pages
Adding social icons to your WooCommerce site will play a huge role in ensuring that you can easily engage with your customers to retain them and even gain new prospects. It will also be easy for them to reach you in case of any product or service issue, keep up with customer queries, and understand their different dynamics and purchase decisions.
The advantages of a well-customized WooCommerce email are vast and can help you achieve your customer engagement and sales goals. Use these plugins to meet your business goals by adding social icons to your WooCommerce emails.

0 Comments