
Customer service is one of the essential aspects of running a business successfully. If your customer service isn’t good, your business cannot survive for long. Therefore, most businesses implement chatbots on their websites. They allow them to effectively resolve customer queries and offer sound solutions.
If you’re using WordPress, then it’s possible to add a chatbot on WordPress websites as well.
Through that, you can handle your customer queries and ensure that you’re meeting your business’s customer service requirements.
In this post, we’ll look at what a chatbot is and why you need it. In addition, I’ll share the steps to integrate the chatbot with WordPress using a plugin and without it as well. So you can follow the method that best suits your needs.
If you’re ready, then let’s get started.
What Is a Chatbot?
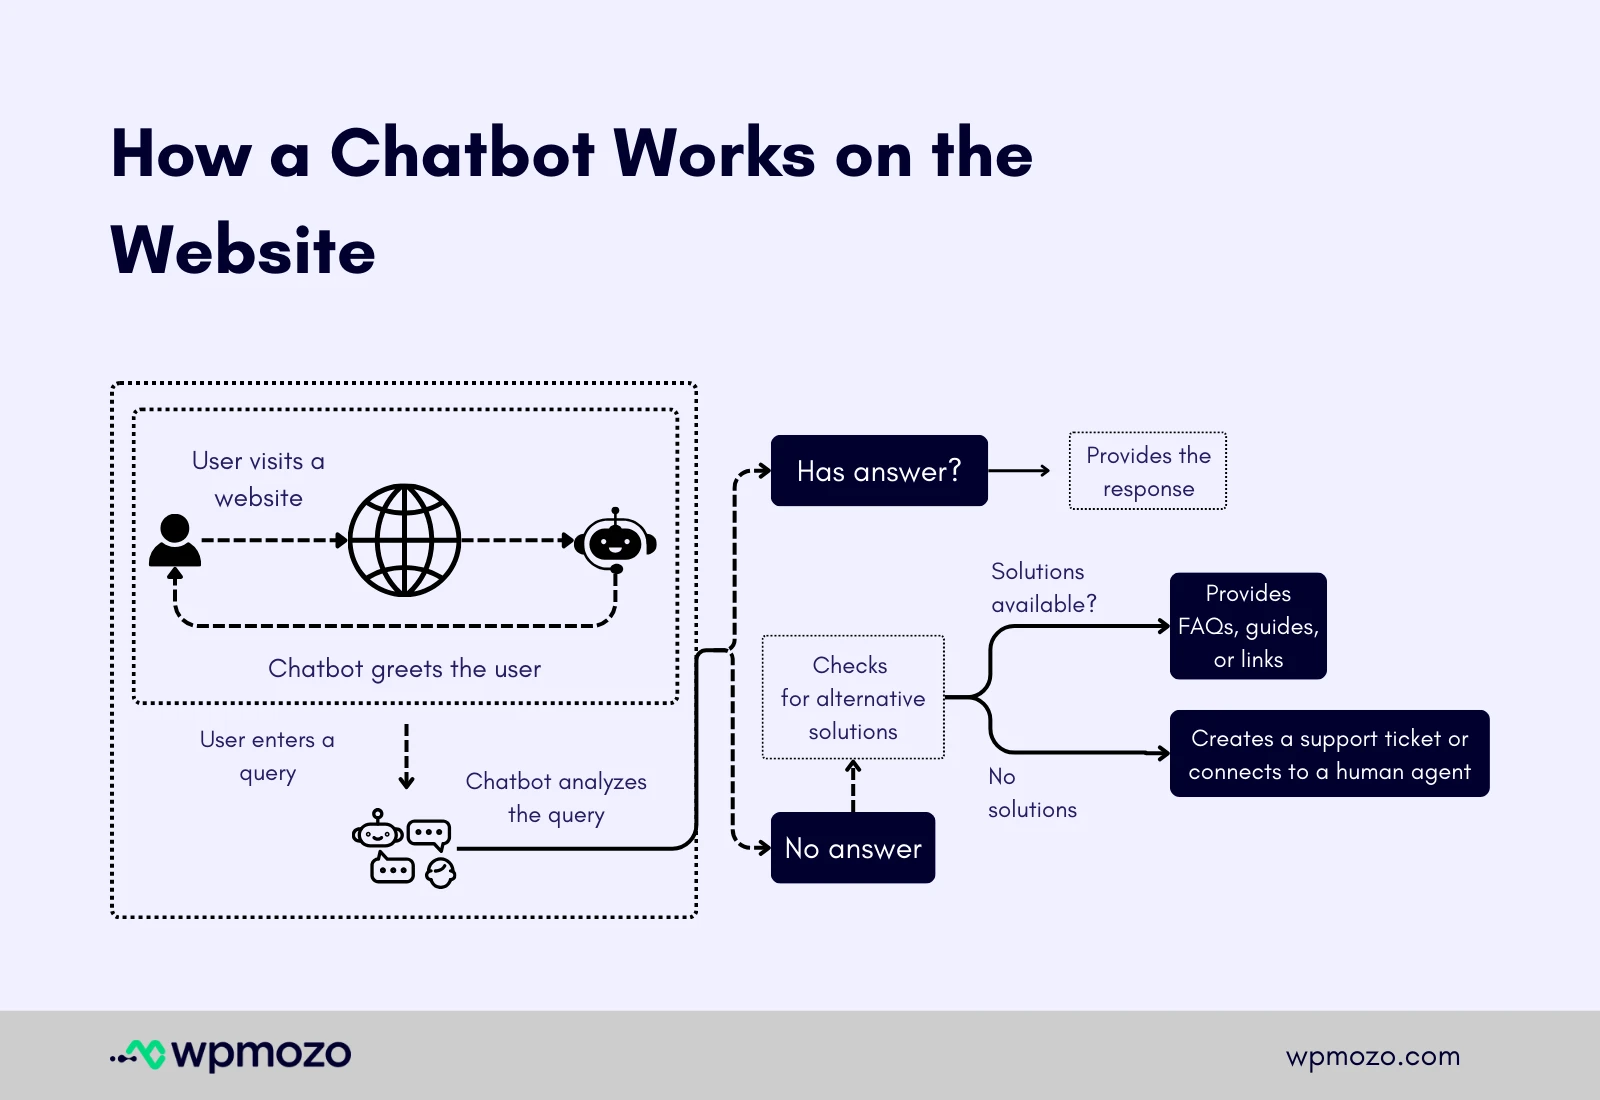
A chatbot is software added to a website using JS or a plugin, and it works as a virtual customer service agent that has some predefined criteria for working. The website owner adds questions and solutions that customers might ask on a regular basis, and the chatbot presents them to the visitor.
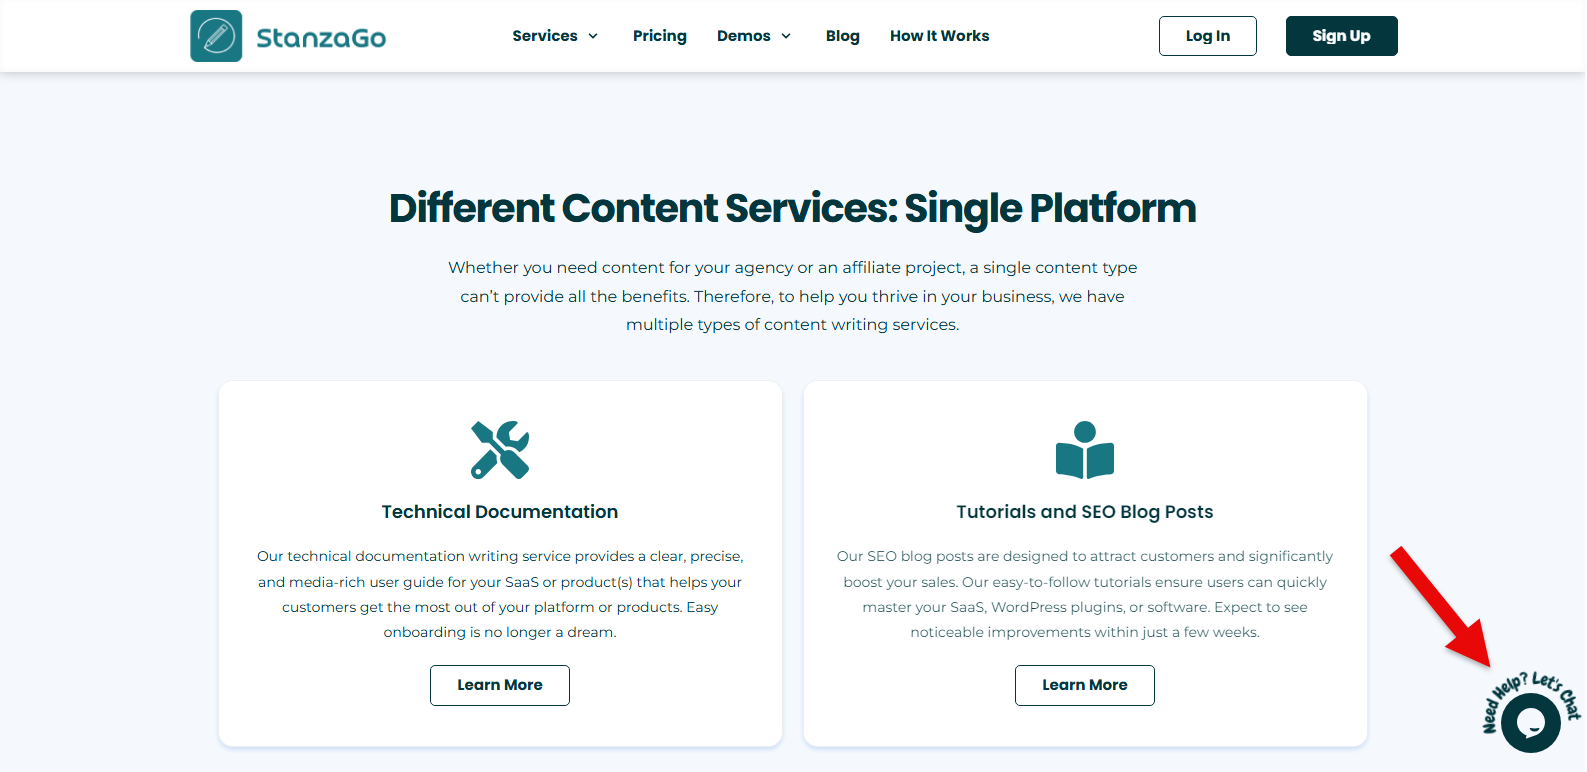
For example, you’ve got a subscription to a popular software, and now you’ve got an issue.
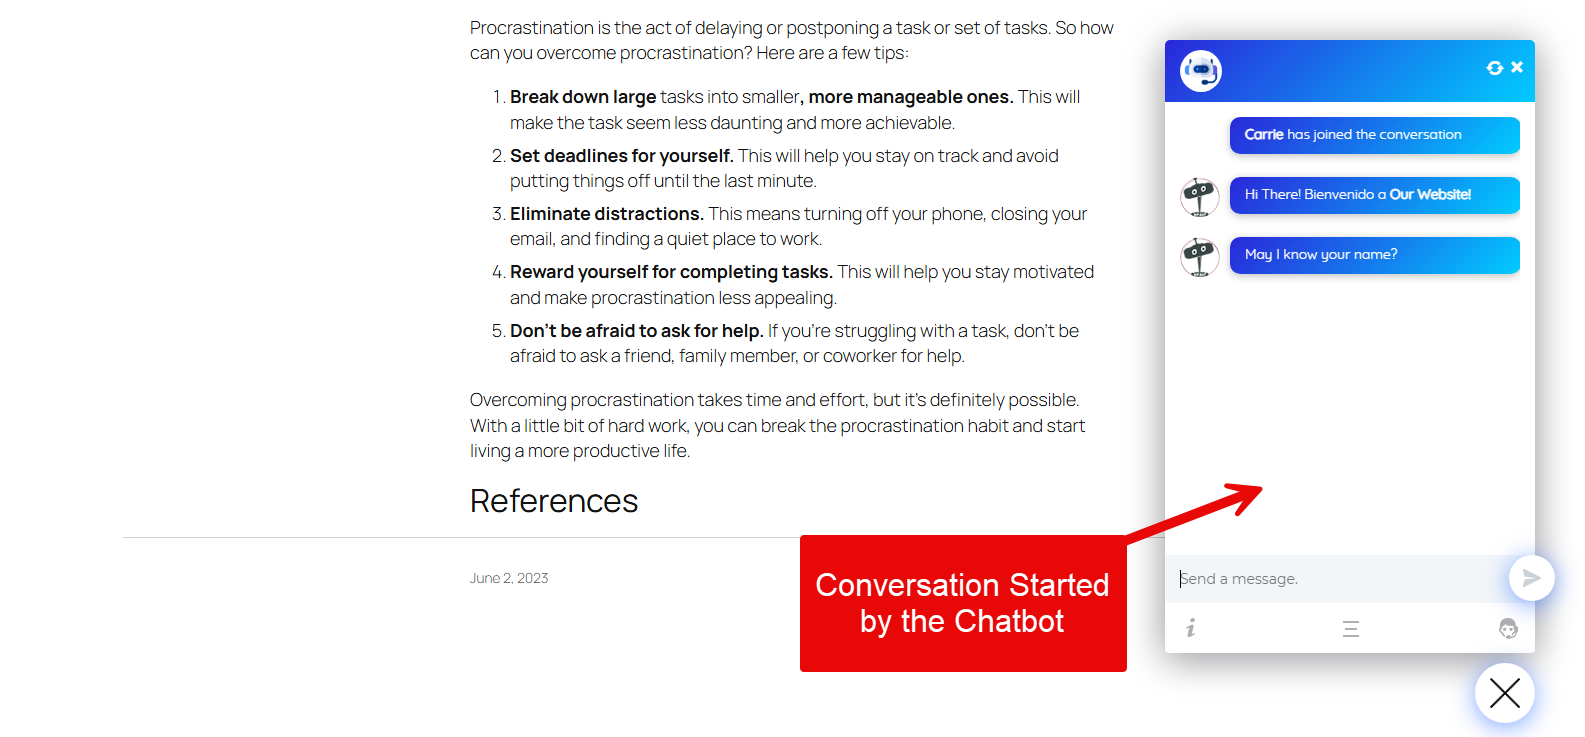
You will visit their website, and upon opening it, you see a little chat icon on the bottom corner of it. When you interact with it, it provides you with a list of topics that might be your concern.
When you select a particular topic, it offers you a solution that was pre-added by the owners.
If the solution helps you, you won’t go for further support, hence reducing the customer queries for the actual customer support team.
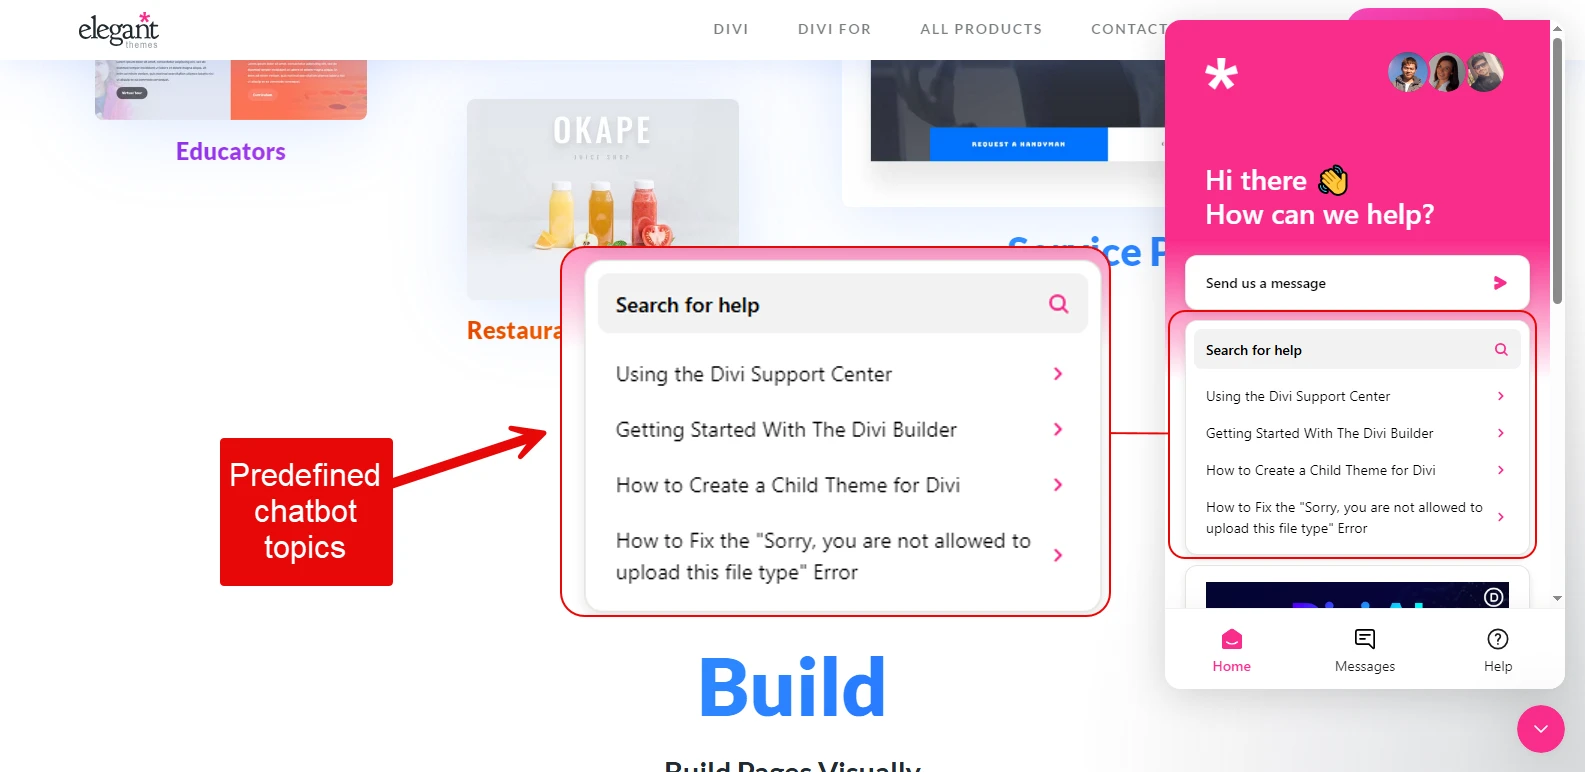
The predefined topics look like the above example.
Sometimes, a chatbot also asks you questions rather than offering topics, and when you answer, it responds accordingly. A chatbot is just like a customer support agent but works on its own without creating any burden for the support team.
Generally, the website owner defines the questions and answers, but now, the AI chatbot for WordPress does the customer service task without any additional intervention from a human other than setting it up on the website.
Why Add a Chatbot to Your Website
The #1 reason why chatbots are important is that they reduce the number of queries customers raise, hence clearing the slate for actual customer support agents to provide more effective service to users who need extensive help. Not just billing-related or general sales help.
In addition, by using a chatbot, you can rest assured that whenever a customer visits your platform, they won’t have to be disappointed as the chatbot first will try to resolve their issue, and if there’s no solution found, it will create a ticket on its own.
When the actual agents are live, they will take the matter into their own hands.
Apart from this, by adding a chatbot on your website, you ensure:
- 24/7 support availability
- Instant responses
- Handling more queries at once without hiring more agents
- Lead generation
- Multilingual support
Now, as we have looked at what a chatbot is and why you should integrate it, let’s look at the chatbots you can use.
List of Chatbots for WordPress That Are Good
The following tools and plugins are some of the best chatbots for WordPress you can try and improve your customer service.
1. AI ChatBot for WordPress – WPBot
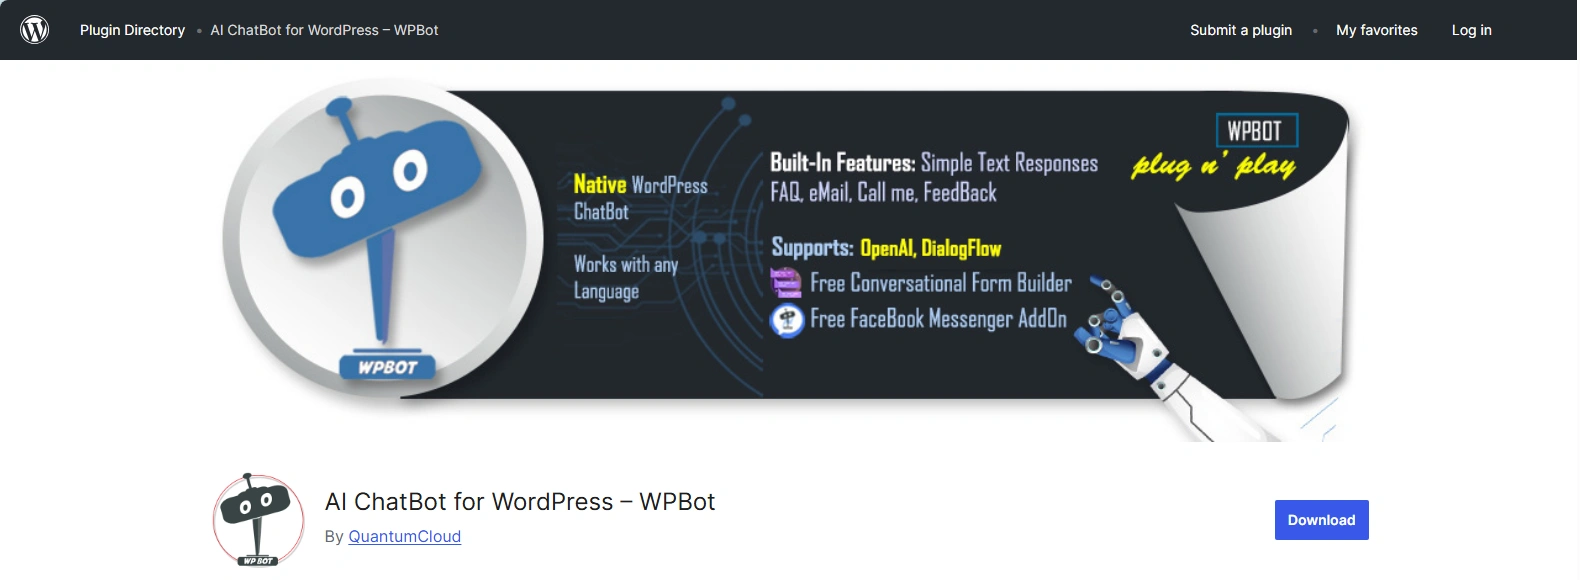
The chatbot plugin, WPBot, is an intuitive tool that can provide automated 24/7 live chat support without needing to write any code. You can use it to generate leads and collect user information as well.
Built on the core WordPress framework, it works perfectly on any WordPress website using any theme. It offers multiple built-in features to provide effective customer support service, but if you need to use any 3rd party tools such as OpenAI or DialogFlow, you can do that as well.
The plugin supports both Natural Language Processing Mode and Button Menu Drive Mode, so you can choose what works best for you.
In addition, it can provide support in RTL as well; hence, a complete chatbot solution for WordPress with ease and without any extra cost, too.
2. ChatBot for Woocommerce – WoowBot
If you’re using Woo and want to enhance user experience, WoowBot can help you achieve that effortlessly.
Using this eCommerce shopbot, you can provide simple customer support to the shoppers that allows them to search their product quickly. If not found, using the same chatbot window, they can notify the website owner/ admin.
It works in any language and provides sleek options to improve automated customer service and increase the digital store’s sales.
3. ChatBot – WP AI Chat Bot Plugin
If you’re in need of an AI chatbot for WordPress, then ChatBot is a good plugin. With this free WordPress chatbot, you can set up effortless customer support that offers live chats, AI bot conversations, and email support tickets.
The chatbot added using this plugin looks very interesting and visitors find it natural to interact with it.
You can enable automated 24/7 customer service tasks with simple training, and later it evolves on its own because of the self-learning AI chatbot capabilities. Once added, no further human engagement required, it can perform different actions such as answer support questions, generate leads, schedule meetings, get customer feedback, and more on its own.
A powerful AI chatbot for WordPress, if you’re looking to speed up the customer support service.
4. Tidio – Live Chat and AI Chatbots
Tidio is a live chat, customer support platform that also offers a plugin for WordPress, to integrate its services. Using its plugin, you can easily set up simple and AI chatbots on your WordPress website.
In order to avail its services, you need to first subscribe to its services, and then through the plugin use them on your website.
You can try its services for free, but in order to get complete functionalities, you need to switch to the premium plans starting from $29/month.
For an AI chatbot, you need to pay additionally if you’re choosing the basic plans.
The Tidio AI chatbot, Lyro, allows you to offer support in multiple languages, act as an AI support agent, use predefined Q&As, and other actions as well.
Overall, it’s a good chatbot for WordPress if you’re looking for paid solutions.
5. AI Chatbot for WordPress – Hyve Lite
Hyve Lite is another free chatbot plugin for WordPress that offers AI-powered customer support service. Using this plugin, you can use your posts and pages content to serve as a knowledge base, offering solutions from what you have already on the website without adding more content.
You can directly operate it from your WordPress Dashboard while controlling data through the OpenAI API key of your own.
Yet, there will be no use of any coding in order to integrate custom data. Furthermore, with Hyve Lite, you use its customizable options such as moderation tools and FAQ tracking to send welcome messages and improve responses.
It uses the OpenAI API key, hence, you get more functionalities if you know the technicalities of artificial intelligence.
6. Crisp – Live Chat and Chatbot
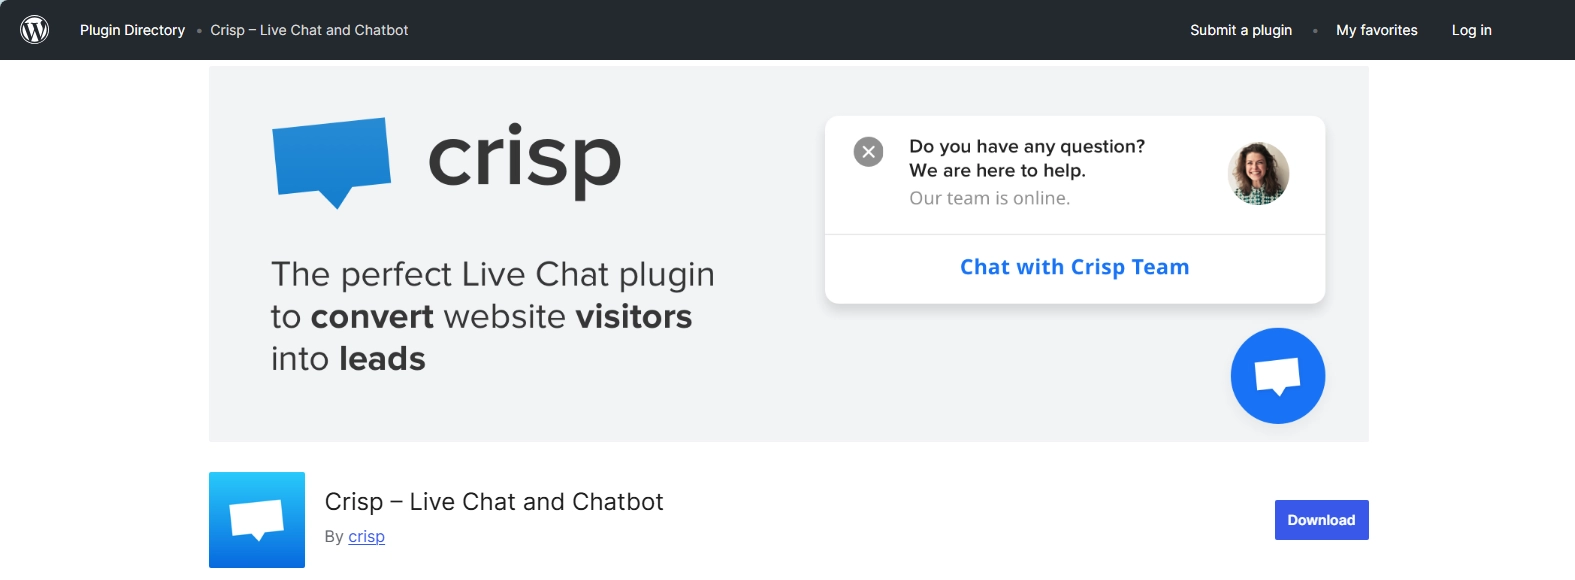
Just like Tidio, Crisp is another Live Chat and Chatbot platform, however, much more affordable. Using its platform, you can build your chatbot, and then with the help of its plugin, you can add a chatbot to your WordPress website.
Crisp services are simple to use and you can add a chatbot without following any complex processes.
It offers its services for free, but in order to add a chatbot you need to pay. The plan starts from $95/month with AI chatbot and AI training.
Once you add it to your website, you add a beautiful and intuitive bot that your customers will love to interact with, it has a minimalist approach. If you’re looking to grow your email list, generate leads, and enhance your customer relationship within the same software, then you should go for Crisp.
The free plugin, in addition to live chat and chatbot, also provides you with Real-time notifications, Desktop apps, Mobile apps, and Availability schedule.
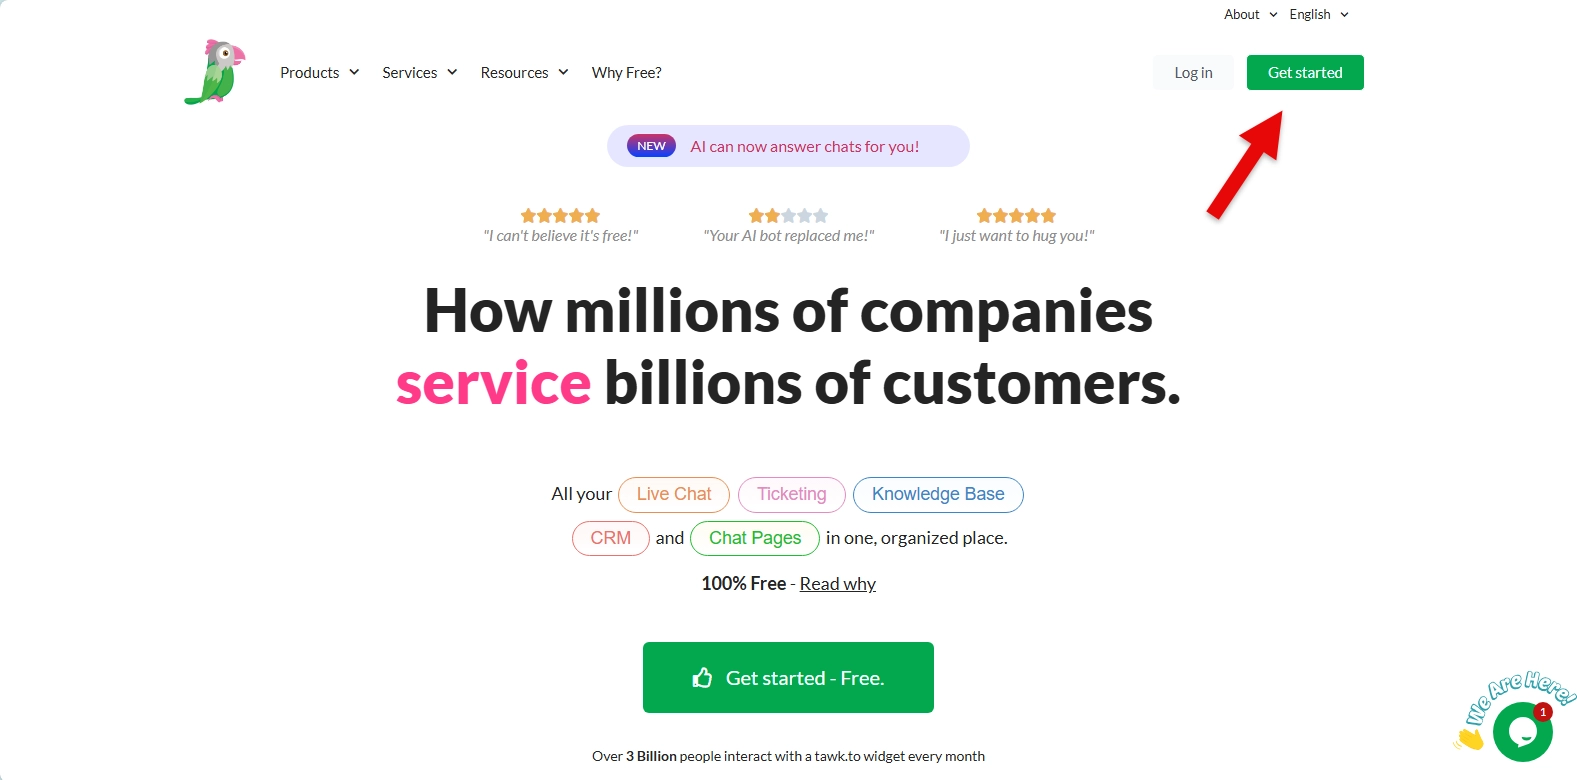
7. tawk.to – Live Chat Software for Your Website
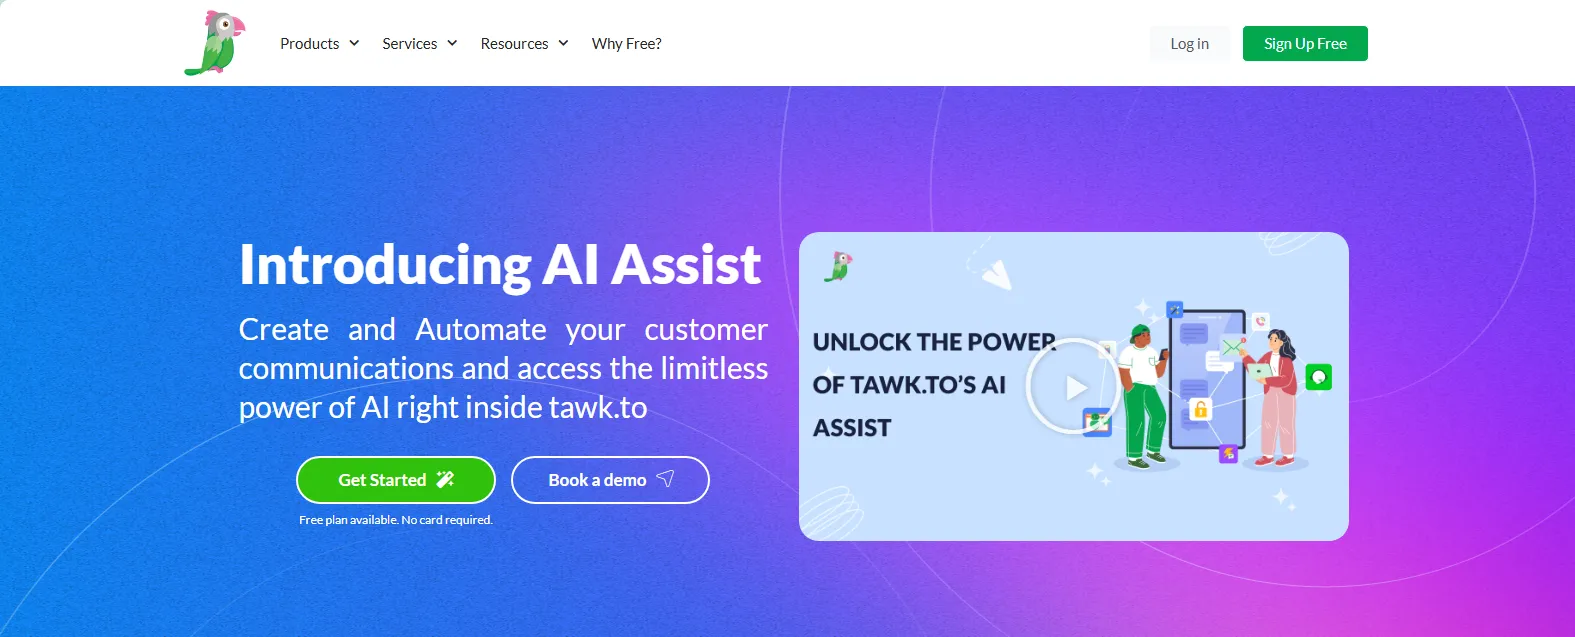
If you don’t want to use a plugin and don’t want to pay either, but need the power of AI, then tawk.to and its live chat tools can be at your service.
The customer support tools it provides allow you to do live chat, ticketing, knowledge base, and now, AI assistant as well.
The new AI assist feature of twak.to, Apollo AI, makes different customer support tasks easy. Using it, you can enable different customer support functions on your website, such as offering 24/7 support, smart replies, and AI commands, allowing quick access to preset AI-powered text tools.
For all of this, you don’t have to pay anything.
Simply, register for its services, customize the options, copy the integration code, add it to your website’s HTML, and that’s it.
Methods to Add a Chatbot on WordPress Website
There are two methods that allow you to add a chatbot to a WordPress website. You can do that through:
- Method 1: Adding a chatbot using a plugin
- Method 2: Adding a chatbot using JS
Both methods are the preferred way, completely depending on your requirements and knowledge of WordPress. If you don’t have technical skills, you should go with the first method, and if you have the technical skills or don’t want to use a plugin, then go with the latter.
Let’s begin with the first one.
Method 1 — Integrating Chatbot With WordPress Using a Plugin
Because we aren’t focusing on WooCommerce for this tutorial, we will use the chatbot plugin by WPBot. It’s a free and good plugin and offers an effortless way to complete our job. The first thing is to install it, then activate, and then configure it to work properly.
Let’s begin with the installation:
Step 1: Install the WPBot Chatbot WordPress Plugin
From your WordPress Dashboard, go to, Plugins → Add New → in the search bar, type “WPBot.”
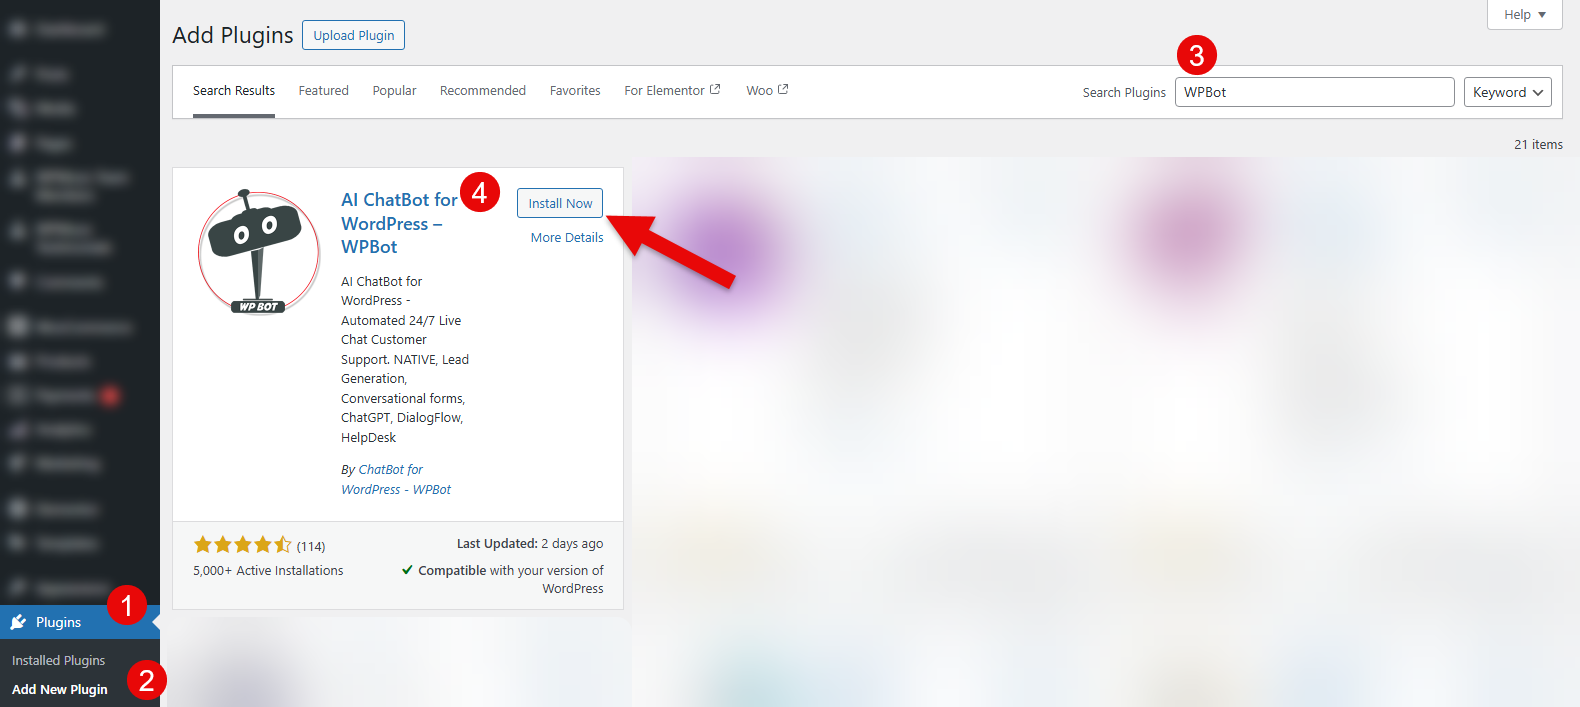
Click Install Now for the above chatbot plugin, and once it’s installed, click Activate.
As soon as you activate the plugin, you’ll be redirected to the plugin’s setting menu. Here are all the options to configure your chatbot. Next step, helps you to understand this plugin effectively.
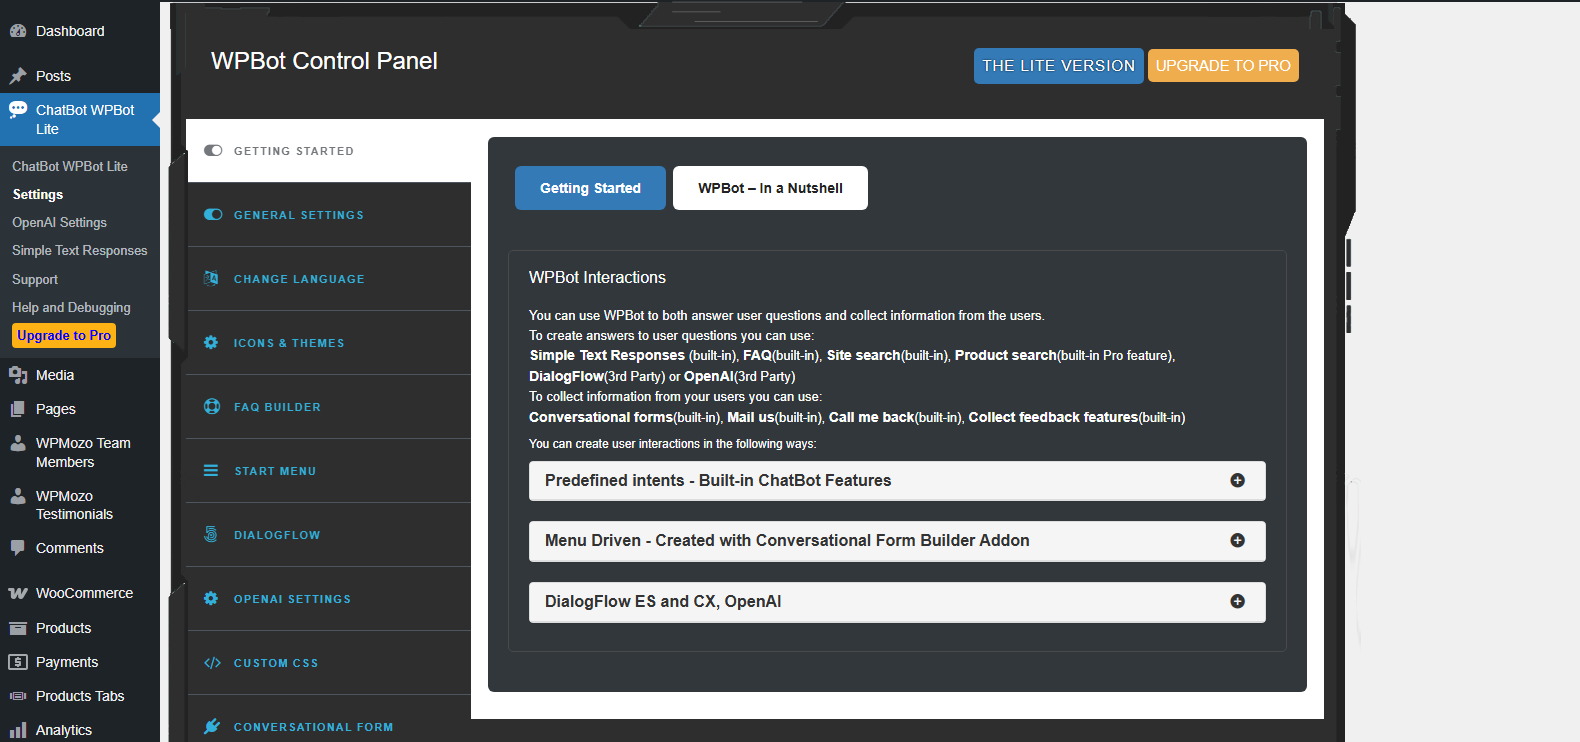
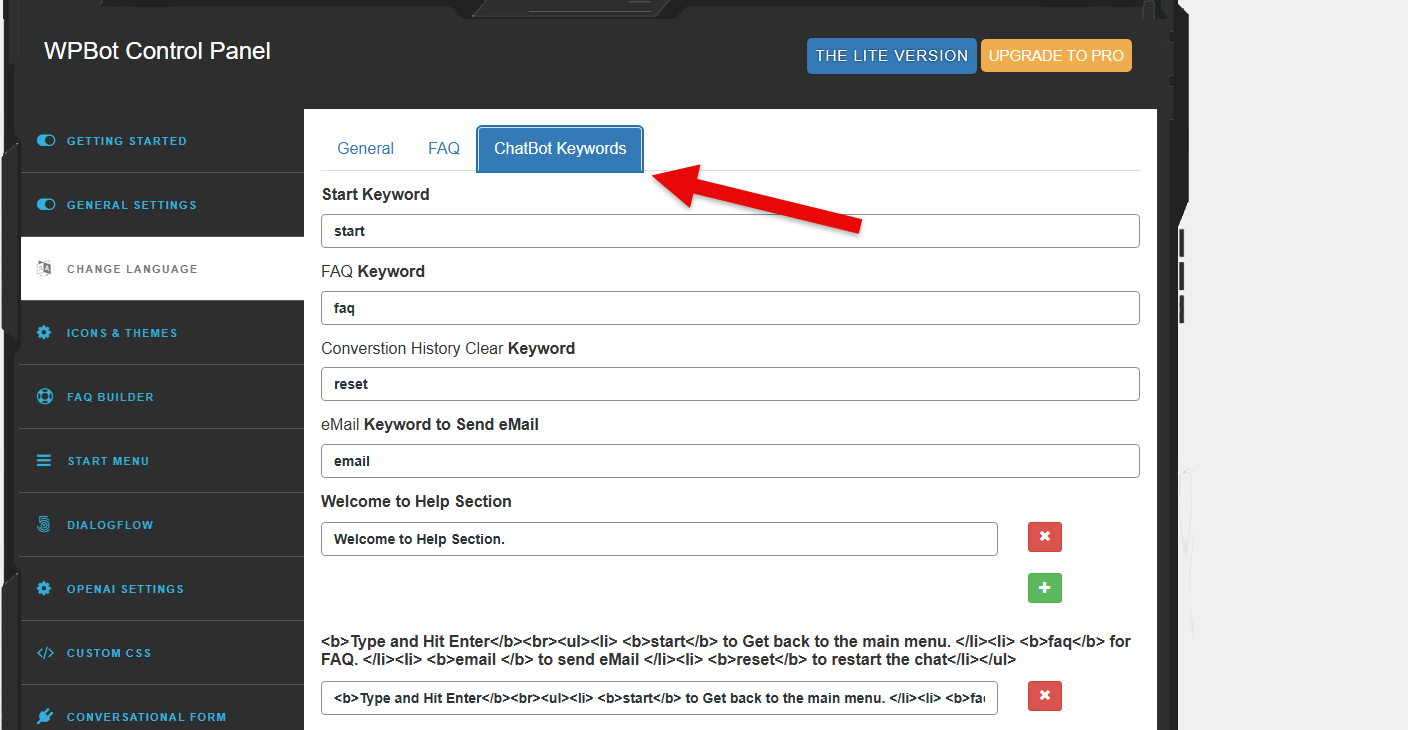
Step 2: Understanding Chatbot Intents
The settings of the plugin start with the Getting Started menu. On this, you can see the WPBot Interactions that are built-in and available with the pro version. The built-in interactions are:
- Simple Text Responses
- FAQ
- Site search
In addition, you can integrate third-party tools to create your WPBot interactions such as DialogFlow or OpenAI. The Predefined intents also include Send email, feedback collection, ask for name, email, and more.
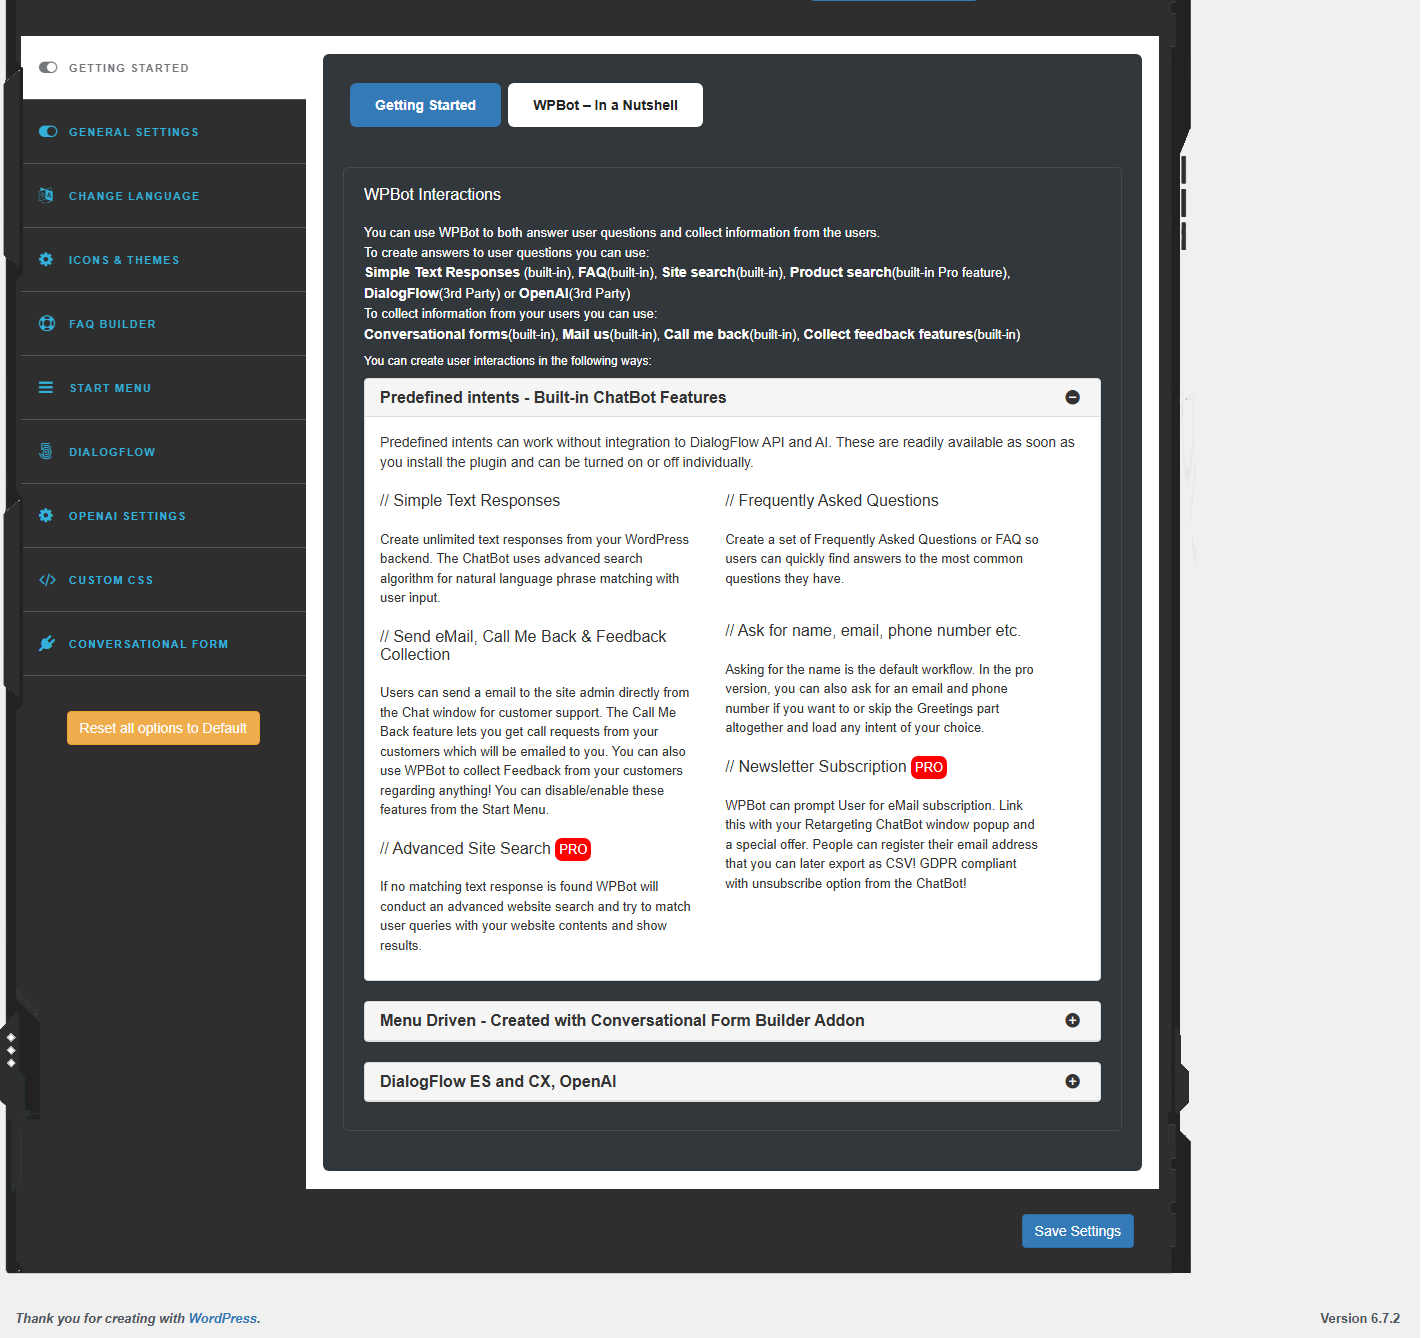
These intents the chatbot will use automatically, providing you with the ability to configure it for advanced functionality. It also allows you to set Menu Driven chatbot conversations using its another plugin Conversation Form Builder.
To understand WPBot’s intents effectively, switch to the WPBot – In a Nutshell.
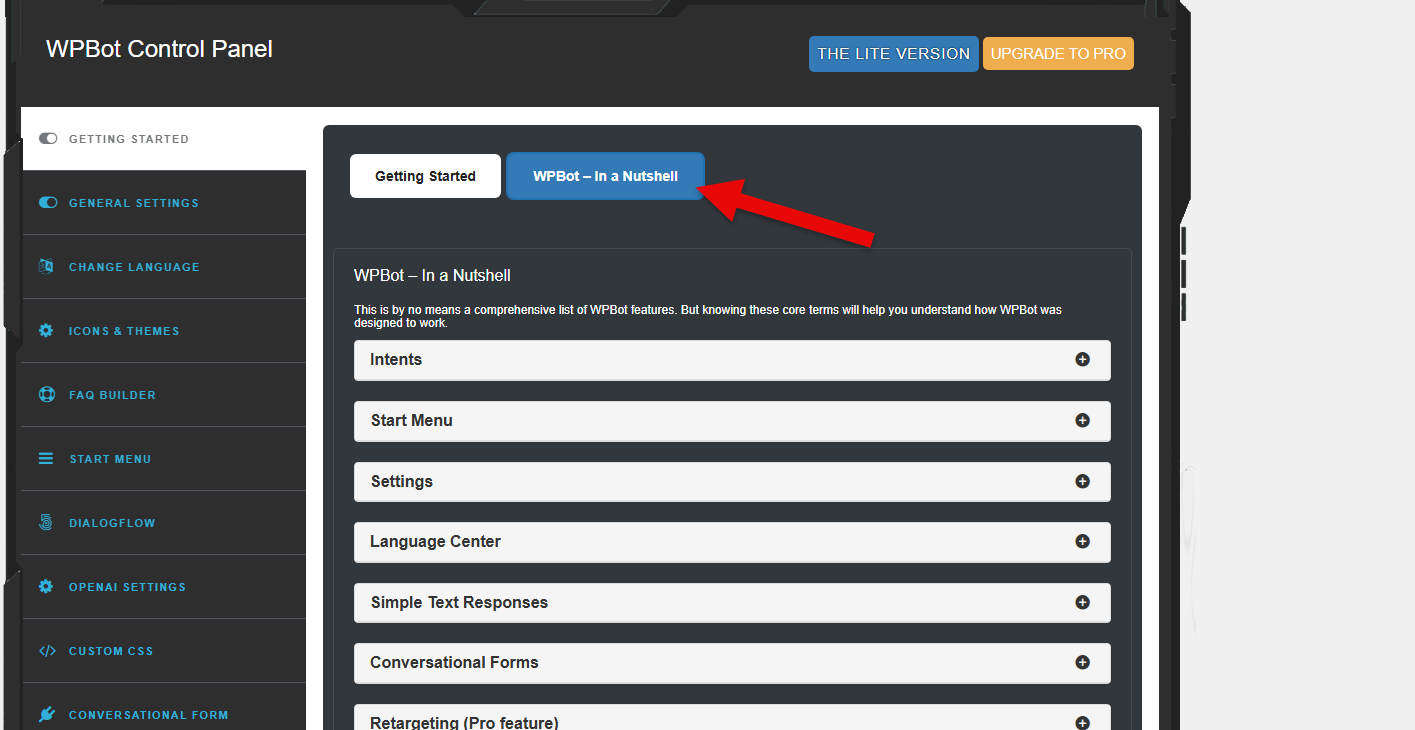
Here, you can learn more about the plugin and how it works as a chatbot. Once you learn all the intents, you can train the chatbot effectively based on your requirements.
Step 3 – Configure General Settings of the Chatbot
After getting yourself familiar with the intents of WPBot chatbot, move to the General Settings.
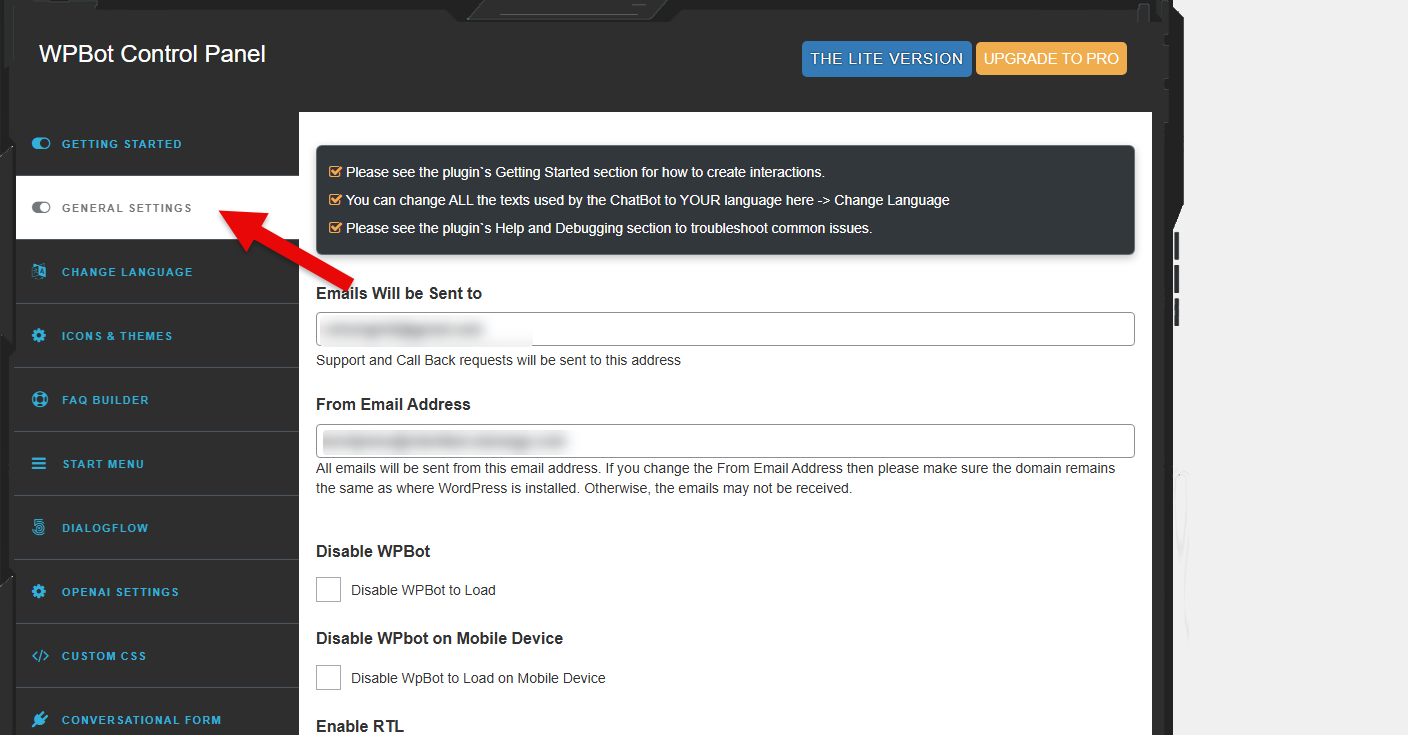
Here, you get the options to configure:
- Sending email address
- From email address
- Disable/enable chatbot
- Disable/enable chatbot on mobile devices
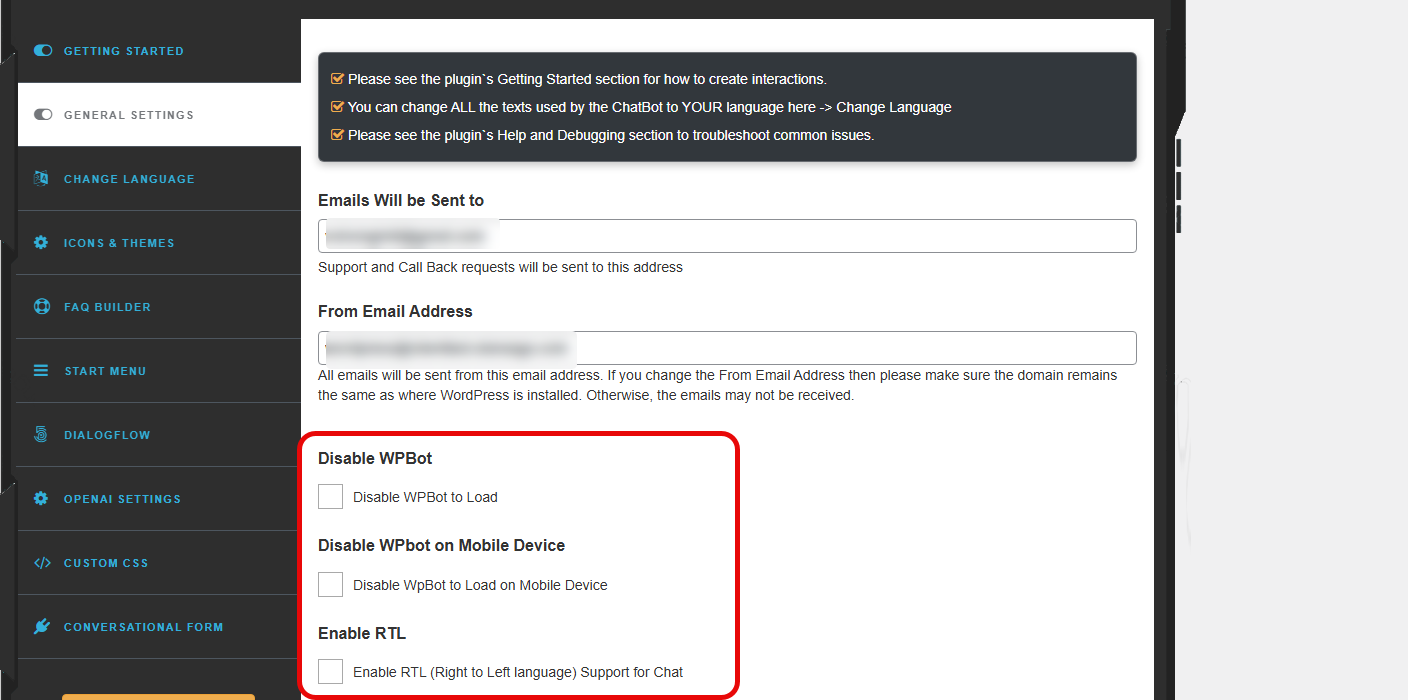
In addition, you can also configure the chatbot for RTL website to offer chatbot interactions to the Right to Left speaking users. But, that’s not all.
The settings also provide you with the options to:
- Open links in a new window
- Show messages after greetings
- Add Bot response delay
- Exclude Chatbot load on specific post types
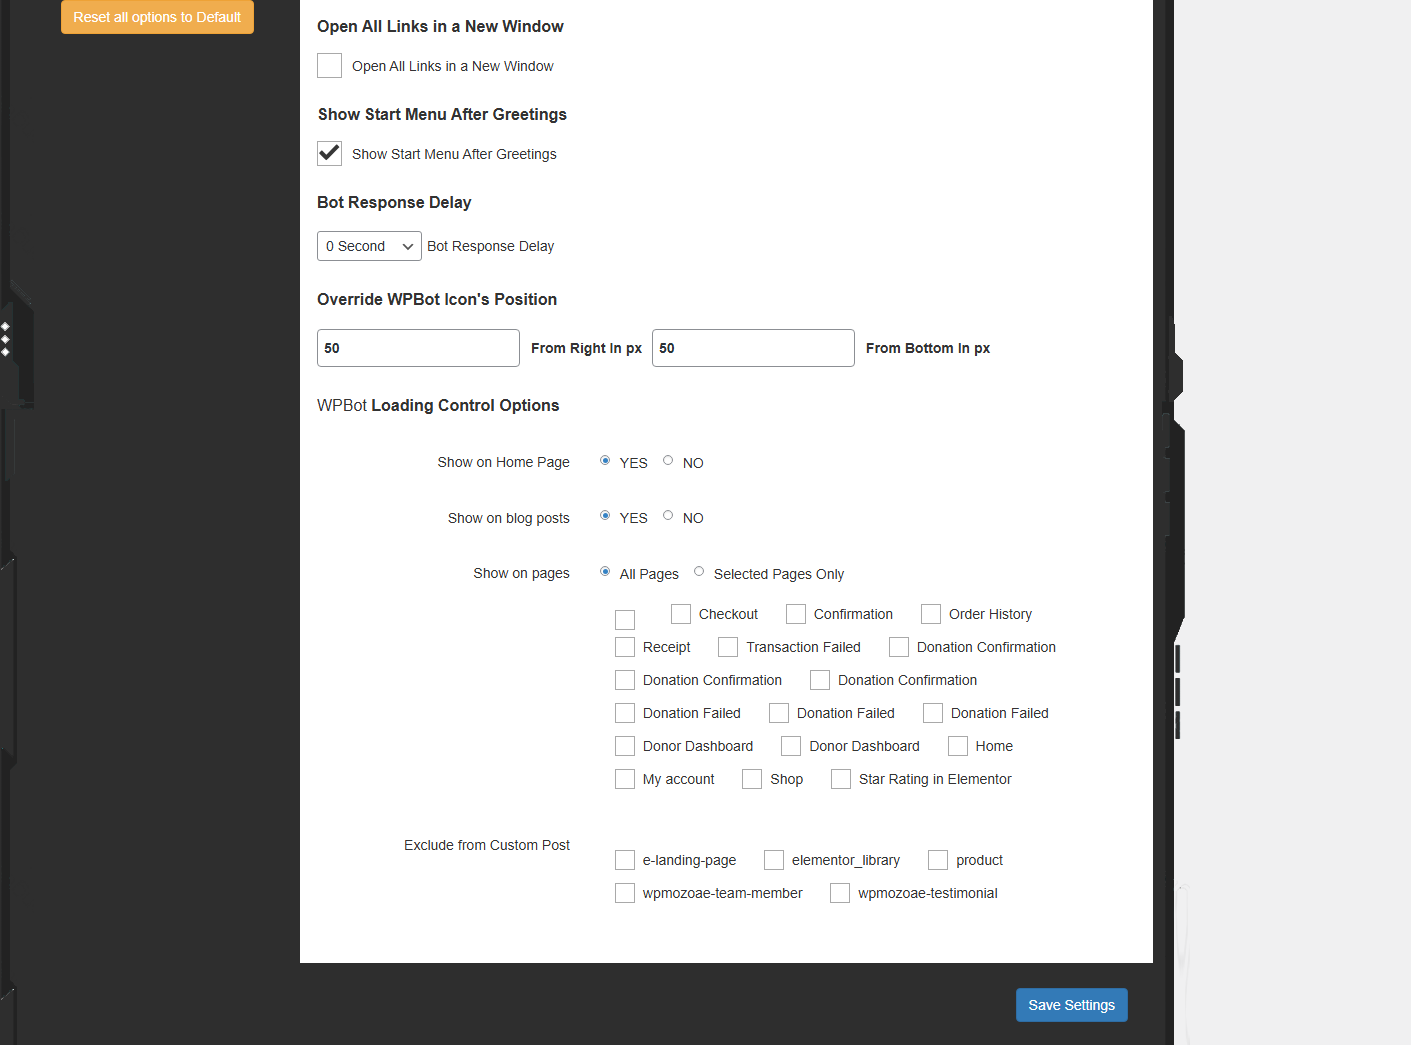
Once you have configured all of this, click Save Settings and move to the Change Language.
Step 4 – Define Language; Add Messages, and FAQs
In the Change Language settings of the WPBot plugin, you get extensive fields and options to add responses in your language.
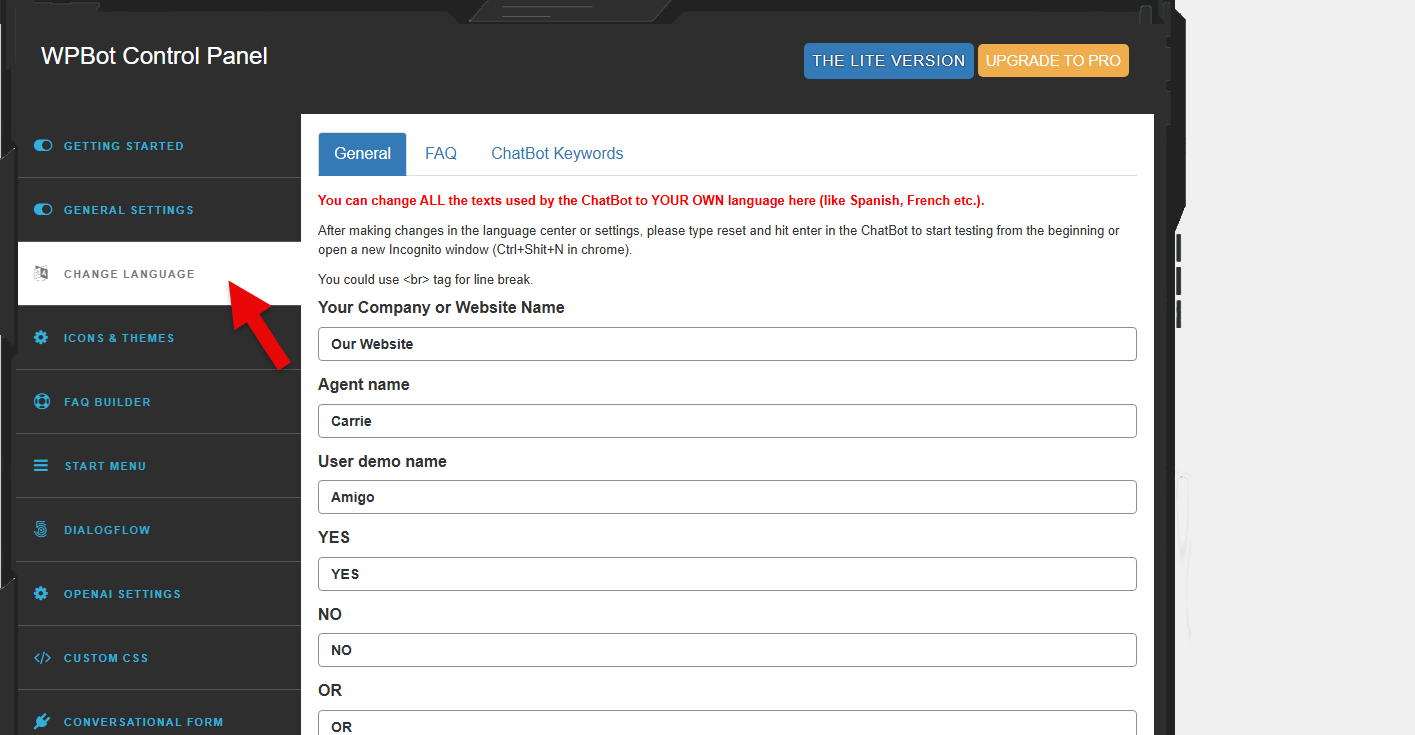
You will find pre-defined responses with the field to add yours. Simply click on the ‘+’ icon, and add the response in your language. For the English users, the chatbot will use the predefined ones, but when a local user adds a query in their language, it will use the content added by you.
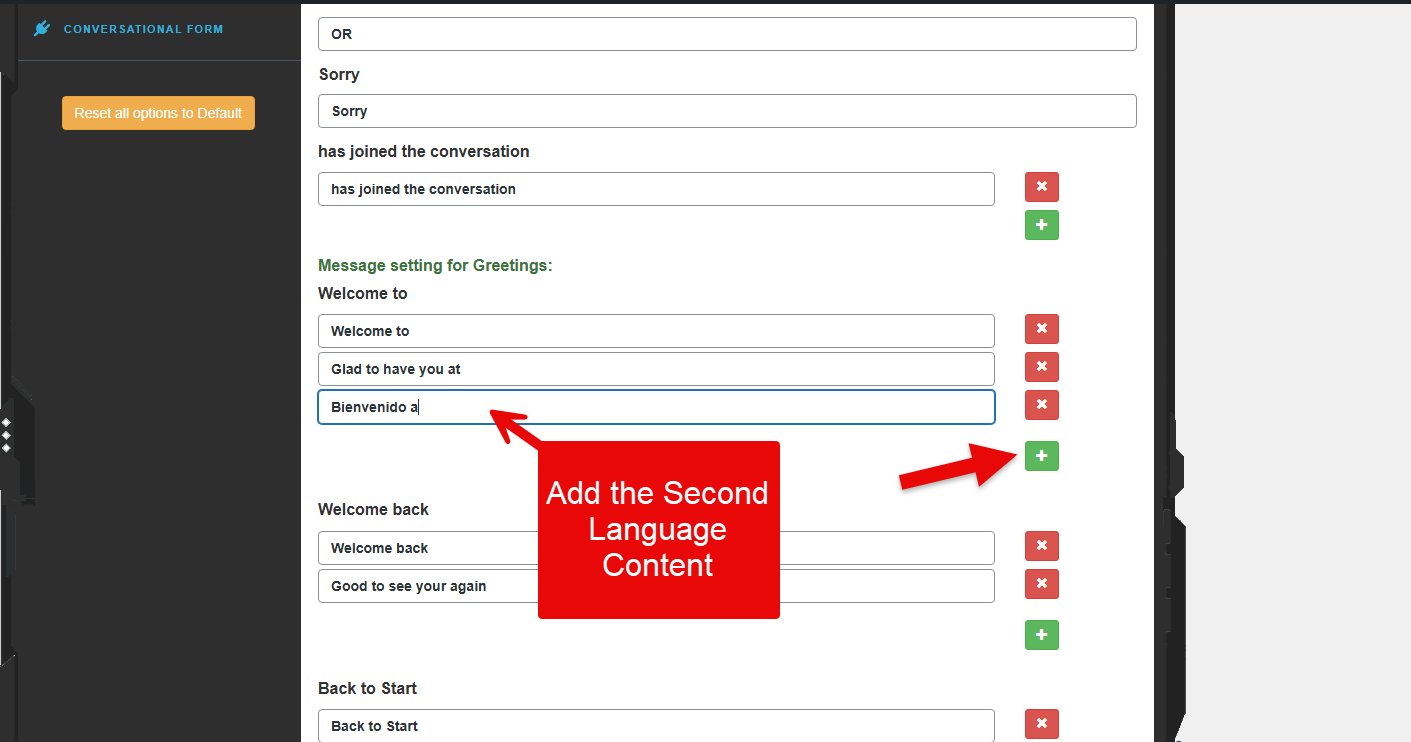
In this way, you will be able to target local users by offering them assistance in their native language. Apart from this, you can also add content in your language for the FAQs and Chatbot keywords.
After adding the alternative language content, save the settings, and move to the FAQ Builder options.
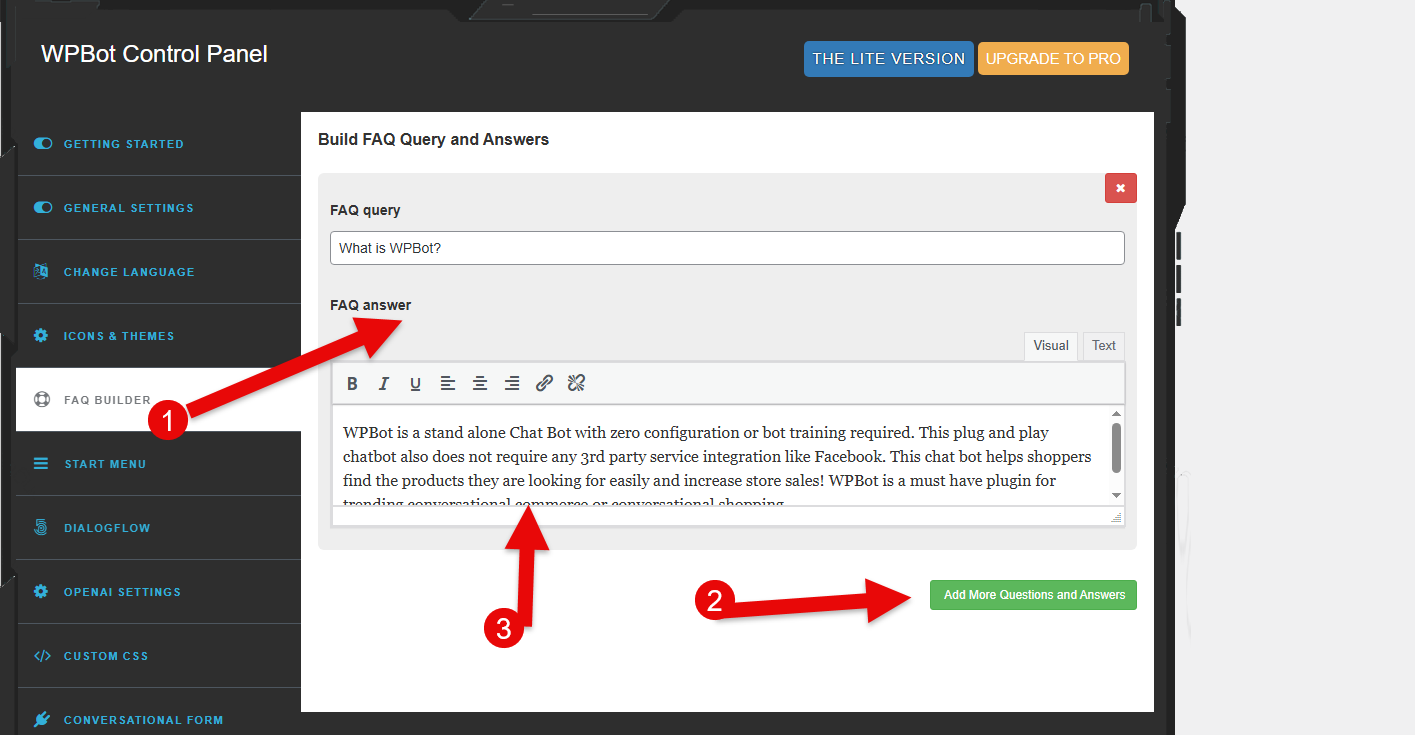
The FAQ Builder tab allows you to create more FAQs and add them to the chatbot. So, when users have some general queries, the bot can use them. Click on the Add More Questions and Answers to add your FAQs.
After adding the FAQs, click Save Settings and move to the next step.
Step 5 – Choose a Chatbot Icon
WPBot Chatbot plugin for WordPress comes with several themes and icons. If you don’t like the default one, then you can select a different one from the ICONS & THEMES.
Apart from the icons and themes, you can also apply custom background color as well as create a custom icon of your choice. To do that, click on the Upload icon button and then add the image you want to use.
The same you can do with Agent Icon, and if you need to make additional changes to the chatbot icon and how it looks, switch to the Custom Style Options. Here, you get the following options:
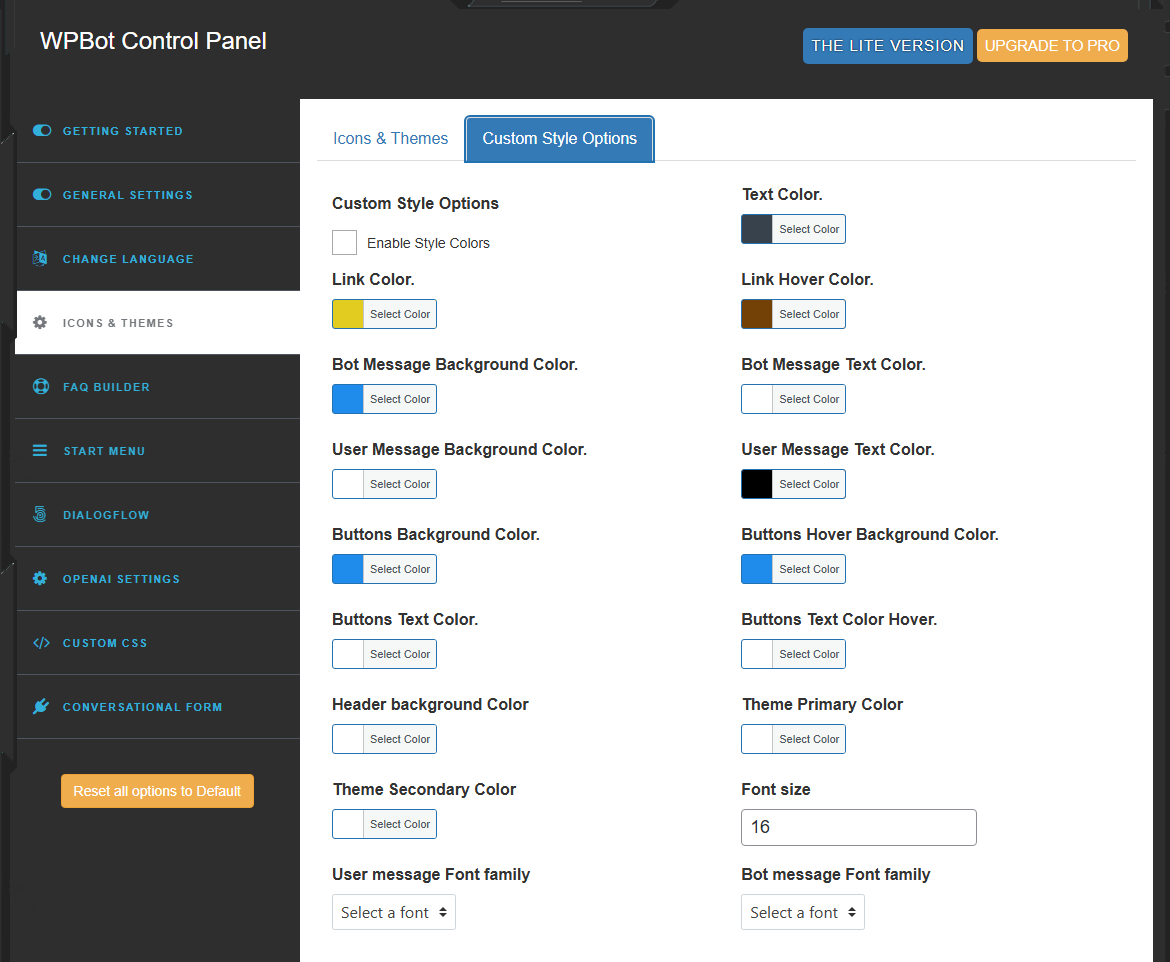
Using all of these, you can style the chatbot in a way that matches your website’s design scheme. Once done customizing your WordPress chatbot, click the Save Settings button.
Step 6 – Access DialogFlow and OpenAI
By default, the WPBot Chatbot works based on its intents and the content you add. However, if you want to use any 3rd party chat integration, then you also have that option using the Google DialogFlow and OpenAI.
Go to DIALOGFLOW and enable it.
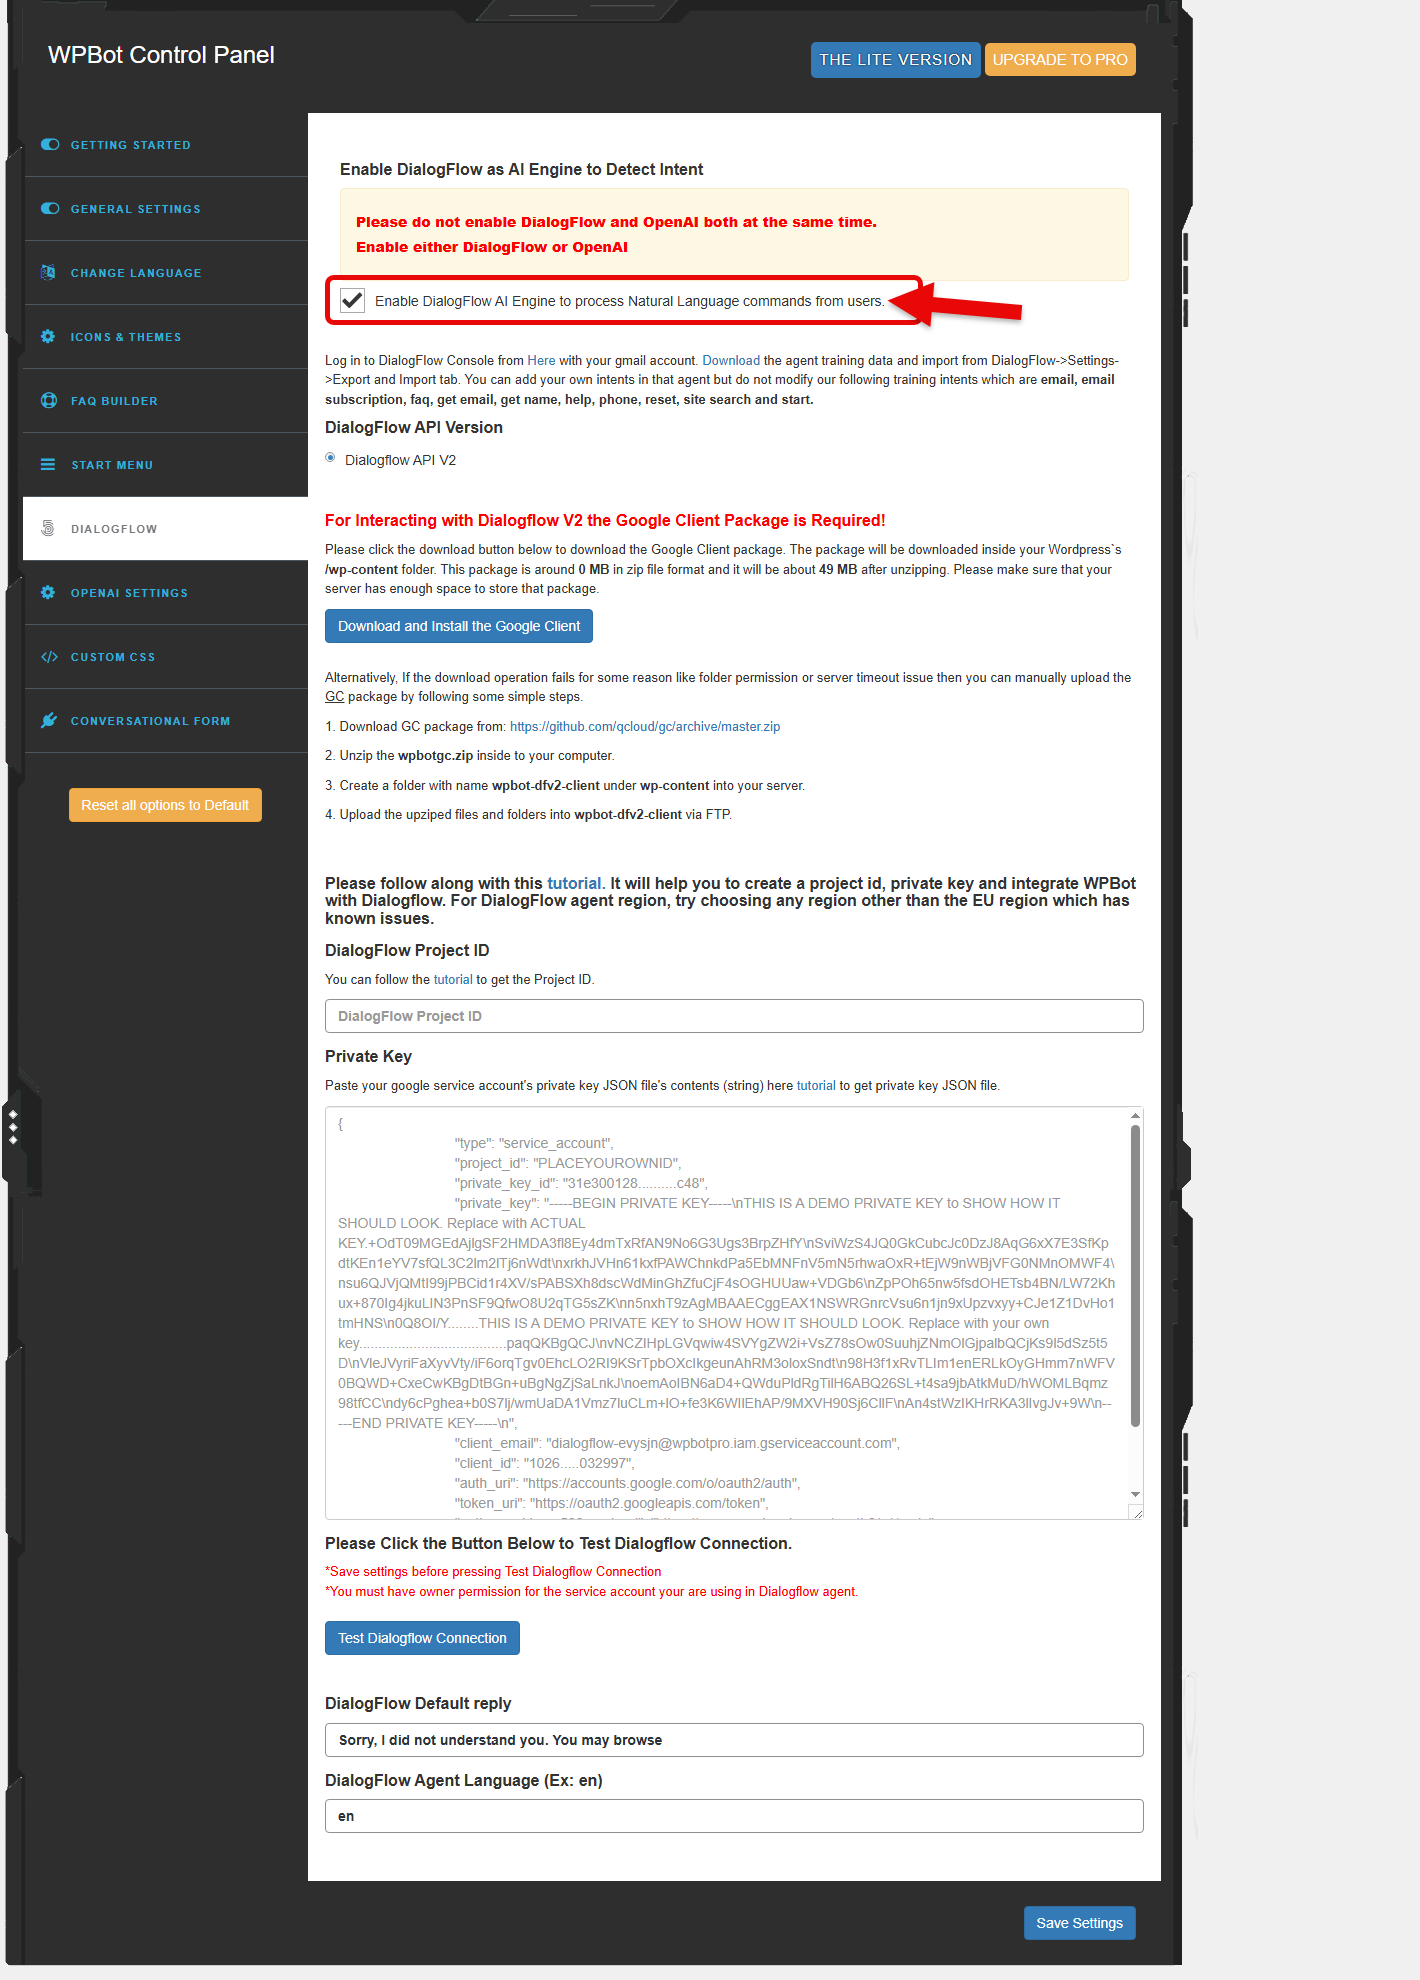
Add the required details and the chatbot will work according to that. If you want to use OpenAI, go to OPENAI SETTINGS.
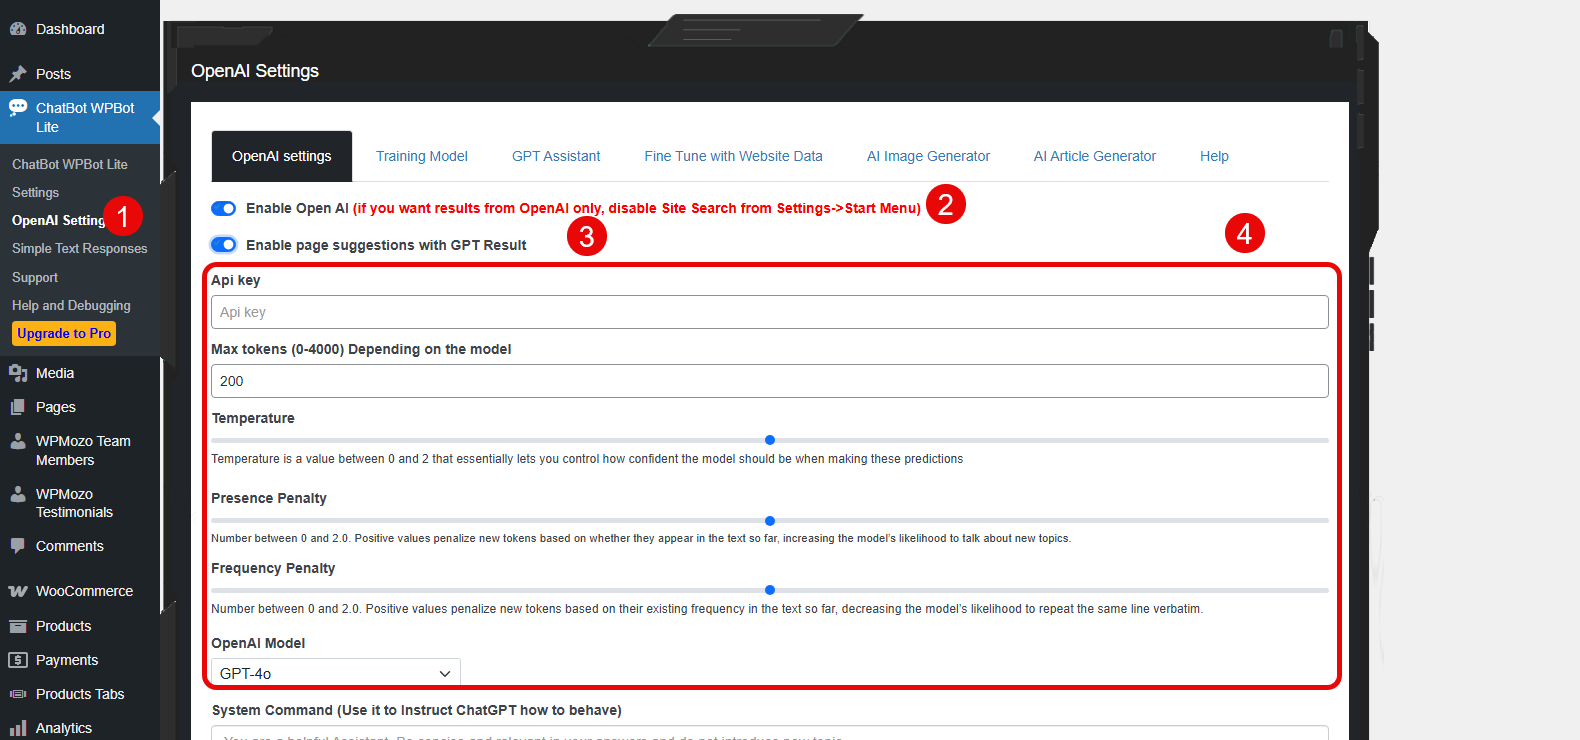
Here, first enable the OpenAI, then enable the page suggestions with GPT result. After this, you need to enter API key, token value, and other details to activate the Open AI chatbot using WPBot Chatbot plugin.
There are other options available but you can only access them with WPBot Chatbot plugin’s premium version.
Hence, Save Settings if you want to use the lite version only.
Step 7 – Use Custom CSS, Add Simple Text Responses, and Test the Live Chatbot
The Chatbot for your WordPress website has been configured almost completely. The only thing remaining is you applying some Custom CSS if needed. So, for that, go to the CUSTOM CSS and add your code.
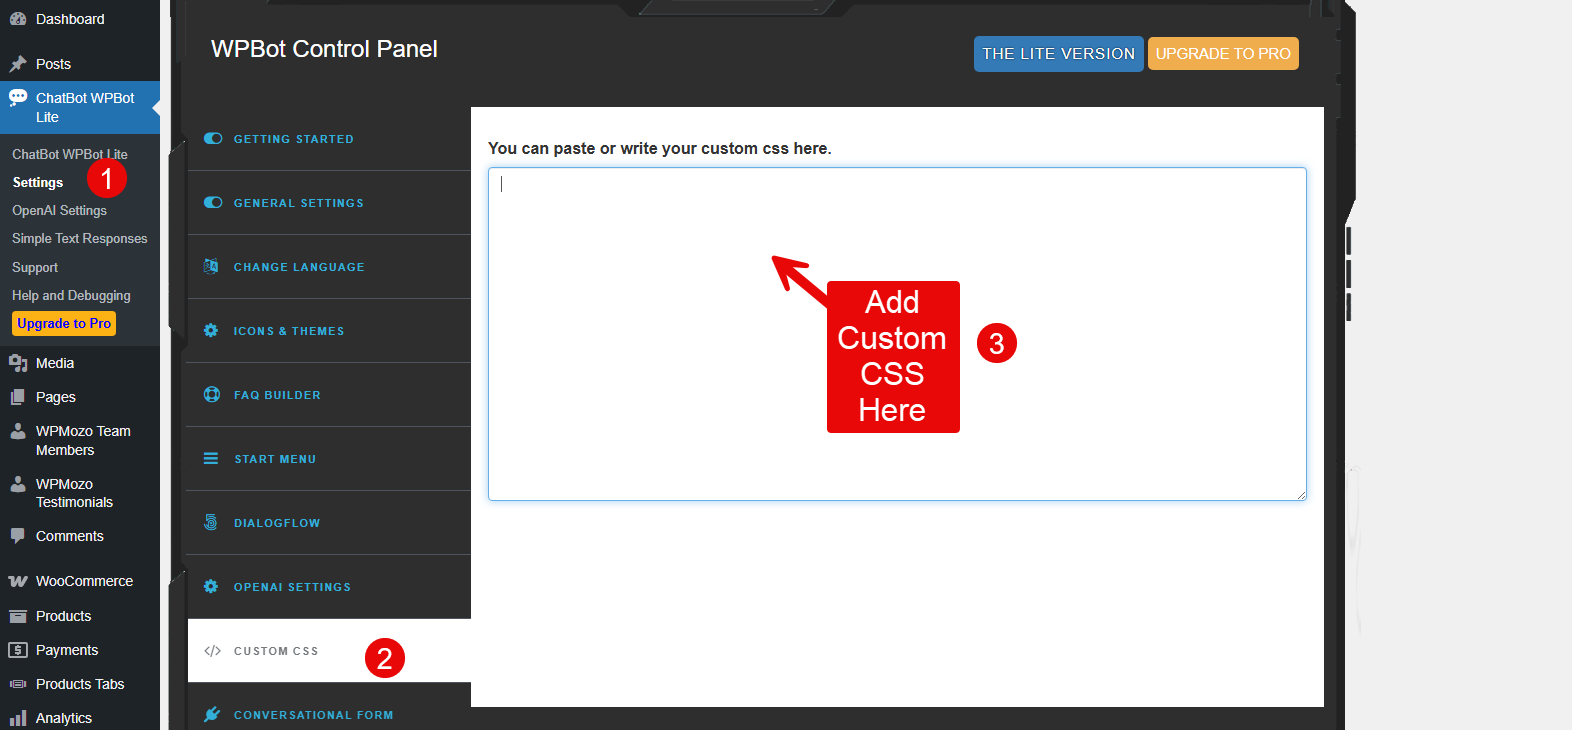
If not, click on the Save Settings button.
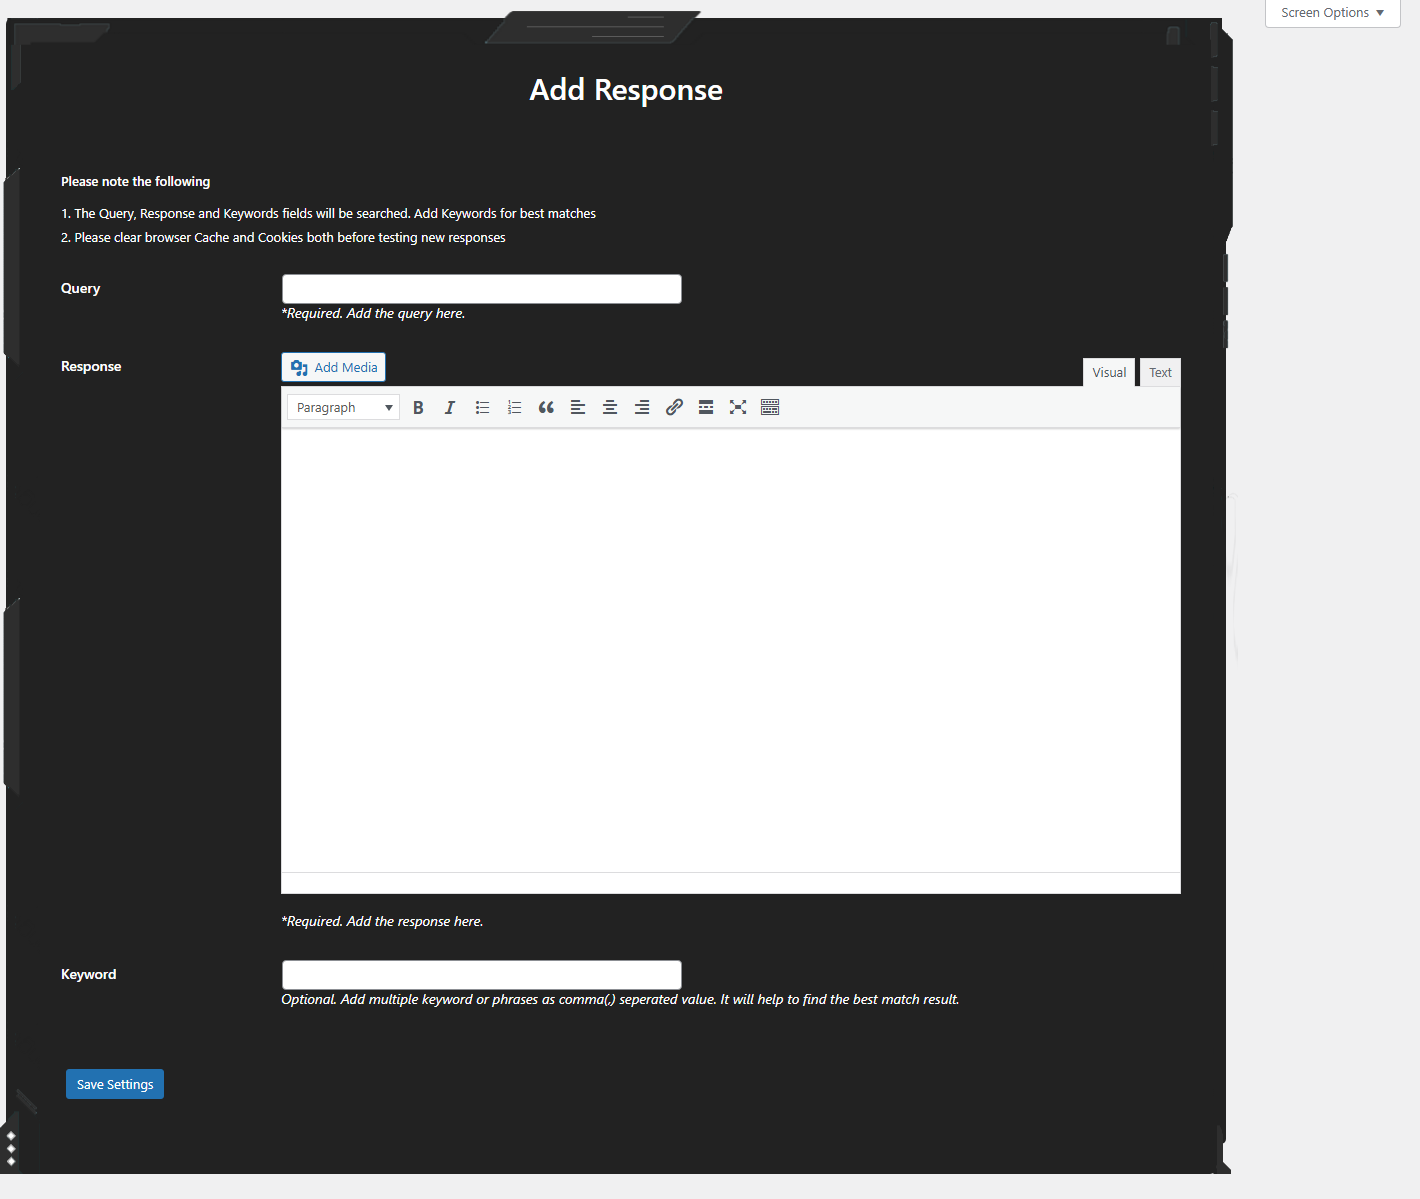
Now, what you need to do is add additional responses that you want to be used for general conversation with the chatbot. Therefore, go to the Simple Text Responses → add your responses by clicking Add New.
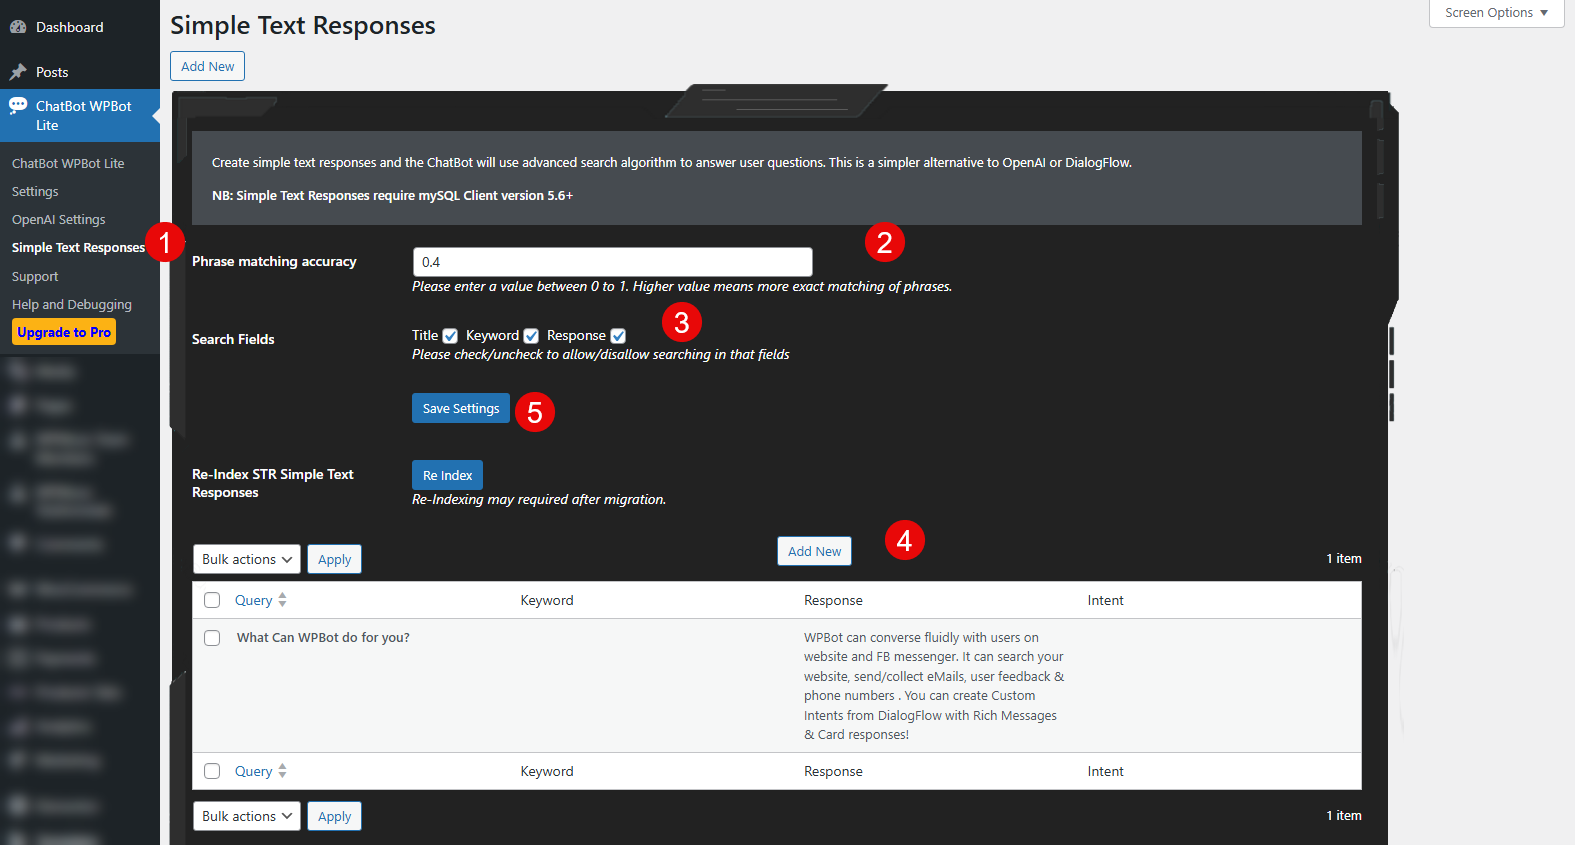
It’s a simpler alternative to OpenAI and DialogFlow if you’re not using them. Here, you get to decide:
- Phrase matching accuracy from 0 to 1
- Search fields: Title, Keyword, and Response
With this, you will be able to train your chatbot using extensive content.
Once you’re done with this, go to the frontend and check your chatbot whether it’s working right or not.
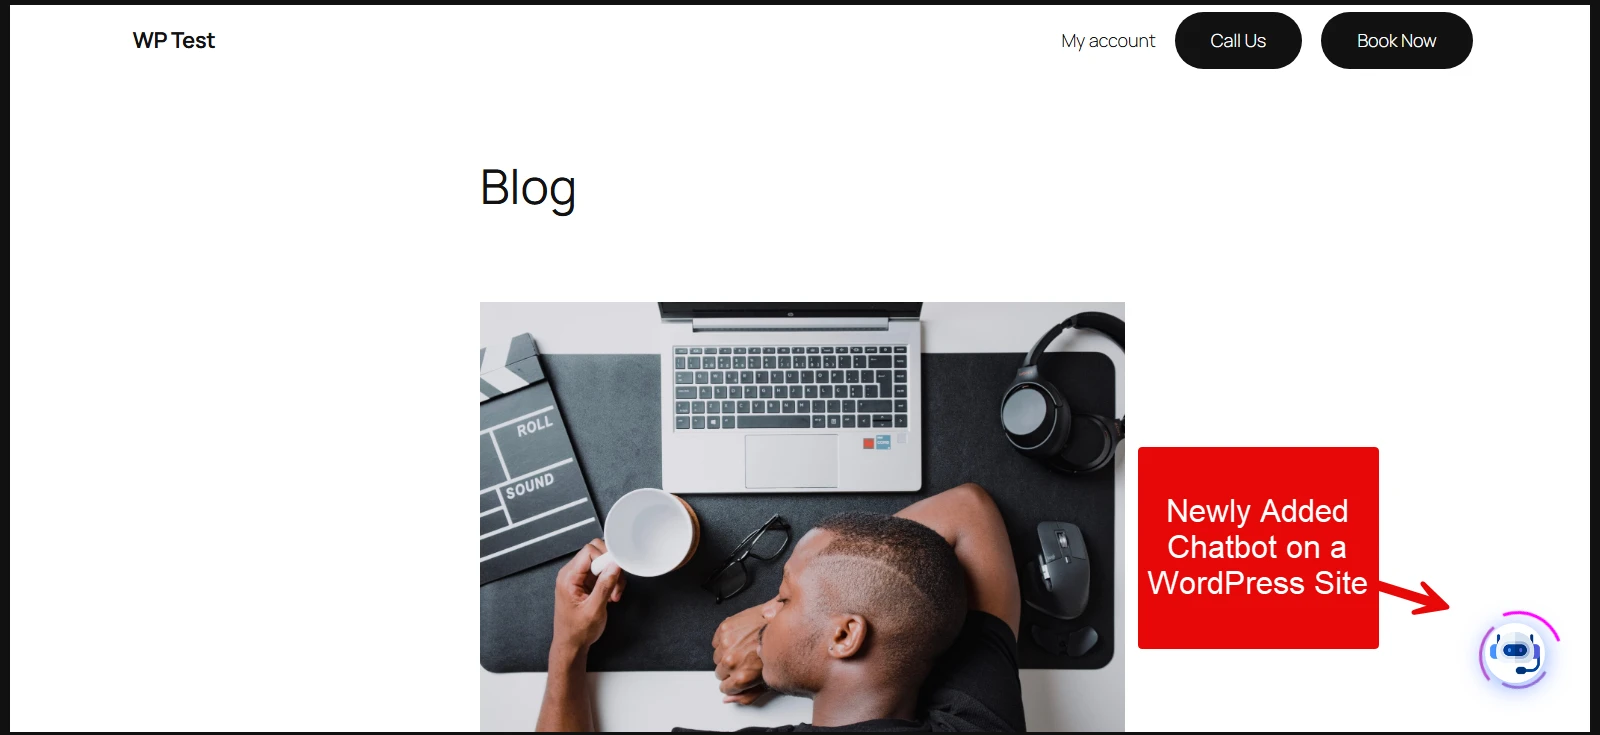
If everything’s fine, then you have added the chatbot successfully.
Now, let your website visitors come and the chatbot will act on your behalf if they have any queries.
Method 2 — Adding Chatbot in Website Using JavaScript
If you don’t want to use a plugin to add a chatbot to your website, then you can do that by using JavaScript. For that, we are going to use the tawk.to free live chat software.
Follow the below to learn how to do that.
Step 1 – Create an Account on tawk.to
Visit tawk.to, and click on the Get started button.
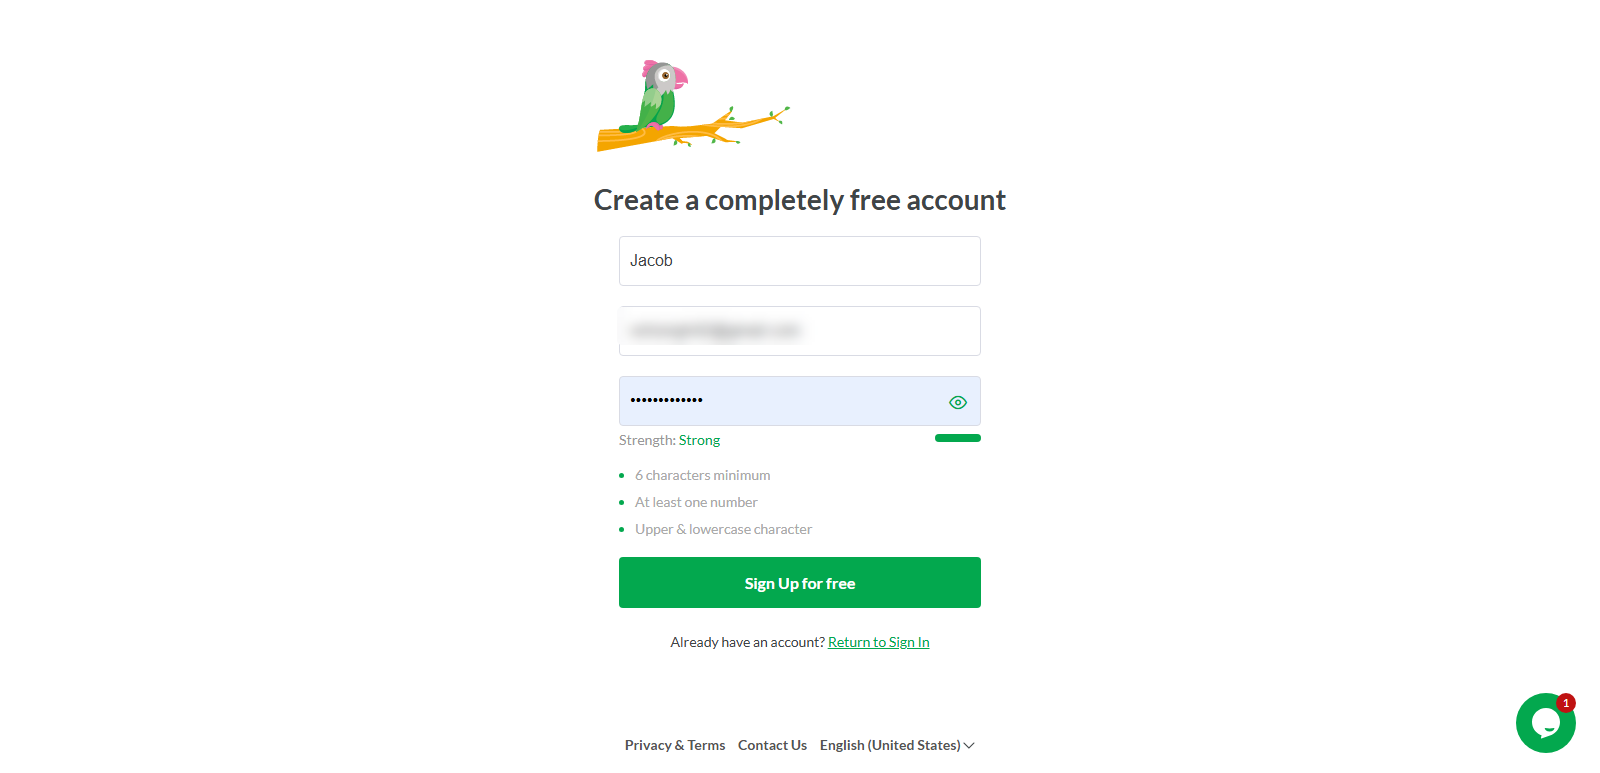
On the new page, add your basic details such as:
- Name
- Password
Then, click Sign Up for free.
After you do that, you will be redirected to the tawk.to set up the wizard. Here, select the services you want to use from tawk.to.
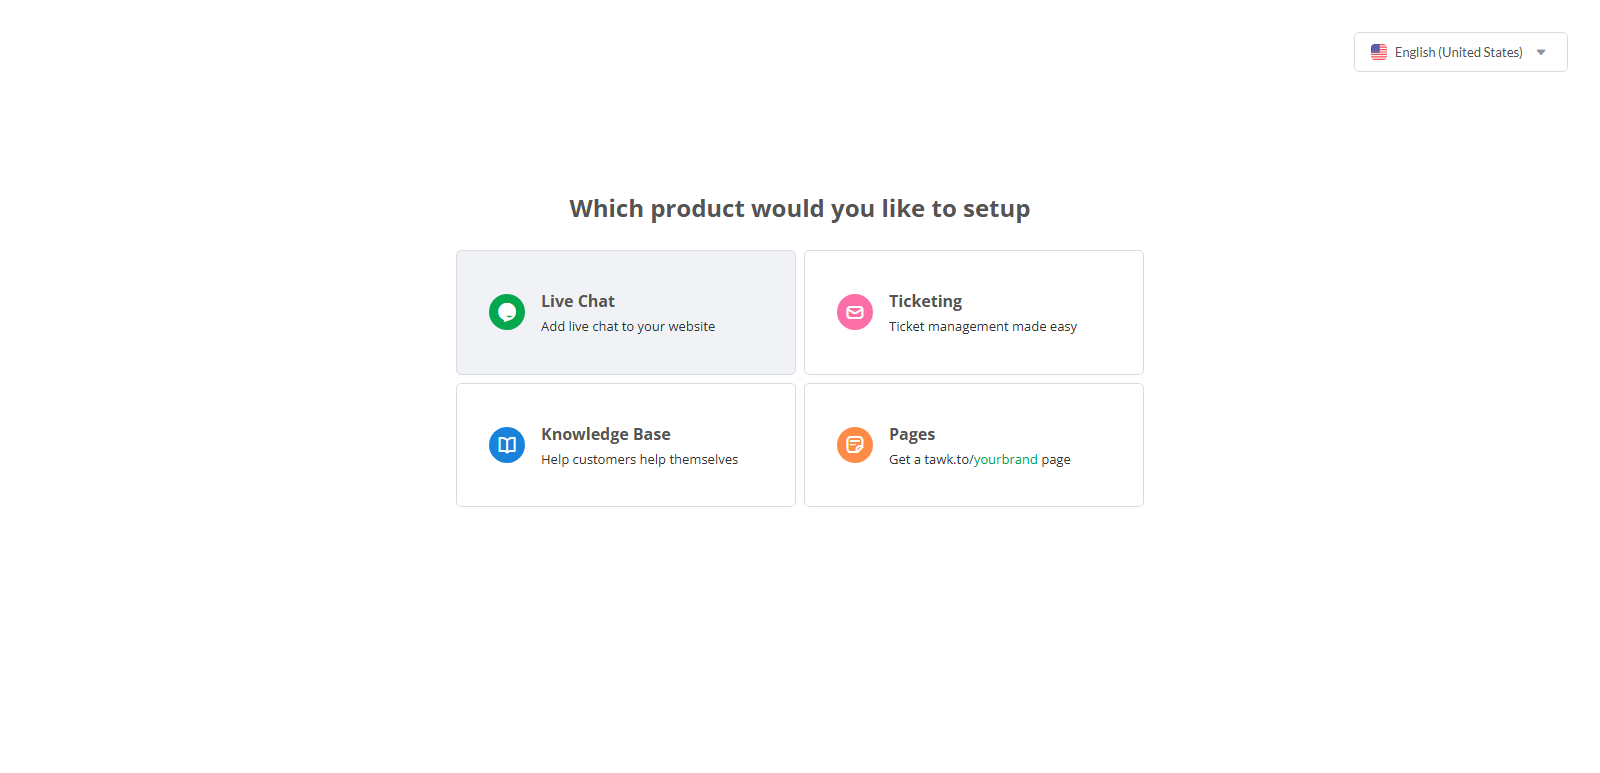
For our tutorial, I chose the Live Chat option. As you select the option, you will be redirected to the new page where you need to enter your website’s URL.
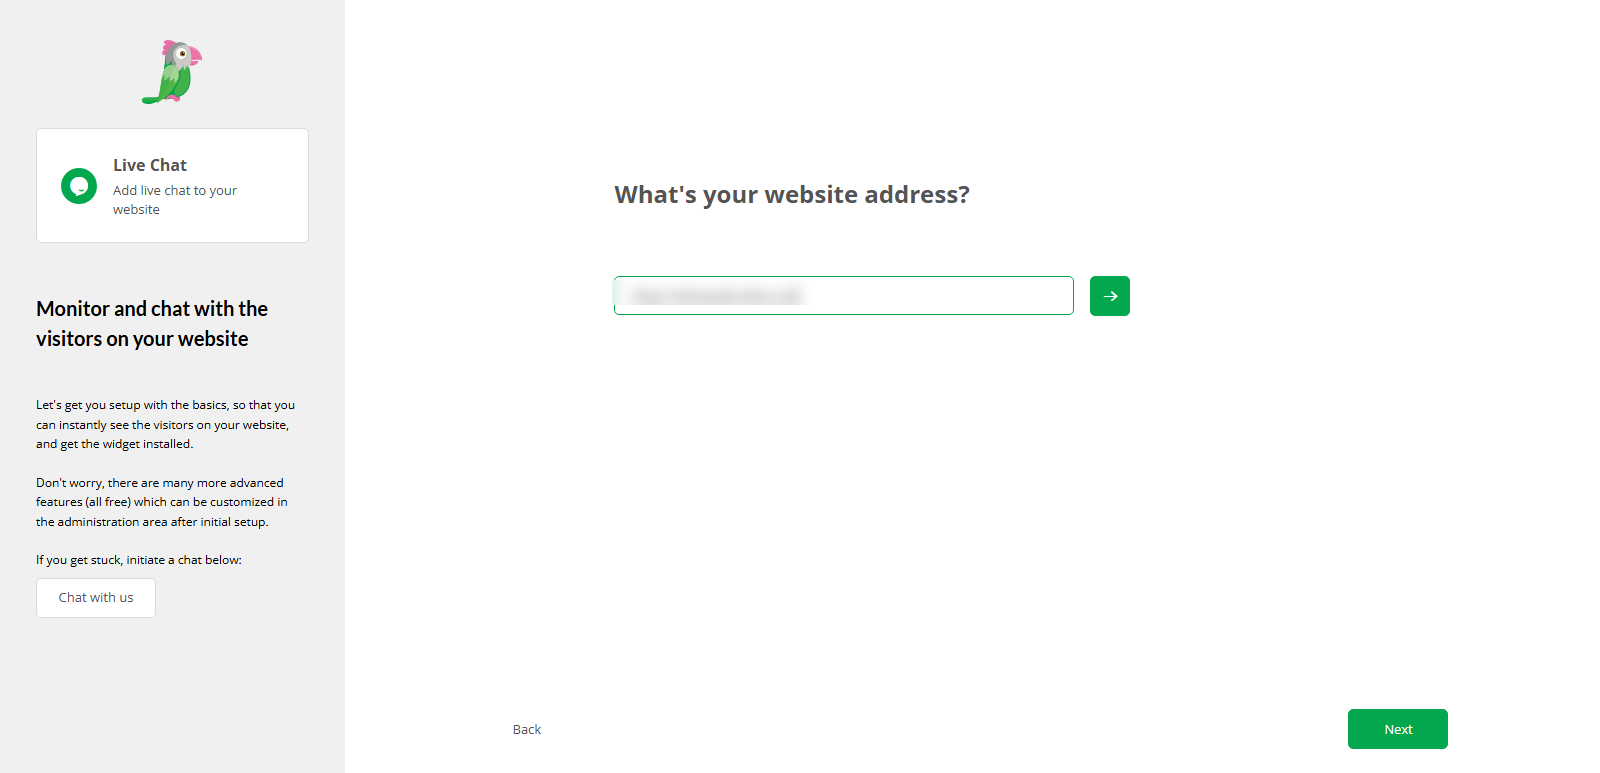
Simply add the URL and then click the →. It will further ask you to enter the organization’s name. Then, you will be directed to choose the style of your live chat.
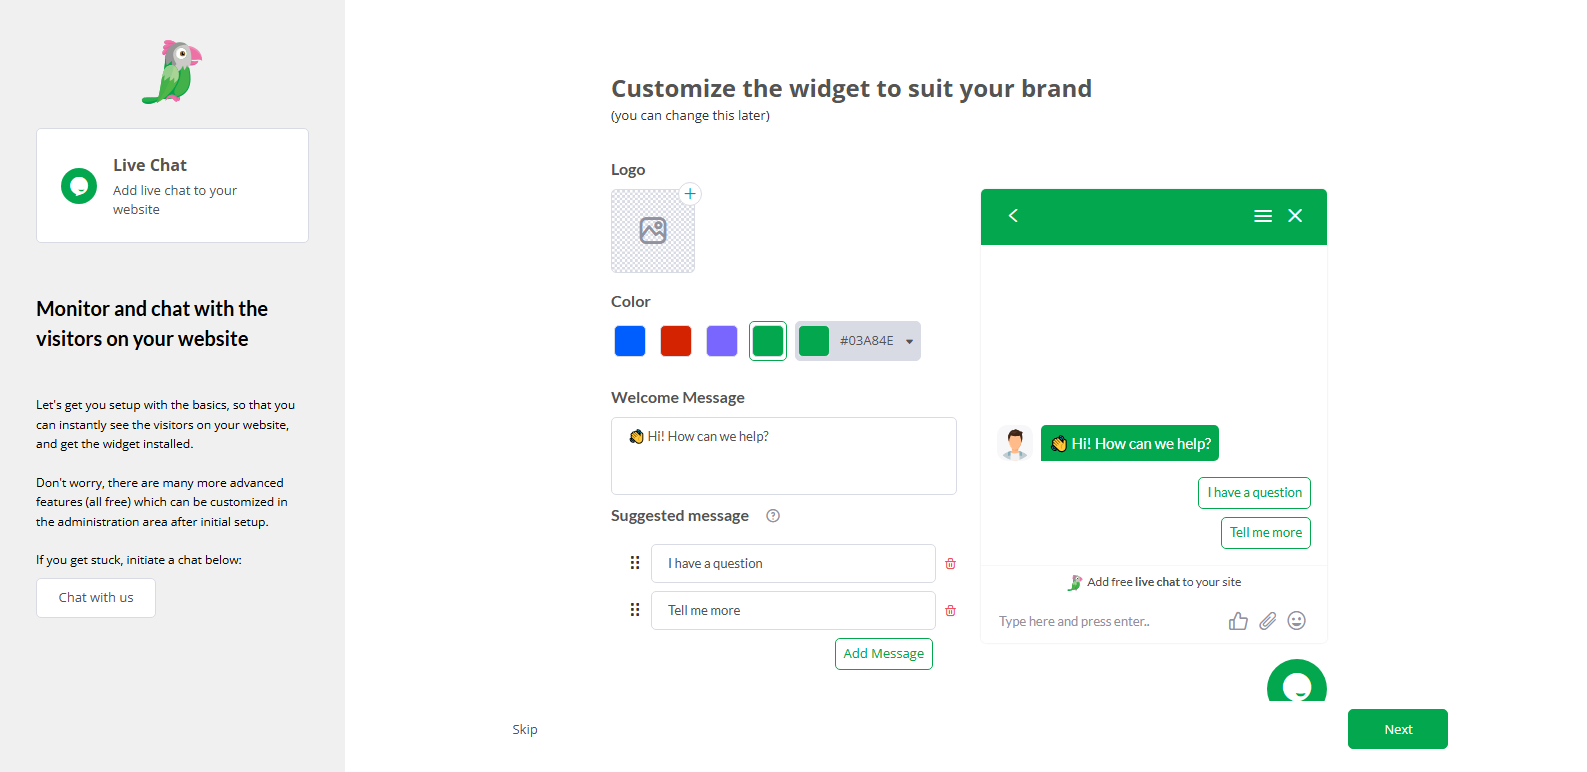
Make your customizations like logo, color, welcome message and suggested message. Then click Next.
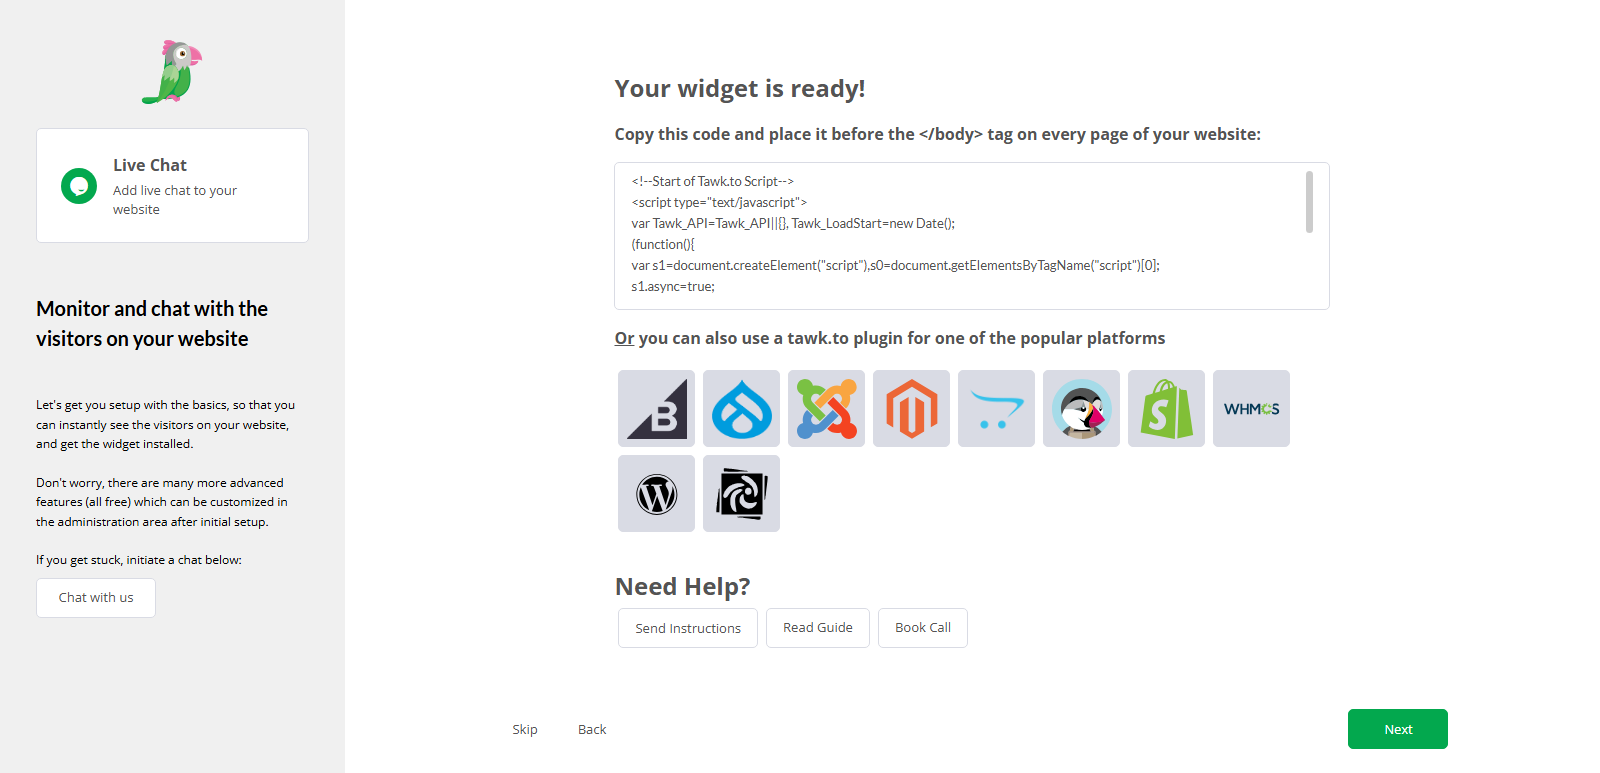
As you finish the customization, you will get your code, but we will not copy it now, first we want to enable the chatbot functionality of tawk.to. So, simply click Next.
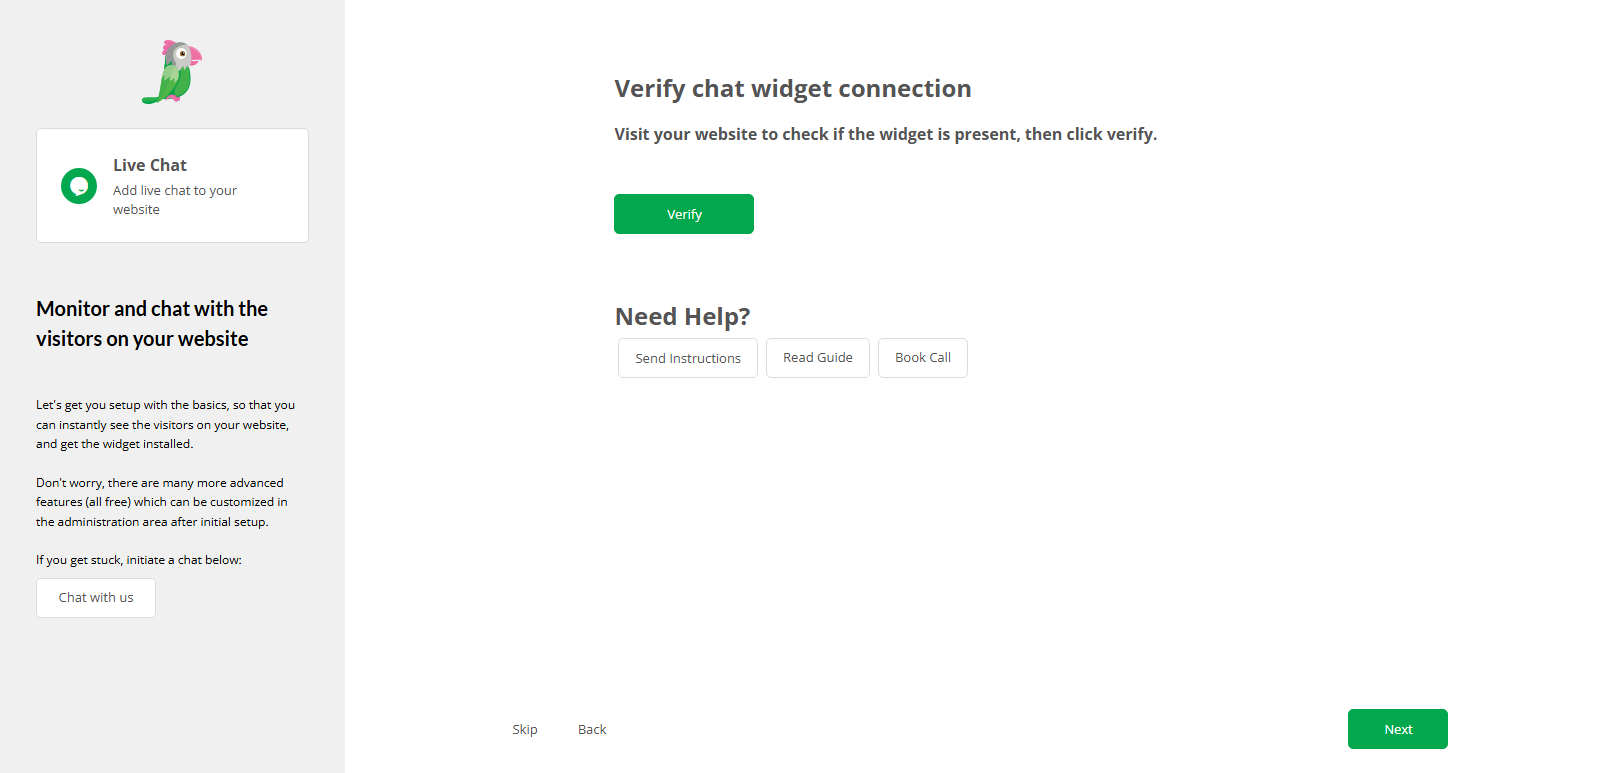
Then, it will ask you to verify it. As we haven’t added the script to the website. Let’s click Next. As you do that, it will take you to the first screen, there, you need to simply skip all the steps.
Once you are in the dashboard, move to the next step.
Step 2 – Enable the Apollo tawk.to Chatbot
tawk.to has incorporated AI assistant to their live chat. This means, now you can have a chatbot using the same live chat software. So, to use that on your website, what you need to do is enable it.
Therefore, go to Add-ons → AI Assist
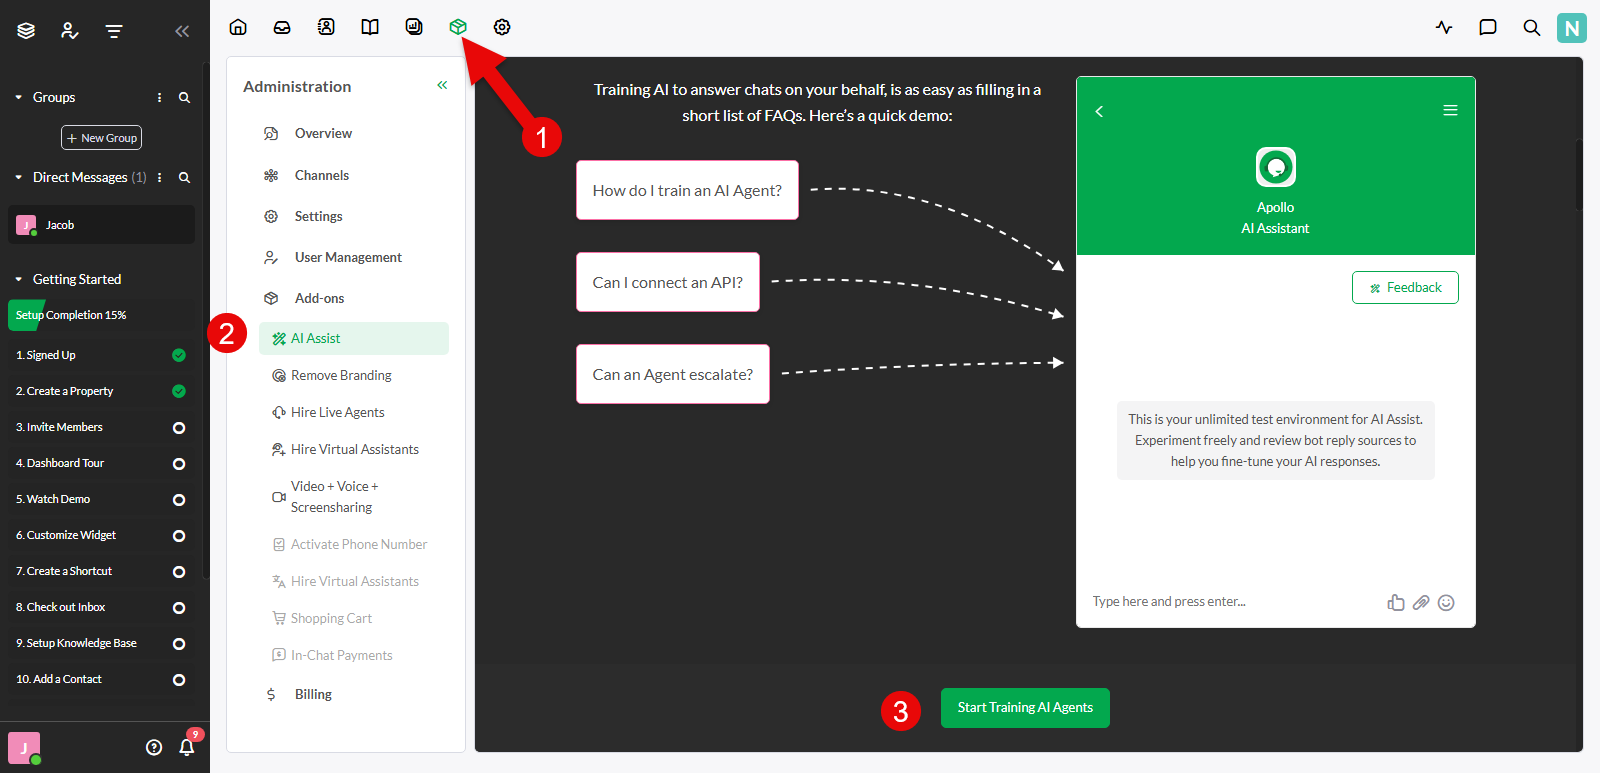
Here, click on the Start Training AI Agents. This will open the setup wizard to train your AI bot.
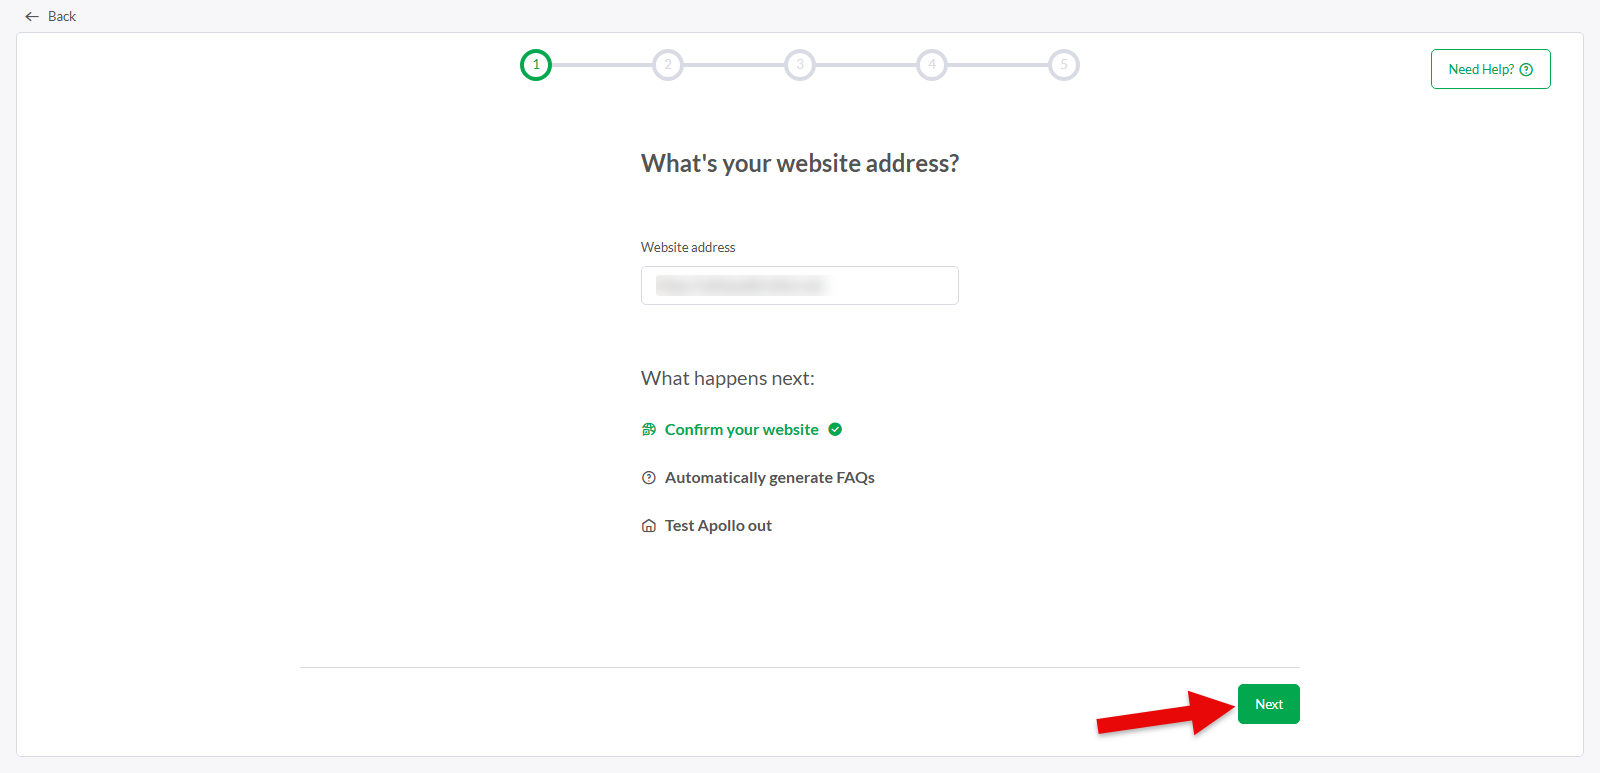
Click Next and the process will begin. As the process completes, you will automatically generate FAQs based on the content of your website. You can edit them, delete them, or add new ones based on your requirements.
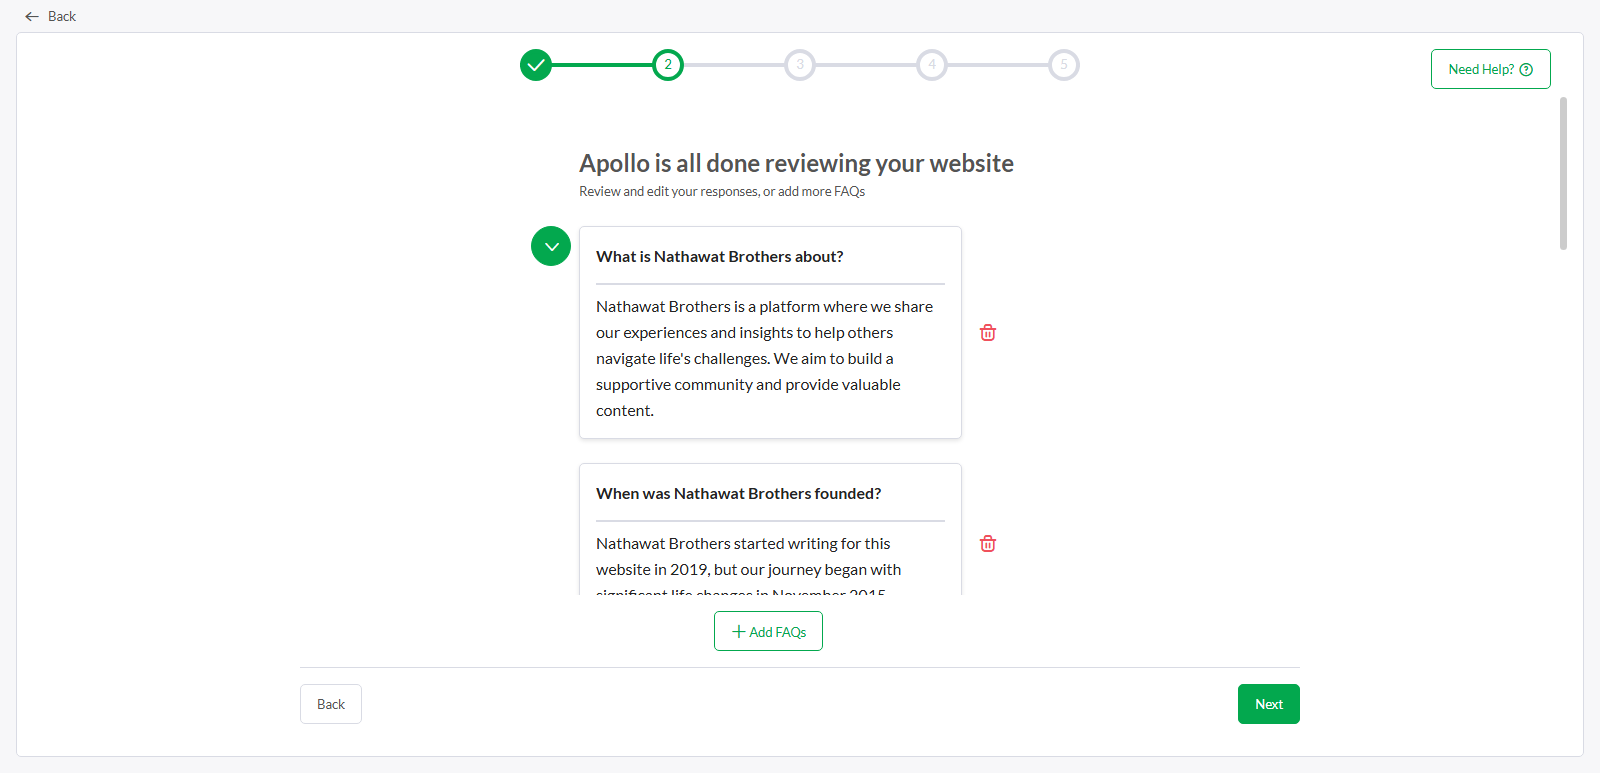
Again, after editing the FAQs, click Next, and then test your AI chatbot.
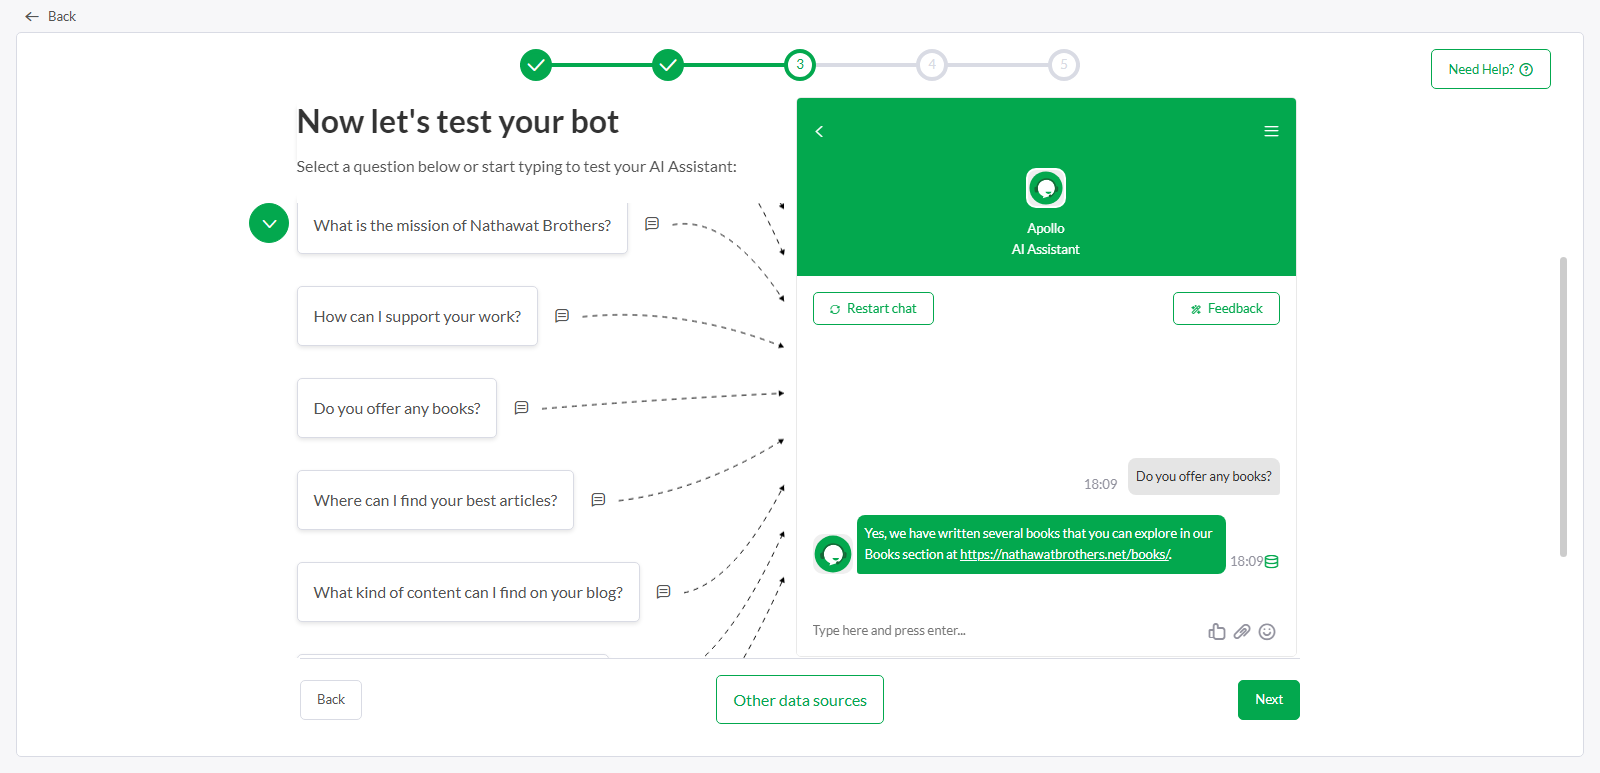
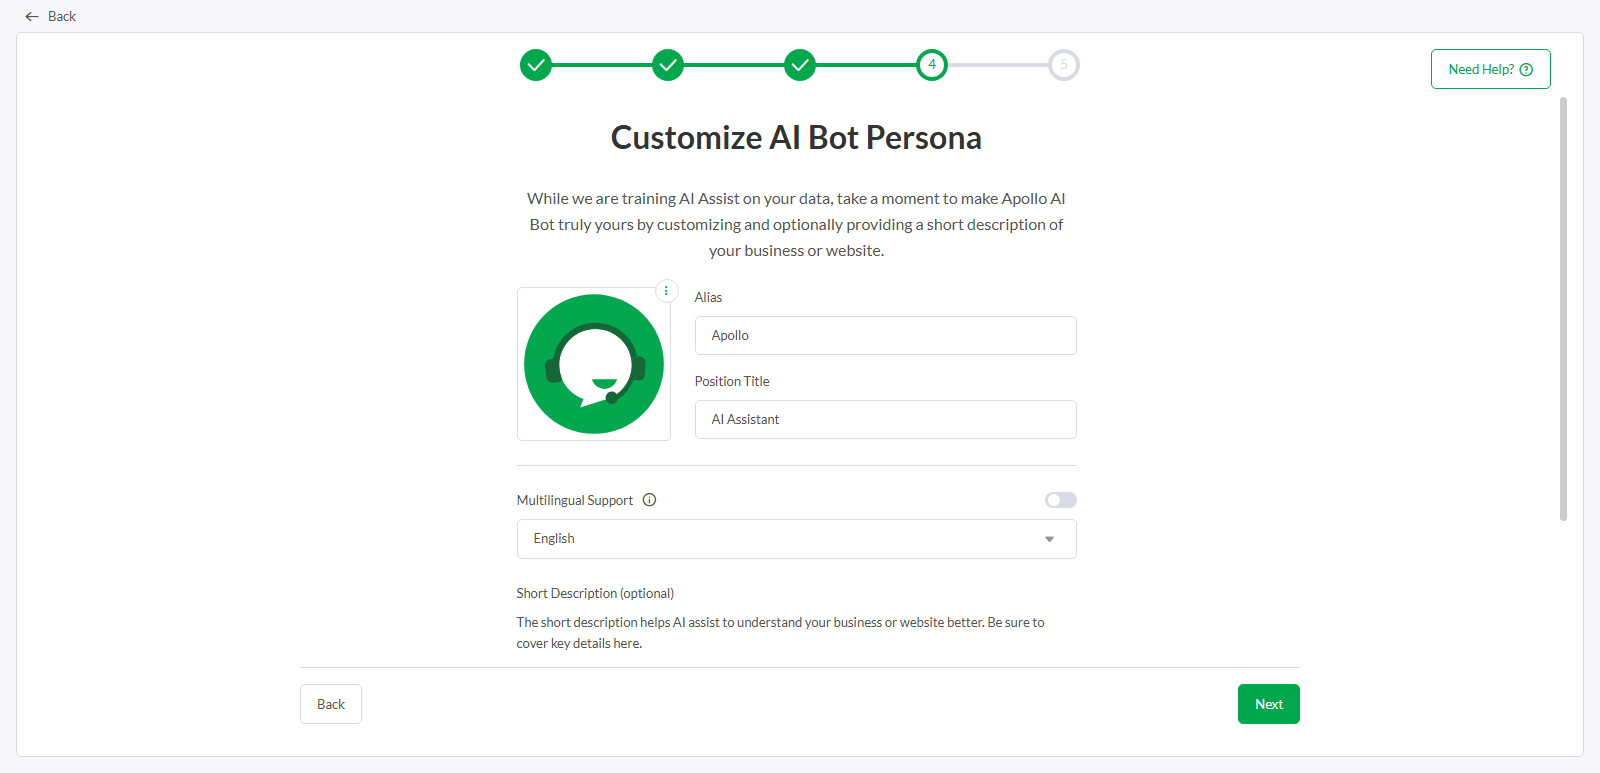
Once satisfied with the responses, click Next. The next setup will ask you to customize the AI persona. Simply add the details as you prefer and then click Next.
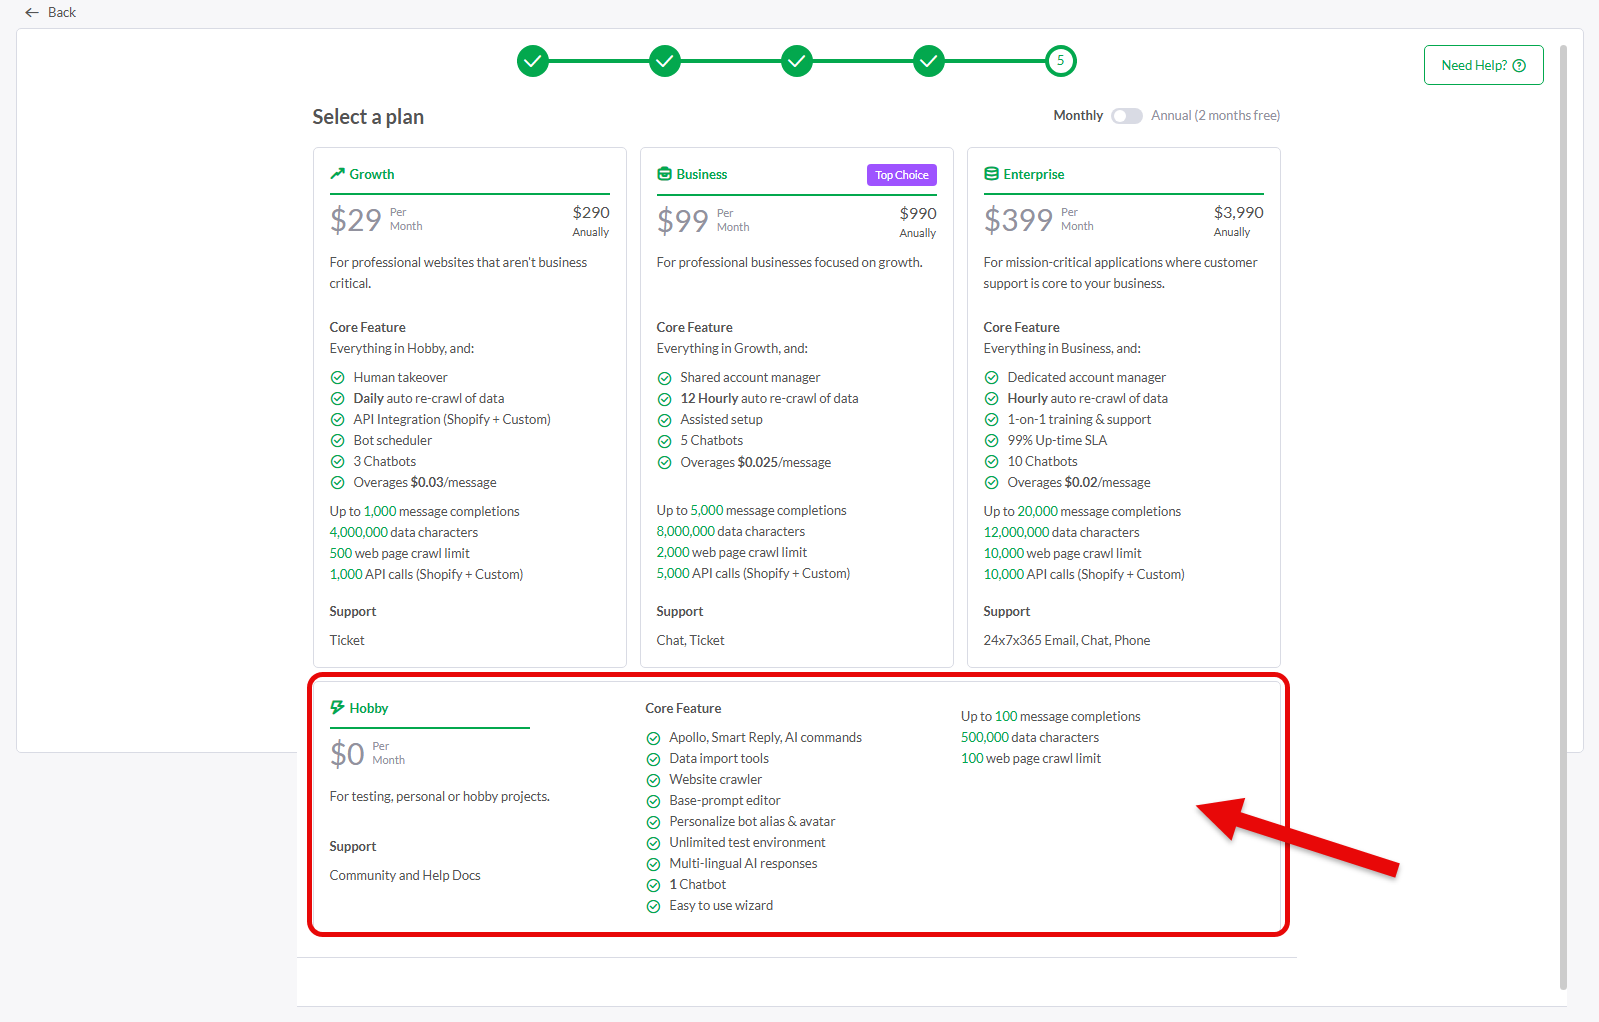
Finally, it will ask you to choose a plan. You have the budget, you can select any available paid plan, but want to use the free one, choose the Hobby plan and click Continue.
A popup will appear, simply click Activate Now.
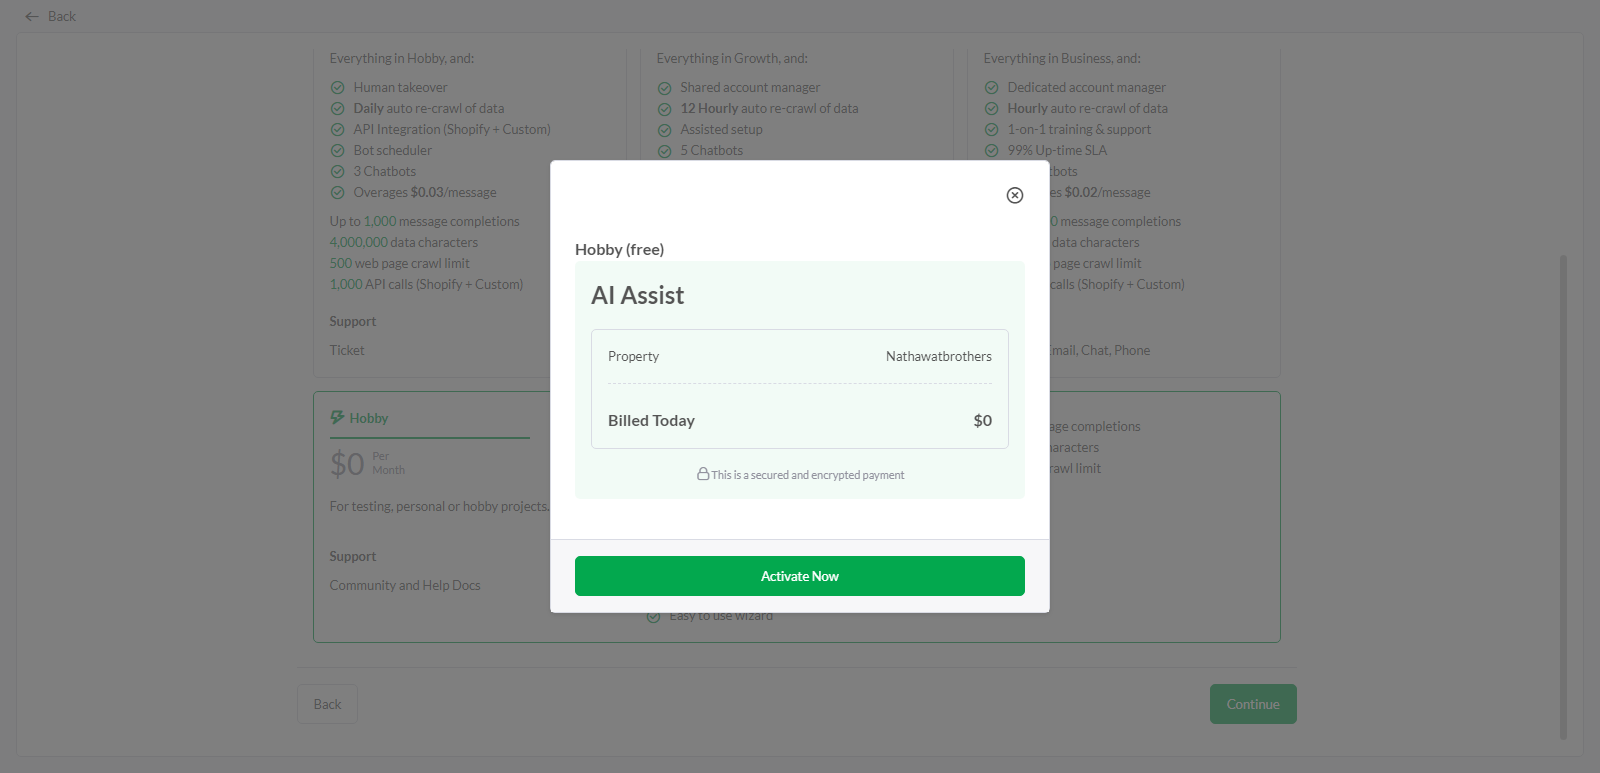
Once done, close the AI Assist setup wizard.
Step 3 – Extract the Chatbot Code
Your tawk.to chatbot is ready to be added to the website. So, now what you need to do is, extract the JS and for that, go to Administration → Channels.
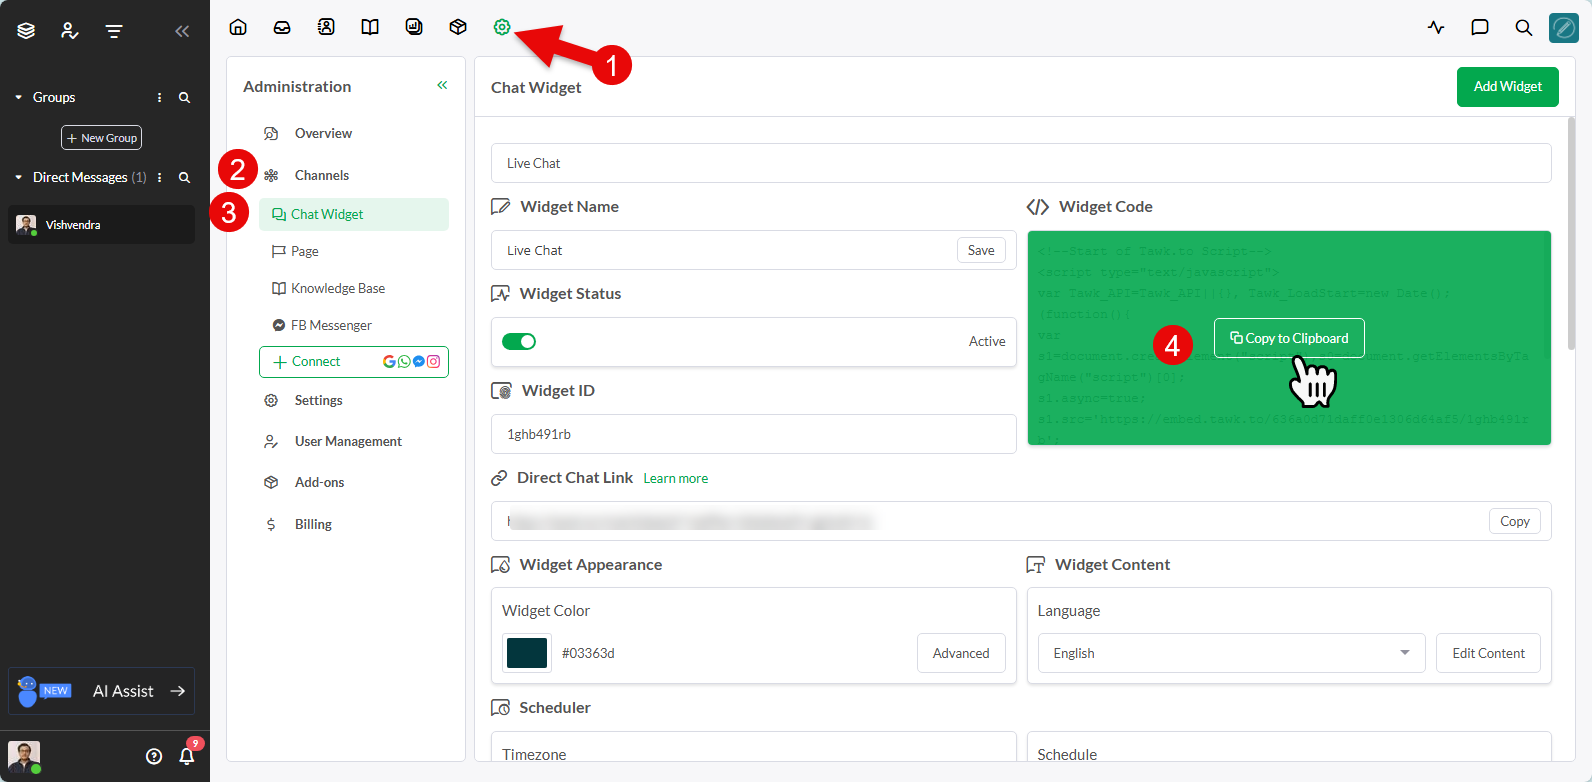
Here, you can see the code under the </> Widget Code section. Hover over the area and click on the Copy to Clipboard button.
Once the code has been copied, move to the next step.
Step 4 – Add Chatbot Code in the Header Tag
Open your WordPress website, and add the code in the Header of the website.
To do that, you need to install a free plugin, because we don’t want to interfere with the theme’s function.php file.
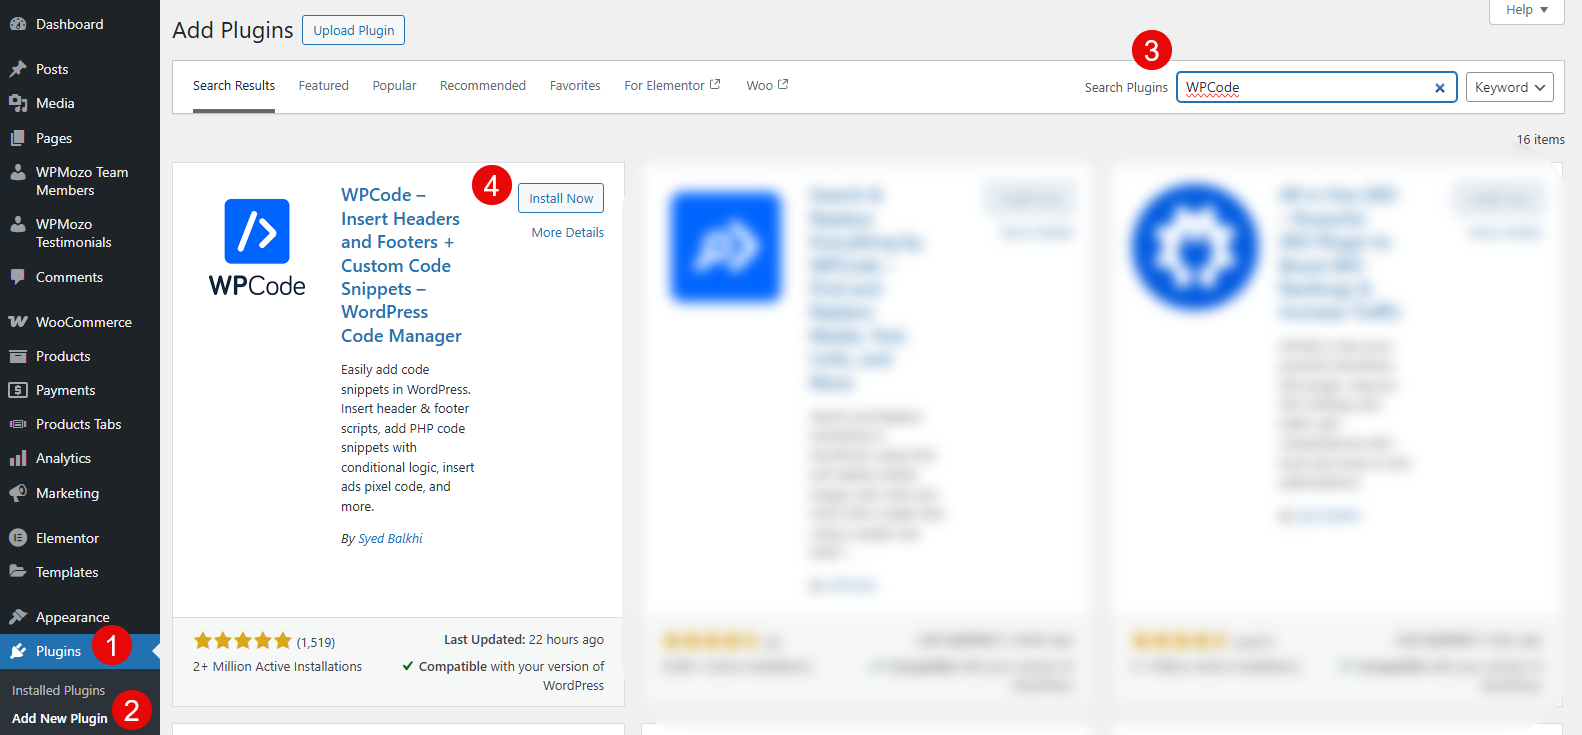
Therefore, go to Plugins → Add New Plugin → search for WPCode → and install the following one.
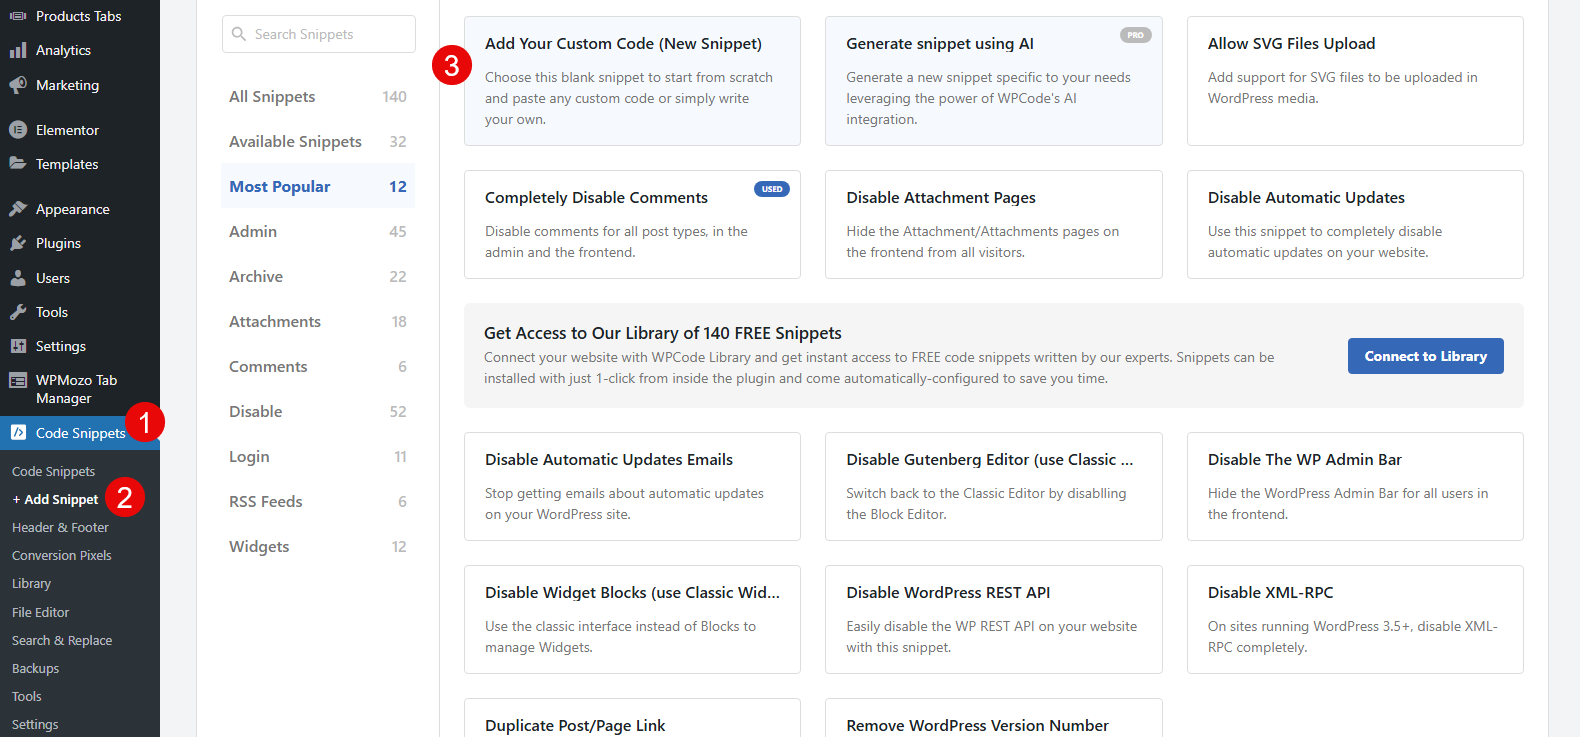
Activate the plugin. Then, head over to the sidebar → Code Snippets → Add Snippet → New Snippet
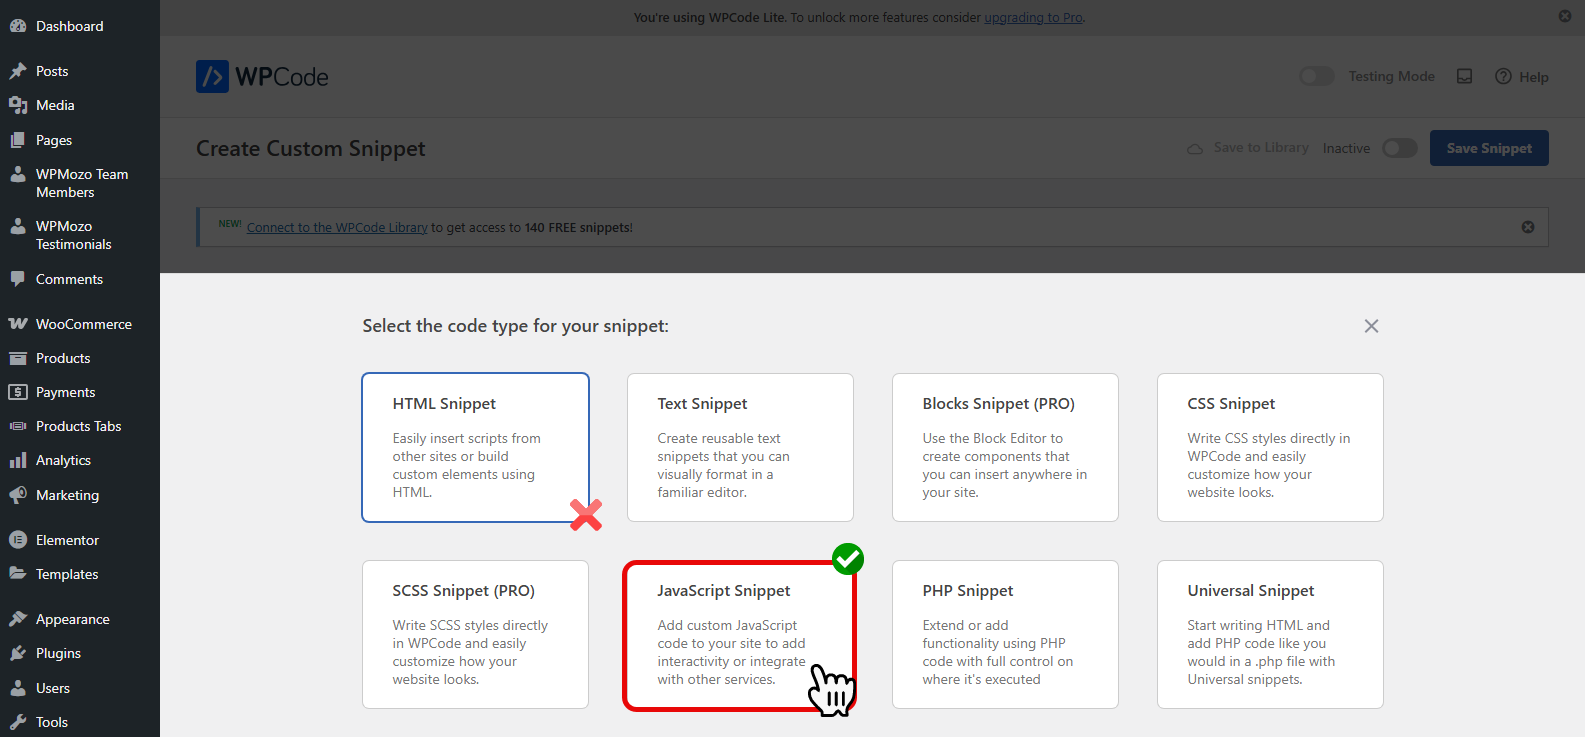
In the new window, first select the snippet type as JavaScript Snippet.
And then do as the following:
- Enter the name of the snippet
- Past the code
- Select Insert Mode: Auto Insert
- Location: Site Wide Header
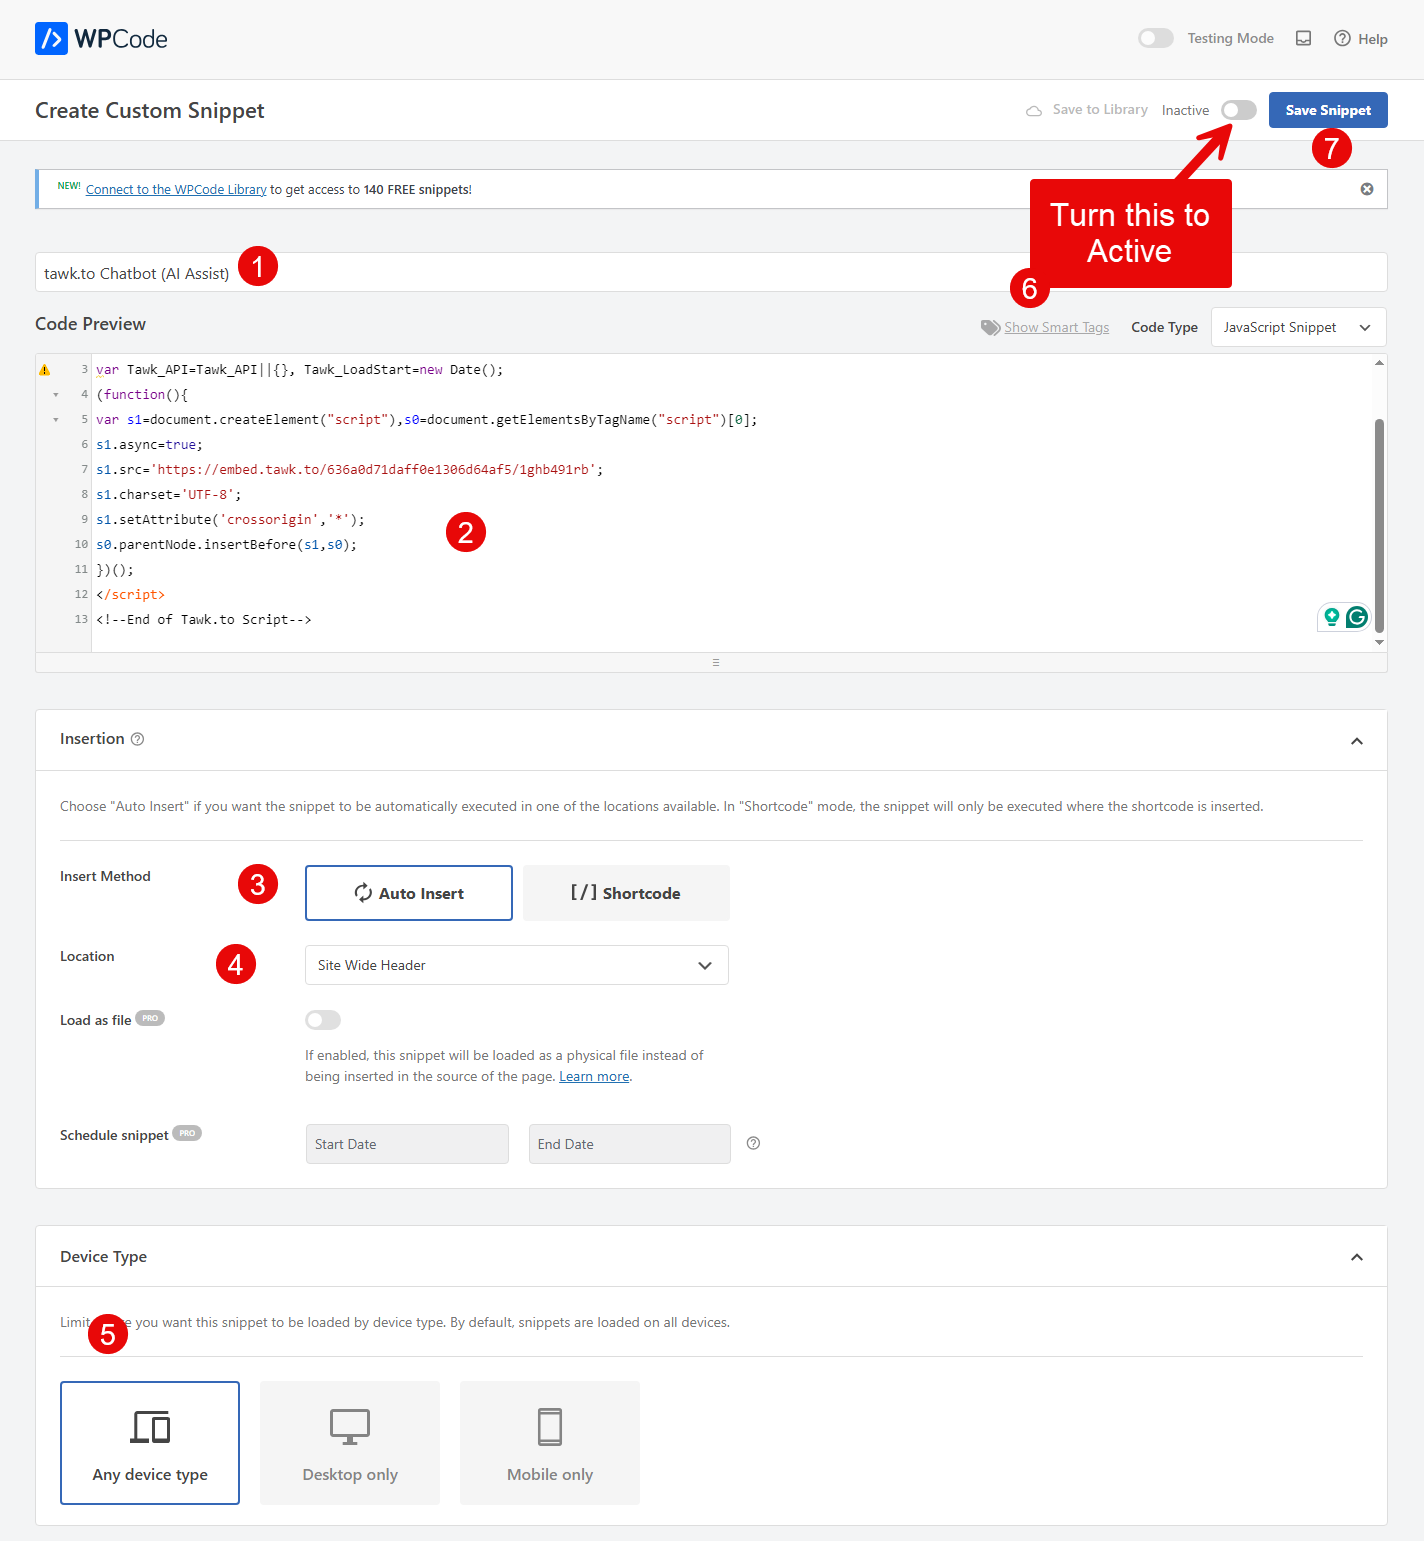
Then check the Inactive → Active, and click Save Snippet.
Step 5 – Test the Apollo AI Assistant
Go to the frontend of your website, and if the chatbot from tawk.to was successfully added, you can see a chatbot icon like the following.
Now, check your chatbot and if you find any issues, simply go to the tawk.to the dashboard and make the required changes. If everything’s fine, then you’ve added a chatbot to your WordPress website without using any plugin, except the script insertion one.
But, tawk.to’s chatbot is effective and will offer a quality assistant to your website visitors.
Conclusion
Above, we explored what a chatbot is and why you should use them.
I have also shared a list of chatbot plugins and platforms that offer powerful solutions to add a chatbot to a WordPress. By following the above steps mentioned in each method, you can easily add your chatbot and assist your website visitors while you’re away. Or on an automation basis, so that you don’t have to spend time on the same task of customer support.
The methods I have mentioned are enough to add chatbots on a WordPress website and offer extensive support to the user.
Try the methods today on your website and let us know what your experience was. I hope these will help you a lot.


0 Comments