
Almost every website has content that allows it to communicate with visitors or customers. But communication alone isn’t enough if there’s no interaction. Research shows that interactivity plays a key role in allowing users to explore the website easily.
There, the Flip Box element comes into play.
If you want to improve interaction on your website’s content, a flip box is one of the recommended design elements. It provides you with the right amount of elements that invoke curiosity in the users’ minds and motivate them to interact.
For website owners using Elementor, creating a flip box element takes only a few clicks.
You only have to use the right flip box Elementor widget, make some adjustments, and you’re done. If you’re looking to add flip box magic to your website, then continue till the end.
What’s a Flip Box?
A flip box is an interactive element that allows you to display content such as images and text with a CTA. It has a front and back side, each containing different elements based on the configuration.
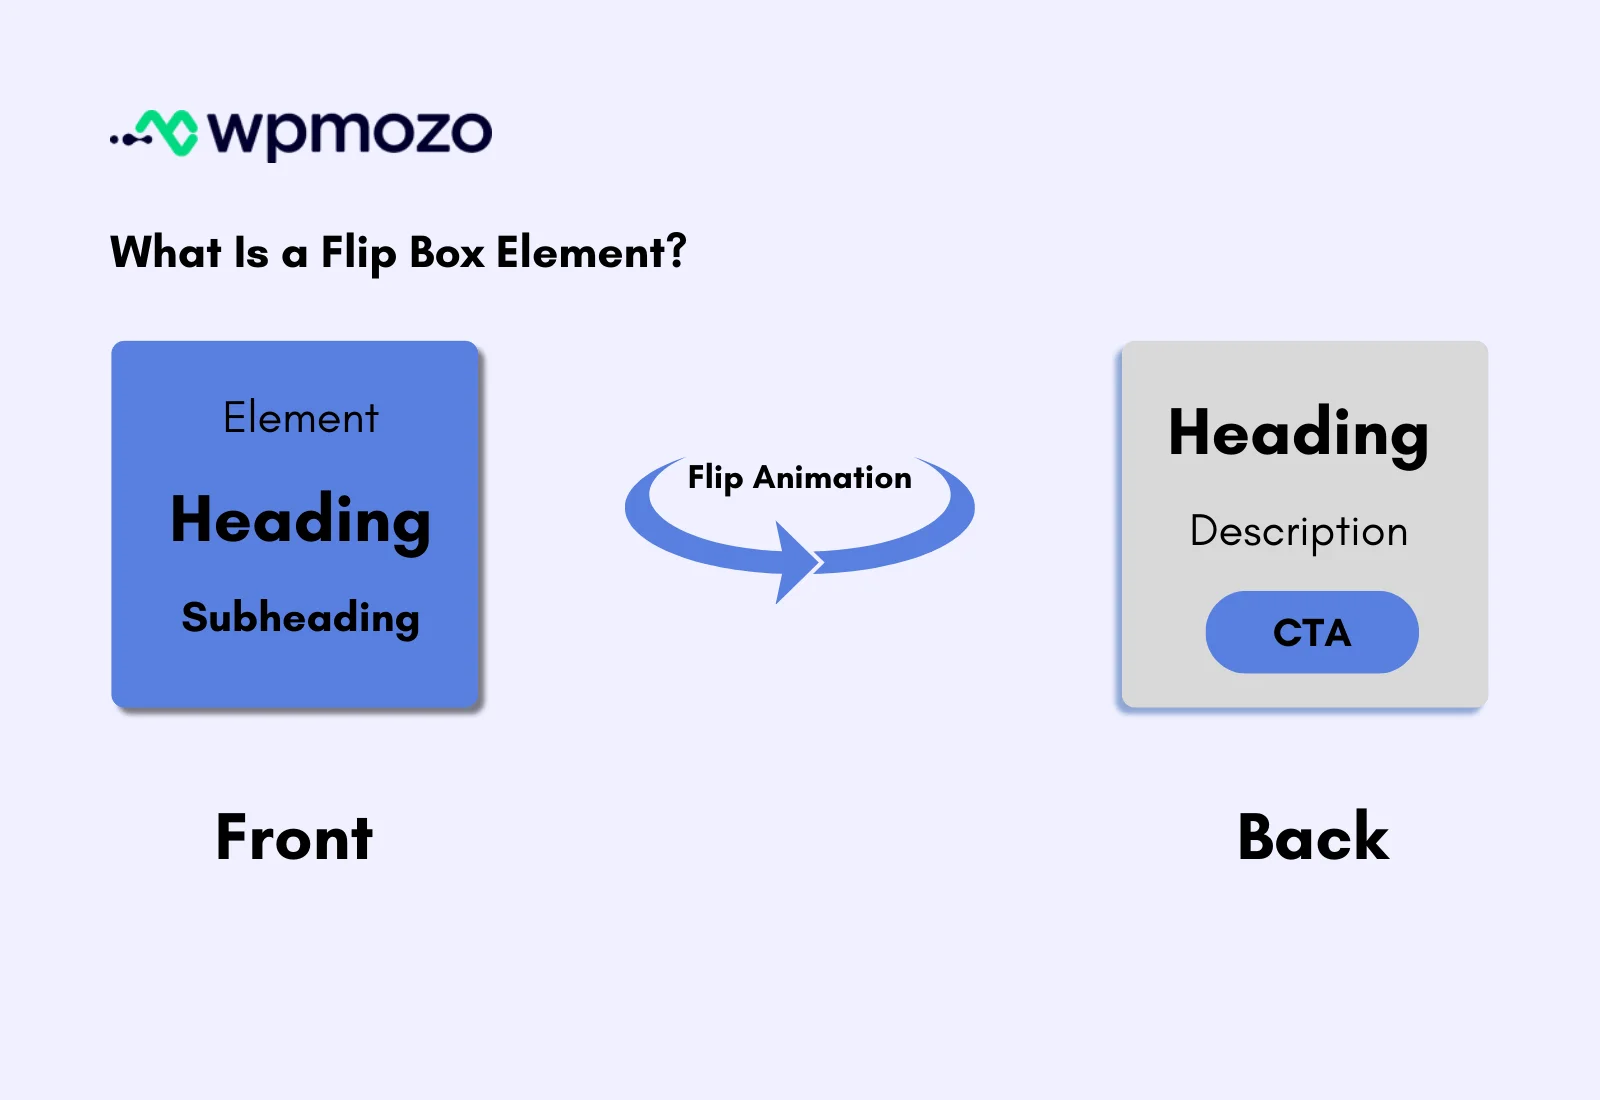
For example, you have created a flip box that showcases content on the front and a CTA with a description on the back. Now, when the user hovers on the flip box, it turns and displays the element on the back. The following flip box example explains it perfectly.
Different Elementor flip box widgets allow you to utilize your flip box element differently.
You can set multiple directions, different flip animations, and custom CTA.
Before you go and create your own flip box Elementor element on your website, it’s useful to know how it can help you.
Benefits of Flip Box
As mentioned earlier, a flip box element on a WordPress website can be an effective way to improve user engagement. Furthermore, it can help you add more to the site, which allows customers to stay for longer.
1. Visual Engagement:
The flip boxes you create add an extra visual touch to the website. Through flip animation, they attract users and motivate them to interact with the content. Thus improving the visual experience and, at the same time, the interactive one.
Furthermore, the need to present dynamic content other than static images or text can also be fulfilled by using a flip box
2. Efficient Use of Space:
By using a flip box on your website, you don’t have to use more space to add content. The front and back sides will effectively let you add content that’s enough for user engagement. Plus, other elements can also take place inside the flip box’s area. Thus, it is a complete solution to use space on the website.
3. Improved User Experience:
The flip boxes you’ll add to the website surely motivate users to interact. When users interact, they find that interaction a better user experience, allowing them to explore your website and its content in a much-improved way.
4. Highlighting Features and Benefits
Add multiple flip boxes on your website to highlight the features and benefits of your products. You can showcase not only products but also different services you offer, all in an interactive and engaging way.
5. SEO Benefits:
When users interact with the content or elements of a website, it increases a website’s user session. If a website has higher user sessions and low bounce rates, then search engines like Google give more credibility to the website’s pages and rank them on appropriate search terms. Hence, good for SEO.
How to Implement the Flip Box on an Elementor Website
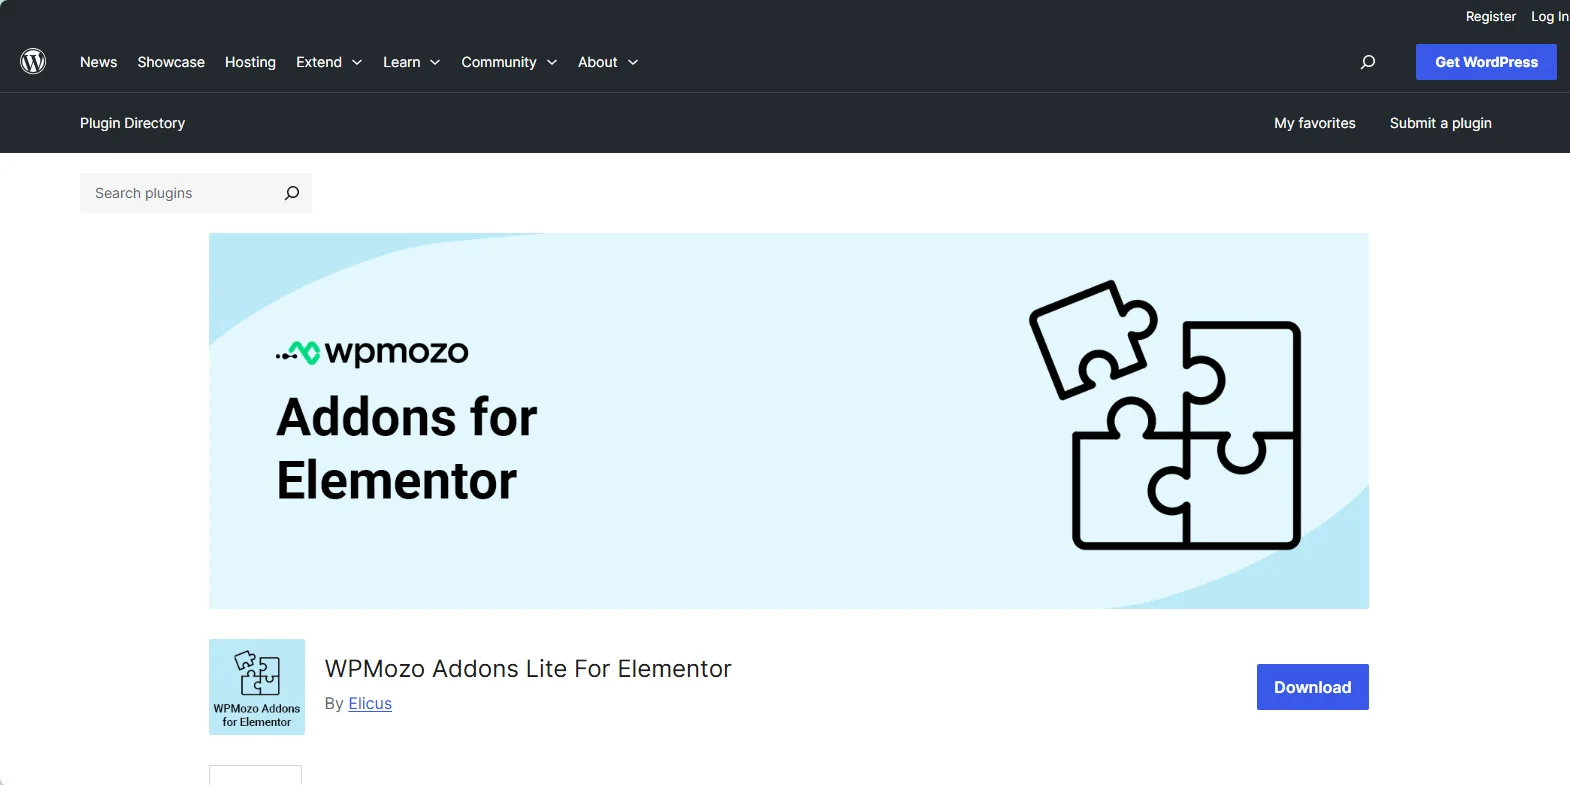
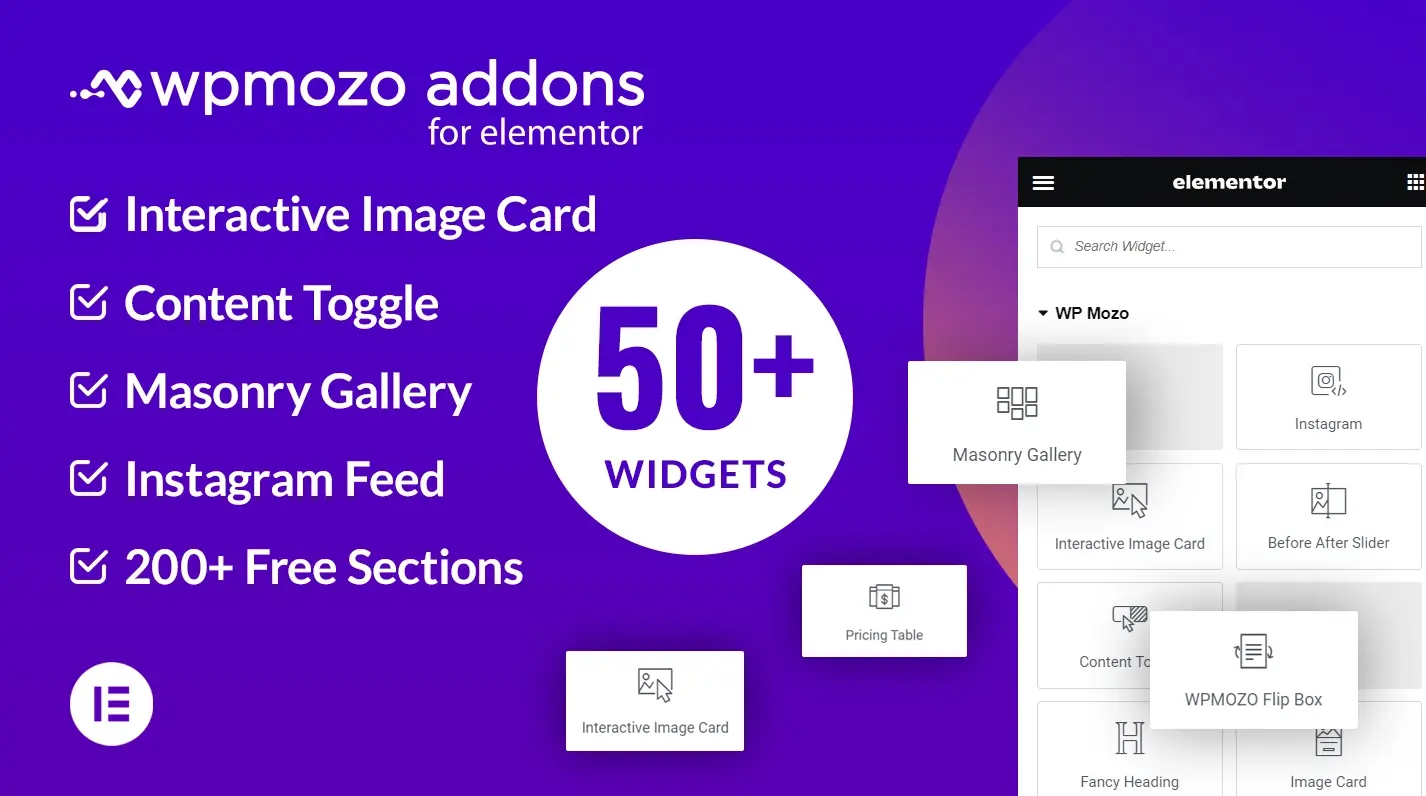
In order to add a flip box on your Elementor website, you can use the Flip Box widget from the free version of the WPMozo Addons for Elementor plugin. The plugin provides you with a total of 14 free Elementor widgets that you can use for various design requirements.
The plugin is lightweight, responsive, and has features and options that you can utilize without any extra effort. We’re going to use the Flip Box widget from the same plugin to add our flip boxes to an Elementor website.
Let’s see how you can do that.
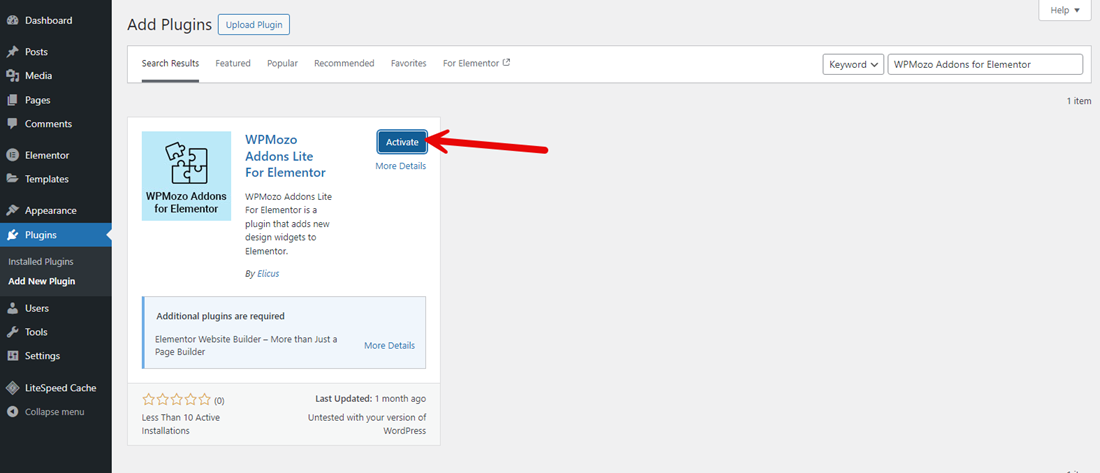
Step 1: Install and Activate the Flip Box Widget
In order to use the Elementor Flip Box widget by WPMozo, you need to install the WPMozo Addons Lite for Elementor. To do that, go to Plugins → Add New Plugin → search for WPMozo Addons Lite for Elementor.
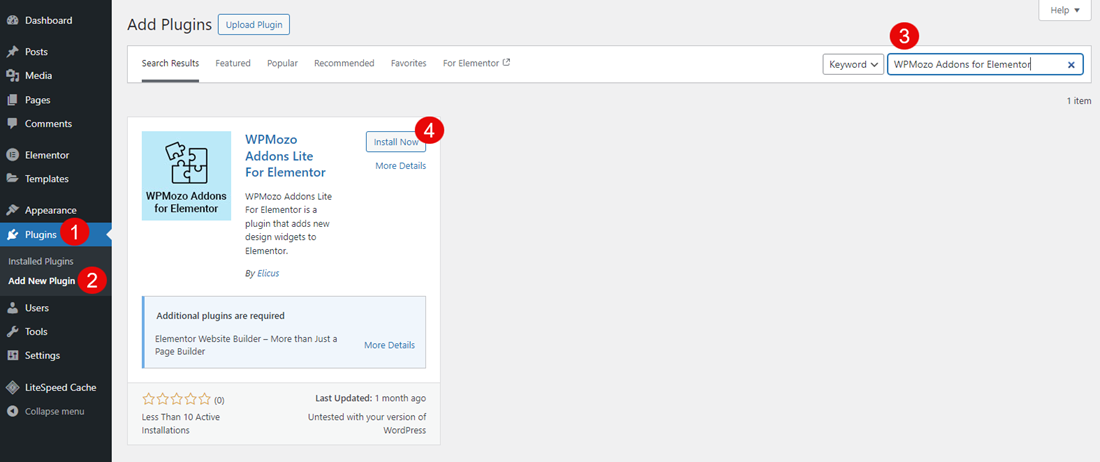
Install the shown plugin in the picture, and once it’s installed, click Activate.
We have activated the plugin, which also has activated our required Flip Box Elementor widget. Now, you need to create a new page or edit an existing one to create your flip boxes. Follow the next steps below:
Step 2: Insert the Flip Box Widget
Launch the Elementor builder by clicking the Edit with Elementor button at the top of the Gutenberg editor. After the launch of Elementor canvas, go to the widgets toolbar on the left, and scroll down to WPMozo → drag and drop the Flip Box widget in the canvas.
As soon as you add the widget, the flip box will appear on the page, as you can see in the above illustration.
Step 3: Add Content and Customize the Flip Box
After adding the flip box Elementor widget, what’s left is to add the content and customize it for further visual enhancement. The Content tab of the widget lets you customize flip box:
- Layout
- Content
- Elements
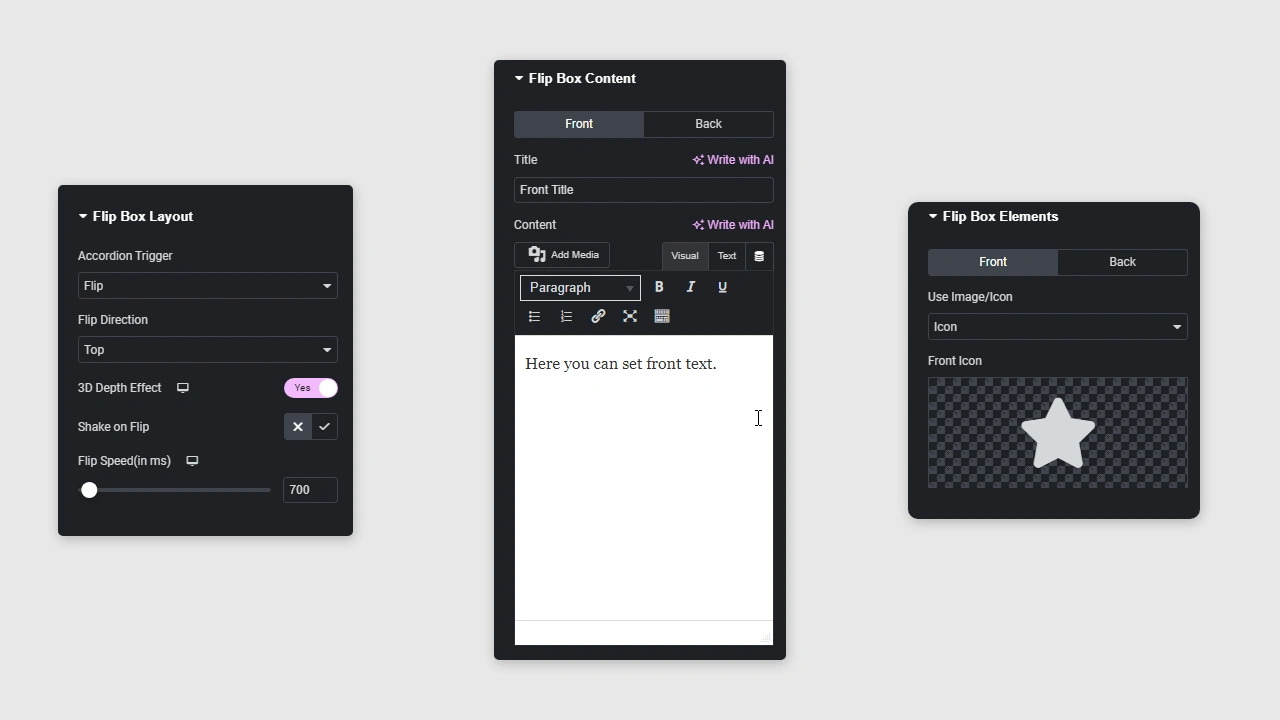
Flip Box Layout Options:
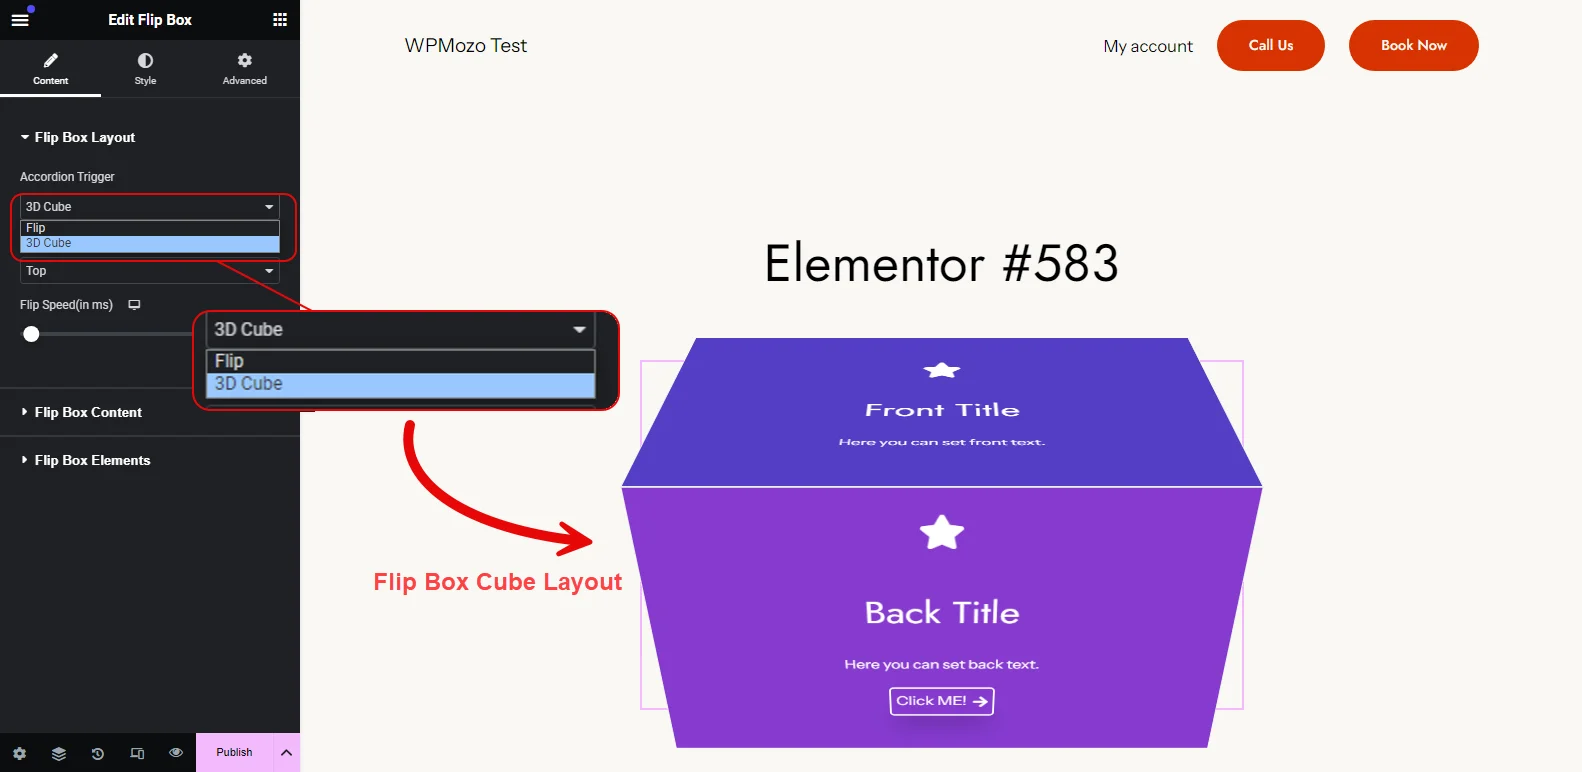
The layout options let you change the Accordion Trigger to either Flip or Cube. The flip box would look like a cube box when users hover over it. Furthermore, you get to change its flipping in up to 8 directions that are: Top, Bottom, Left, Right, Diagonal Left and Right, and Diagonal Inverted Left and Right.
In addition, you can enable the 3D Depth Effect that makes the flip box look like a realistic box. You can also enable the shake effect as well as control the flip speed.
Flip Box Content Options:
Using the Content options, you can add the title and content to the flip box. It lets you do that for both the front and backside. For the content, you can use the rich-text editor to effectively add your content.

Flip Box Elements Options:
As mentioned earlier, you can display elements on your flip box using the Flip Box Elements options.
It provides you with the options to display either an Icon or Image. If you choose to display nothing, you can also select None. Displaying element can be done for both Front and Back Side according to your requirement.
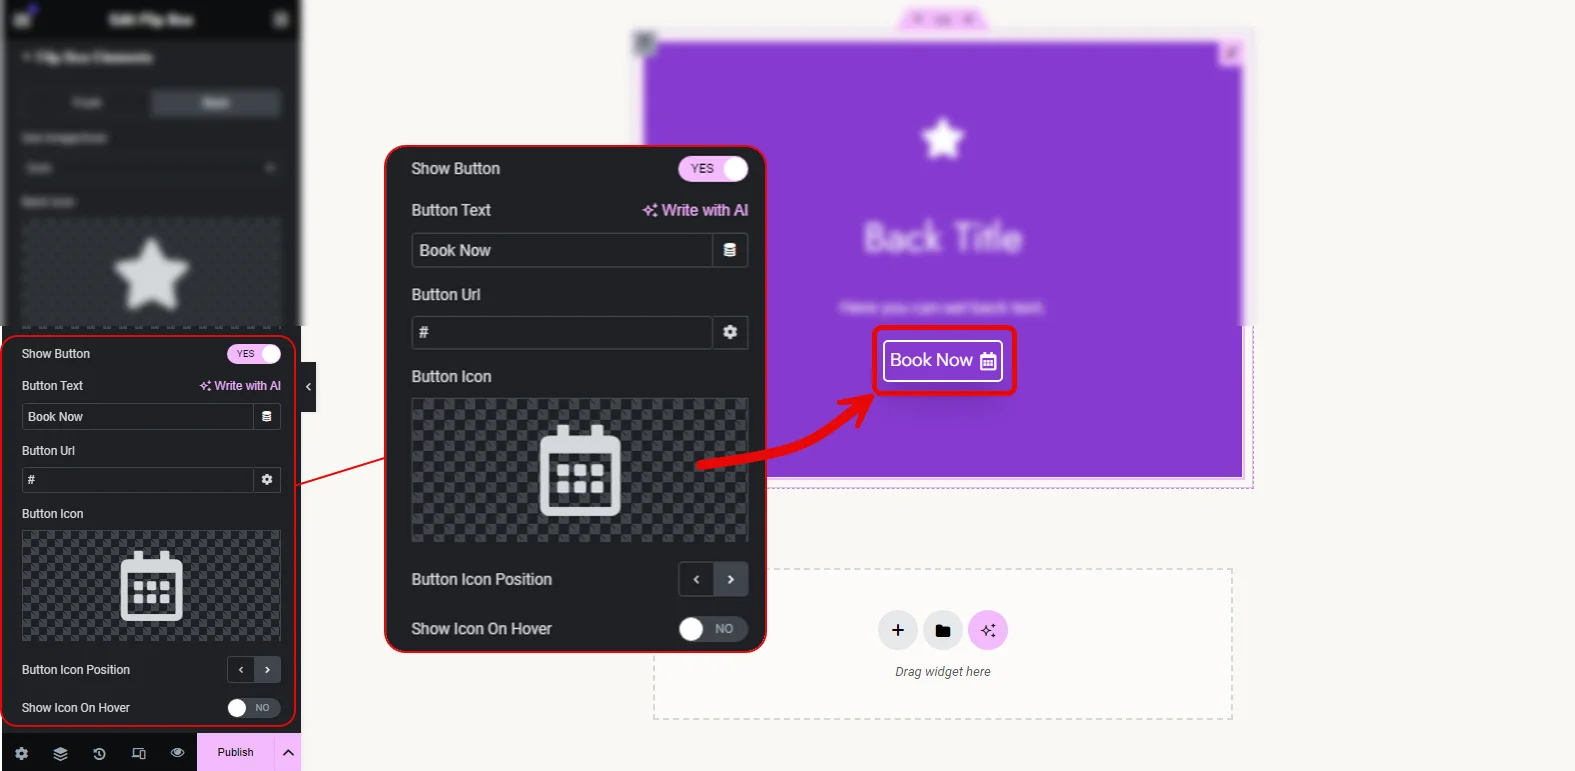
When you choose to display the element on the back, you get the option to display the CTA. Simply turn the Show Button to Yes, and your flip box will have a CTA. After you have enabled the button, you get more options to customize it, such as text, URL, Icon, position, and visibility.
Based on the requirements, make your changes.
Flip Box Style Options
In the Style tab of the flip box widget, you get additional options that improve the design of your flip box. It enables you to:
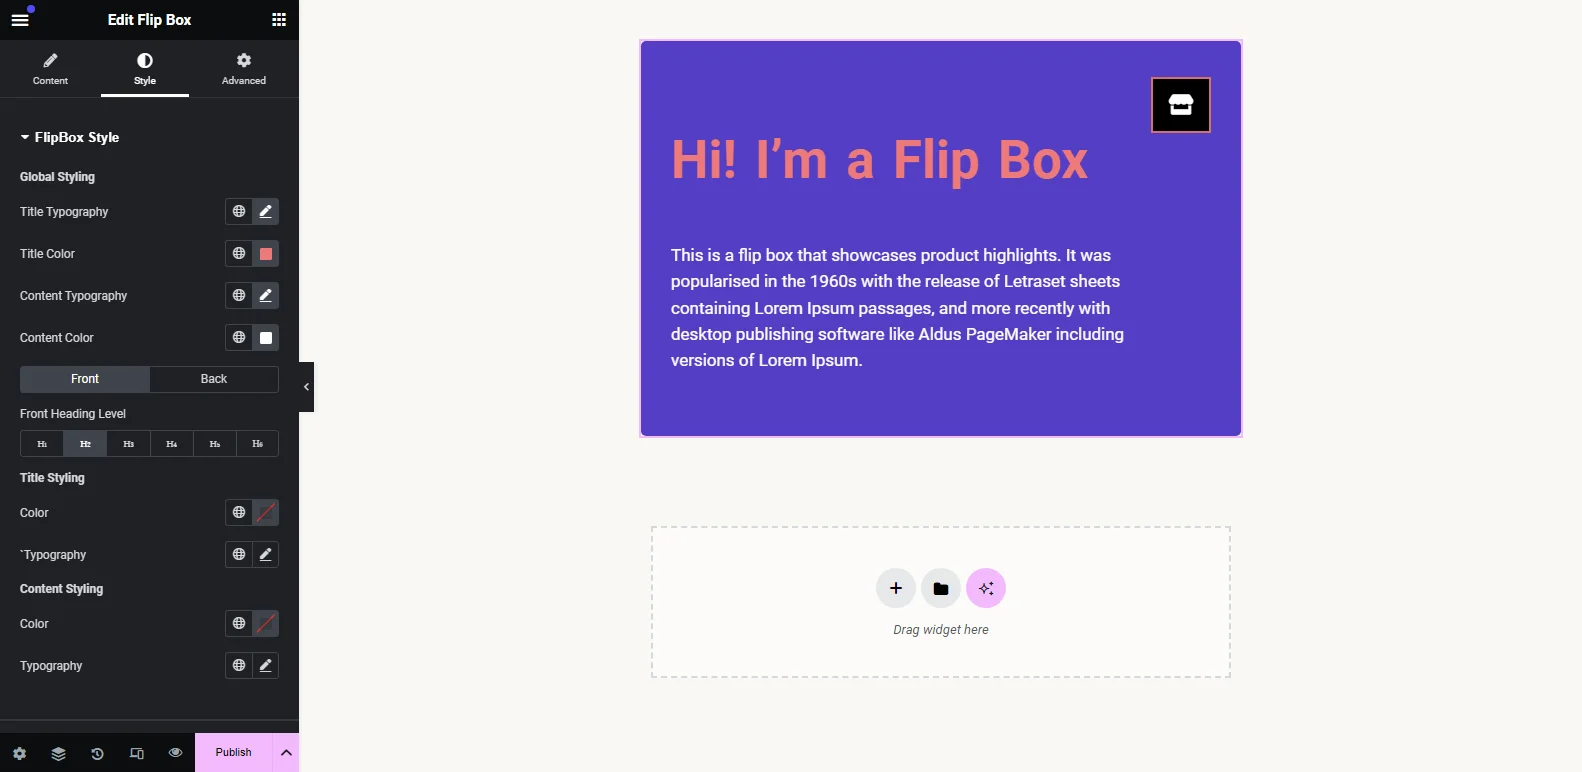
- Apply text customization: Typography, Color, Heading level, Styling, and more
- Image/Icon placement, color, size, and style
- Content Alignment
- Border customizations
- Background customizations
- Sizing
- Button styling
After utilizing all of the above options effectively, you can design your Elementor flip box like the examples in the below section. 👇
Examples of Elementor Flip Box
Wrapping Up
By following the above steps, you’ll be able to effectively create and add flip boxes on your Elementor website. The plugin has intuitive options that make utilizing the flip box widget to be utilized to the fullest.
With clear and highly interactive flip boxes, you can improve the website’s user interaction, further facilitating lead generation and a better user session. However, don’t overload your website with flip boxes because too much always overwhelms the user.
Keep everything minimal and only when it seems necessary.
In addition to the flip box widget for Elementor, the plugin offers other useful widgets that you can use for other designing purposes. If your requirements are for advanced elements, then try the premium version of WPMozo Addons Lite for Elementor.
This plugin opens more possibilities for creating highly functional elements on your Elementor website. You get around 20+ widgets covering Woo, Image, and Content designing requirements.
Try it today, and let us know your experience using it.


0 Comments