Tab Manager for WooCommerce Documentation
Search for answers or browse our knowledge base.
How to use
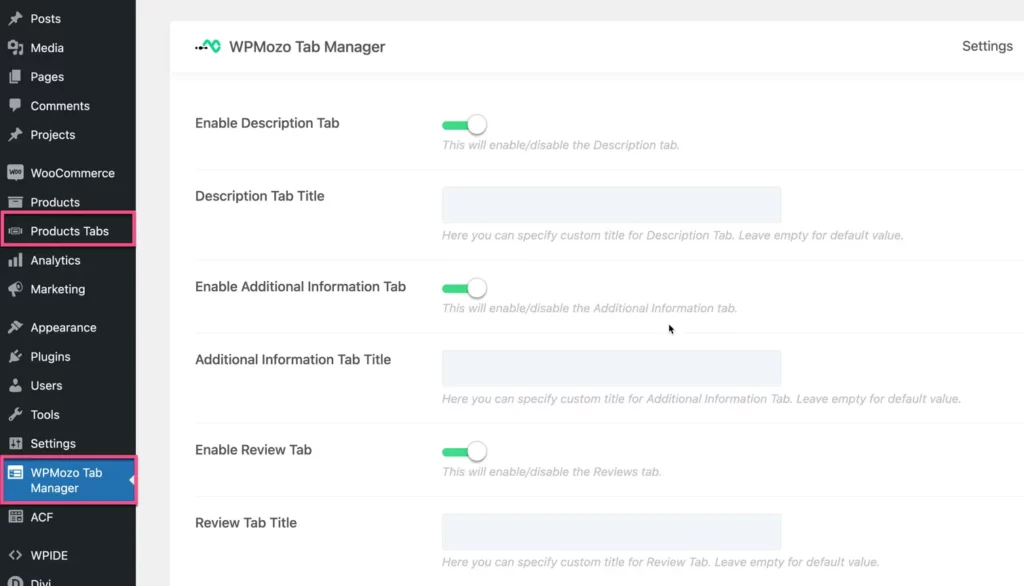
Once you activate the Tab Manager for WooCommerce plugin, it adds two settings named ‘WPMozo Tab Manager‘ and ‘Products Tabs‘ to your website.

Manage Default Tabs
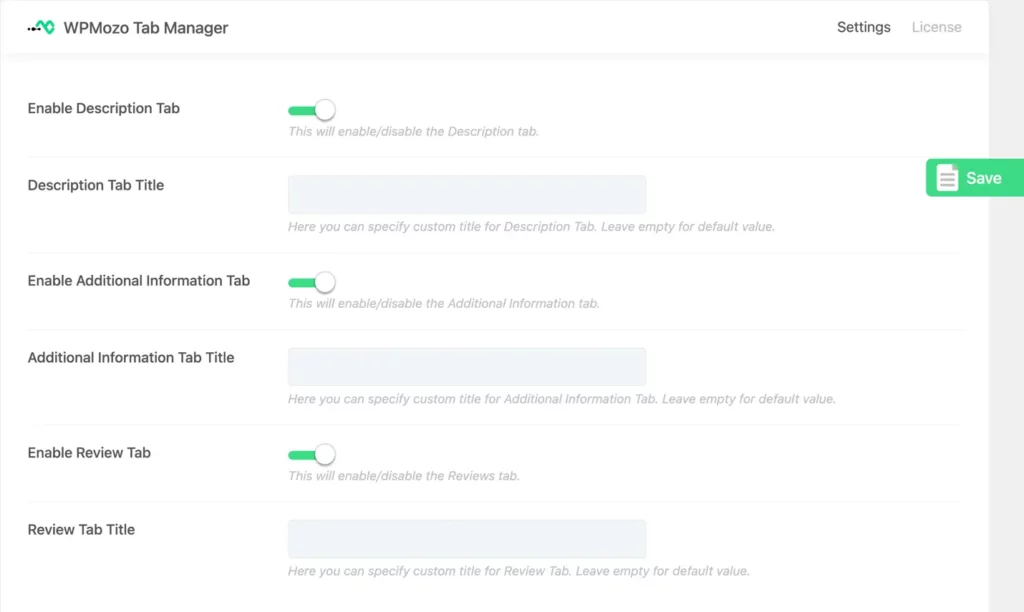
WPMozo Tab Manager
Here, you can modify the default text of WooCommerce tabs or show/hide existing WooCommerce tabs.

If you have edited the title for the default WooCommerce tab globally but want to change it at the product level, you can use the option present on the individual product page which will allow you to override the configuration for the default tabs. For example, if you have disabled the description tab globally in the tab manager, then on the specific product page, you can still enable the description tab using the option provided by the tab manager there.

How to create new tab
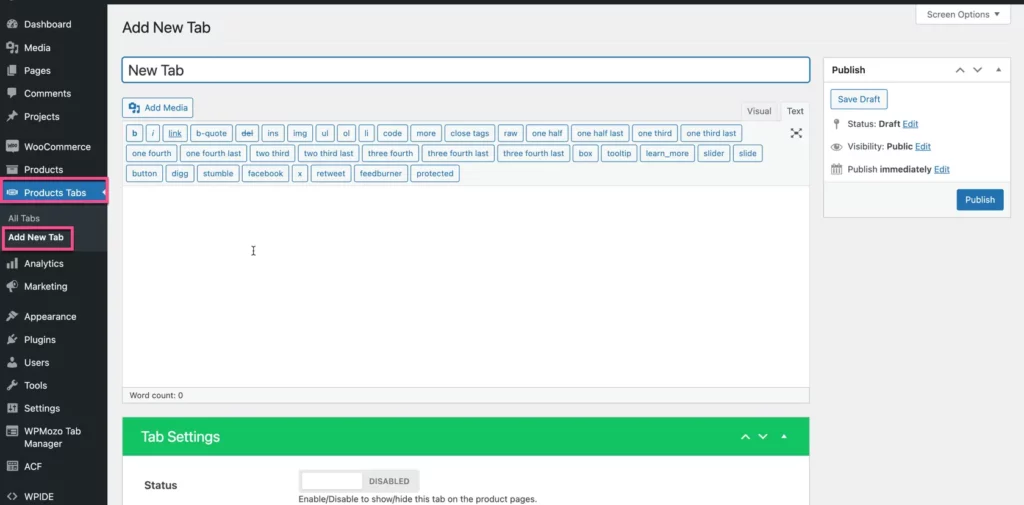
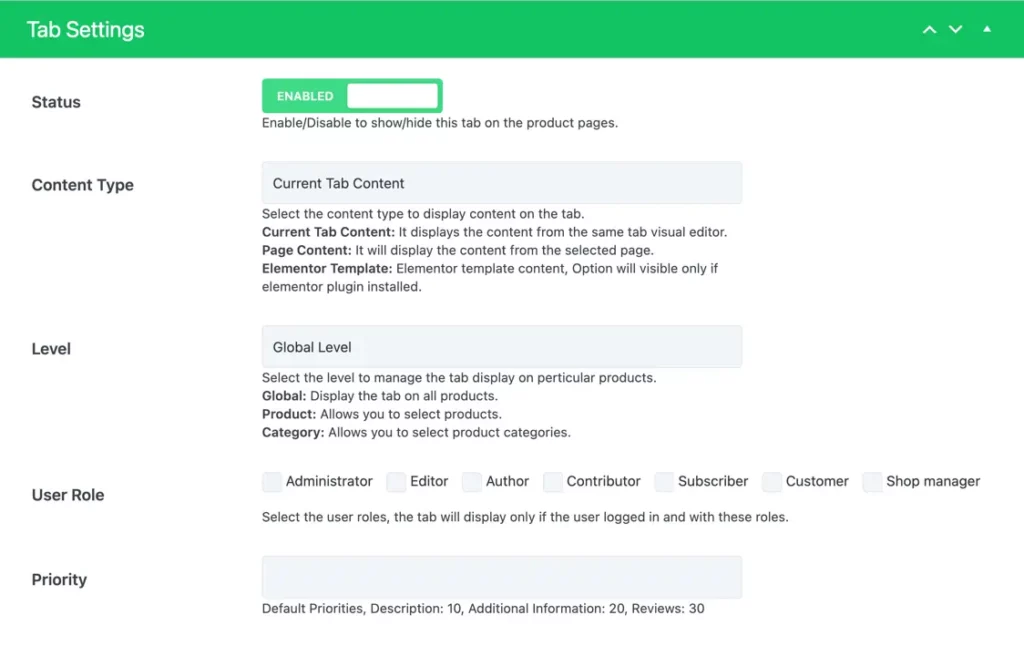
To create a new tab, navigate to the Products Tabs settings on your WordPress dashboard. Create a new tab and publish it. In the tab settings, you have options for tab status, content type, level, user role, and priority.

Tab Status
With the status setting, you can enable /disable the tab on the product pages.
Content Type
With this setting, you can select the content type. This could be current tab content, page content, and Elementor template. Elementor template content is only visible if the Elementor plugin is installed.

Level
- Global: Displays the tab on all products.
- Product: Allows you to select specific products.
- Category: Allows you to select product categories.


User Role
In the user role option, when you select a specific role, the tab will only be displayed if the user is logged in and assigned to that particular role.