
A study by Google found that websites with interactive animations can improve user engagement by up to 70% and increase conversion rates by up to 43%.
In other words, animations create a more memorable and user-friendly experience. That explains why every majorly successful website has adopted animated web design recently.
Lottie animation (lightweight animations created using JSON), for example, greatly improves the visitor experience on any website. These animations are both autoplay and hover-activated.
In this article, you’ll learn step-by-step how to add Lottie animations in Elementor, both with and without using a plugin.
So, let’s get right into it!
What is Lottie Animation?
Don’t worry if you haven’t heard the term “Lottie animation” before. I’m here to explain everything about it.
Lottie animation refers to lightweight animations created using JSON (JavaScript Object Notation).
These high-quality animations can catch a visitor’s attention quickly. As found in a Google study, having such animations on your website results in increased conversion rates.
The best thing about Lottie animation is that it doesn’t really affect the performance of your website. Even with multiple Lottie animations, your site will still load quickly without any issues!
Adding Lottie Animations in Elementor Without Using a Plugin
While Elementor has several plugin options for Lottie, you can easily add them manually without relying on additional tools. Here’s how you can do so in five easy steps:
1. Download a Lottie Animation
Start by visiting LottieFiles or a similar platform.
Browse through the vast collection and download the JSON file of the animation you want.
These files are lightweight and highly optimized for web use.
Here’s a breakdown of the steps you need to follow in order to download the Lottie animation:
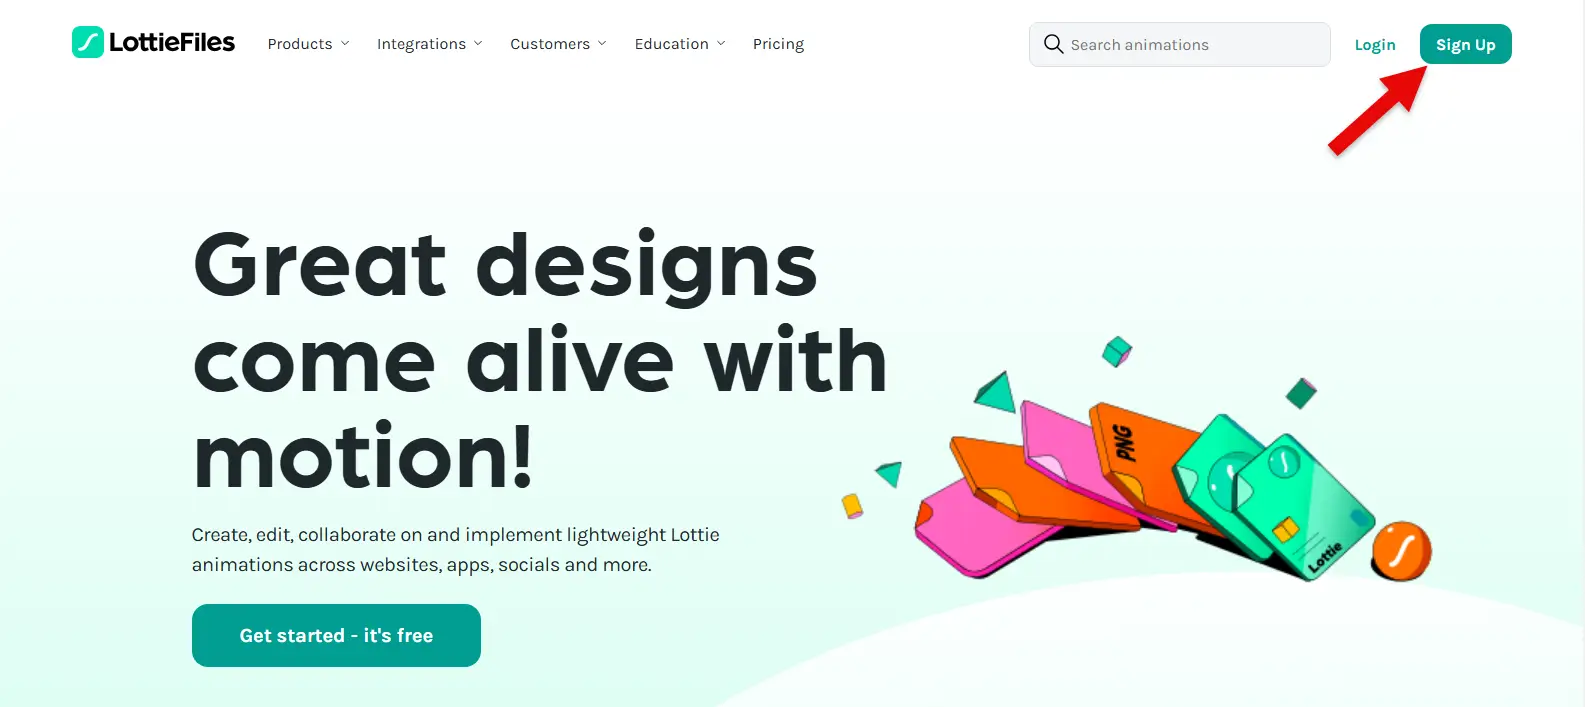
- Step 1: Go to the LottieFiles website and start by creating your account there.
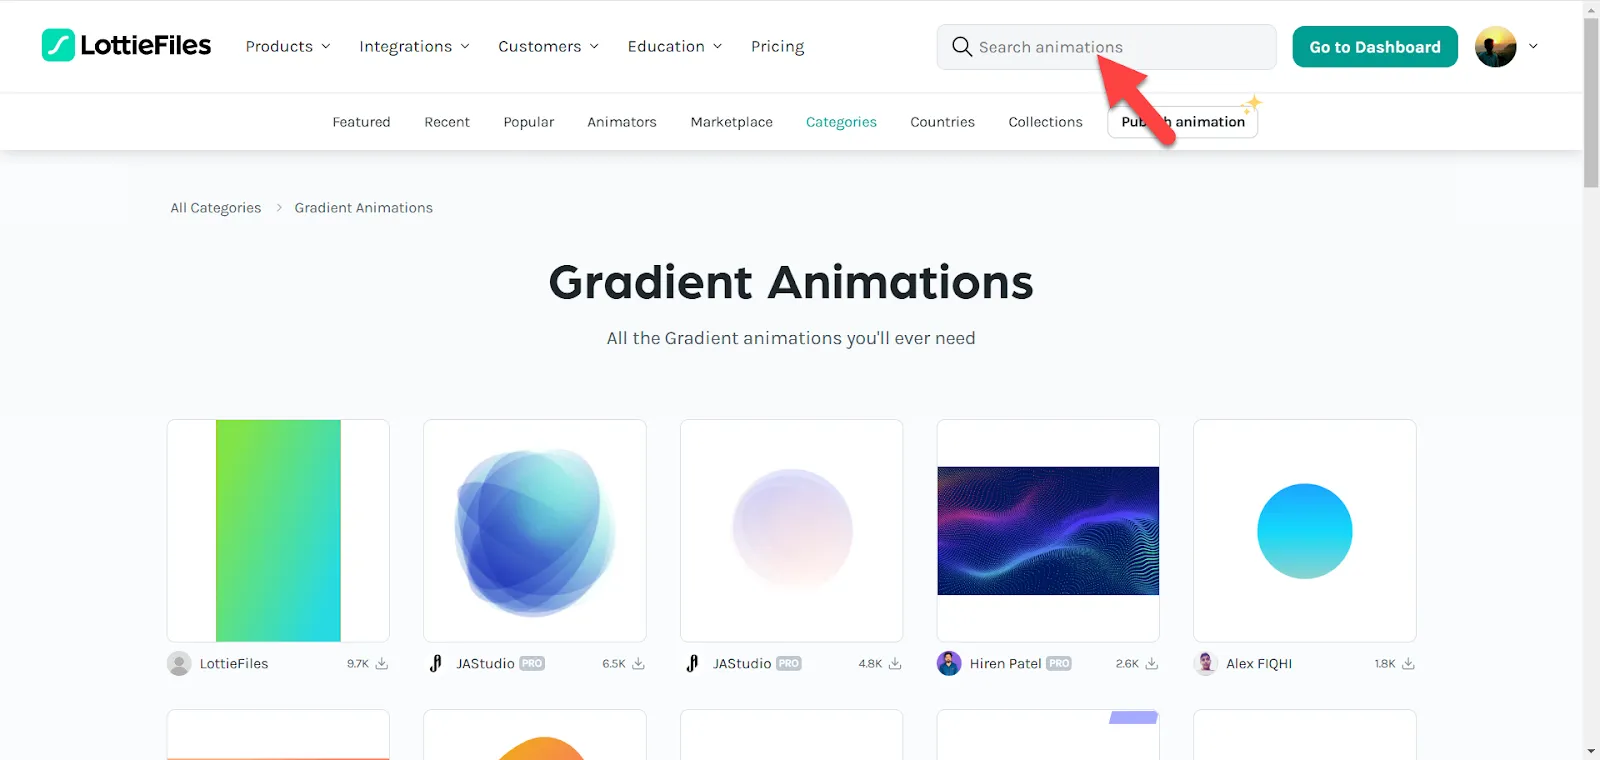
- Step 2: Once your account is created, search for your desired Lottie animation using the search box highlighted in the screenshot below.
- Step 3: Open the Lottie you select and click on the Download button to start the downloading procedure.
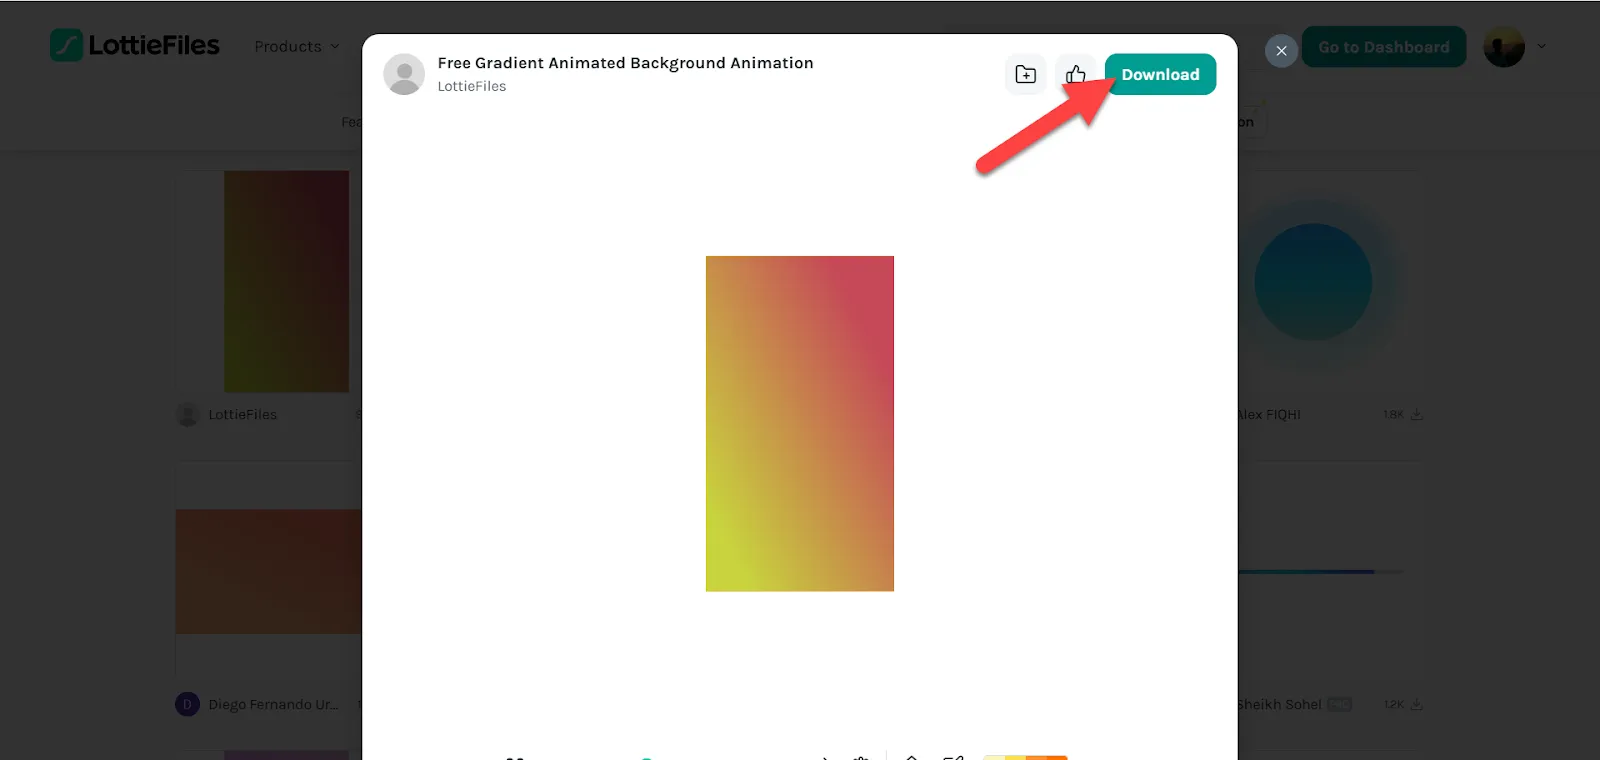
- Step 4: Now, you can select the file type (JSON in this instance) to complete the download.
2. Insert Lottie Widget from Elementor
Once you have downloaded the JSON file, go to your Elementor editor and insert the Lottie widget into the page.
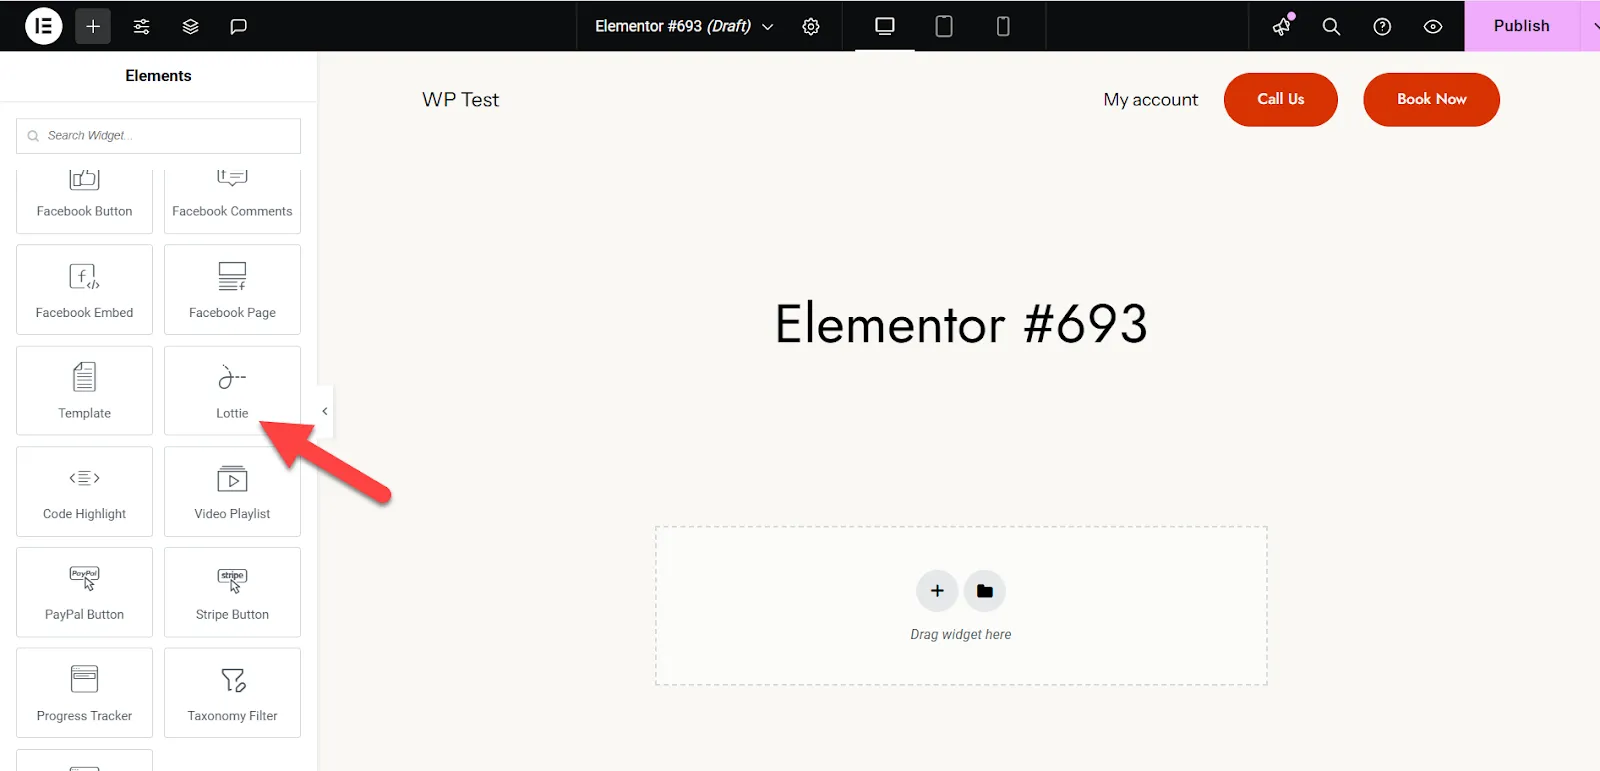
(The Lottie widget by Elementor is available to the Pro users. If you’re using the free version of Elementor, then you should skip to the next sections.)
- Adding Lottie animation in Elementor using HTML
- Adding Lottie animation in Elementor using a free plugin
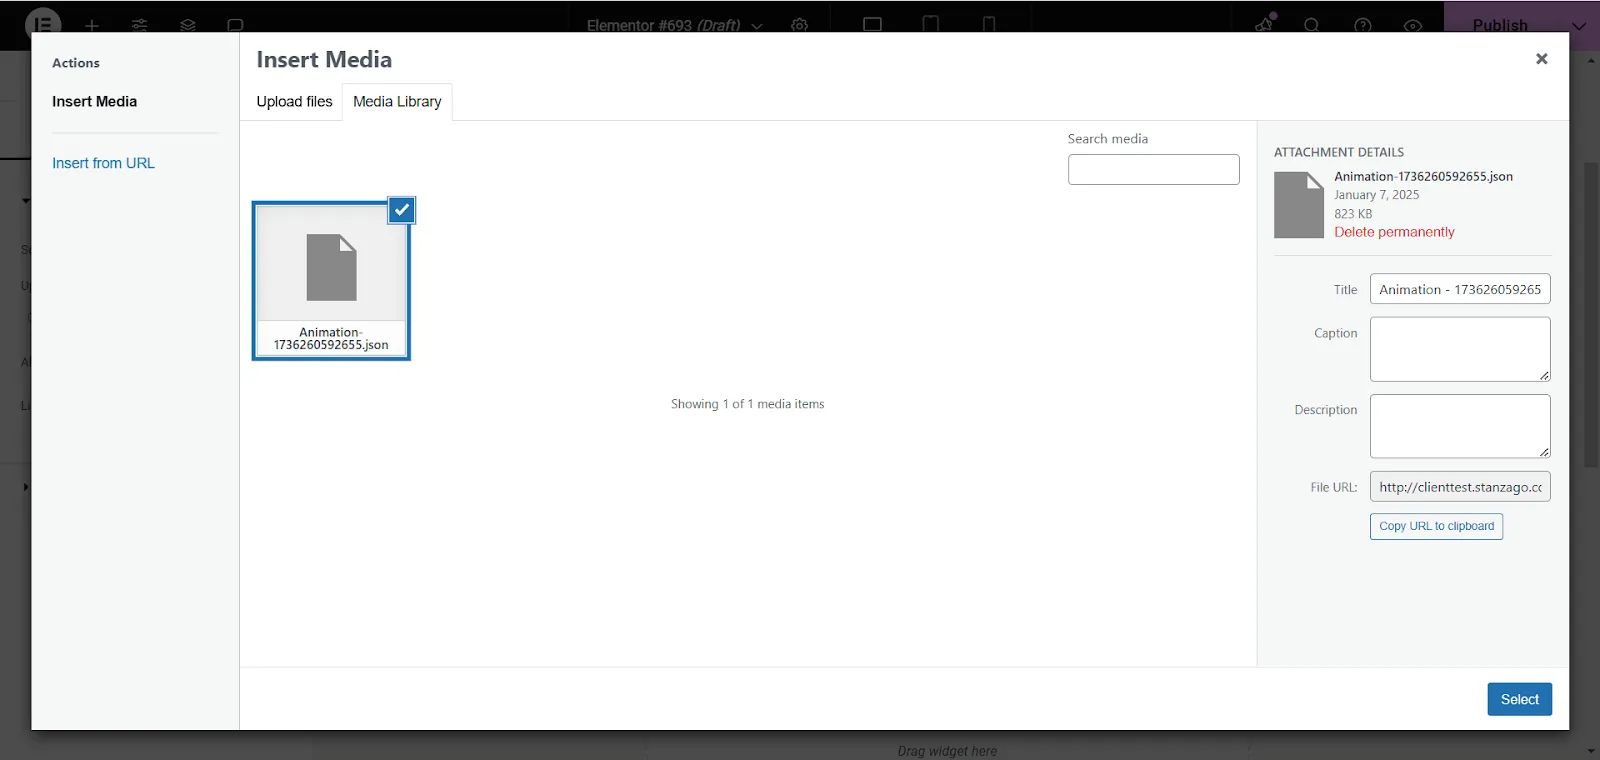
3. Upload Your JSON File to Your Server
To host the animation, upload the JSON file to your website. You can do this through your hosting platform’s file manager or using an FTP client like FileZilla. Save the file in a directory you can easily access, such as yourdomain.com/lottie/filename.json.
Look at the ‘Upload JSON File’ box in the image below, you can upload the file this was as well.’
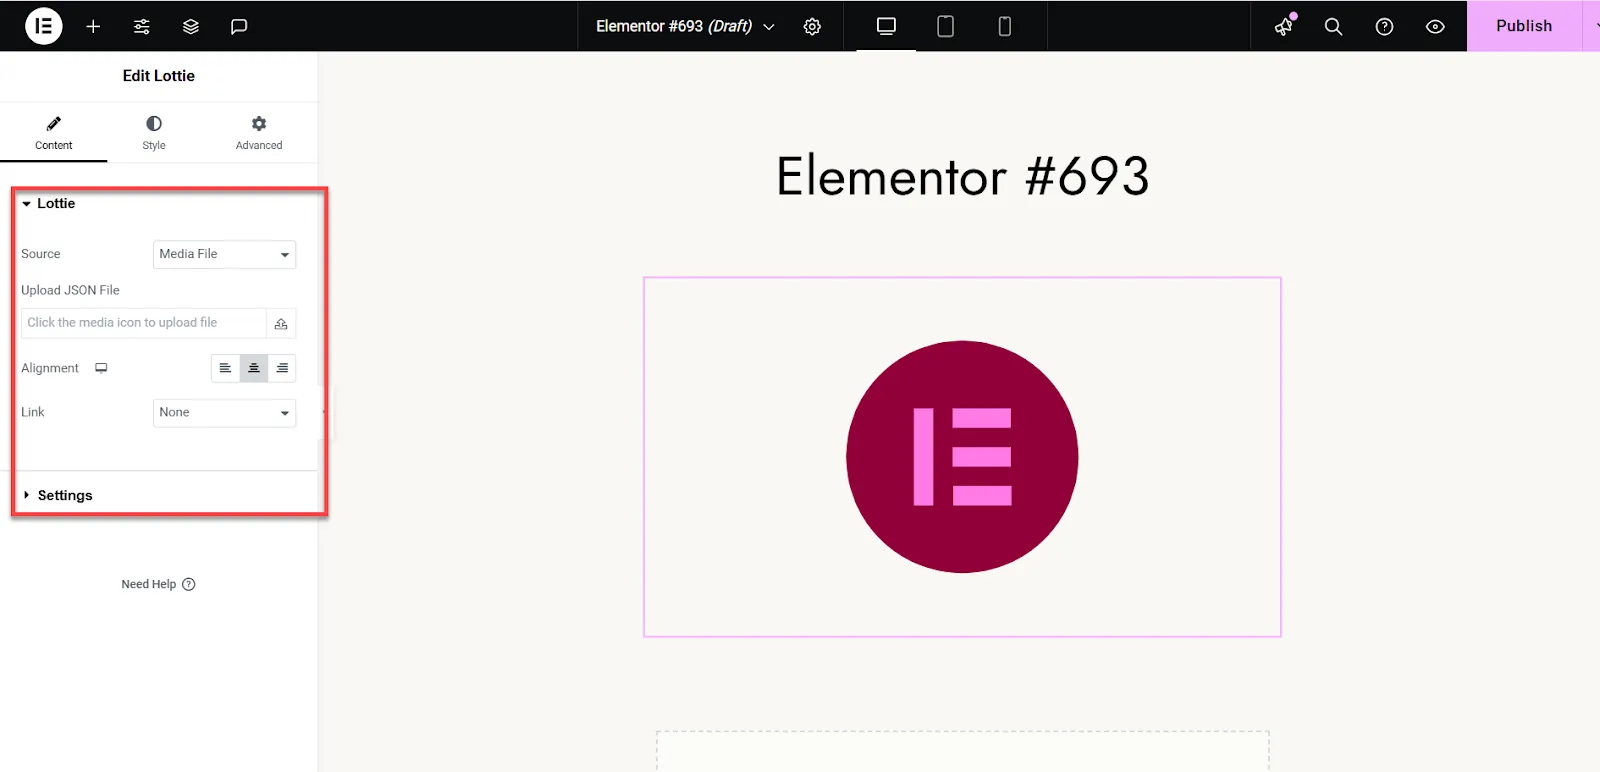
4. Start Customizing the Lottie
After following these steps, you are ready to customize the animation to your liking.
Alternative Way to Add Lottie (Using HTML)
Although the above method works just as fine when adding animations, there are a few reasons why you might want to use HTML to do it. For instance, HTML allows you to control all your Lottie’s animation behaviors in detail. So, someone wanting full control over how the Lottie appears and behaves on their site could use this method to do so!
In this method, you will do some of the things from the above guide and add HTML in the end to bring your Lottie to life.
1. Download Lottie (JSON File)
Go to the Lottie website and download the JSON file for the Lottie animation of your choice.
2. Upload JSON to Your Website
Now, upload the JSON file to the hosting directory of your website.
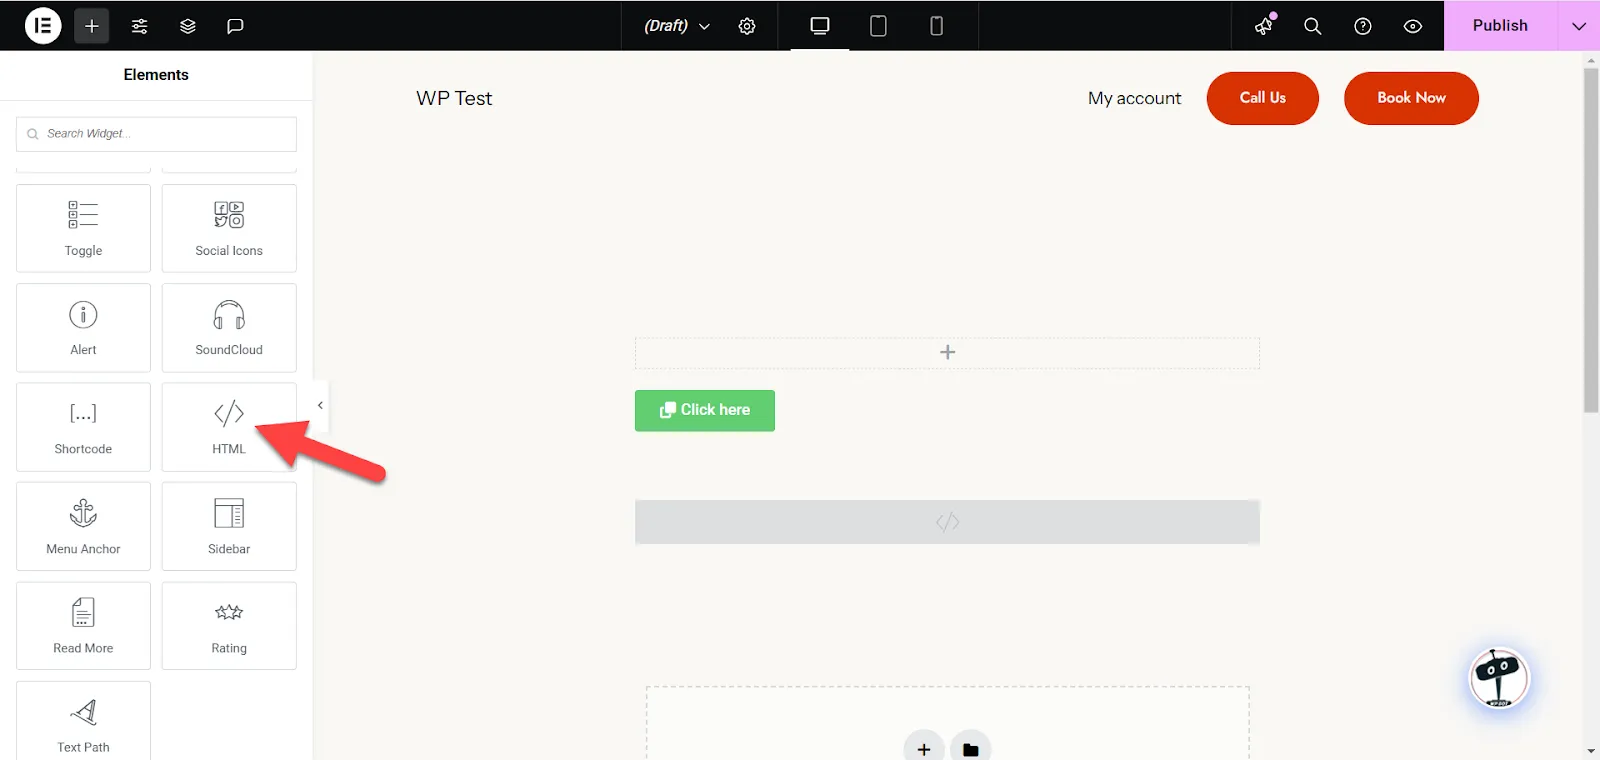
3. Add an HTML Widget in Elementor
Open the Elementor editor and drag the HTML widget to the section where you want the animation to appear. This widget lets you directly add custom HTML or JavaScript code.
4. Embed the Lottie Animation Code
Paste the following code into the HTML widget:
<script src="https://cdnjs.cloudflare.com/ajax/libs/bodymovin/5.12.2/lottie.min.js"></script>
<div id="lottie"></div>
<script>
    var animation = lottie.loadAnimation({
        container: document.getElementById('lottie'),
        renderer: 'svg',
        loop: true,
        autoplay: true,
        path: 'https://yourdomain.com/lottie/filename.json'
    });
</script>
Here’s a screenshot of where you need to paste the code.

5. Customize as Needed
Adjust the container’s dimensions using Elementor’s advanced settings for spacing and alignment.
You can also tweak the loop or autoplay options in the script.
Adding Lottie Animations in Elementor Using a Plugin
Now that you’ve read about the somewhat technical ways to use Lottie animations, here’s an even easier alternative method that saves you time and effort.
In this method, you can rely on an external plugin to add Lottie animations to Elementor that perform as efficiently.
So why use this method specifically?
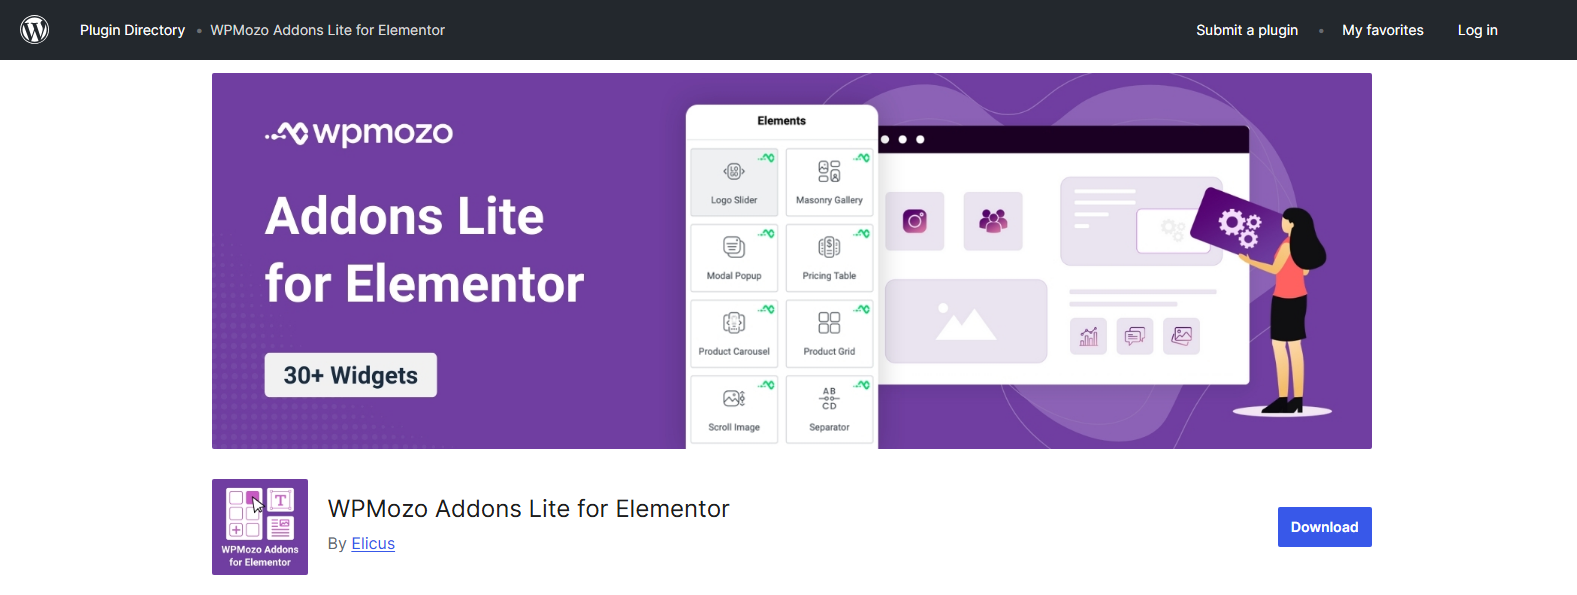
The simple answer is extensive customization options. Plugins like WPMozo Addons Lite for Elementor allow you to customize your Lottie animation in multiple ways. Yes, you might be able to do something similar using custom HTML code. However, the plugin’s Lottie Widget is a simpler alternative with a variety of customization options.
Before getting into the details of this method, let’s learn more about the WPMozo plugin.
Why Choose WPMozo Addons for Elementor for Lottie Animations
The WPMozo Addons Lite for Elementor plugin extends Elementor’s functionality with advanced widgets, including the widget that allows you to add Lottie animations.
The plugin, in general, has multiple add-on options to choose from. All its widgets support extensive customization options, allowing you to build highly functional websites.
The widget we’ll use for this article is the Lottie for Elementor widget, as shown in the guide below.
This widget enables you to embed dynamic animations that play automatically on hover or when a visitor scrolls to a specific section. Such animations make your website more interactive and engaging.
Step-by-step Guide to Add Lottie Animations Using a Plugin
Follow these steps to insert Lottie animations into Elementor using the WPMozo Addons plugin.
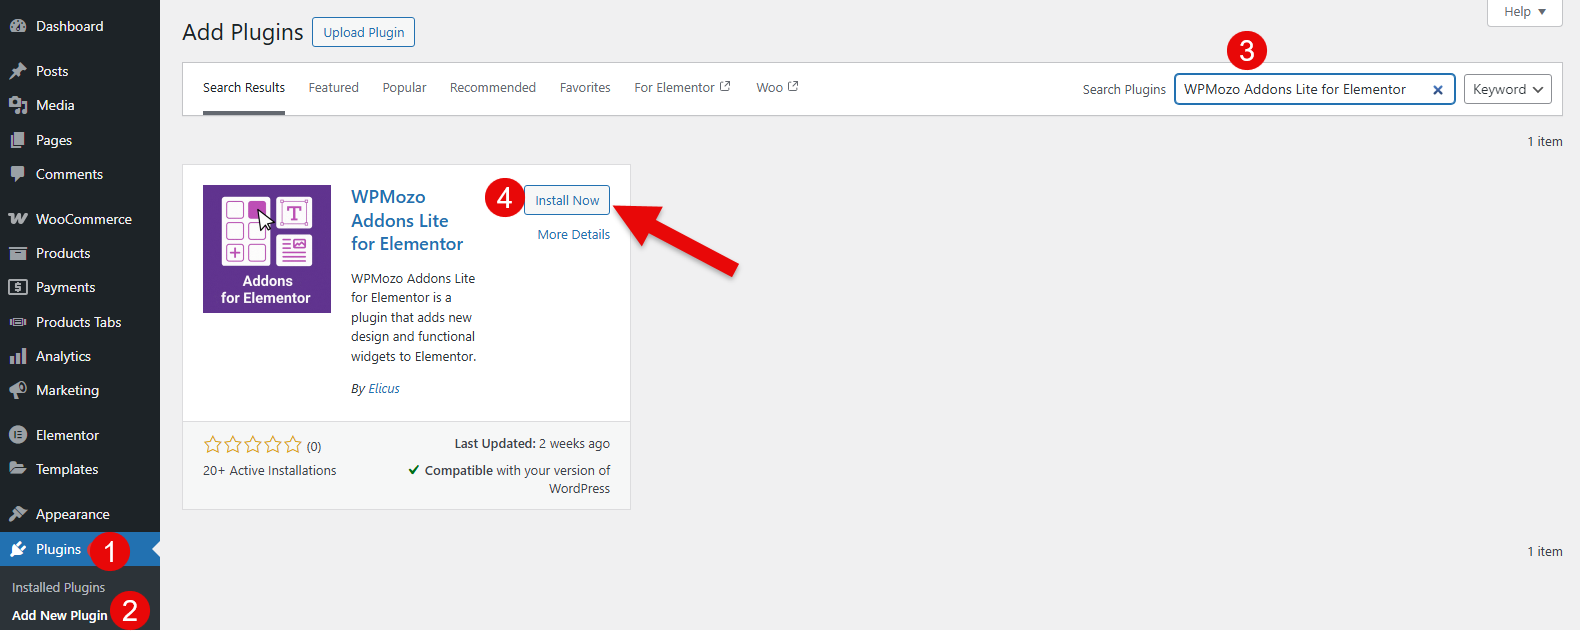
1. Install the Plugin
First, ensure that the free WPMozo Elementor addons plugin is installed and activated.
You can find it in the WordPress plugin repository. Or in the plugin’s window of WordPress Dashboard. Simply search WPMozo Addons Lite for Elementor and install the following one:
2. Open the Elementor Editor
Go to the page or post where you want to add the animation and launch the Elementor editor.
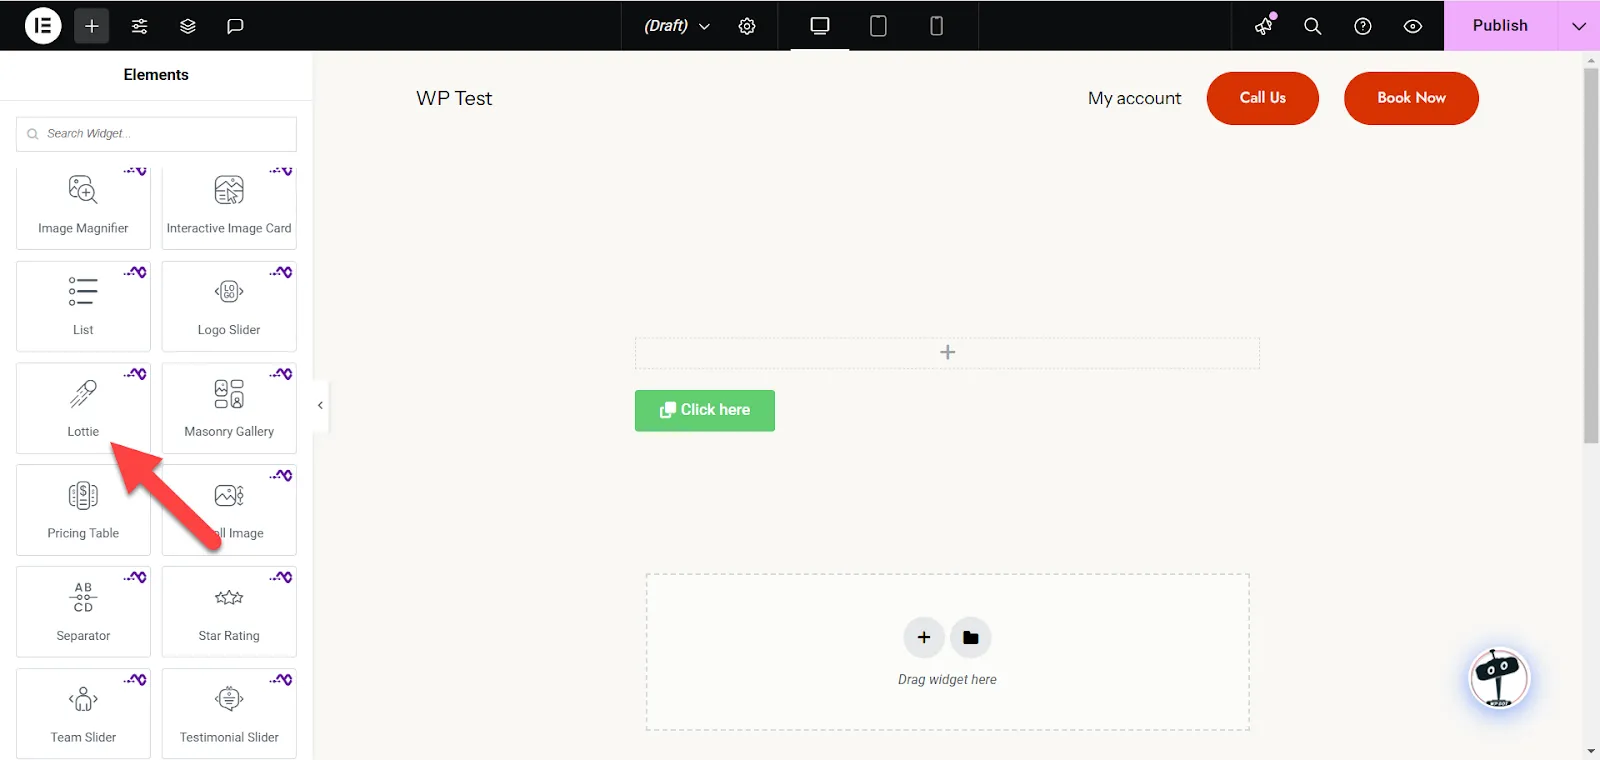
3. Locate the Lottie Animations Widget
Scroll down the widget panel until you find the WPMozo Addons section. Locate the Lottie Animations widget and drag it onto the desired section of your page.
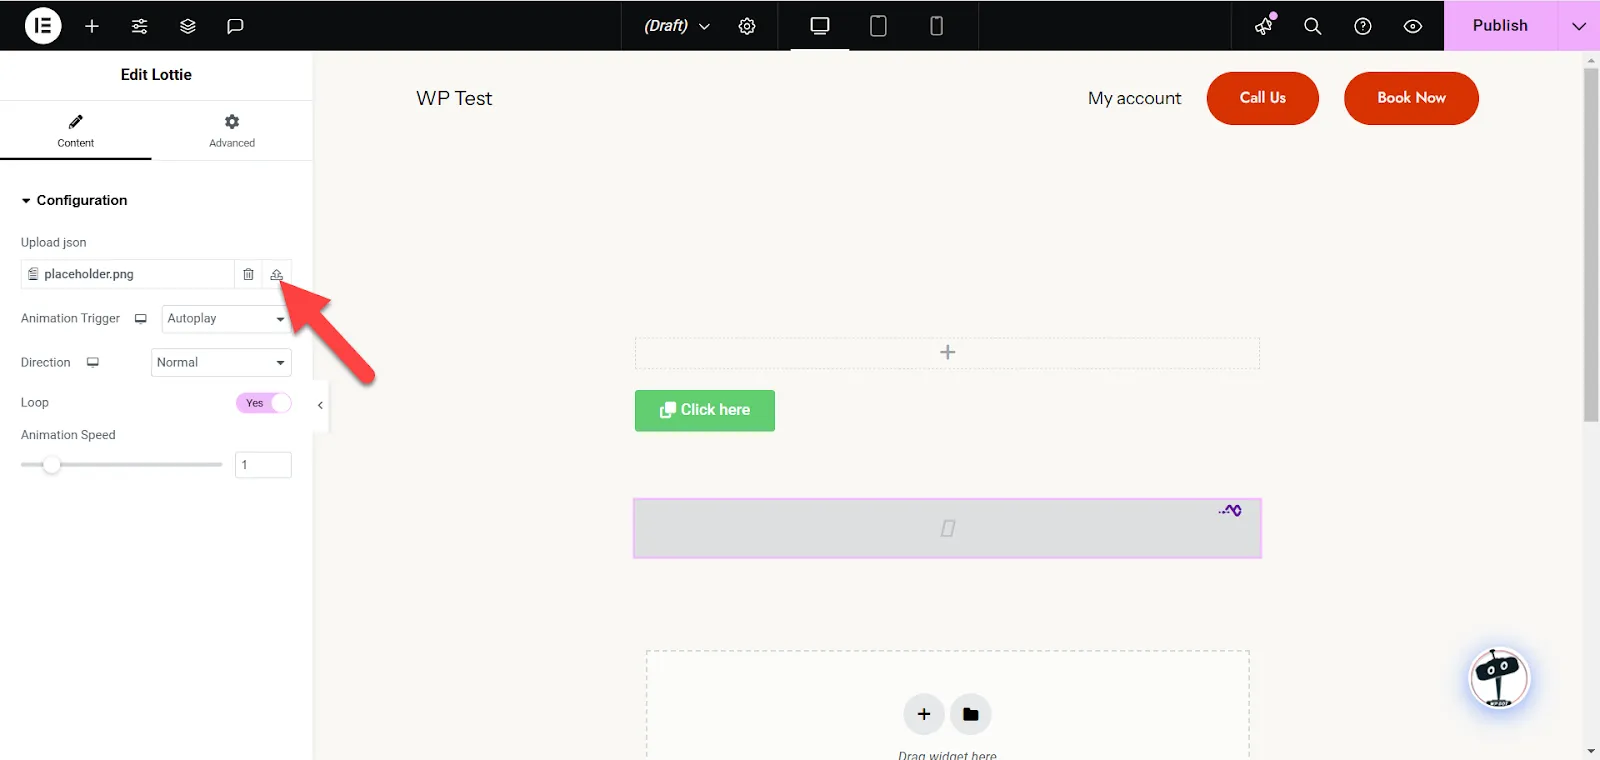
4. Upload Your Lottie Animation File
In the widget’s settings, you will find an option to upload your Lottie JSON file. Click on the “Upload JSON File” button and select the animation file from your computer.
5. Customize the Animation
After uploading, you can tweak the settings:
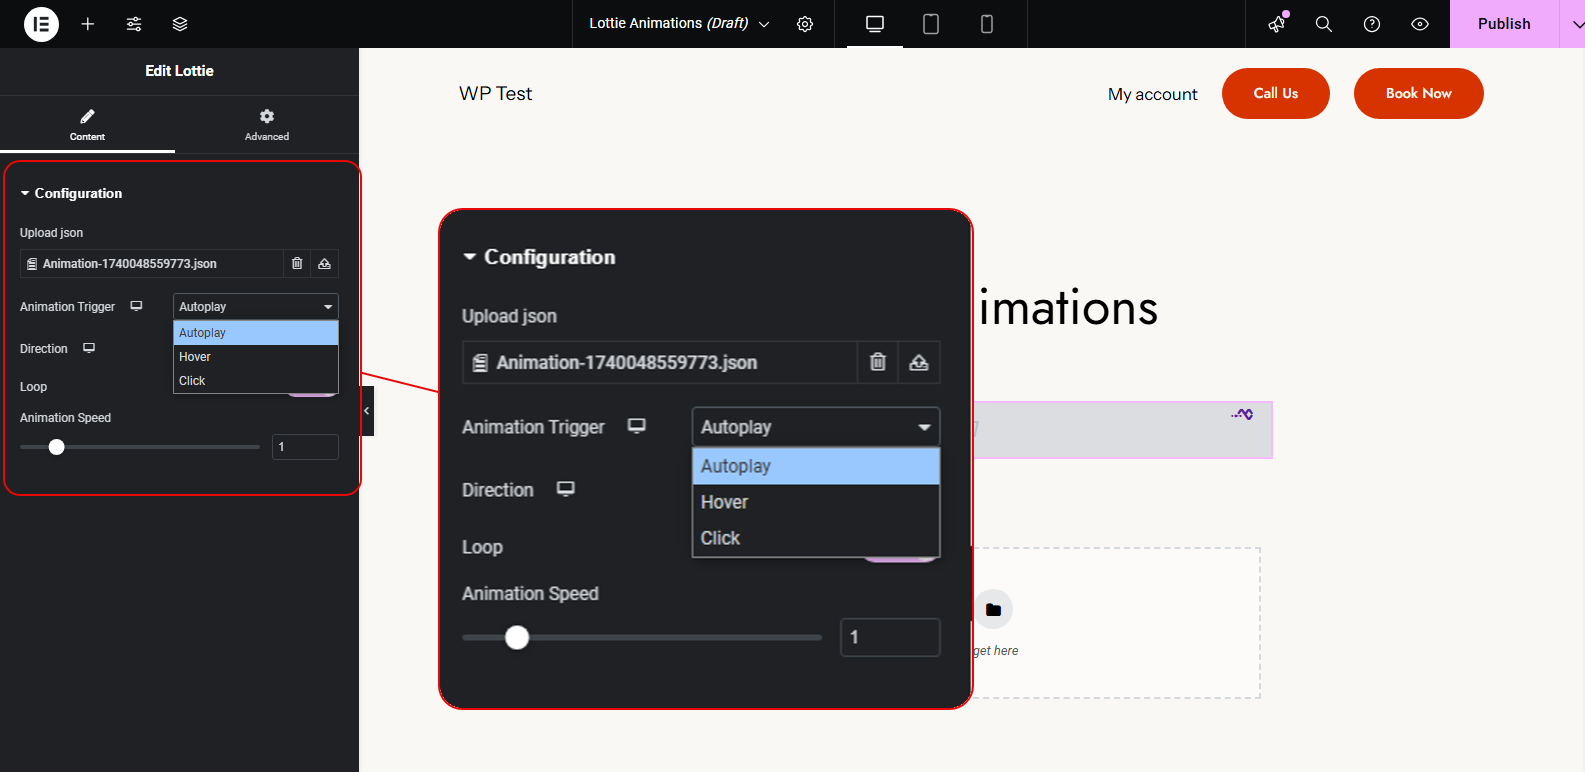
- Play Mode: Choose whether the animation plays on hover, click, or scroll.
- Loop: Enable or disable looping.
- Animation Speed: Adjust the playback speed to fit your design needs.
6. Preview and Publish
Once your customization is complete, preview the animation to see it in action. If satisfied, click “Publish” to make it live.
Wrapping Up
Web design is all about creating interactive elements that are also visually appealing to visitors.
Lottie animations have become a popular way of attracting visitors to websites. These lightweight and scalable animations bring any website to life. Designers use Lottie animations to highlight key sections, create interactive visual elements, and make web pages more engaging.
However, adding such animations manually can be complex, especially for those unfamiliar with coding.
This article provides a step-by-step guide on how to integrate Lottie animations into Elementor designs using a plugin like WPMozo Addons Lite for Elementor easily. There’s also a step-by-step guide on how to add these animations without using any plugins.
I’ve covered the entire process, from installing the plugin to customizing your animations, ensuring you have everything you need to add dynamic Lottie animations effortlessly.


0 Comments