
Still using Gutenberg like it’s 2018? It’s time to level up.
Gutenberg is designed for those users who love to have full control of customization with better performance and faster publishing.
We have made this guide with precise expert-backed tips that will lift the way you use the WordPress block editor. You can call this an ultimate Gutenberg tutorial.
What is the WordPress Gutenberg Editor?
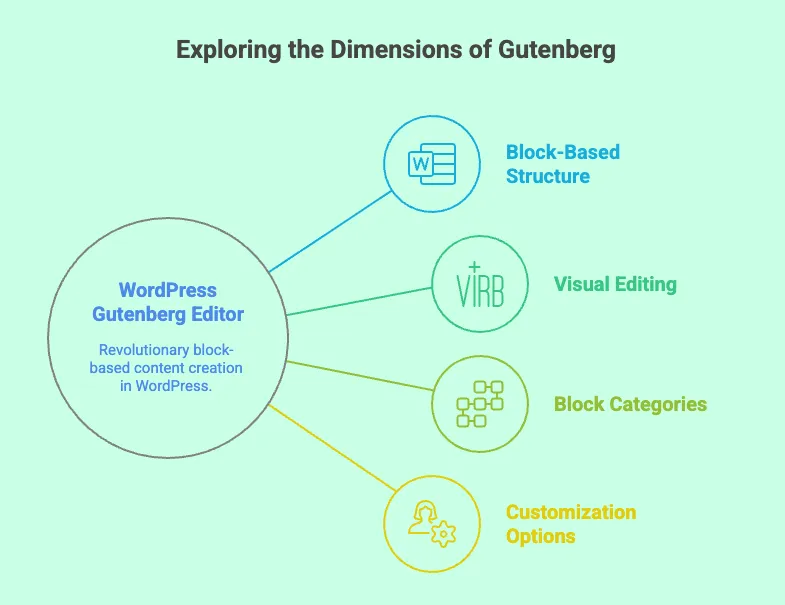
Gutenberg is a block-based content editor, launched in December 2018 with WordPress 5.0.
Before Gutenberg, you had one big text box. Now everything is made of blocks. Paragraphs, images, and buttons are all blocks. You can move them around and style each one differently.
WordPress Gutenberg changed how we create content. What makes Gutenberg special is that what you see is what you get. You don’t have to switch between editing and preview modes. You see exactly how your content will look while you’re making it.
Gutenberg comes with around 102 blocks. They’re organized into six groups: Text, Media, Design, Widgets, Theme, and Embedded Content. Each block has its own settings and styling options.
Gutenberg Tutorial That Works: 11 Tips to Control Your Website Smarter
These helpful suggestions come from years of building WordPress sites. Each one solves real problems that people face every day and shows you how to use the Gutenberg Editor. We have tried to sum up this Gutenberg tutorial with the most commonly used blocks.
1. Link Text in Smart Ways
Good linking is about more than just adding links to words. It’s about connecting your content in ways that help both readers and search engines.
Use the Ctrl+K shortcut (Cmd+K on Mac): Select any text and press these keys. A link box pops up instantly. Gutenberg will show you pages from your own site first. This makes linking super easy.
Try button blocks for important links: Buttons look better than plain text links for calls-to-action. You can change their colors, add hover effects, and make them stand out.
Use the media & text block: To make entire image sections clickable. This works great for showcasing products or services.
Add Anchor links for long articles: Navigate to any heading’s Advanced settings and add an HTML Anchor. You can enter a word or two without spaces to make a unique web address just for that block. So when a reader clicks that link, it will jump particularly to that heading.
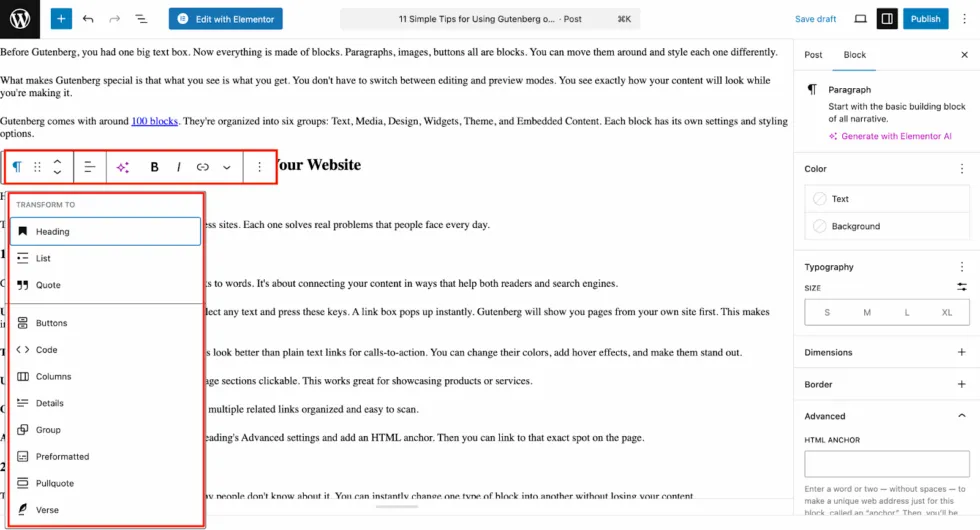
2. Change Blocks Into Other Blocks
This is one of Gutenberg’s best features, but many people don’t know about it. You can instantly change one type of block into another without losing your content.
Click the block icon: From the toolbar, click on the first icon from the left. You’ll see a list of what you can change the block into.
Transform text blocks easily: Change bullet points into numbered lists. Turn quotes into callout boxes. Convert headings into paragraphs when you need to reorganize.
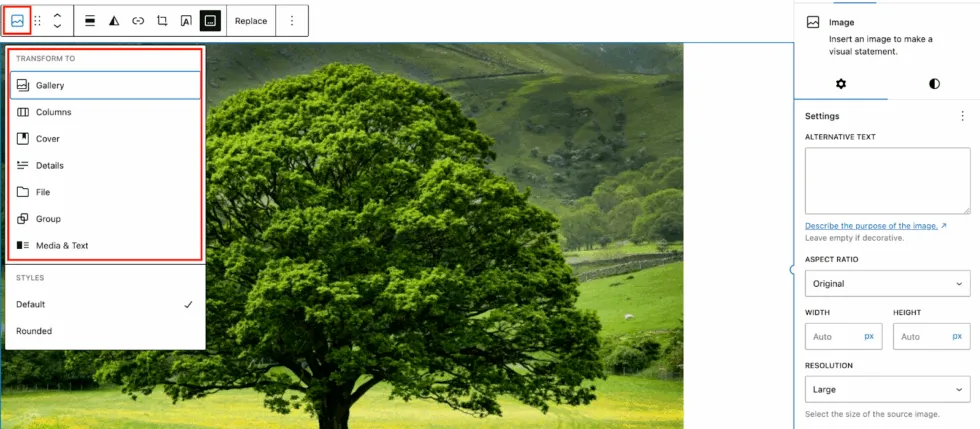
Work with image blocks: Start with single images, then transform them into galleries. Or turn an image into a cover block for hero sections.
Use group blocks: Select multiple blocks, then transform them into a Group. Now you can style them all together and move them as one unit.
Try nested transformations: Transform blocks into groups, then transform groups into columns or other complex layouts.
3. Drag and Drop Images from Your Computer
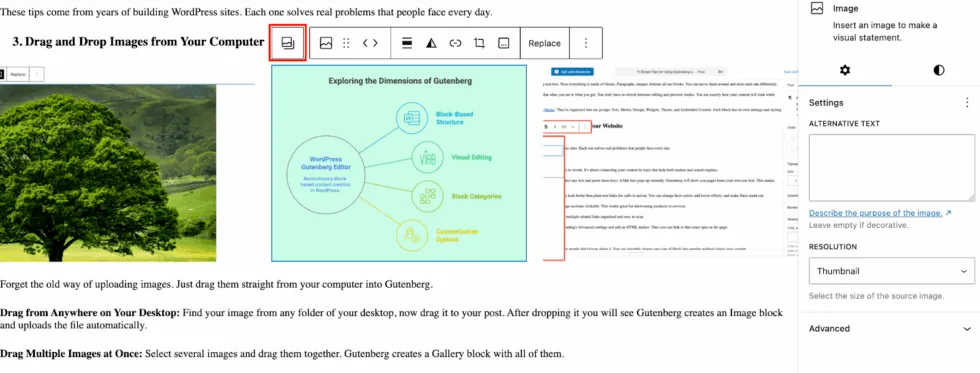
Forget the old way of uploading images. Just drag them straight from your computer into the WordPress block editor. In this section of our Gutenberg tutorial, you will get the secret tips for the image block.
Drag from anywhere on your desktop: Find your image from any folder of your desktop, and now drag it to your post. After dropping it, you will see Gutenberg create an Image block and upload the file automatically.
Drag multiple images at once: Select several images and drag them together. Gutenberg creates a Gallery block with all of them.
Images get organized automatically: Dragged images go into your media library with proper dates and file names.
Multiple sizes get created: WordPress makes different sizes for different devices automatically.
4. Add Borders and Rounded Corners to Images
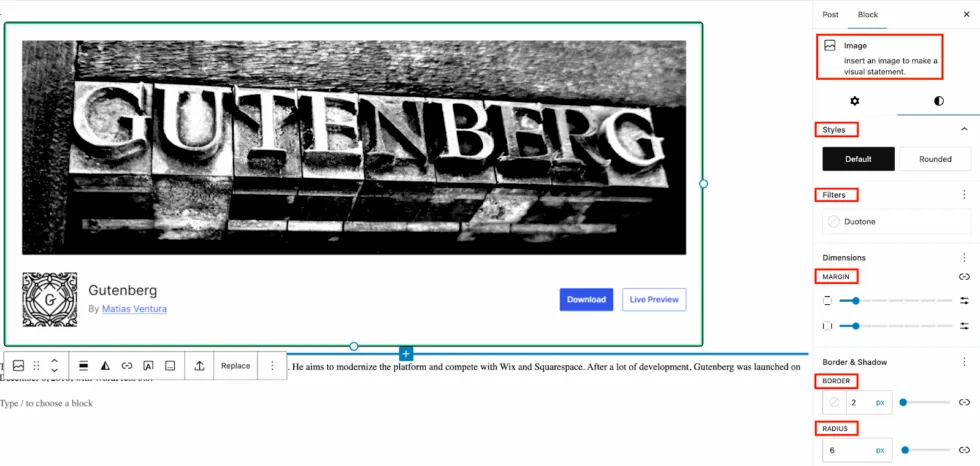
Small visual details make your content look professional. Gutenberg lets you style images without knowing any code.
Add borders easily: Select an image, then look for “Border” in the sidebar. Choose width, style (solid, dashed, or dotted), and color.
Make rounded corners: Use the border radius setting. Try 8-12 pixels for subtle rounding, or 50% for perfect circles on square images.
Combine effects: Use borders with shadows for images that really pop off the page.
Stay consistent: Pick border styles that match your brand and use them everywhere.
5. Control Your Text Styling
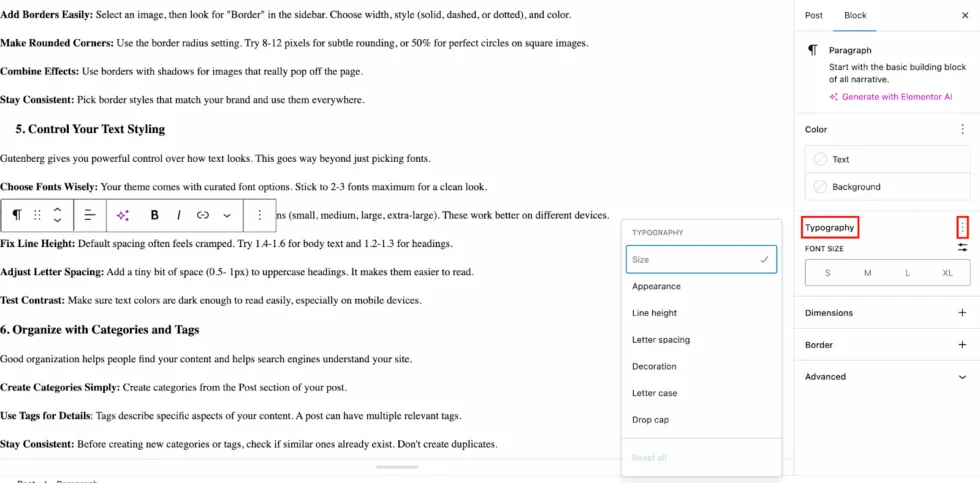
Gutenberg gives you powerful control over how text looks. This goes way beyond just picking fonts.
Choose fonts wisely: Your theme comes with curated font options. Stick to 2-3 fonts maximum for a clean look.
Use the size scale: Instead of random sizes, use the preset options (small, medium, large, extra-large). These work better on different devices.
Fix line height: Default spacing often feels cramped. Try 1.4-1.6 for body text and 1.2-1.3 for headings.
Adjust letter spacing: Add a tiny bit of space (0.5- 1px) to uppercase headings. It makes them easier to read.
Test contrast: Make sure text colors are dark enough to read easily, especially on mobile devices.
Gutenberg is awesome when it’s about managing every section of your post or page. Want to use Gutenberg in a more advanced way? Then try the free WPMozo Blocks and Addons plugin, one of the best plugins for the Gutenberg editor. The blocks of this plugin are created to maximize the impact of your webpage elements only by using the WordPress block editor.
6. Organize with Categories and Tags
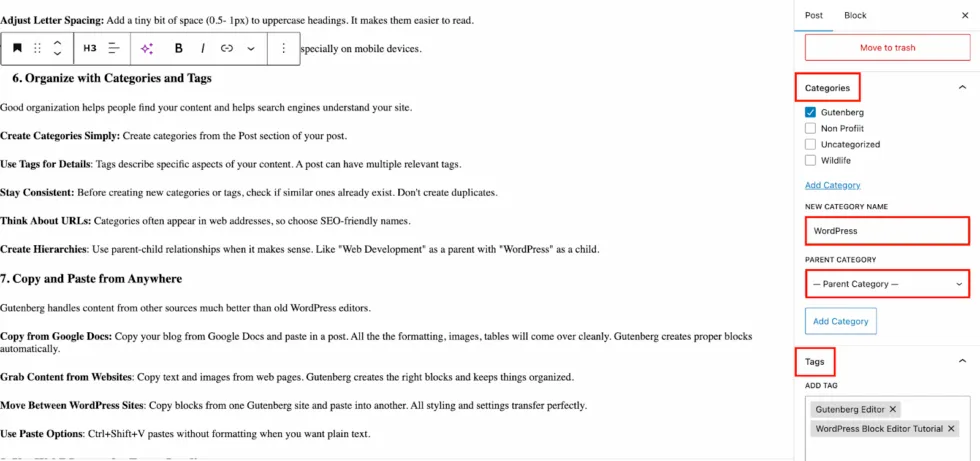
Your website must help people find your content and assist search engines in understanding your site.
Create categories simply: Create categories from the Post section of your post.
Use tags for details: Tags describe specific aspects of your content. A post can have multiple relevant tags.
Stay consistent: Before creating new categories or tags, check if similar ones already exist. Don’t create duplicates.
Think about URLs: Categories often appear in web addresses, so choose SEO-friendly names.
Create hierarchies: Use parent-child relationships when it makes sense. Like “Web Development” as a parent with “WordPress” as a child.
7. Copy and Paste from Anywhere
Gutenberg handles content from other sources much better than the old WordPress editors. Let’s check what secret tips are there in our Gutenberg tutorial for you.
Copy from Google Docs: Copy your blog from Google Docs and paste it into a post. All the formatting, images, and tables will come over cleanly. Gutenberg creates proper blocks automatically.
Grab content from websites: Copy text and images from web pages. Gutenberg creates the right blocks and keeps things organized.
Move between WordPress sites: Copy blocks from one Gutenberg site and paste into another. All styling and settings transfer perfectly.
Use paste options: Ctrl+Shift+V pastes without formatting when you want plain text.
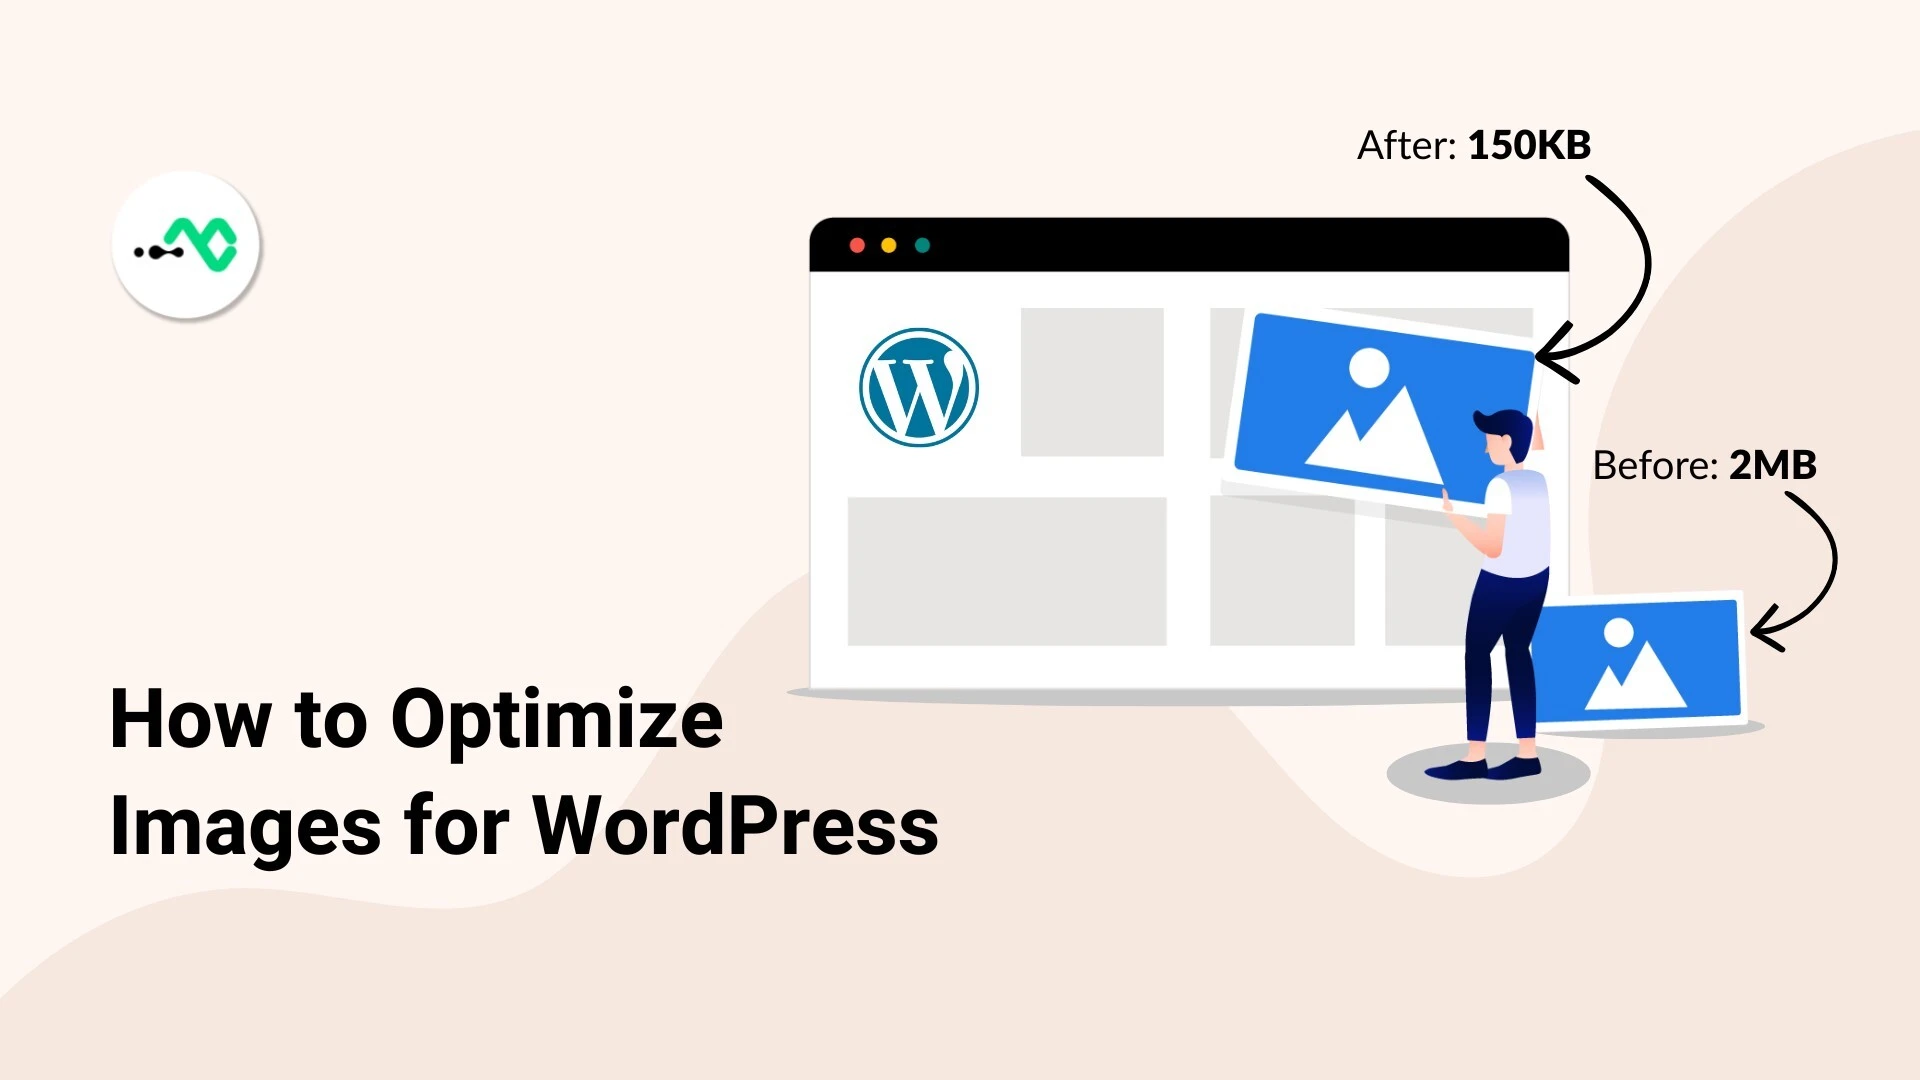
8. Use WebP Images for Faster Loading
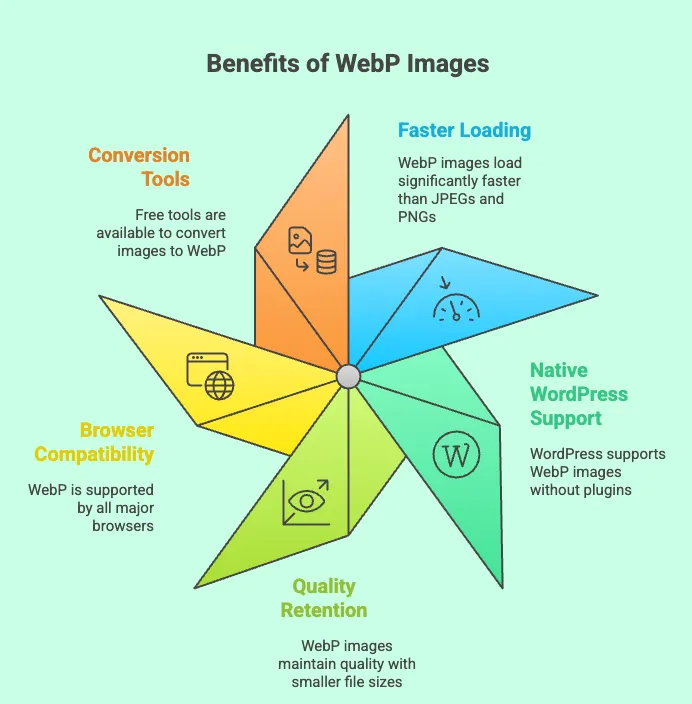
WebP images load 25-34% faster than regular JPEGs and PNGs. Your visitors will notice the difference. Mark this as one of the best tips in our Gutenberg tutorial; most WordPress users are not aware of it.
WordPress supports WebP natively: Just drag and drop WebP files like any other image. No plugins needed.
Keep the same quality: WebP images look just as good as JPEGs but with smaller file sizes.
All browsers support WebP: You don’t need to worry about browser compatibility in 2025.
Convert existing images: There are some free websites where you can convert your current images to WebP format.
9. Check How Your Content Looks on Different Devices
Don’t wait until after publishing to see how your content looks on phones and tablets. Gutenberg shows you right in the editor.
Use the preview button: Switch between desktop, tablet, and mobile views instantly. Also, check the preview in a new tab.
Watch text behavior: Make sure headings aren’t too big on mobile and body text isn’t too small.
Check image sizing: Large images might look awkward or load slowly on phones.
Test buttons and links: Make sure they’re easy to tap on touch screens.
Preview throughout creation: Check different devices as you build, not just at the desktop.
10. Learn the Keyboard Shortcuts
Keyboard shortcuts make you much faster once you learn them. Your hands stay on the keyboard instead of reaching for the mouse.
- / opens the block inserter
- Ctrl+Shift+D duplicates blocks
- Ctrl+K adds links
- Shift+Alt+H shows all shortcuts
- Ctrl+Alt+T inserts blocks above
- Ctrl+Alt+Y inserts blocks below
- Arrow keys move blocks up and down
- Ctrl+B for bold
- Ctrl+I for italic
11. Customize Your Editor Settings
Make Gutenberg work the way you want. The editor has lots of options you can adjust. Find preferences in the three-dot menu at the top right. Click “Preferences” to see all options.
Try different modes:
- Spotlight mode highlights the current block
- Fullscreen mode hides distractions
- Top toolbar keeps all controls in one place
Reduce distractions. Turn on fullscreen and spotlight modes when you need to focus on writing.
Adjust for accessibility. High contrast and reduced motion options help people with different needs.
Hide unused blocks. Clean up the block inserter by hiding blocks you never use.
Set up teams consistently. Document preferred settings so everyone on your team uses the same setup.
Frequently Asked Questions
Should I use Gutenberg?
Yes, absolutely. Gutenberg is the future of WordPress. It’s built into every WordPress site since 2018.
Most themes and plugins are made for Gutenberg now. Learning it opens up much more flexibility than the old editor. Yes, there’s a learning curve, but these tips will help you get through it quickly.
Do I need the Gutenberg plugin?
No. Gutenberg is built into WordPress already.
The separate Gutenberg plugin gives you experimental features before they’re officially released. Most people don’t need it. The built-in editor has everything you require.
Start Following the Updated Gutenberg Tutorial from Today
This Gutenberg tutorial will transform how you create content in WordPress. You don’t need to learn them all at once. Start with the ones that solve your biggest problems right now. Maybe that’s learning keyboard shortcuts to work faster. Or using WebP images to speed up your site.
As each tip becomes natural, add another one. Soon you’ll be creating professional-looking content much faster than before. Remember, Gutenberg keeps getting better with each WordPress update. Master these basics now, and you’ll be ready for whatever new WordPress Gutenberg features come next.
The best part? Once you get good at Gutenberg, the tool disappears. You stop thinking about how to use it and focus on creating great content for your audience. That’s when you know you’ve truly mastered WordPress.
Hope this Gutenberg tutorial will work in the long run for you.


0 Comments